Dead Simple Chat offers prebuilt Chat that can be added in minutes to any app or website. Can be completely customized and offers powerful JavaScript Chat API and SDK.
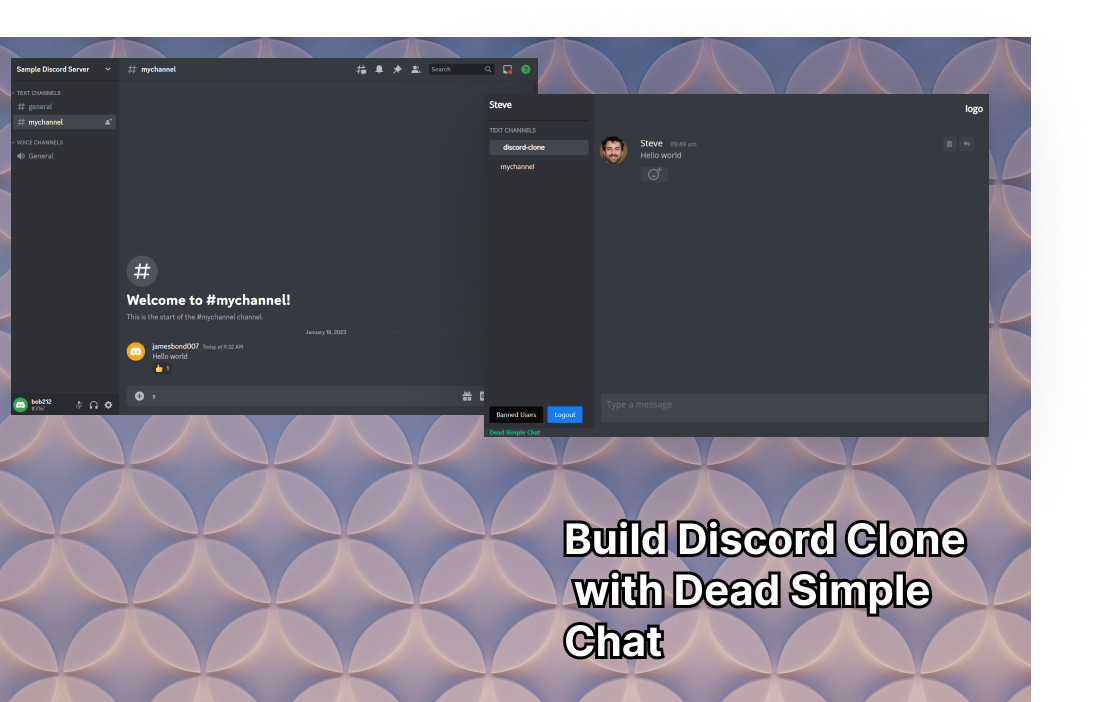
In this blog post, we will build a Discord like Chat using Dead Simple Chat, let's get started, and the great thing about our Discord Clone is that it can be embedded on your website, unlike discord.

A discord chat room looks like the image above. We will customise our Dead Simple Chat, Chat Room to look like the discord chatroom above.
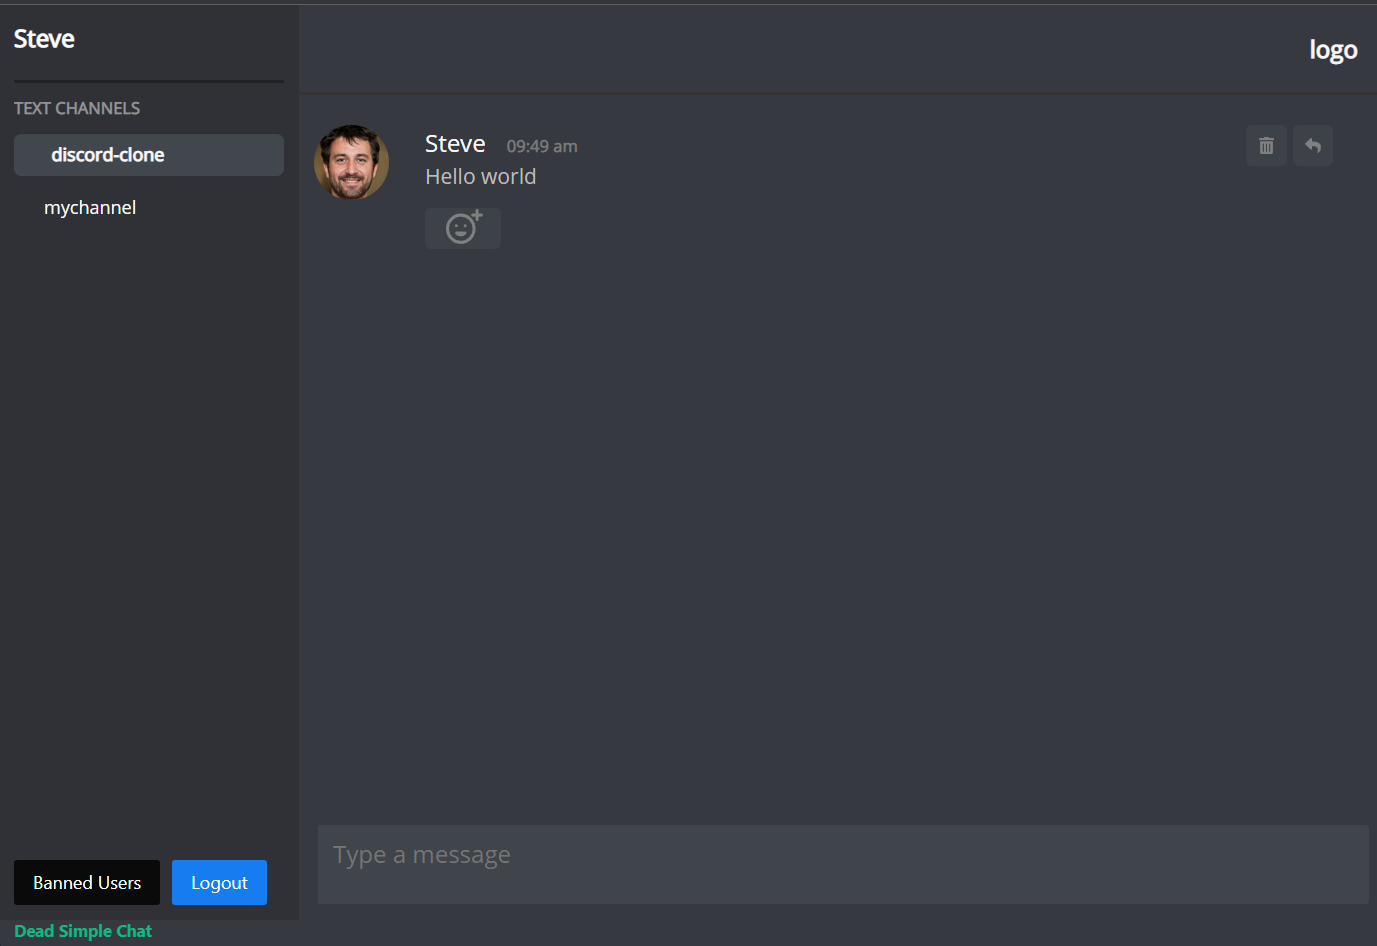
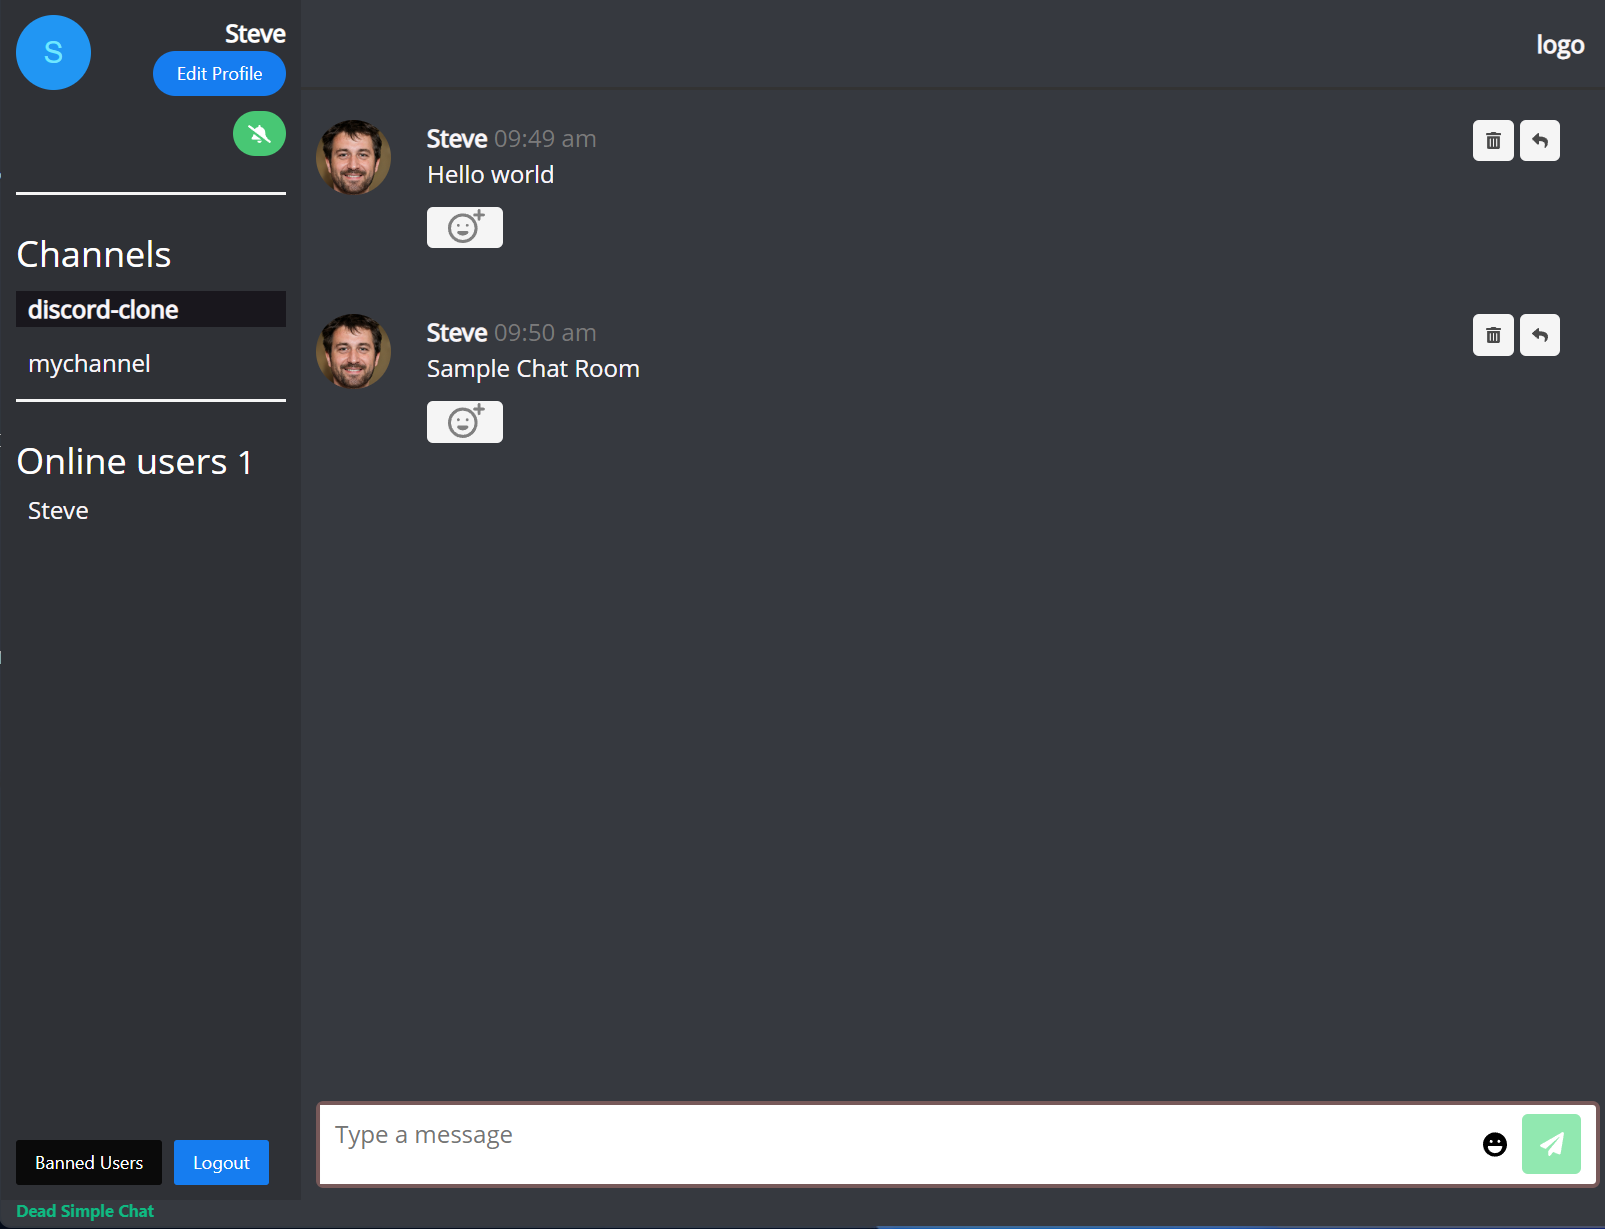
We will customise Dead Simple Chat to look like Discord Chat, and our final Chat UI will look like the image below:
Step 1: Signup for Free Dead Simple Chat Account
The first step would be to signup for a free Dead Simple Chat account. You can signup by going to https://deadsimplechat.com/getstarted
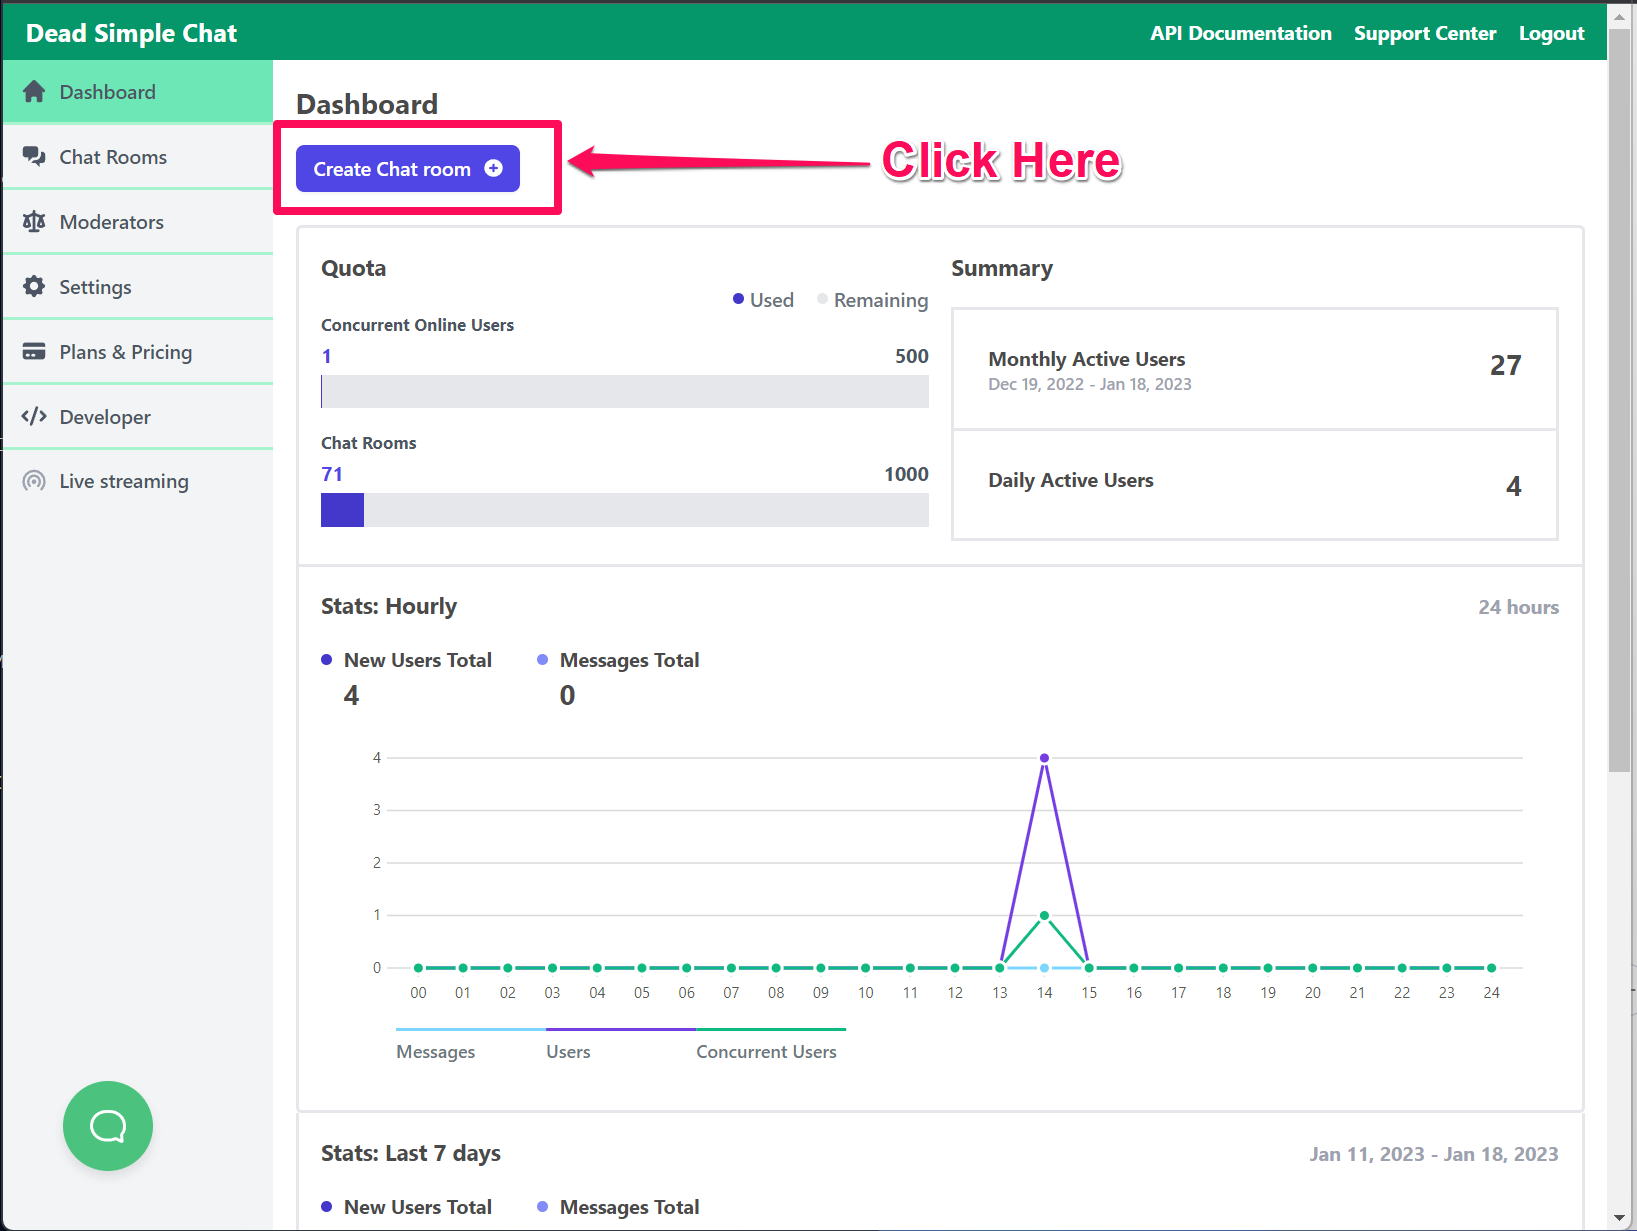
After you have signed up you will be taken to the Dead Simple Chat dashboard.
DeadSimpleChat can also be used for Virtual Event Chat or as a Live Streaming Chat solution apart from building the discord clone

Step 2: Create a Chat Room
On the dashboard click on the "Create Chat Room" button to create your first chat room.
You can name your chat room anything you like and then press the save button.
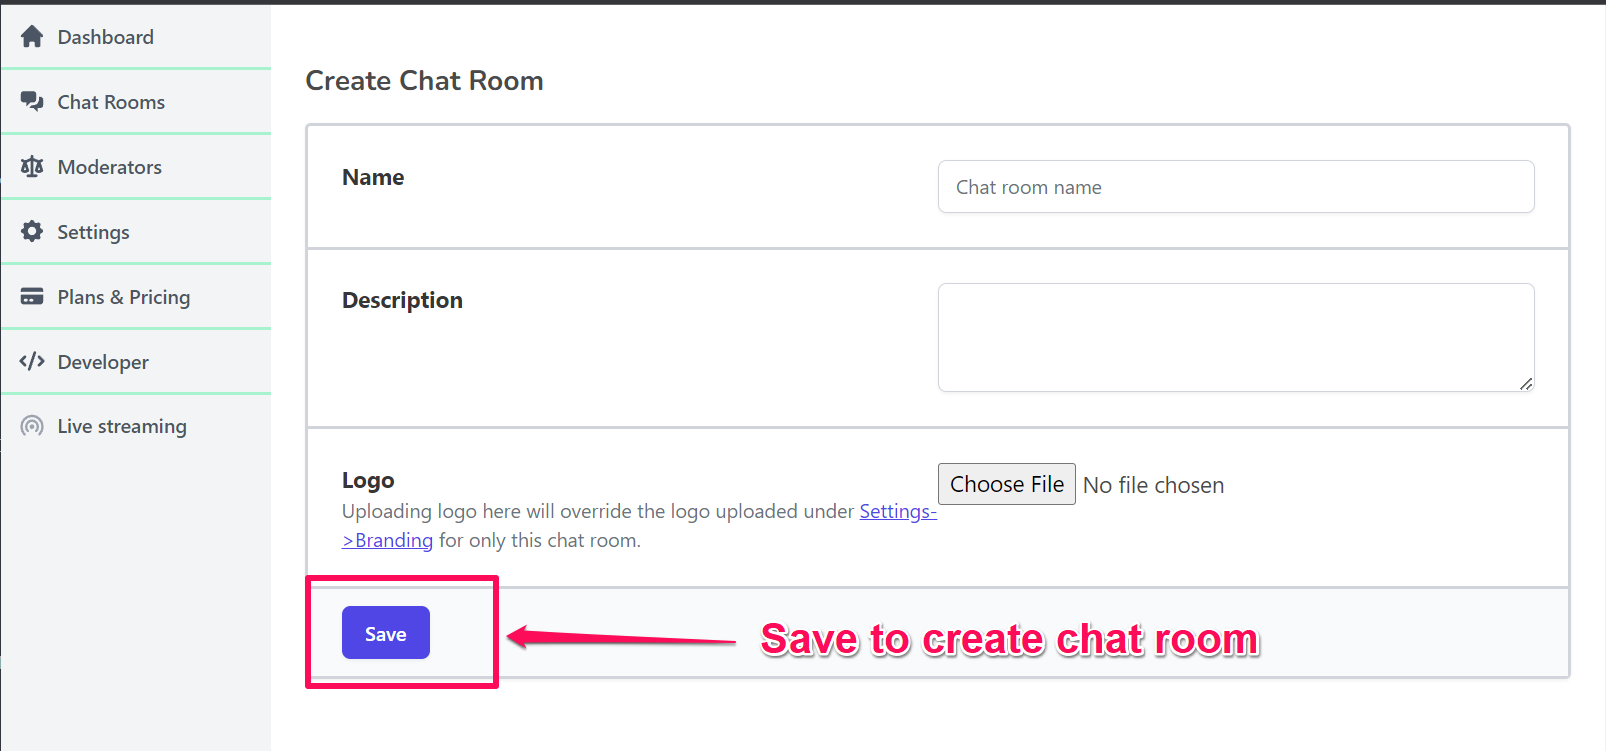
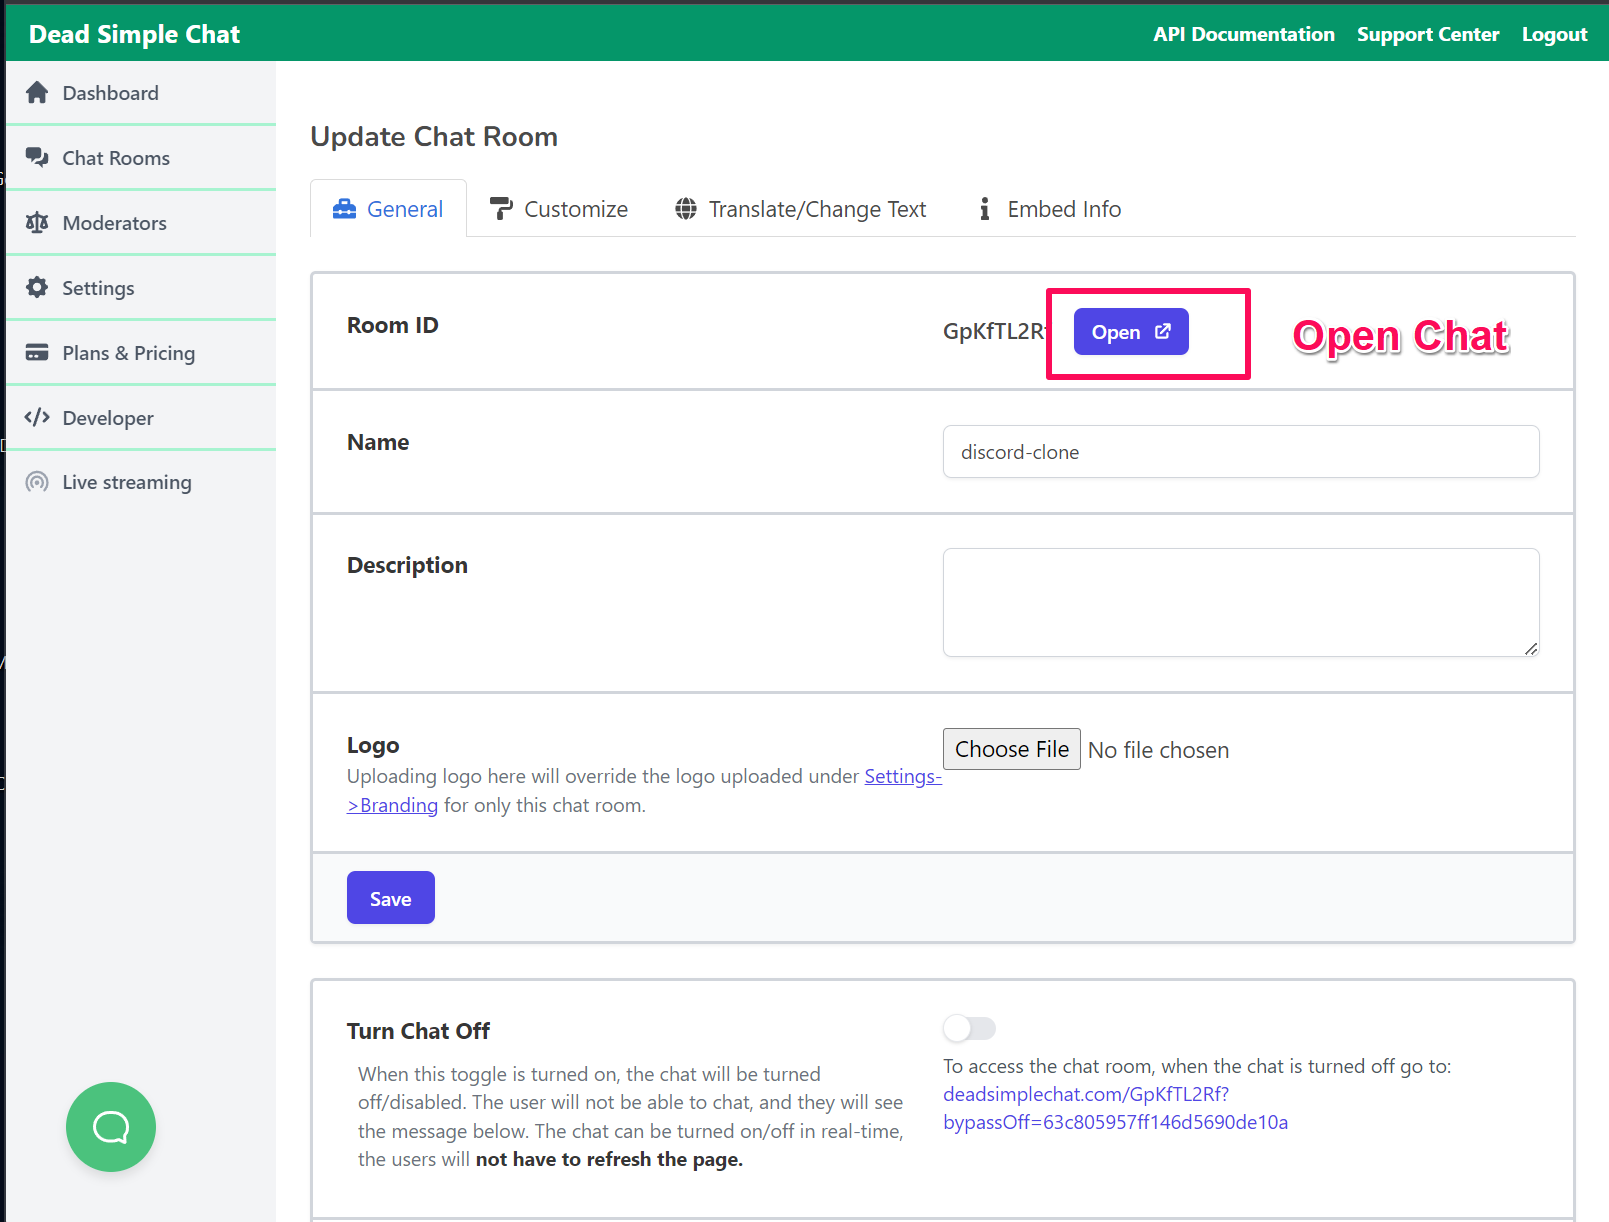
After you press the save button you will be taken to the Chat Room Setting page, for this page you can customise the setting for your chat room.
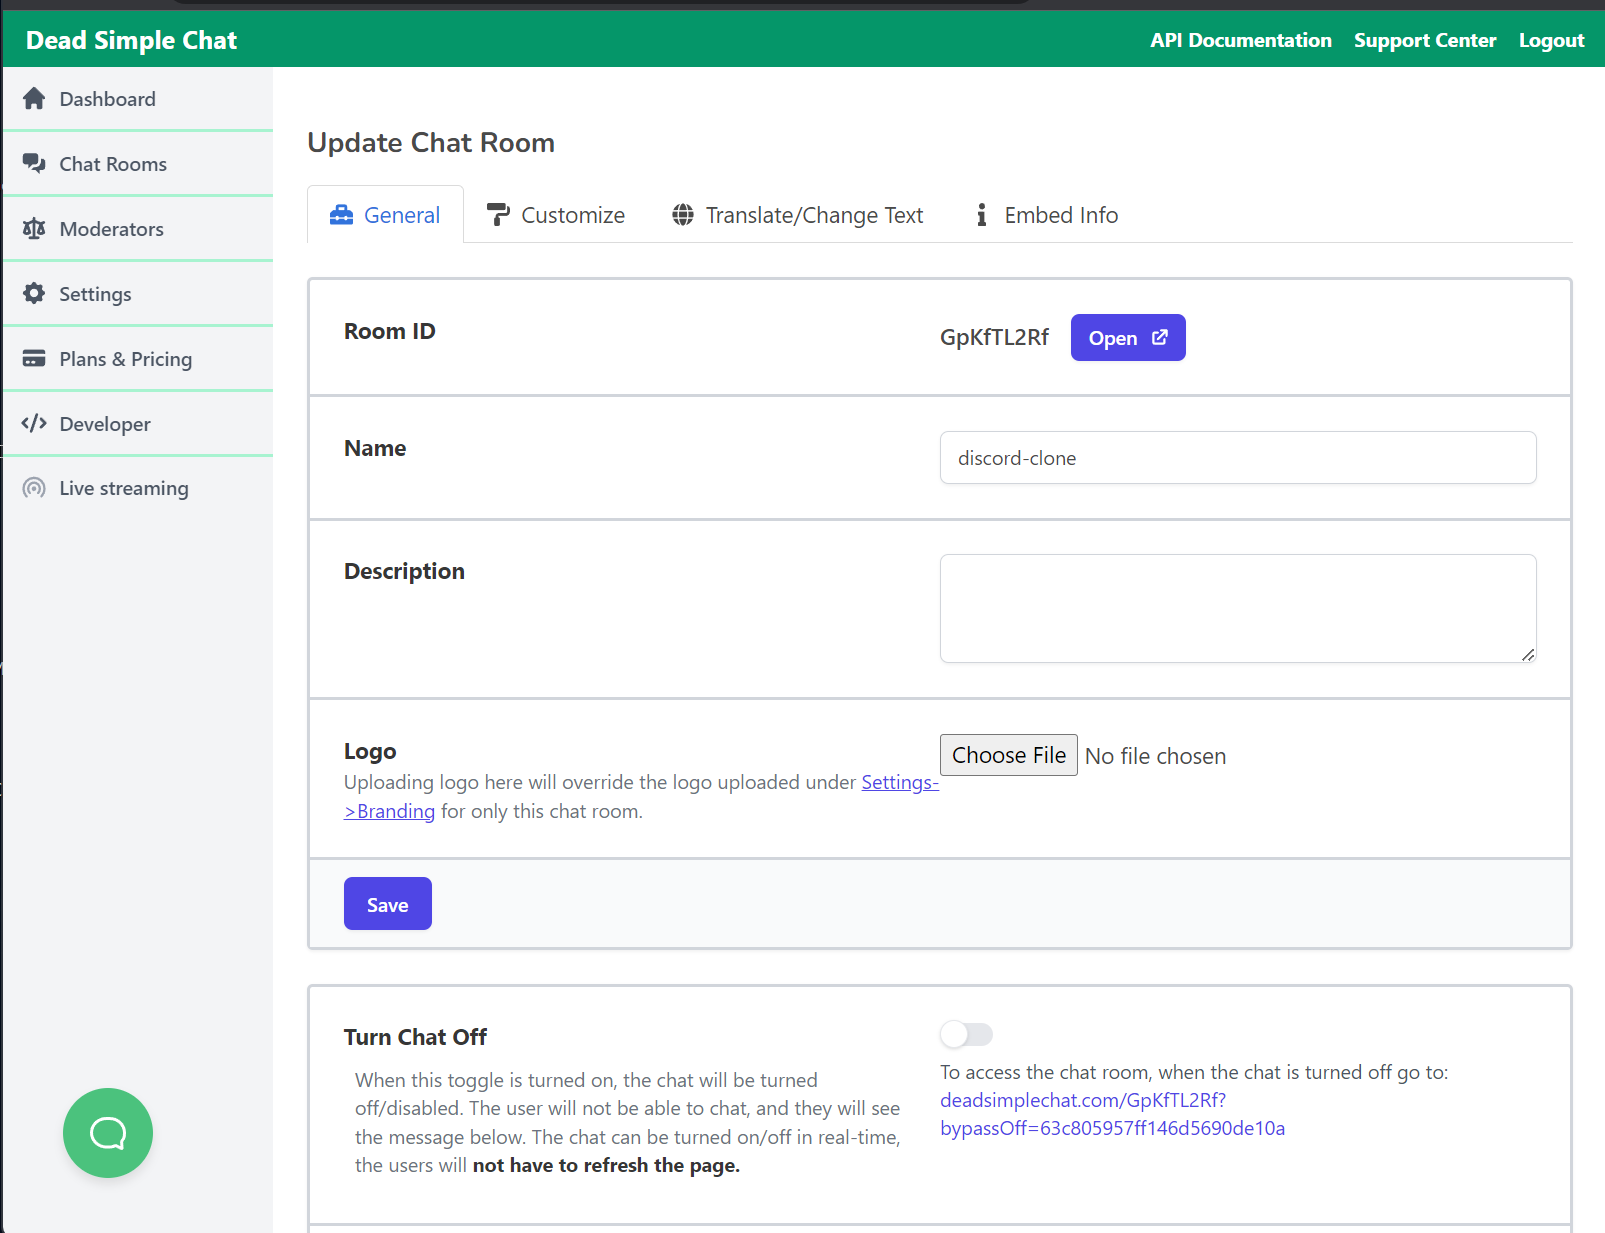
Press the "Open Button" to open the chat in a new tab
This is how our Dead Simple Chat Chat Room looks like:
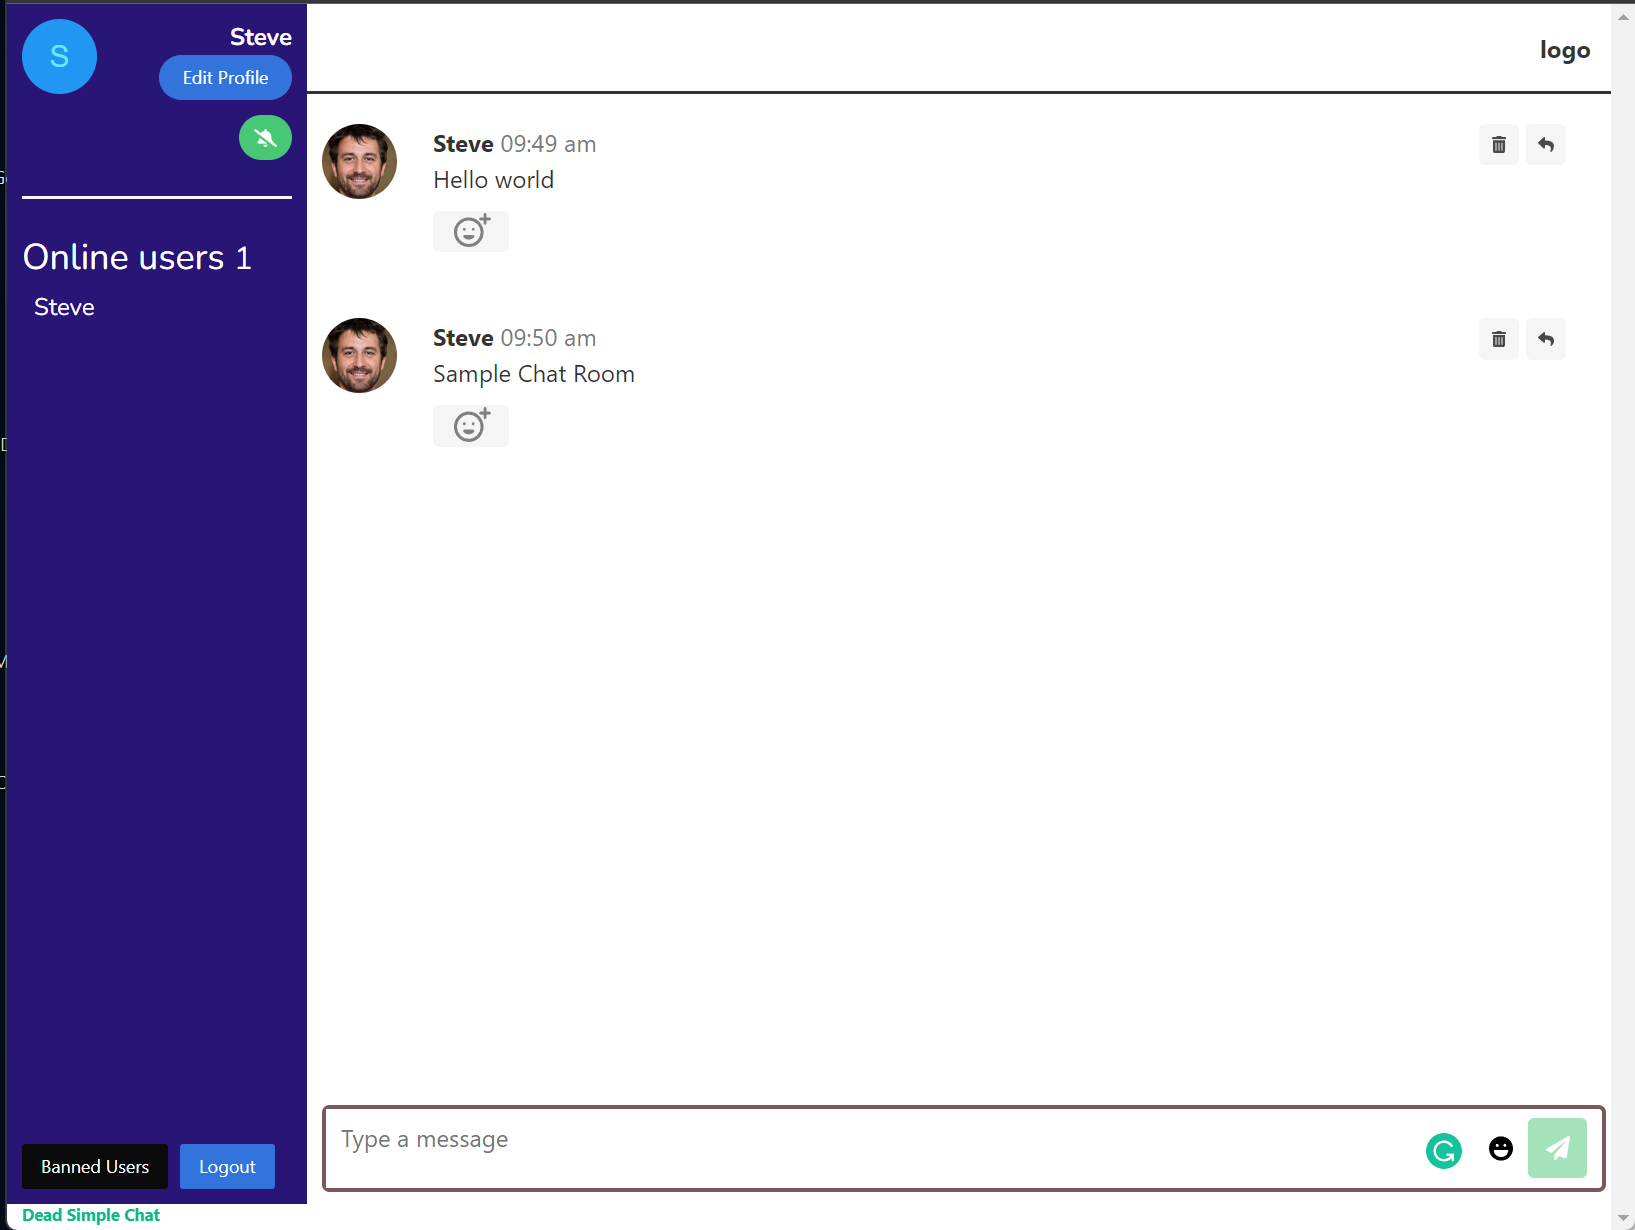
Now in the next step we will customise it to look like Discord Chat Room.
Step 3: Customizing the Chat Room to Look Like Discord Chat
Let's Customise the look and feel of our Dead Simple Chat, Chat Room and features to match Discord Chat.
Enable Channels
Discord has channels, in Dead Simple Chat we can enable channels as well in our chat Room.
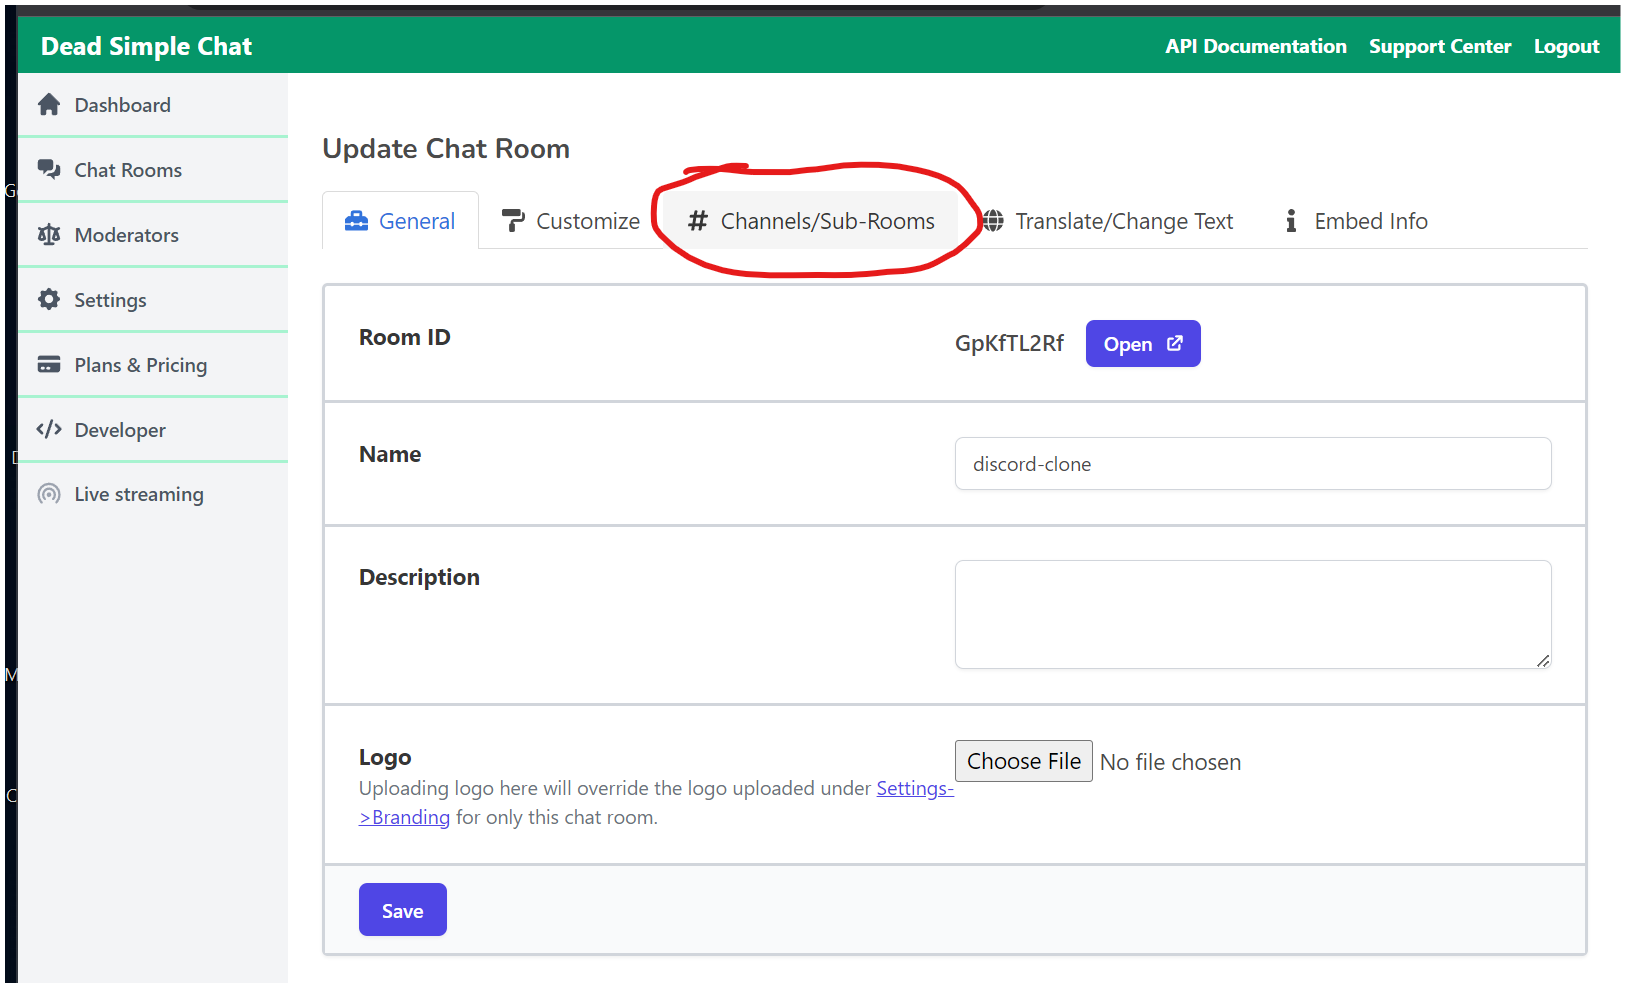
To Enable Channel Go to Chat Room Settings page, scroll down and turn on the "Sub Chat Room / Channels" Option.

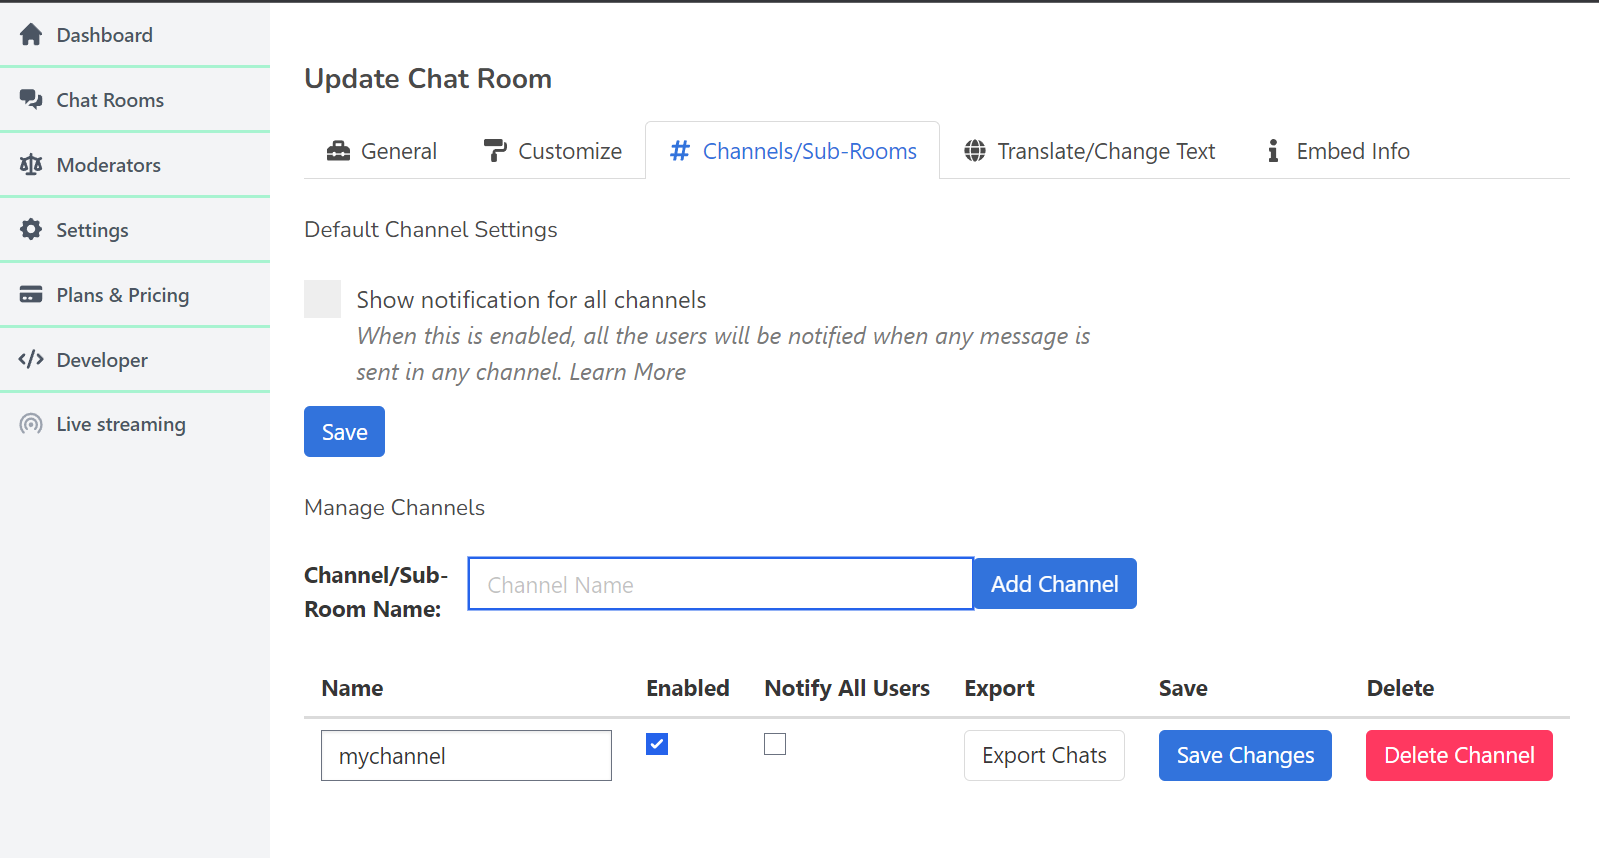
This will result in Channels/Sub-Room tab to appear in the Settings
From the Channels/Sub-Room page we can add the Channels, we have created a channel named my channel
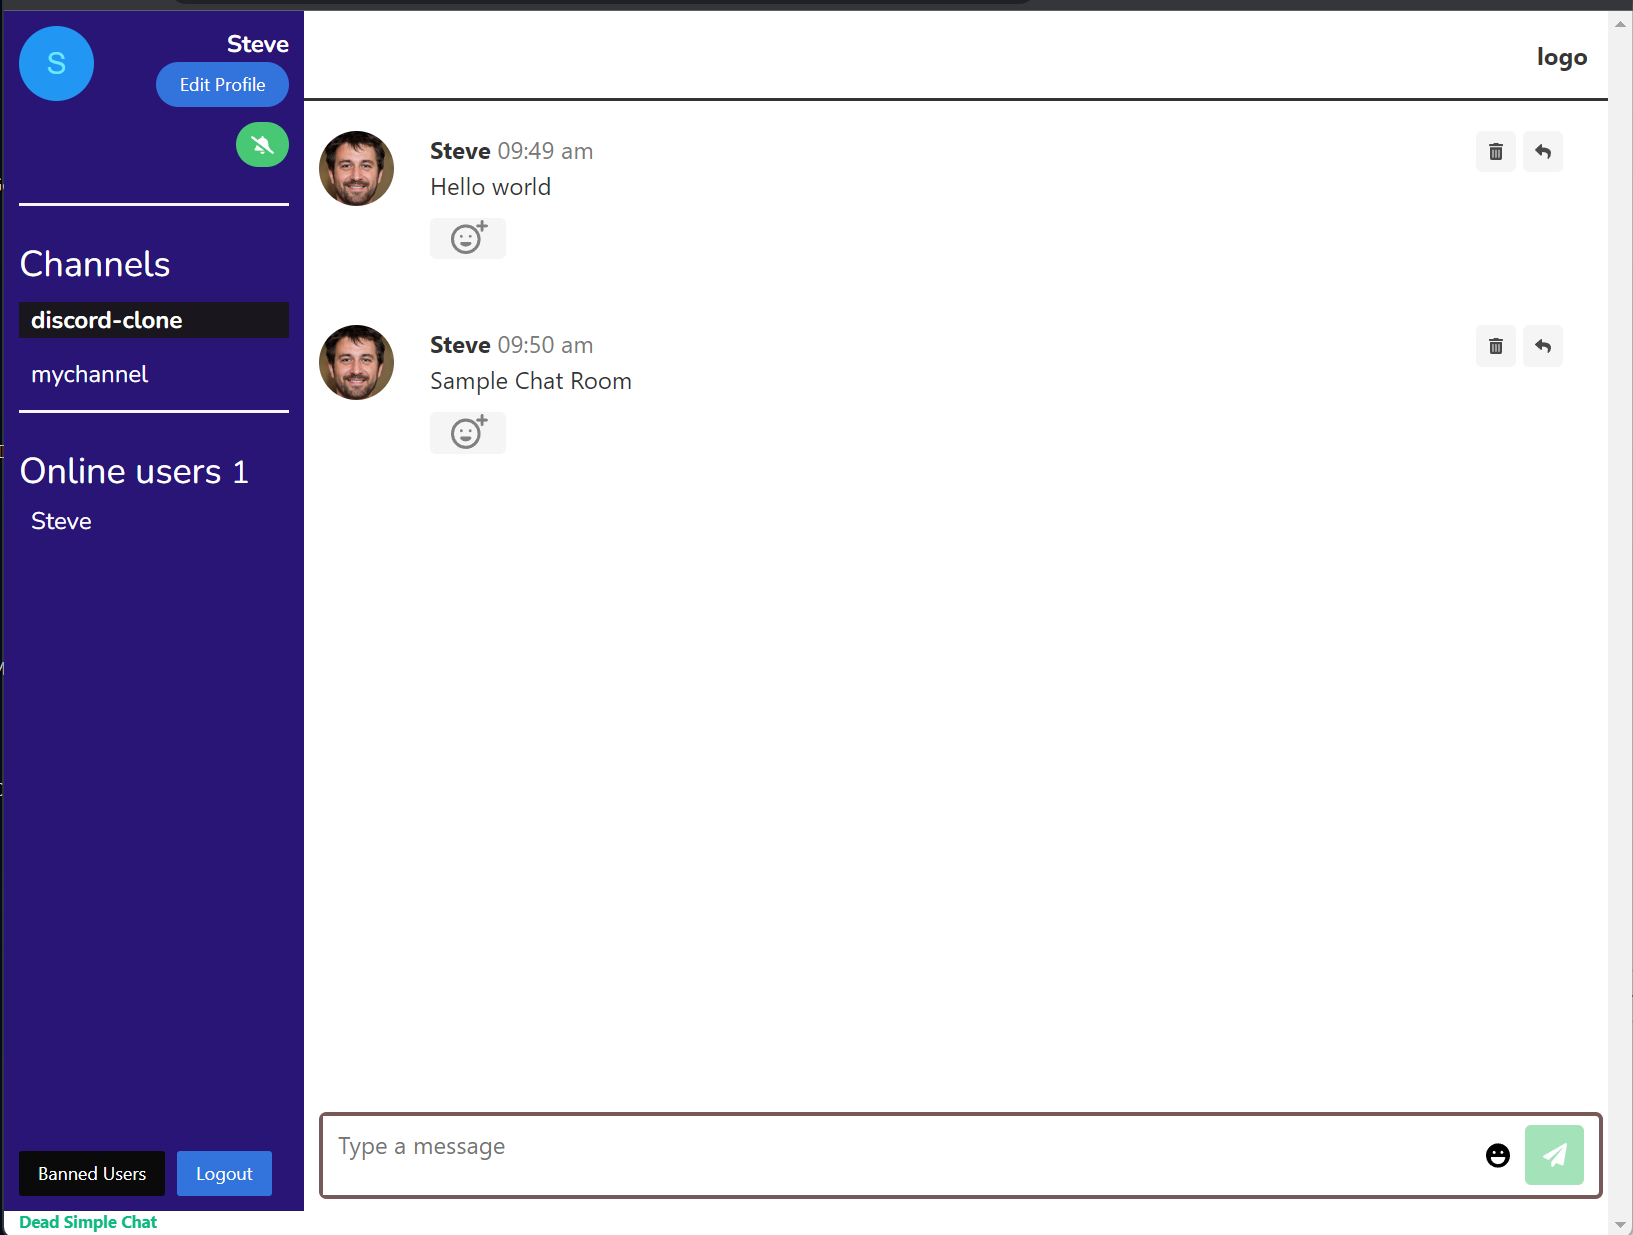
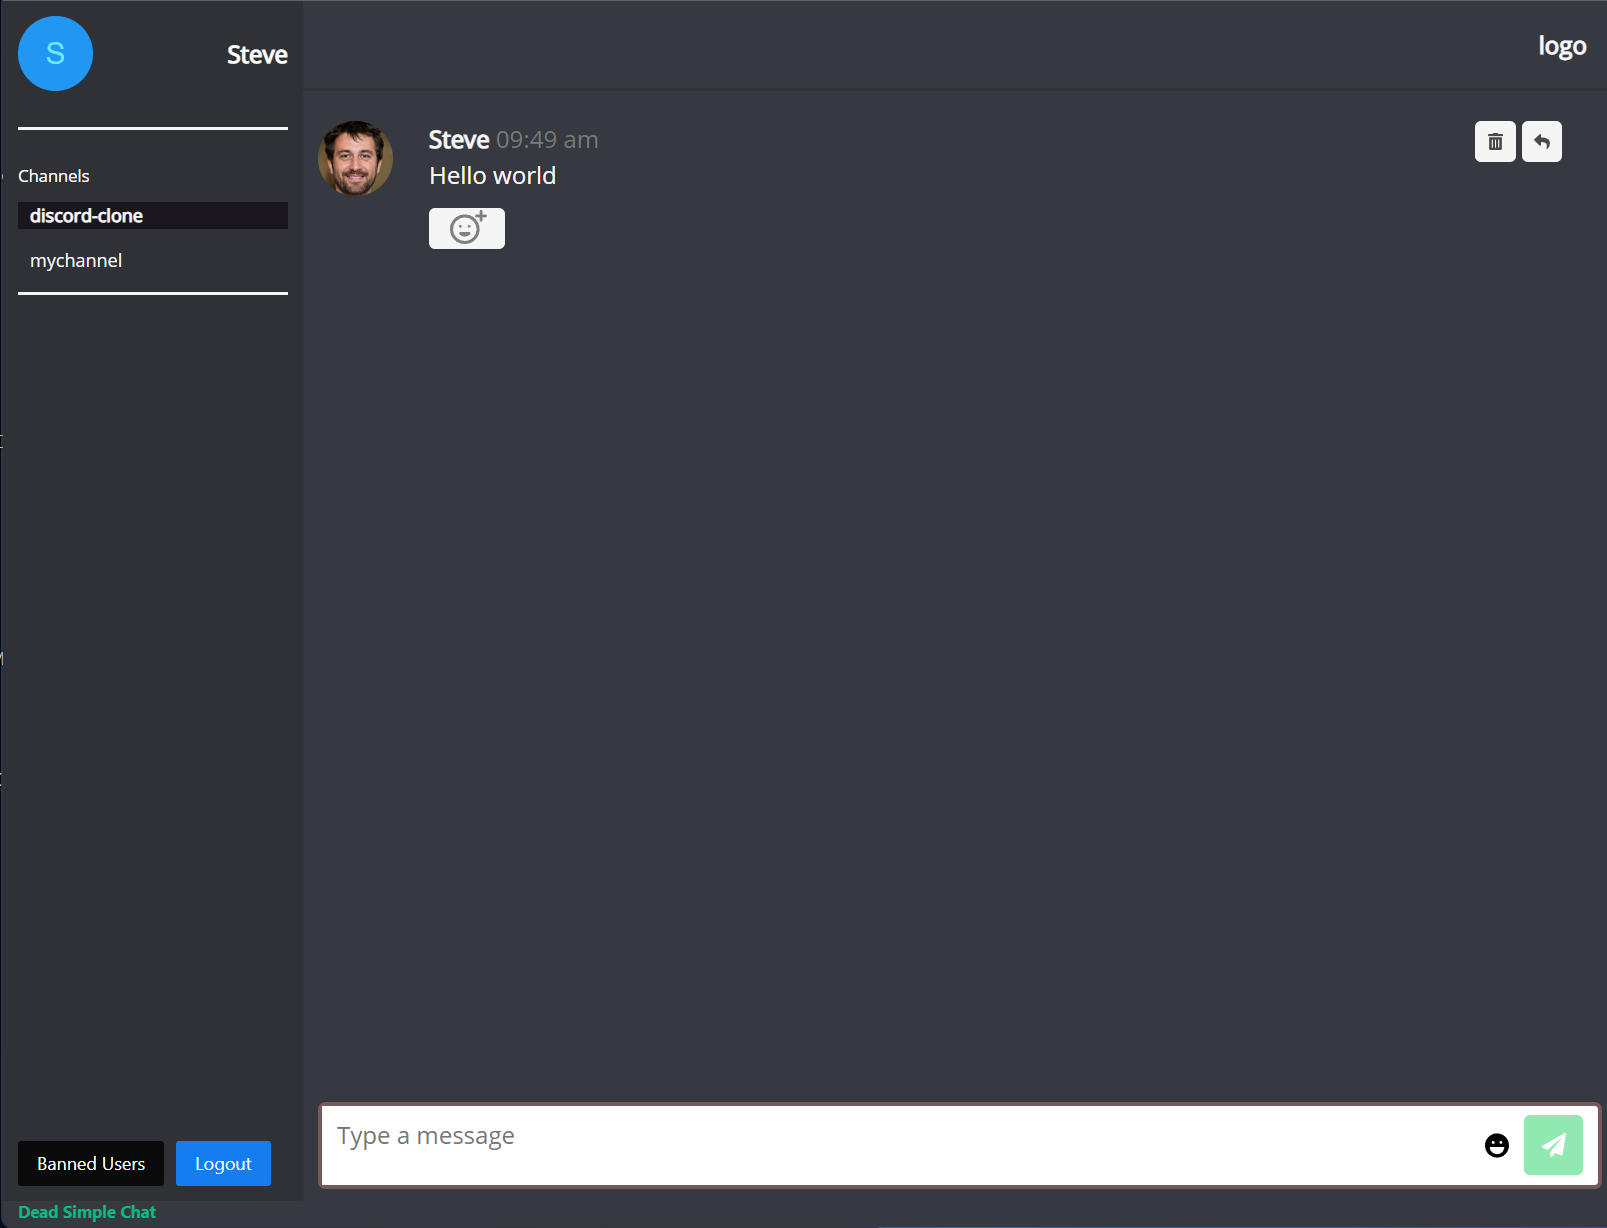
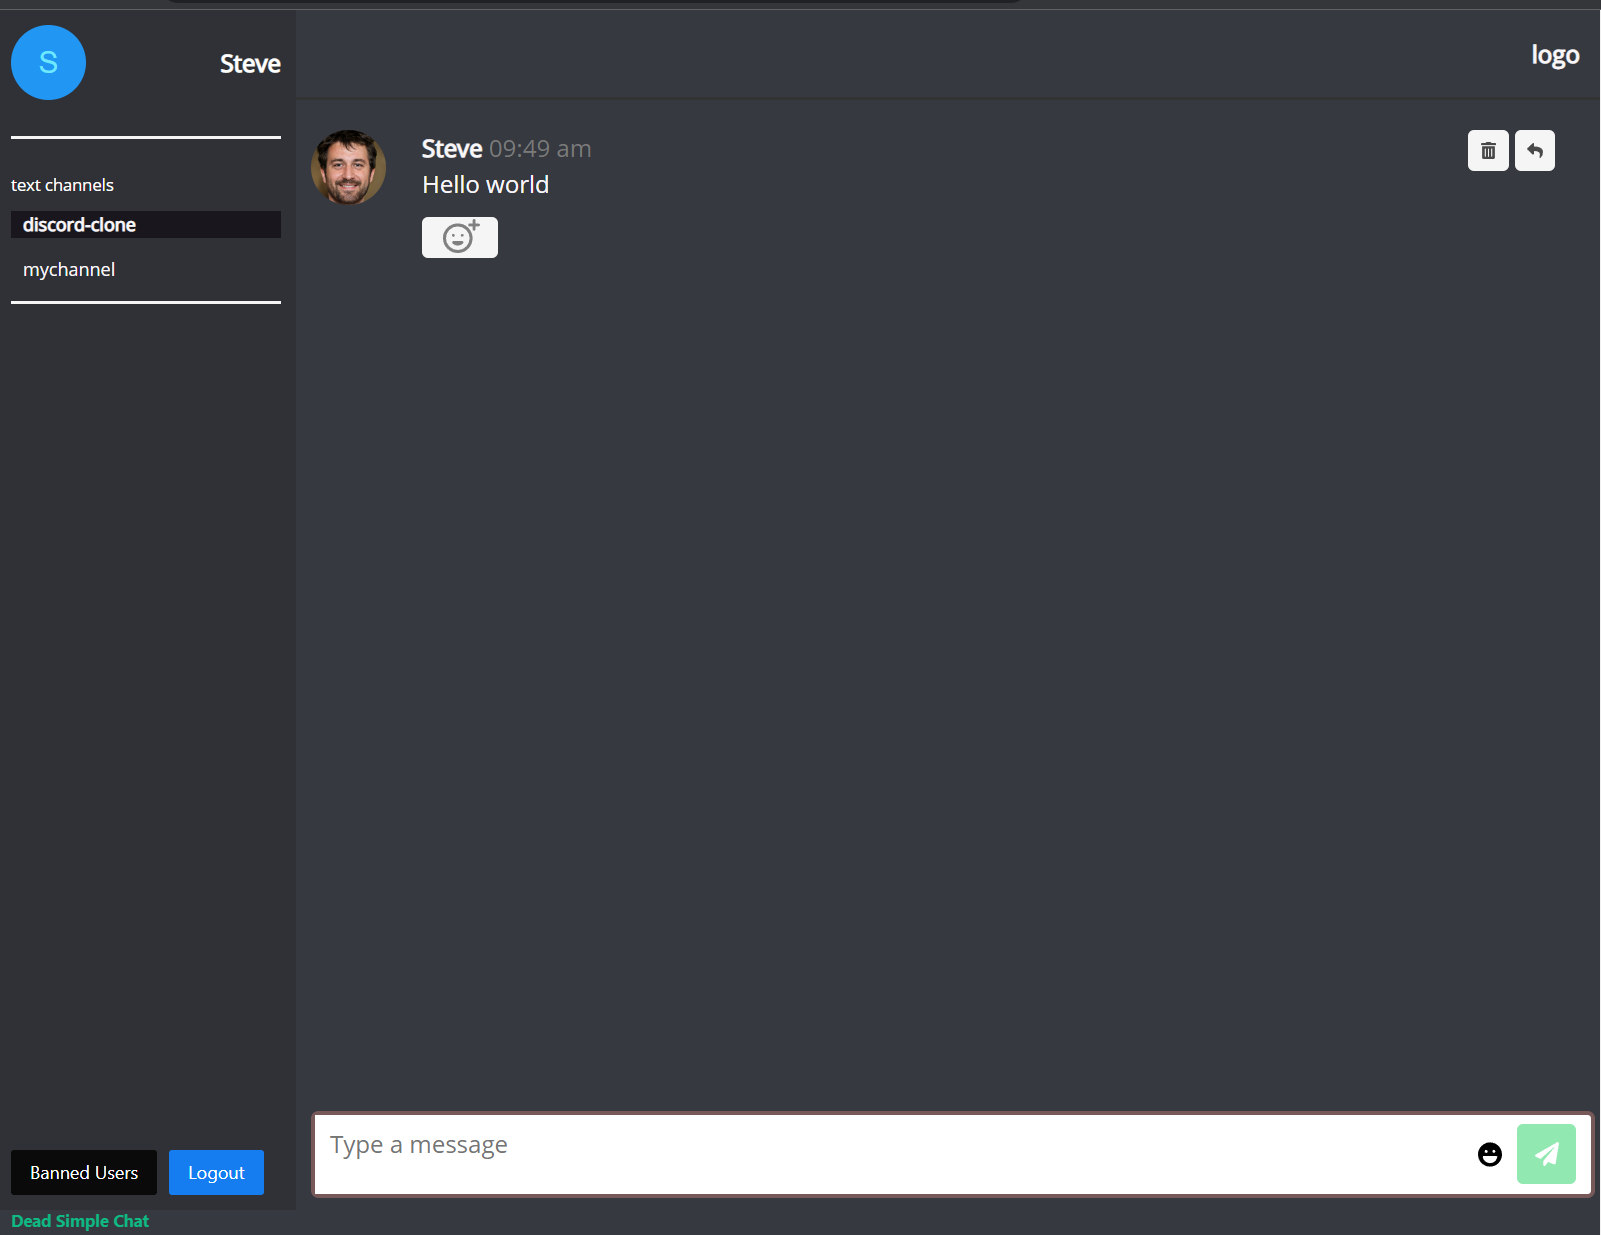
When we enable channels, we can see the channels list on the chat room sidebar
Customizing Colors
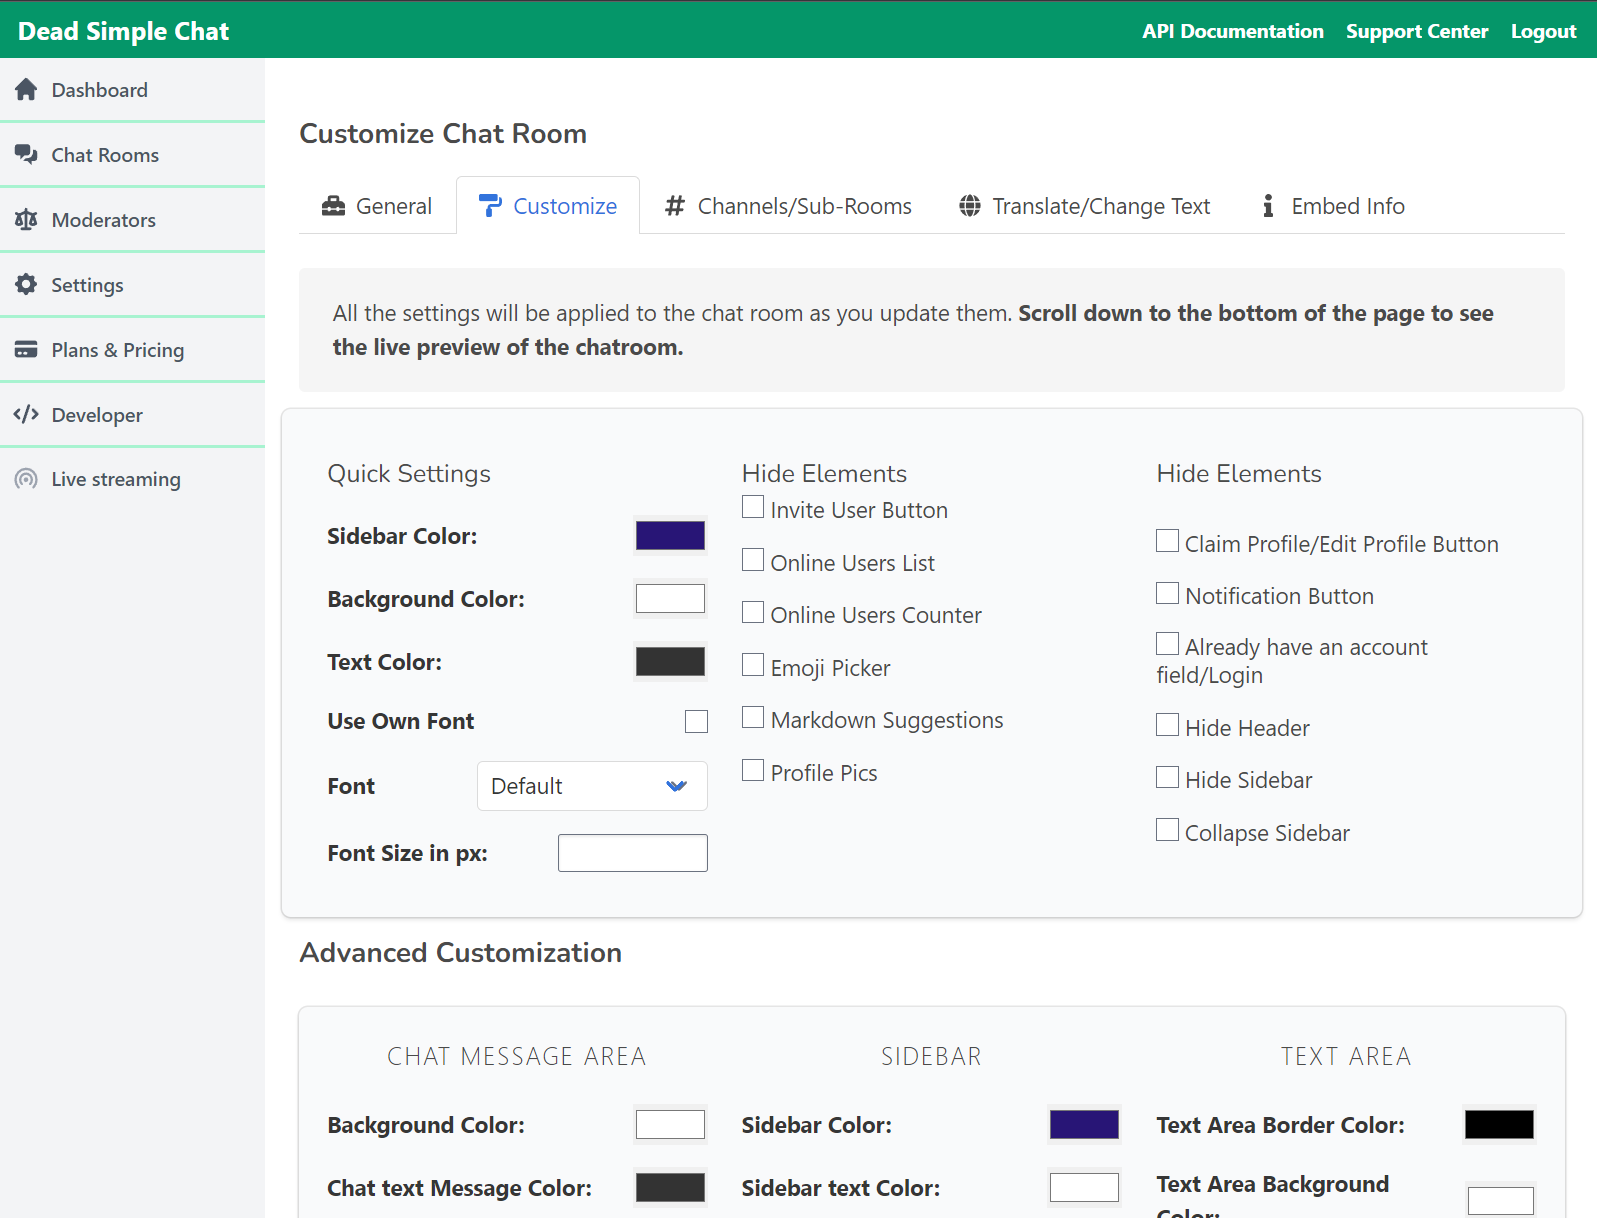
We will update the colours to match Discord. To update colors, we will go back to our chat room settings page and then go to the Customize tab.
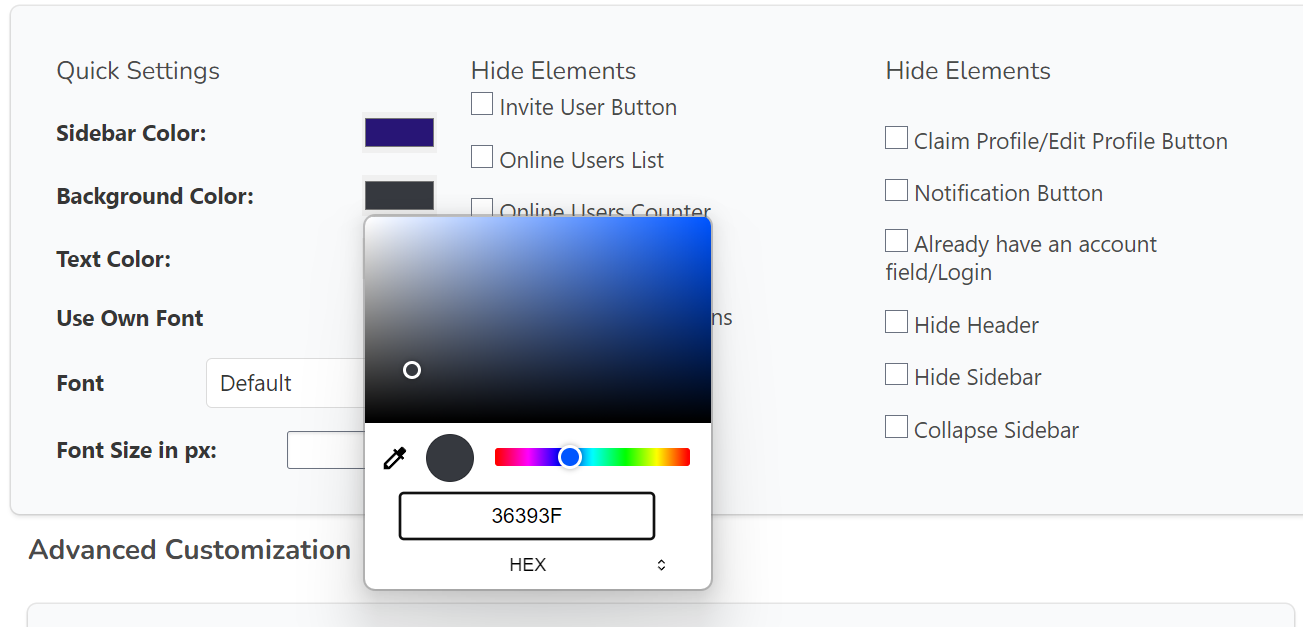
We will set the background colour to #36393f to match the Discord background colour.
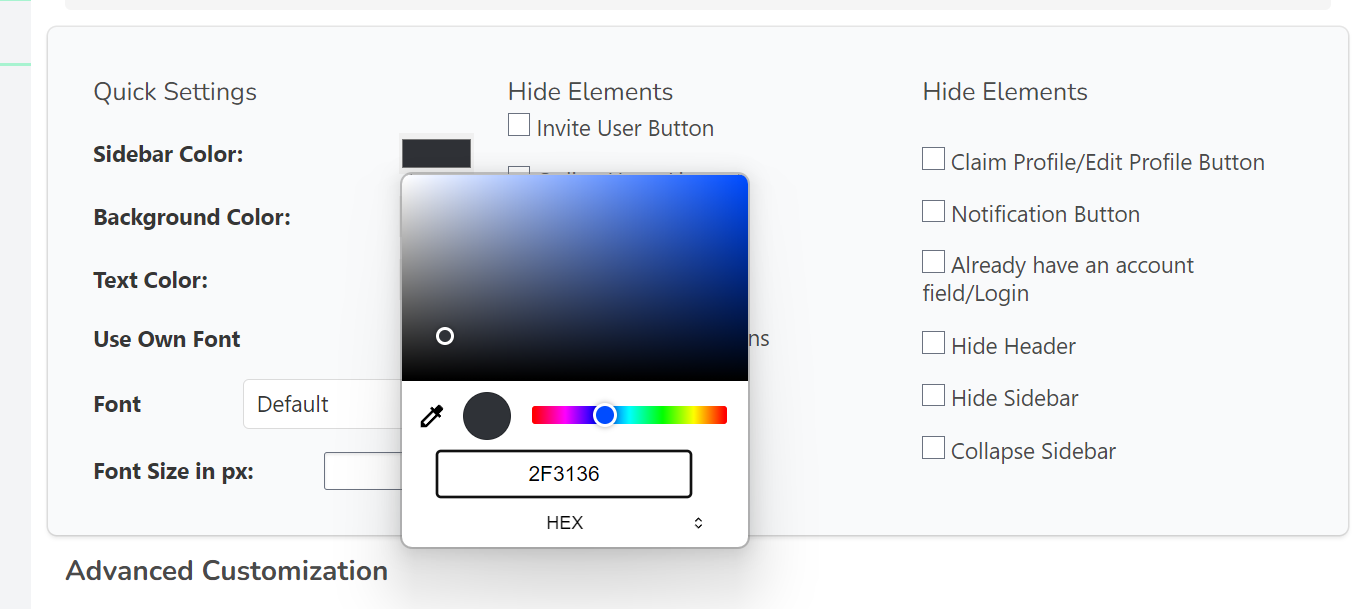
We will set the sidebar color to #2f3136 to match the discord sidebar color
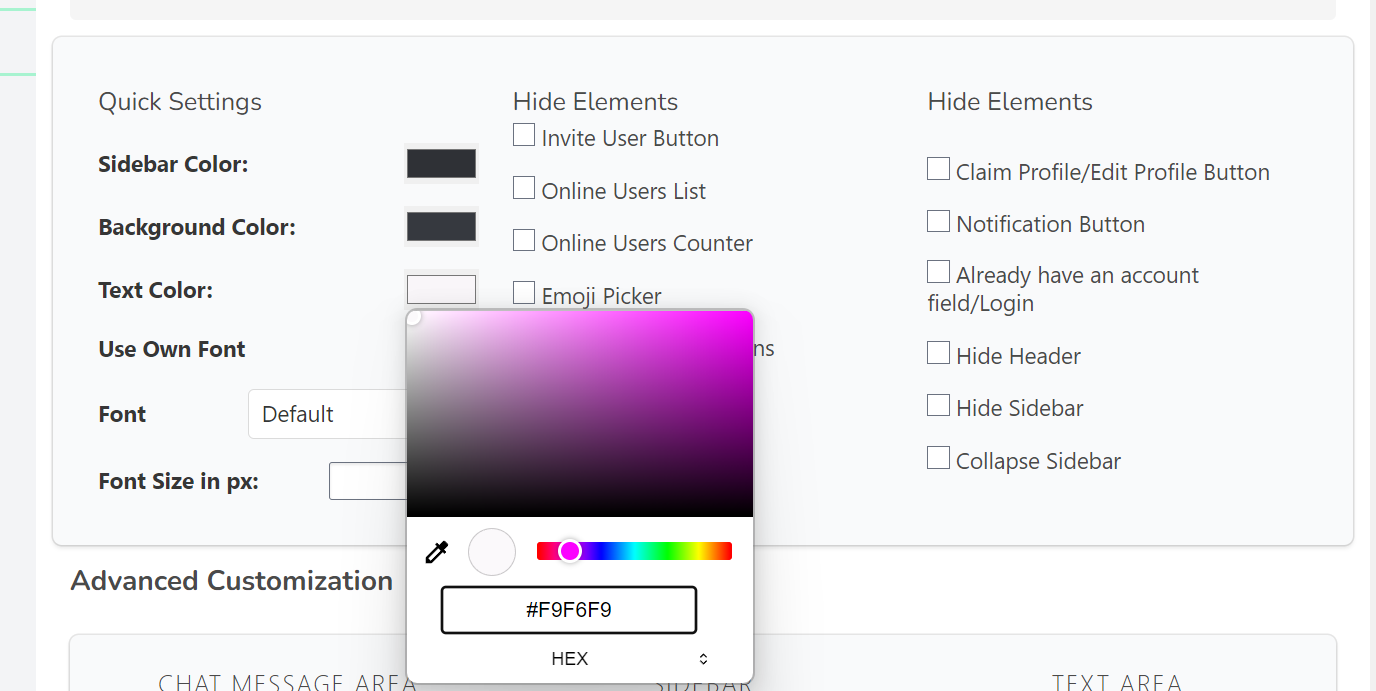
We will set the text color #f9f5f9 to match the discord text color.
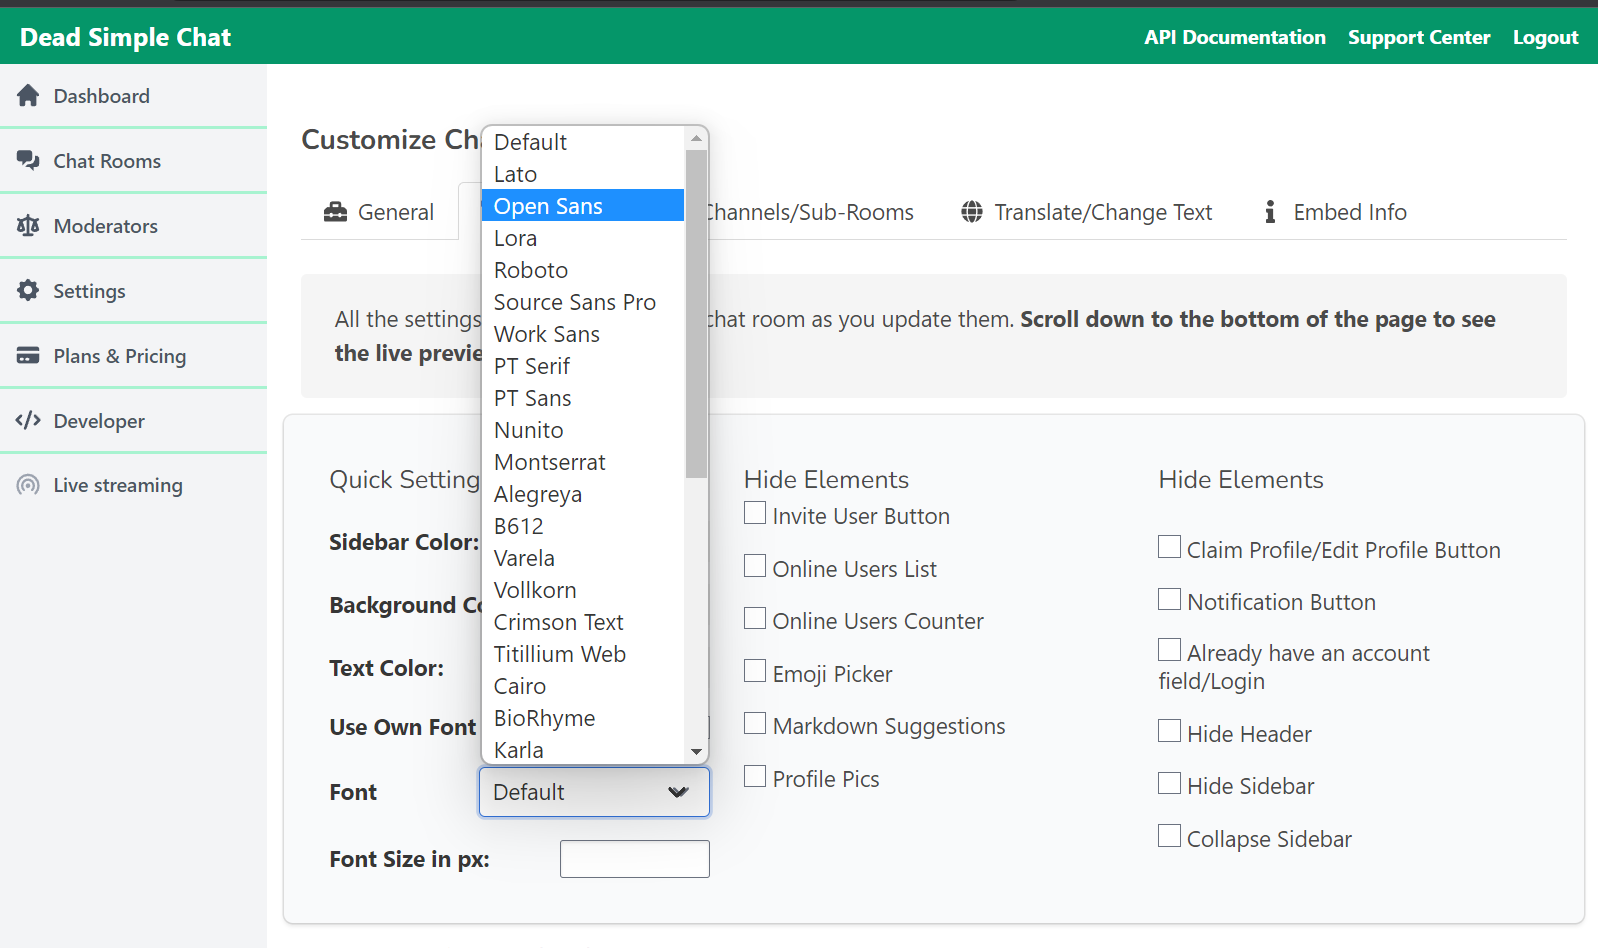
We will select the font "Open Sans" which is similar to the discord font
Now let's look at our customisations, after the customisations our chat room looks like this:
Customizing the sidebar to match Discord
Now we will change the sidebar to match discord, we will make the following changes:
- Make the font size smaller
- Match the hover and selected colour and add rounded corners
- Update the Channels text to "TEXT CHANNELS"
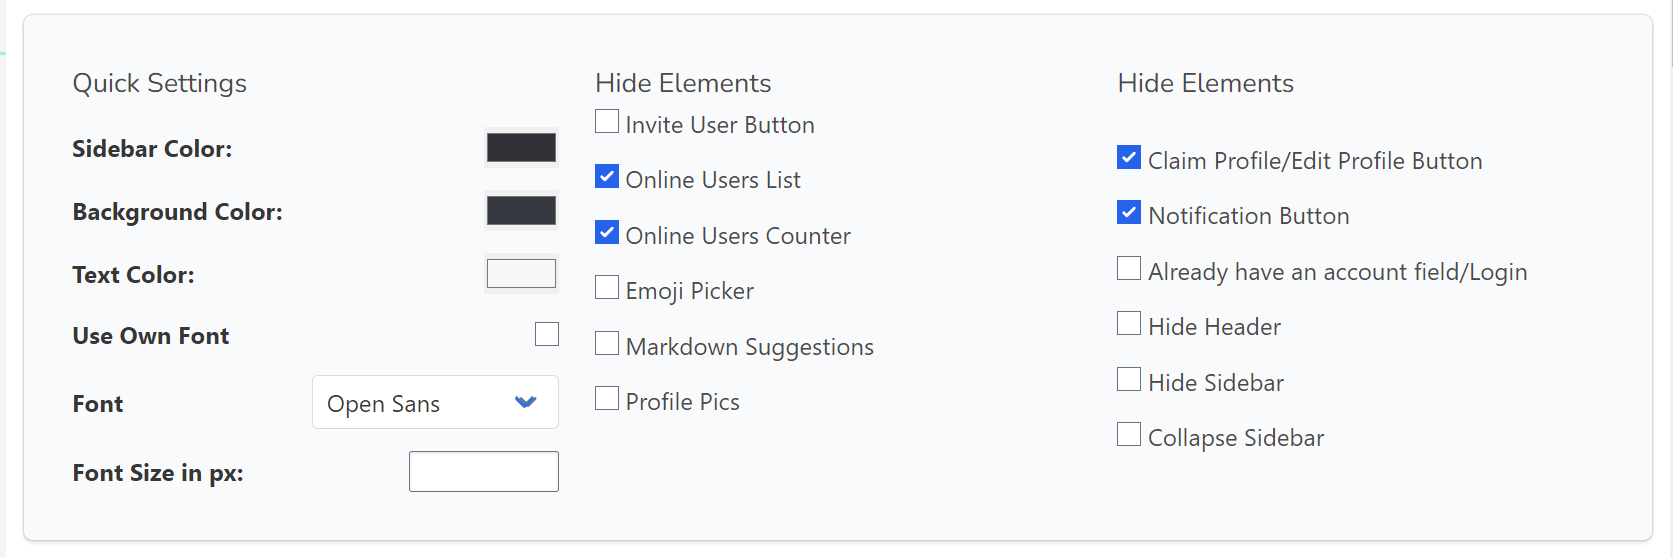
- Hide Online Users from the sidebar
- Hide the Edit profile button etc.
We will check the following options to hide the online users from the sidebar and notification icon buttons.
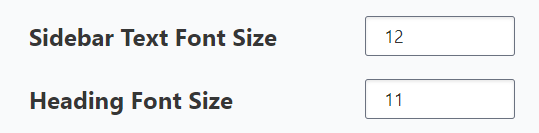
We will scroll down and set the font size to 11 and 12 respectively
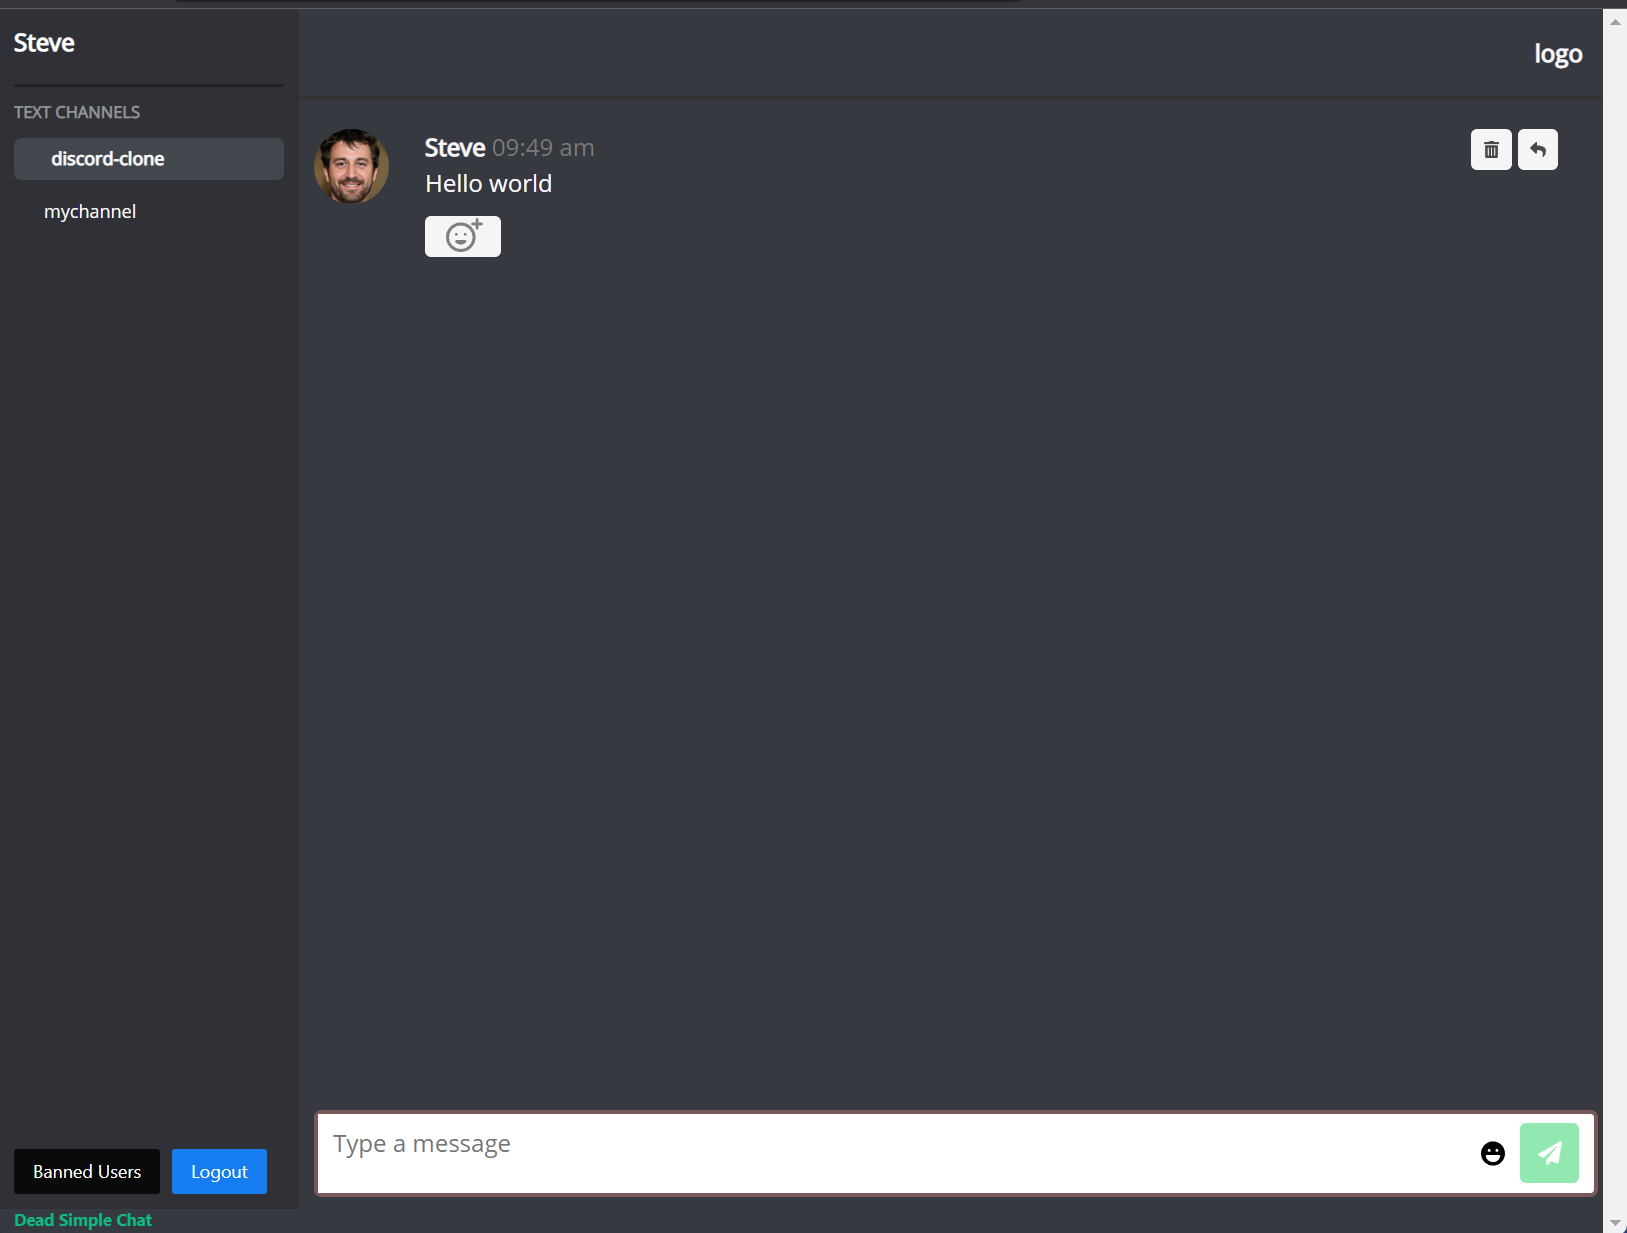
Our chat room looks like this after the customization
We change text Channels to "Text Channels" by going to the "Translate / Change-Text" tab
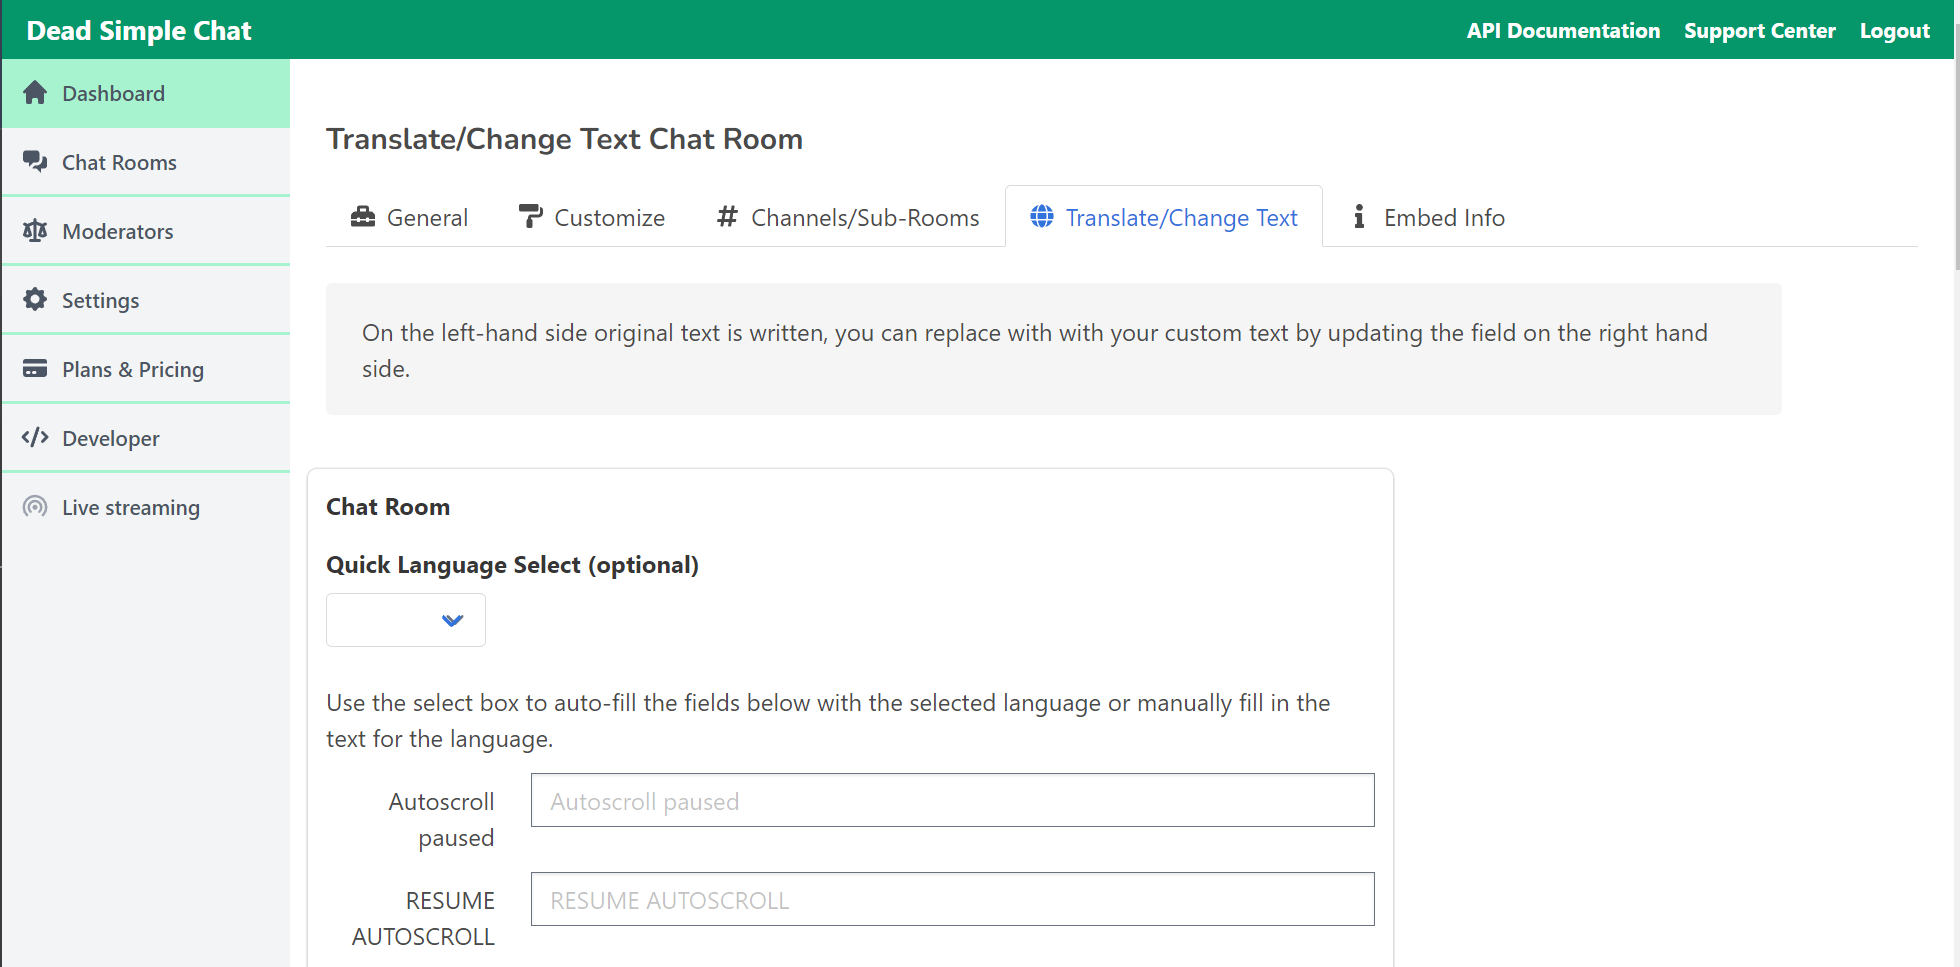
Then scroll down and change "Channels" to "text channels"
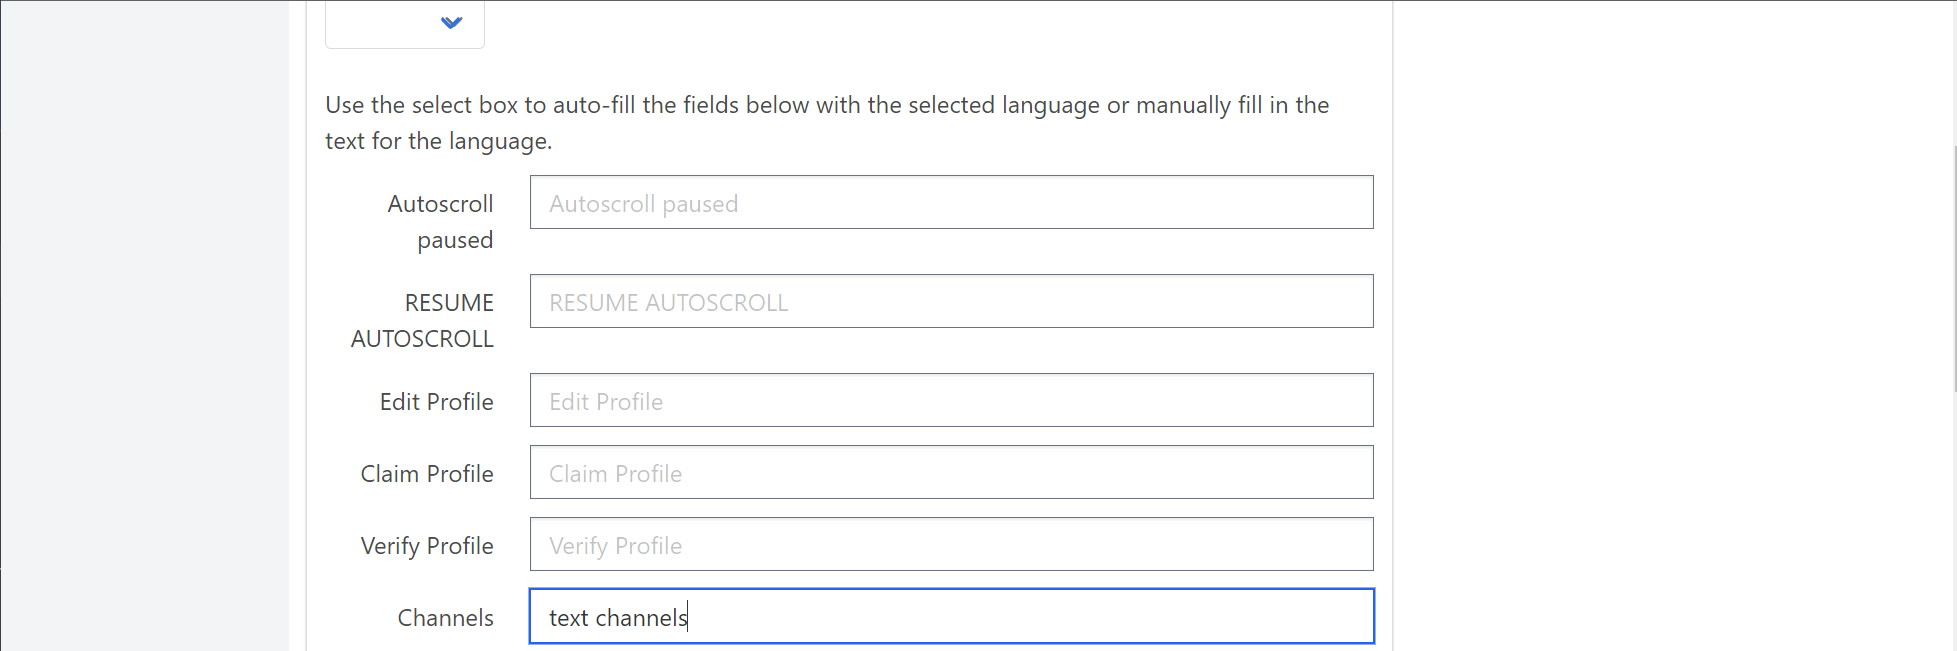
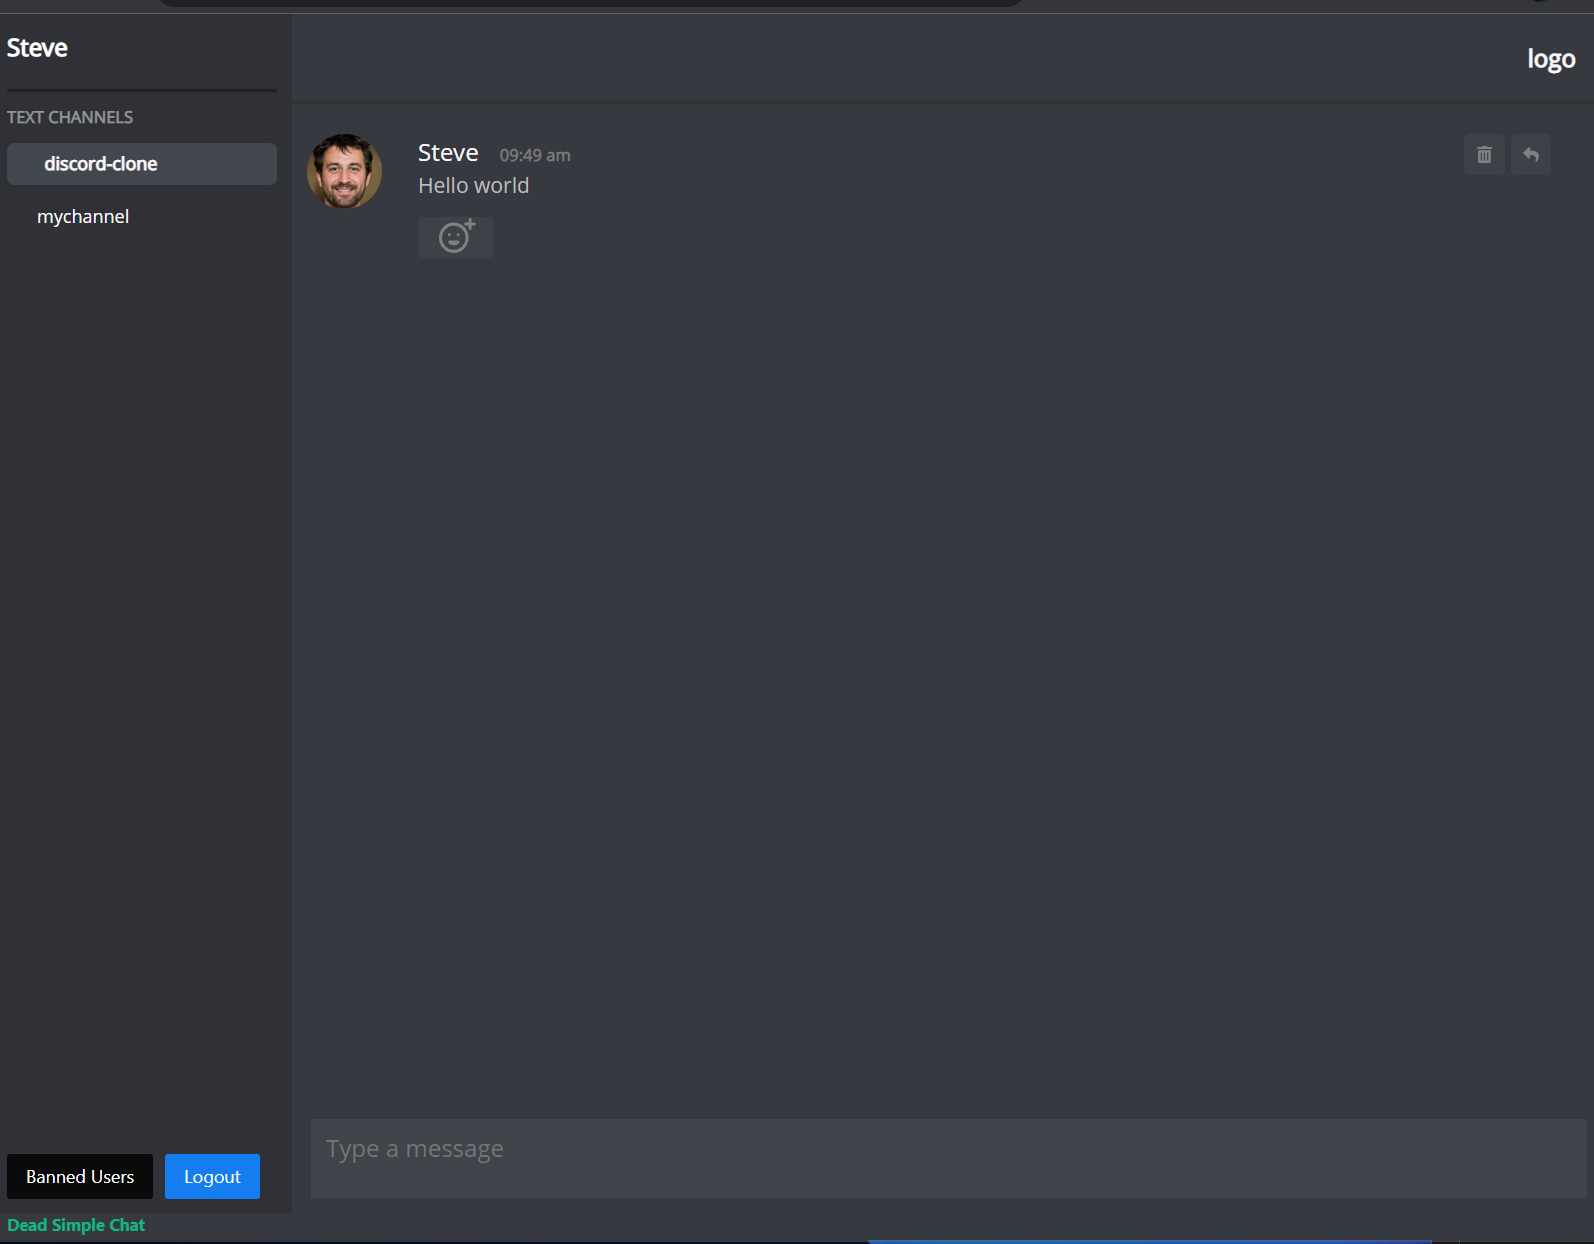
We will make it upper case using CSS. Our chat room finally looks like this
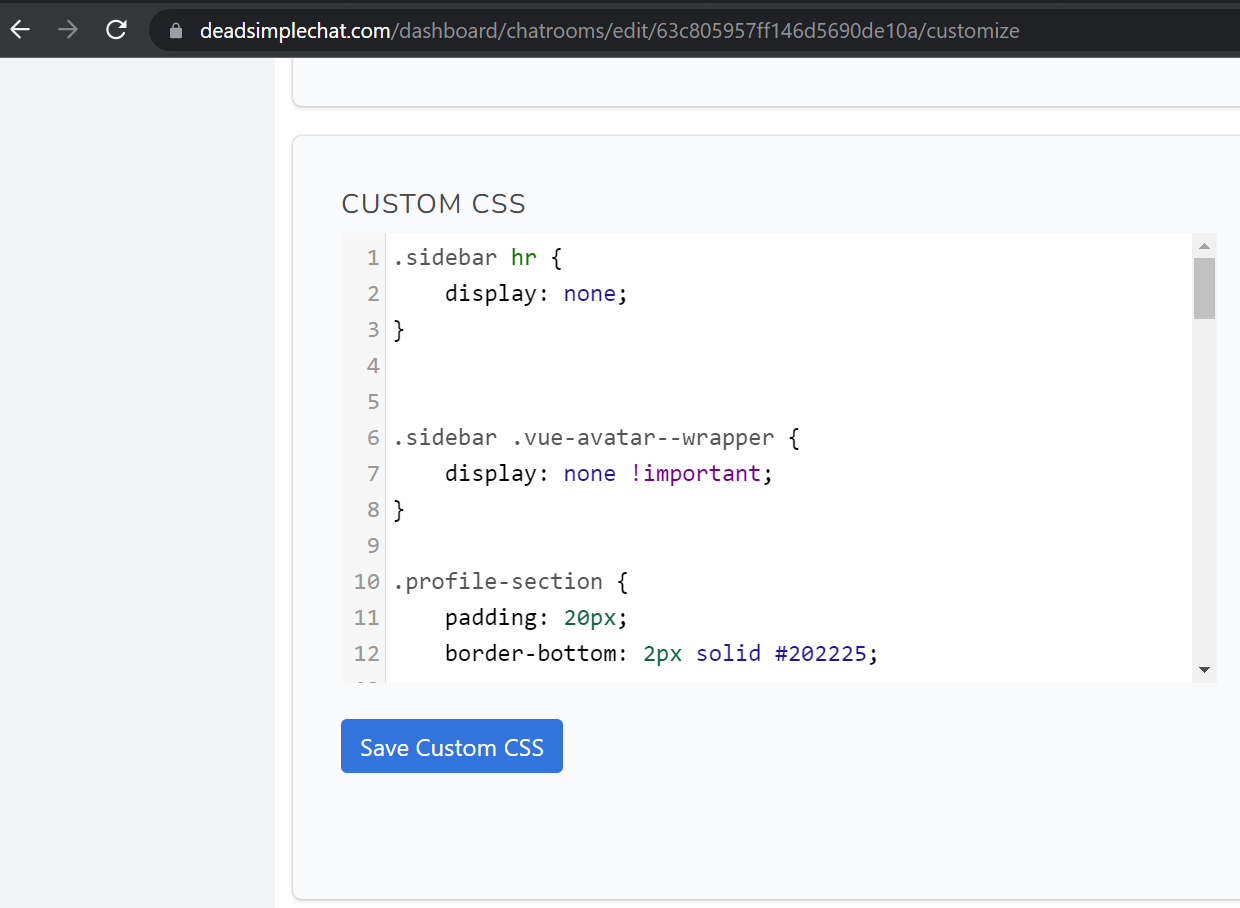
There are still white lines in the sidebar, we will use custom CSS to make some final touches to the sidebar.
Here is the custom CSS that we will use
.sidebar hr {
    display: none;
}


.sidebar .vue-avatar--wrapper {
    display: none !important;
}

.profile-section {
    padding: 20px;
    border-bottom: 2px solid #202225;

}

.profile-section .column {
    position: absolute !important;
    margin: 20px;
    top: 10;
    left: 10;
}

.channelsHeading {
    margin-top: 10px;
    text-transform: uppercase;
    font-weight: 600;
    color: #919396 !important;

}

.activeChannel {
    background-color: #42464d !important;
    padding: 5px;
    border-radius: 10px;
    margin-top: 10px;
    border-radius: 5px !important;
}

.channelsList {
    padding-left: 12px;
    padding-right: 12px;
}
After apply the Custom CSS our chat room will look like this:
Customising Chat Messages to Match Discord
We will use some custom CSS to customise the font-size, hover and background colours of the chat message.
.message-timestamp {
    font-weight: 600;
    font-size: 11px;
    margin-left: 10px;

}

.message-username {
    font-weight: 400;
    font-size: 16px;
}

.markdown-body {
    color: #bcbbbe !important;
    font-size: 14px;
}


.likeReactionContainer .likeReactionButton {
    background: #3d4148 !important;
}

.likeReactionContainer .likeReactionButton:hover {
    background: #40444b;
}

.deleteMessageButton {
    background: #3d4148 !important;
    color: #808080 !important;
}

.replyMessageButton {
    background: #3d4148 !important;
    color: #808080 !important;
}
After apply custom CSS our Chat Room looks like this:
Customizing the text area
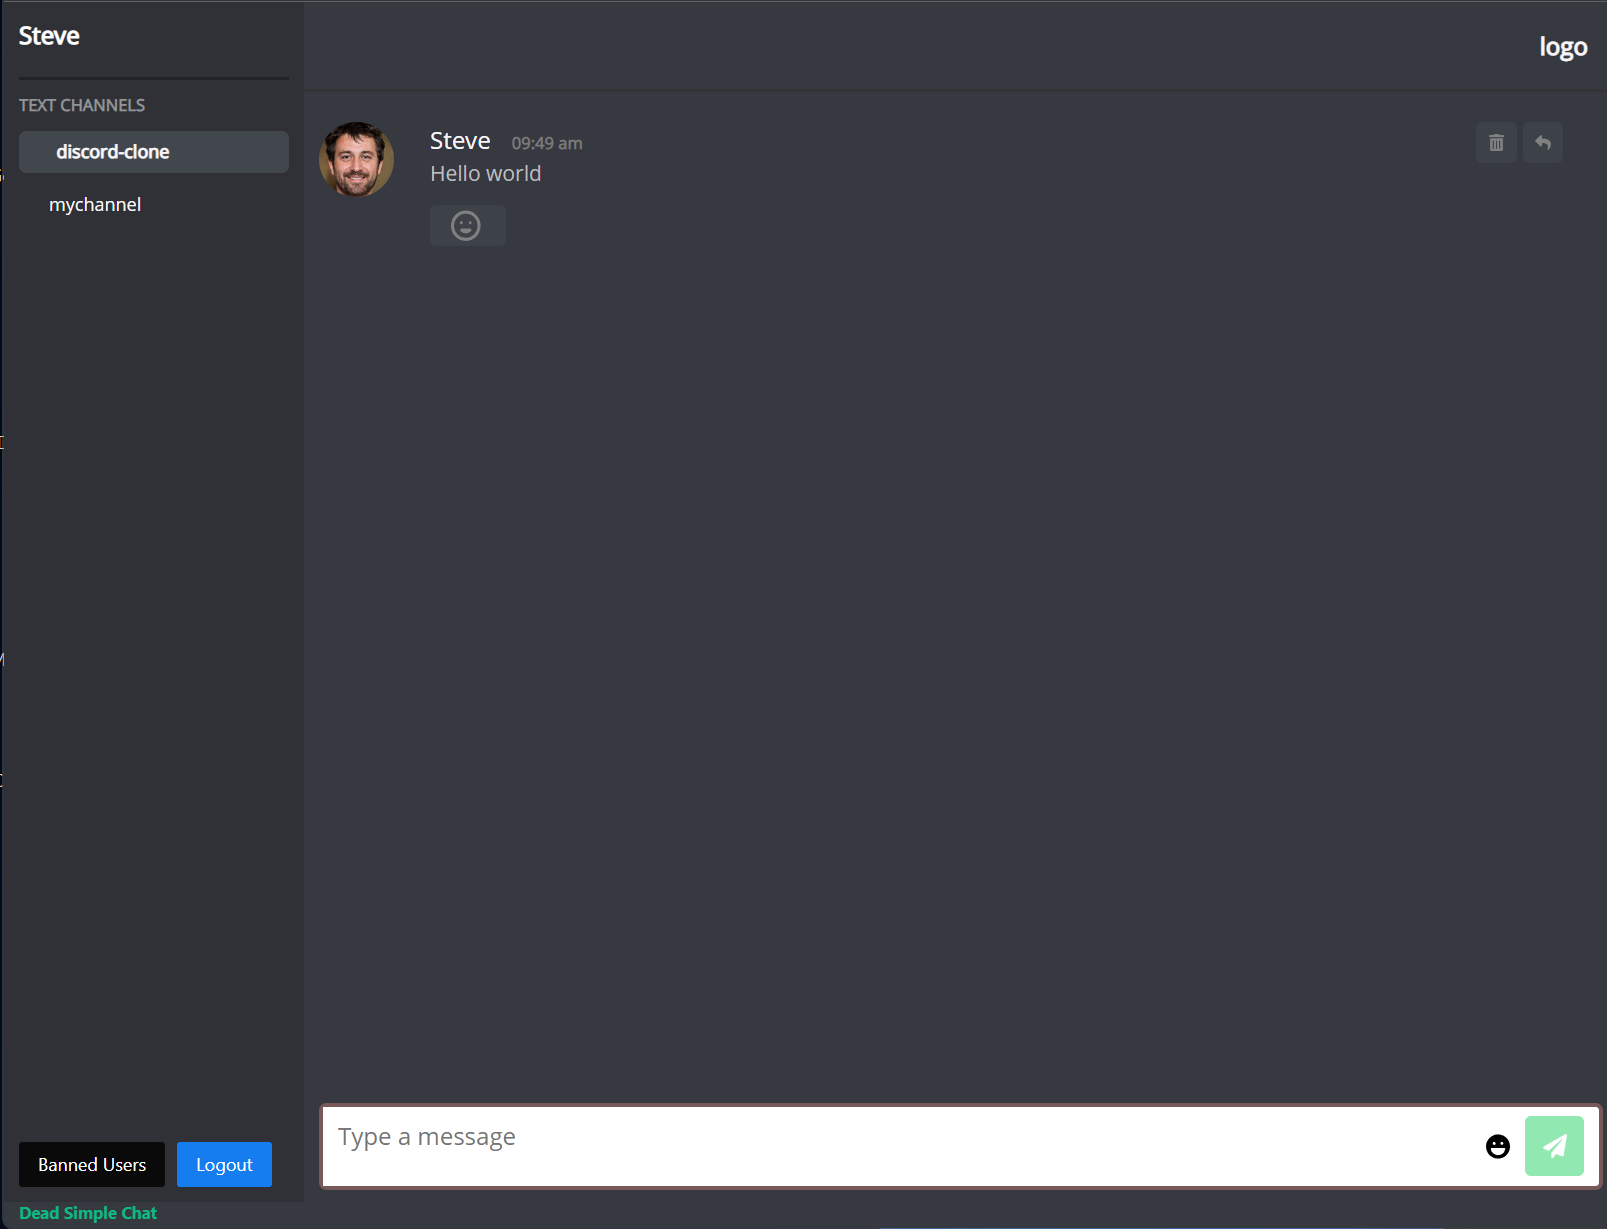
We will customise the bottom text area to match discord. In the chat room settings we will set the Text Area Background and Border Color to #36393f
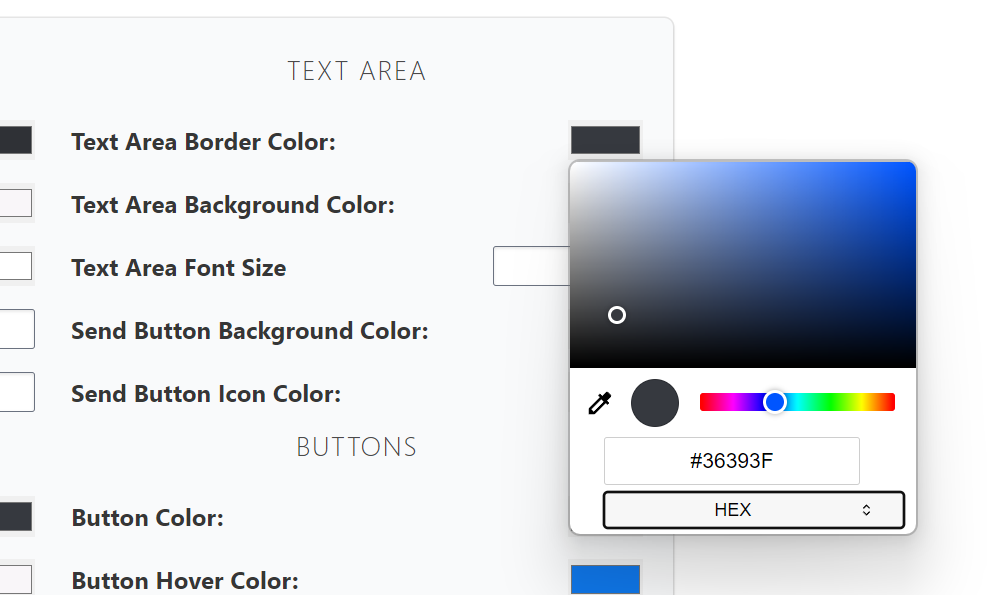
We also want to hide the send button, we will hide it using the following custom CSS code.
.textarea-div button {
    display: none;
}
And our chat room looks like this:
Complete Custom CSS Code
Here is the complete custom css code, you can paste all the custom css under Chat Room Settings -> Customise and then scroll down to the Custom CSS text area as shown in the image below:
.sidebar hr {
    display: none;
}


.sidebar .vue-avatar--wrapper {
    display: none !important;
}

.profile-section {
    padding: 20px;
    border-bottom: 2px solid #202225;

}

.profile-section .column {
    position: absolute !important;
    margin: 20px;
    top: 10;
    left: 10;
}

.channelsHeading {
    margin-top: 10px;
    text-transform: uppercase;
    font-weight: 600;
    color: #919396 !important;

}

.activeChannel {
    background-color: #42464d !important;
    padding: 5px;
    border-radius: 10px;
    margin-top: 10px;
    border-radius: 5px !important;
}

.channelsList {
    padding-left: 12px;
    padding-right: 12px;
}

.message-timestamp {
    font-weight: 600;
    font-size: 11px;
    margin-left: 10px;

}

.message-username {
    font-weight: 400;
    font-size: 16px;
}

.markdown-body {
    color: #bcbbbe !important;
    font-size: 14px;
}


.likeReactionContainer .likeReactionButton {
    background: #3d4148 !important;
}

.likeReactionContainer .likeReactionButton:hover {
    background: #40444b;
}

.deleteMessageButton {
    background: #3d4148 !important;
    color: #808080 !important;
}

.replyMessageButton {
    background: #3d4148 !important;
    color: #808080 !important;
}

.textarea-div button {
    display: none;
}
Here is a list of some related articles that are a good read
- Build Node.JS Chat App with WebSocket, Node.js Cluster and Redis
- Real Time Chat with React and Socket.IO
- SendBird Alternatives - SendBird vs Competitors
- GetStream Alternatives vs Competitors in 2023
Conclusion
We have updated the Dead Simple Chat, Chat Room to match the look and feel of Discord.
Discord Cannot be Embedded on your website, whereas with Dead Simple Chat, you can embed it on your webpage.
Here in this example, we have used the pre-built interface from Dead Simple Chat, but Dead Simple Chat also offers the Chat SDK, using with you can integrate chat into your own custom chat ui.
You can read our SDK Docs here: https://deadsimplechat.com/developer/
Ready to Add Chat to Your Website?
Get started for free. No credit card required.
Start a Free Trial
![Webinar Chat: The Complete Guide to Engaging Your Audience [2026]](/blog/content/images/size/w600/2026/02/article-hero-webinar-chat.svg)
