Options API has been the go to method of creating components in Vue. With the introduction of Vue 3, a new method of creating components was introduced called the composition API
In this article we are going to learn about Options API and composition API, their differences and why composition API was introduced along with an example
Options API: An Introduction
Options API was the default method of creating components in Vue 2. When we think of a Vue component structure that would include component logic basic options like
- method
- data
- computed
- watch
We are talking about the Options API. In the Options API the method is for writing functions, data is the state of the component, computed if for derived state and so on
This method has been the core of vue since its inception. A component created with Options API would look something like this
export default {
  data() {
    return {
      count: 0
    }
  },
  methods: {
    increment() {
      this.count++;
    }
  },
  computed: {
    doubleCount() {
      return this.count * 2;
    }
  }
}Composition API
In the composition API developers can group the component code by functionality or logic, instead of the rigid options based structure previously envisioned by the Options API
This makes it easier to create larger and more complex components then before and also aids in maintainability and reliability.

To achieve reactivity and flexibility the composition API offers functions like
refreactiveandcomputed
let us look how a component is created using the composition api
import { ref, computed } from 'vue';

export default {
  setup() {
    const count = ref(0);
    const doubleCount = computed(() => count.value * 2);

    function increment() {
      count.value++;
    }

    return {
      count,
      doubleCount,
      increment
    }
  }
}
In summary, the Options API distributes the component logic based on Options type and the composition API allows for the grouping of component logic by concern or feature
Creating a Project to better understand Options API vs Composition API
In this section we are going to create a project with Options API and then introduce the composition api to better understand the differences between these two APIs
We are going to create a task manager for this example and we are going to use vite to create the project
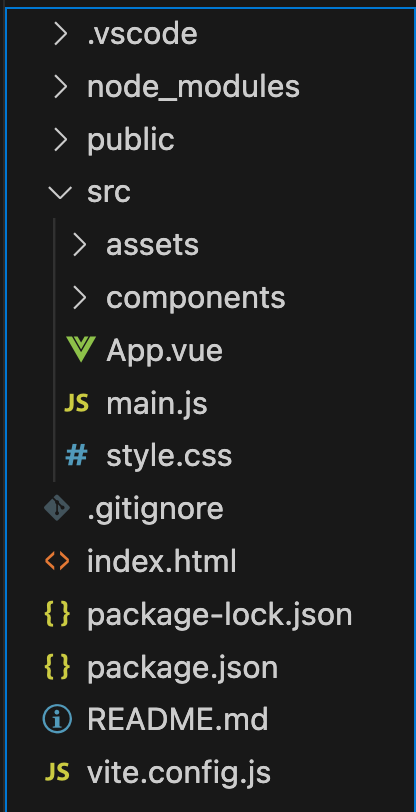
Step 1: Create a new vite project
write the below code in your terminal to create a new Vue project with vite
npm create vite@latest my-vue-app -- --template vue
now you have created a new project cd into the my-vue-app directory and run the npm install and npm run dev commands
cd my-vue-app
npm install
npm run dev
Now, Open the code in your code editor. I am using VSCode and go to the local url where your app is running
Step 2: Creating the TaskList Component with the help of Options API
In this section we are going to create a TaskList component using the Options API
in your components folder create a file called TaskList.vue and paste the below code in it
<template>
    <div class="task-list">

      <!-- Task Input Section -->
      <div class="task-input">
        <input v-model="newTask" placeholder="Add a new task" />
        <button @click="addTask">Add</button>
      </div>

      <!-- Incomplete Tasks -->
      <div class="incomplete-tasks">
        <h3>Incomplete Tasks</h3>
        <ul>
          <li v-for="task in incompleteTasks" :key="task.id">
            <span>{{ task.title }}</span>
            <button @click="completeTask(task.id)">Mark Complete</button>
            <button @click="deleteTask(task.id)">Delete</button>
          </li>
        </ul>
      </div>

      <!-- Completed Tasks -->
      <div class="completed-tasks">
        <h3>Completed Tasks</h3>
        <ul>
          <li v-for="task in completedTasks" :key="task.id">
            <span>{{ task.title }}</span>
            <button @click="incompleteTask(task.id)">Mark Incomplete</button>
            <button @click="deleteTask(task.id)">Delete</button>
          </li>
        </ul>
      </div>

    </div>
  </template>

  <script>
  export default {
    data() {
      return {
        tasks: [],
        newTask: ''
      };
    },
    computed: {
      incompleteTasks() {
        return this.tasks.filter(task => !task.completed);
      },
      completedTasks() {
        return this.tasks.filter(task => task.completed);
      }
    },
    methods: {
      addTask() {
        if (this.newTask.trim()) {
          this.tasks.push({
            id: Date.now(),
            title: this.newTask,
            completed: false
          });
          this.newTask = '';
        }
      },
      deleteTask(taskId) {
        this.tasks = this.tasks.filter(task => task.id !== taskId);
      },
      completeTask(taskId) {
        const task = this.tasks.find(t => t.id === taskId);
        if (task) task.completed = true;
      },
      incompleteTask(taskId) {
        const task = this.tasks.find(t => t.id === taskId);
        if (task) task.completed = false;
      }
    }
  }
  </script>

  <style scoped>
  .task-list {
    width: 80%;
    margin: 20px auto;
    box-shadow: 0px 0px 12px rgba(0, 0, 0, 0.1);
    padding: 20px;
    border-radius: 5px;
  }
  .task-input {
    margin-bottom: 20px;
  }
  </style>
Handling data
We are using the Option APIs data function here which acts as the component's state to store information.
data() {
  return {
    tasks: [],      // tasks Array will hold all the tasks
    newTask: ''  // newTask is of type which will hold the new task
  };
}
Handling functionality through methods
In the Options API we can create JS function to add functionality to our components.
These functions can be created inside the methods options. Here are some of the functions that we are creating inside the methods option
addTask : This function is used to create new tasks
addTask() {
  if (this.newTask.trim()) {
    this.tasks.push({
      id: Date.now(),
      title: this.newTask,
      completed: false
    });
    this.newTask = '';  // Reset the input field
  }
}
deleteTask This method is used to delete a task
deleteTask(taskId) {
  this.tasks = this.tasks.filter(task => task.id !== taskId);
}
completeTask This function is used to mark a task as completed
completeTask(taskId) {
  const task = this.tasks.find(t => t.id === taskId);
  if (task) task.completed = true;
}
incompleteTask This function is used to mark a task as incomplete, if first they were marked as complete by mistake
incompleteTask(taskId) {
  const task = this.tasks.find(t => t.id === taskId);
  if (task) task.completed = false;
}
Computed Properties and Watchers
we can use computed properties to filter tasks
incompleteTasks Here we are using computed properties to filter and display only the tasks that have not been completed yet
incompleteTasks() {
  return this.tasks.filter(task => !task.completed);
}
completedTasks : Likewise here we are filterning the tasks that have been completed and only showing those taks
completedTasks() {
  return this.tasks.filter(task => task.completed);
}
Our basic tasks list does not use watchers but if it did we can use the Option API watch property to declare the watchers there
Now we have created the TaskList, the next thing is to include it in the App.Vue and see it working
Adding the TaskList to App.Vue
open your App.Vue file and paste the following code there
<script setup>
import TaskList from './components/TaskList.vue';
</script>

<template>
  <div>
    <a href="https://vitejs.dev" target="_blank">
      <img src="/vite.svg" class="logo" alt="Vite logo" />
    </a>
    <a href="https://vuejs.org/" target="_blank">
      <img src="./assets/vue.svg" class="logo vue" alt="Vue logo" />
    </a>
  </div>
  <TaskList />
</template>

<style scoped>
.logo {
  height: 6em;
  padding: 1.5em;
  will-change: filter;
  transition: filter 300ms;
}
.logo:hover {
  filter: drop-shadow(0 0 2em #646cffaa);
}
.logo.vue:hover {
  filter: drop-shadow(0 0 2em #42b883aa);
}
</style>
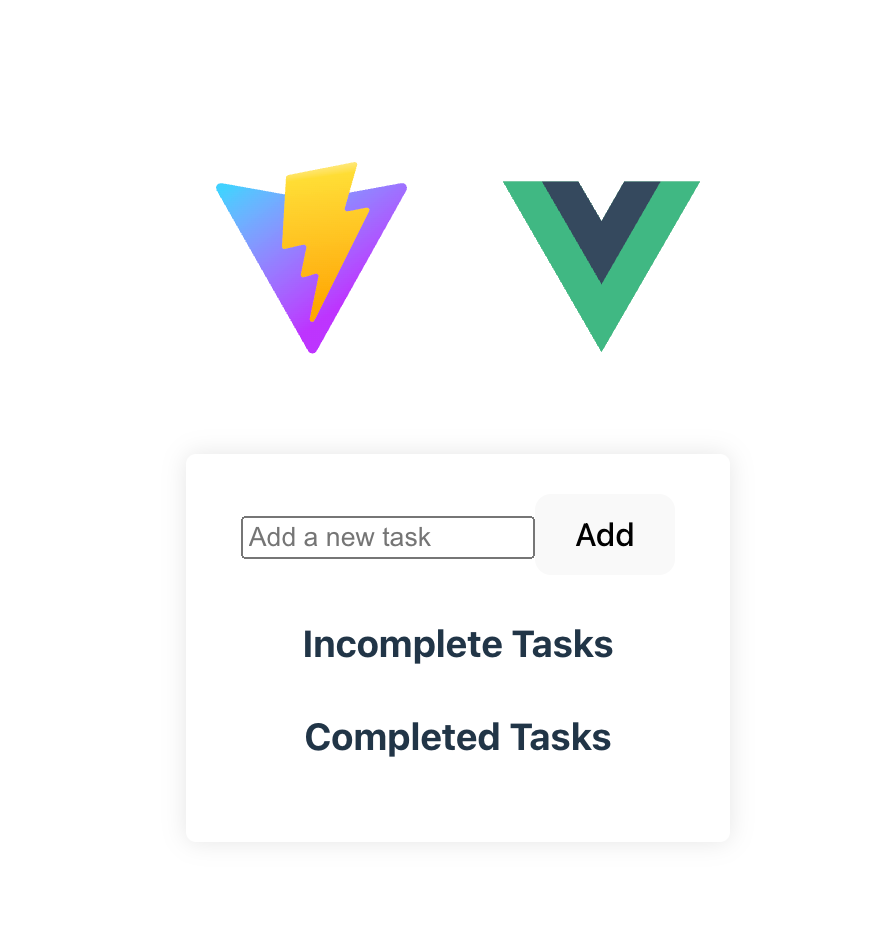
In the app I have some logos so that it looks good.
Let us learn what we are doing in the App.vue file
Importing the TaskList Component
We need to import the tasklist component from the TaskList.Vue file to App.vue file
import TaskList from './components/TaskList.vue';
Then we have the template and the scoped styles then we are having the TaskList component inside the template like
<template>
  <div>
    <a href="https://vitejs.dev" target="_blank">
      <img src="/vite.svg" class="logo" alt="Vite logo" />
    </a>
    <a href="https://vuejs.org/" target="_blank">
      <img src="./assets/vue.svg" class="logo vue" alt="Vue logo" />
    </a>
  </div>
  <TaskList />
</template>
and we have our app live and working
Rebuilding the TaskList with Composition API
In this section we will rebuild the composition api so that you can better understand the differences between the options api and the composition api
In the Options API we had options like
- data
- methods
- computed
- watch
Let's see what we have in the composition API
Handling data in composition API
Here instead of data Object we have the ref and the reactive functions.
If we want to make a single value reactive (string, boolean, or number etc) then we can use ref and if we want to convert the whole object to reactive reference then use the reactive
In other words for simple properties use ref and for complex properties or Objects use reactive function to make properties /data reactive reference
import {ref,reactive} from 'vue';

const tasks = ref([]);
const new Task = ref('');
Handling functionality in composition api
Methods in composition api are plain JS functions. There is no longer a need to describe them inside the methods Object.
const addTask = () => {
  if (newTask.value.trim()) {
    tasks.value.push({
      id: Date.now(),
      title: newTask.value,
      completed: false
    });
    newTask.value = '';
  }
}
Computed properties and watchers in composition api
Computed properties and watchers use the computed and watch functions
import { computed, watch } from 'vue';

const incompleteTasks = computed(() => tasks.value.filter(task => !task.completed));
const completedTasks = computed(() => tasks.value.filter(task => task.completed));

watch(tasks, (newVal, oldVal) => {
  console.log('Tasks have changed!');
});
Complete TaskList Component using Composition API
So we have converted the complete TaskList component from Options API to composition API
<template>
  <div>
    <input v-model="newTask.value" @keyup.enter="addTask" placeholder="Add a new task">
    <ul>
      <li v-for="task in tasks.value" :key="task.id">
        <input type="checkbox" v-model="task.completed">
        {{ task.title }}
      </li>
    </ul>
  </div>
</template>

<script>
import { ref, computed } from 'vue';

export default {
  name: 'TaskList',
  setup() {
    const tasks = ref([]);
    const newTask = ref('');

    const addTask = () => {
      if (newTask.value.trim()) {
        tasks.value.push({
          id: Date.now(),
          title: newTask.value,
          completed: false
        });
        newTask.value = '';
      }
    };

    return {
      tasks,
      newTask,
      addTask
    };
  }
}
</script>

<style scoped>
/*Any styling the you wish to write*/
</style>
Summary for converting TaskList to Composition API
Setup function: Setup function is the entry point where you declare your data, functions and event listeners as composition api provides grouping by functionality
Reactivity use ref or reactive: Make individual properties a reactive ref using ref or if you want to make the whole Object reactive reference use the reactive
functions: All the functions are declared inside the setup function
Template access: Anything that needs to accessed in the template must be returned from the setup function
Advanced use-cases
State Management: Composition API + Pinia
Pinia is the new default state management library for Vue Js. If you want to use a store the Pinia API are pretty straightforward. You can use useCoolStore() pattern this is similar to Vueex 5
import { defineStore } from 'pinia';

export const useMyStore = defineStore({
  id: 'mystore',
  state: () => ({
    someStateValue: '',
  }),
  actions: {
    setSomeStateValue(value) {
      this.someStateValue = value;
    },
  },
});
In this above code we are using the defineStore function of Pinia to create a new store and we are naming it mystore
then in this store we have a single reactive state property called someStateValue and we are initialing the state property with an empty string
To modify the value of someStateValue we have the function or action setSomeStateValue
Lastly we are exporting the state useMyStore so that other components can use it
This article is brought to you by DeadSimpleChat, Chat API and SDK for your website and APP
using Pinia with composition api
let us use the useMyStore within a component that is created with composition api
import { useMyStore } from '@/stores/mystore';

export default {
  setup() {
    const store = useMyStore();

    return { someStateValue: store.someStateValue };
  },
};
here we are importing the useMyStore function which will provide our component the access to the already defined Pinia store
In the component and since we are using the composition api we have the setup function
inside the setup function we have a const named store and we are assigning the useMyStore function to the store const
This grants us access to the store state that is data and actions that is functions
lastly we are exposing the someStateValue to the components template from the store so that we can use it for rendering the component
Routing with Pinia, Vue Router and composition API
Using Vue Router with Pinia is quite easy
import { useRouter, useRoute } from 'vue-router';

export default {
  setup() {
    const router = useRouter();
    const route = useRoute();

    router.push({ name: 'BestRouteEver' });

    return {};
  },
};
In this example we are using the useRouter and the useRoute Hooks provided by the Vue Router.
First we initialize the two const namely router and the route
The router gives us access to the router instance and the route gives us insight into the current route's details
All the integration is within the setup function signifying that we are using the composition api in this example instead of the options api
Lastly to navigate we are using the router.push function to take the application to BestRouteEver
You might be interested in some of our other articles
- Watchers in Vue.js
- React useMemo Vs useCallback
- React Hooks: Cheat Sheet, with examples
- Build Electron App with Vue in 3 easy steps
Conclusion
In this example we learned about the Options API as well as the composition API
Thus composition api is a better option to use then the Options API in Vue js. It is basically aims at solving the same problem but has a more logical organization of code that helps the app scale a lot better with more readable code base
This article is brought to you by DeadSimpleChat, Chat API and SDK for your website and app
Compositon API provides grouping of code based on logical functionality as compared to Options API which provides a more rigid structure
You can use options api in the Vue 3 as well if you are developing small apps and are more comfortable using the options api. It is more welcoming to new developers coming on to the Vue platoform
But for large scale apps or app that has a lot of complexcity the composition api is a better choice
Composition API is also quite good and easy to learn once you understand the basic idea behind it
I would suggest that composition api is even more easier to learn for a novice programmer as it provides logical or functional grouping of the code at one place which is better than a scattered approch of Options api which also has a rigid structure
Thank you for reading I hope you liked the article
Ready to Add Chat to Your Website?
Get started for free. No credit card required.
Start a Free Trial
![Webinar Chat: The Complete Guide to Engaging Your Audience [2026]](/blog/content/images/size/w600/2026/02/article-hero-webinar-chat.svg)
