Dead Simple Chat offers prebuilt Chat that can be added in minutes to any app or website. Can be completely customized and offers powerful JavaScript Chat API and SDK.
Introduction
In this article I am going to explain how to build an Angular Chat Application using DeadSimpleChat
Chat can be easily added to any existing Angular web page or application. Or you could create one from scratch.
I will be going through both these methods:
- Adding Chat to existing Angular App
- Creating a new Angular App and Adding Chat to it.
Adding Chat to your Existing Angular App
To add chat to your existing angular app, you will need an account with DeadSimpleChat. If you do not have an account, you can create one for free on the DeadSimpleChat.com . DeadSimpleChat has JavaScript Chat API and SDK
Here are the Steps once you have created an account
Step 1: Get the Embed Code
Once you have created an account, you will land up in the Dashboard.
From the Dashboard Click on the Create Chat Room Button to create a chat room
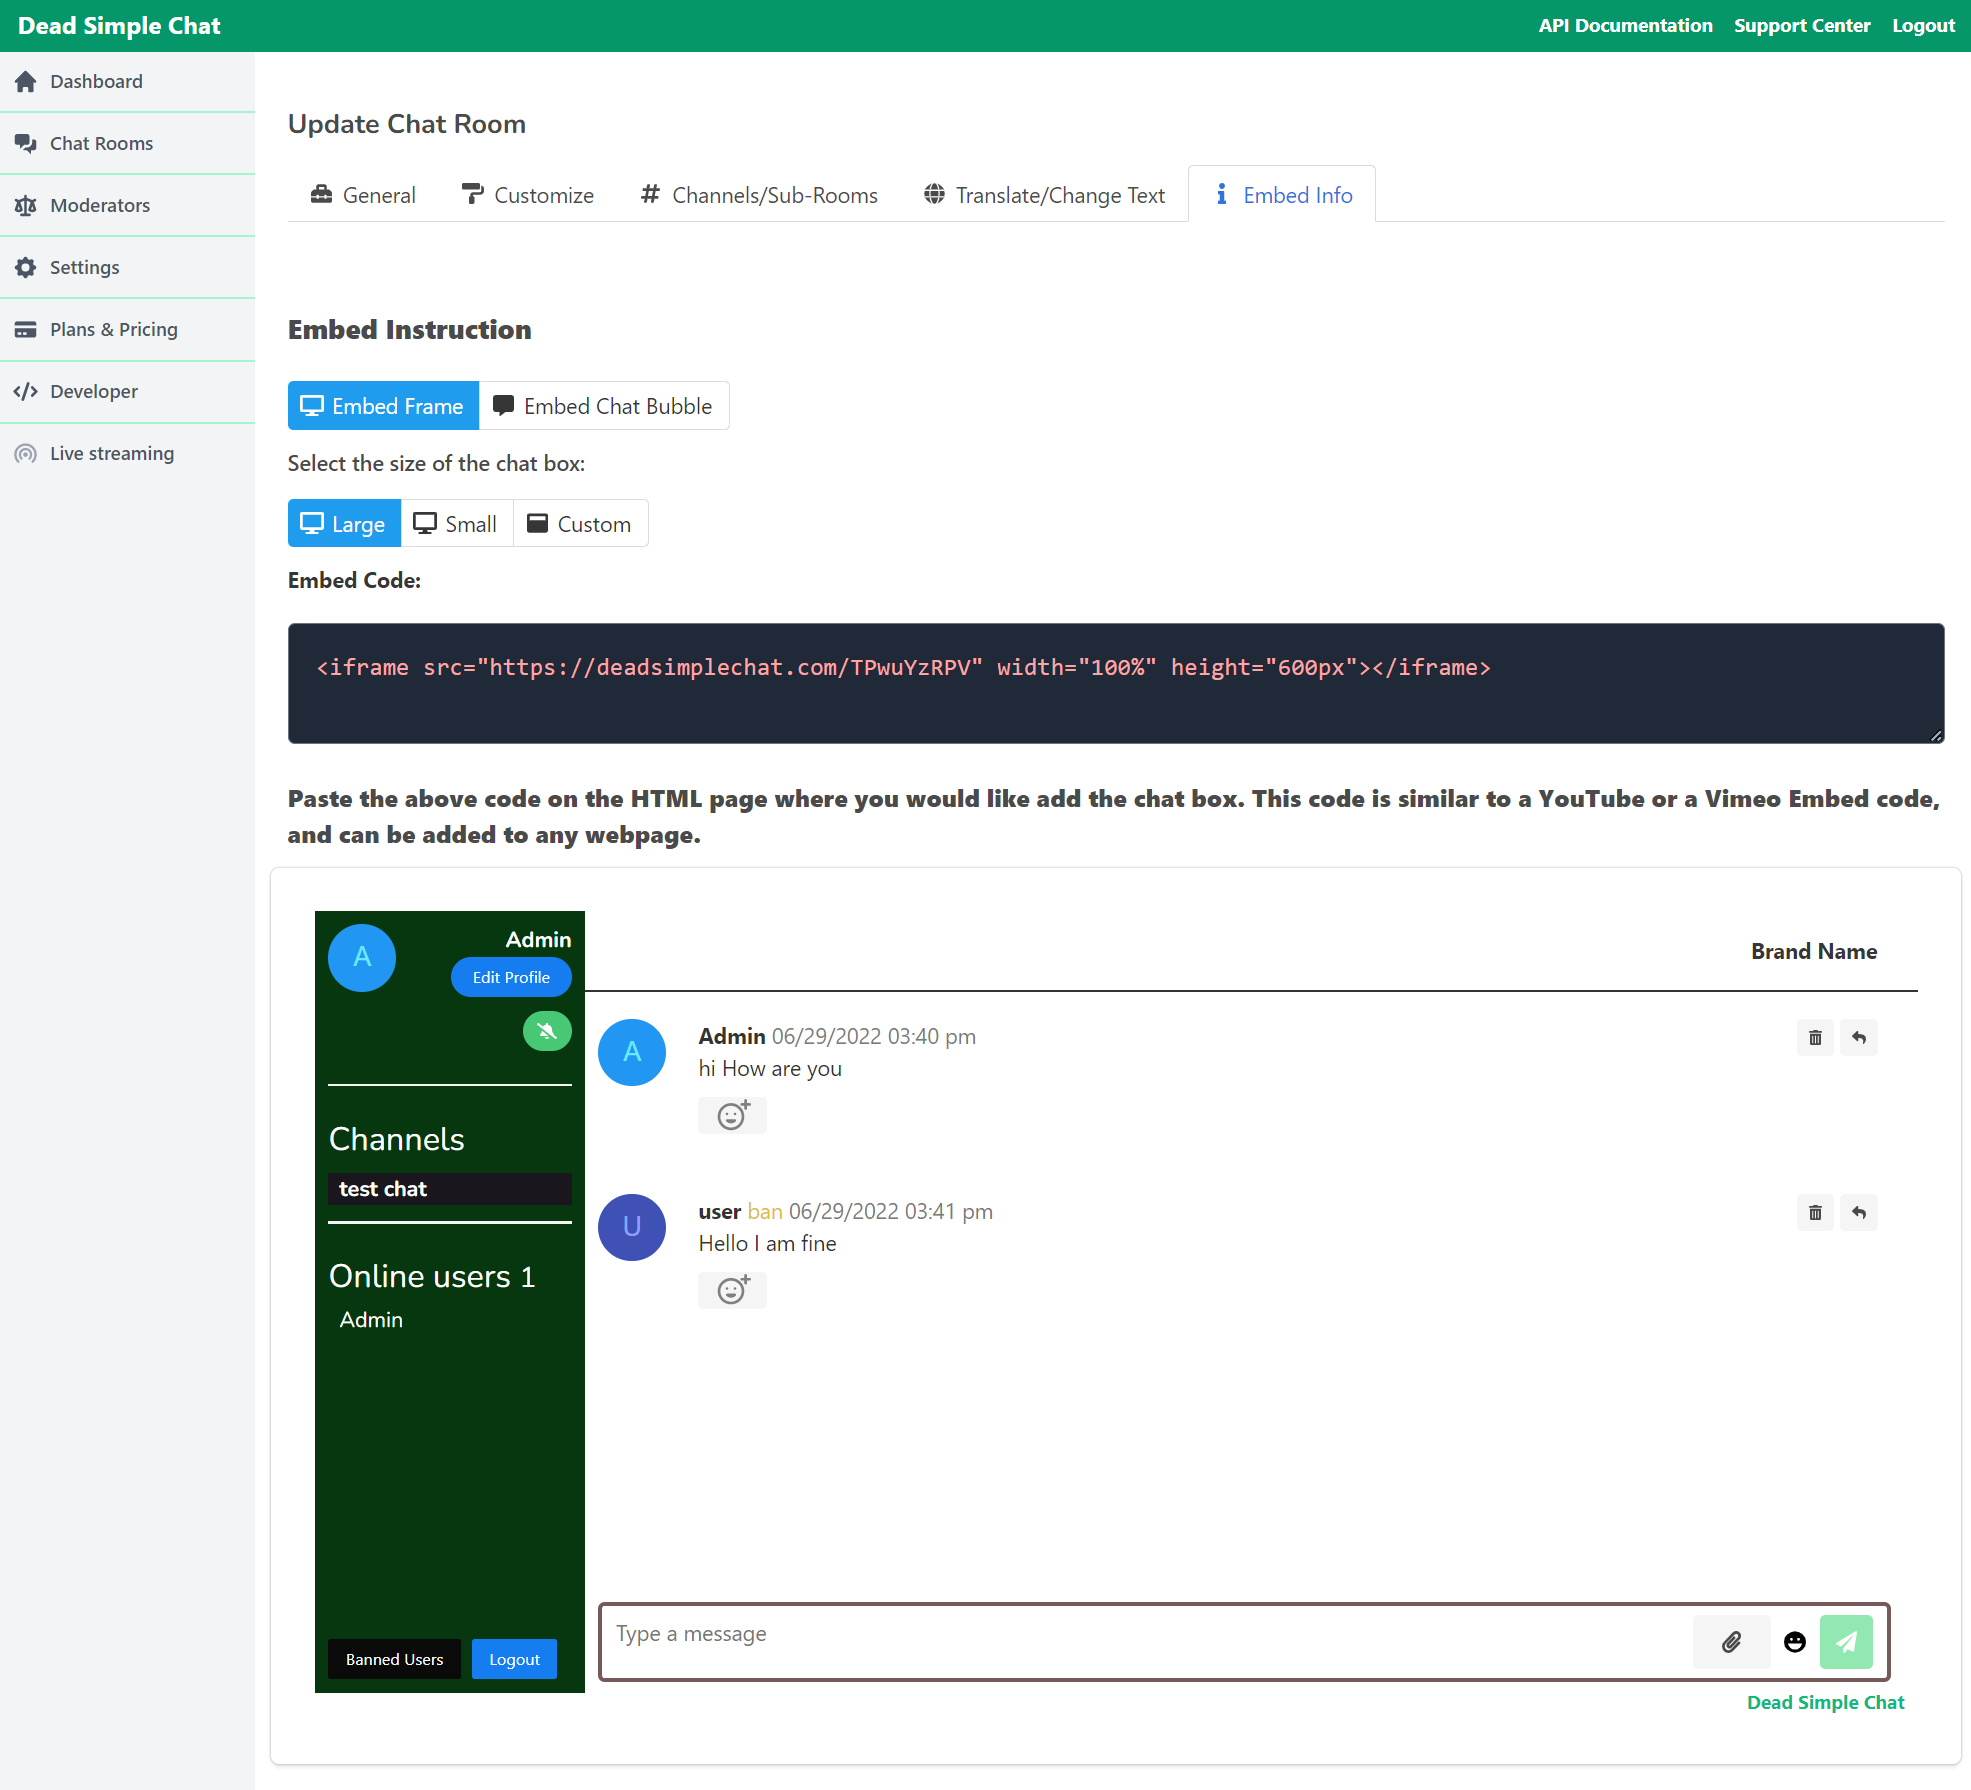
Once you have created a chat room click on the Embed Info button to Get the Embed Info
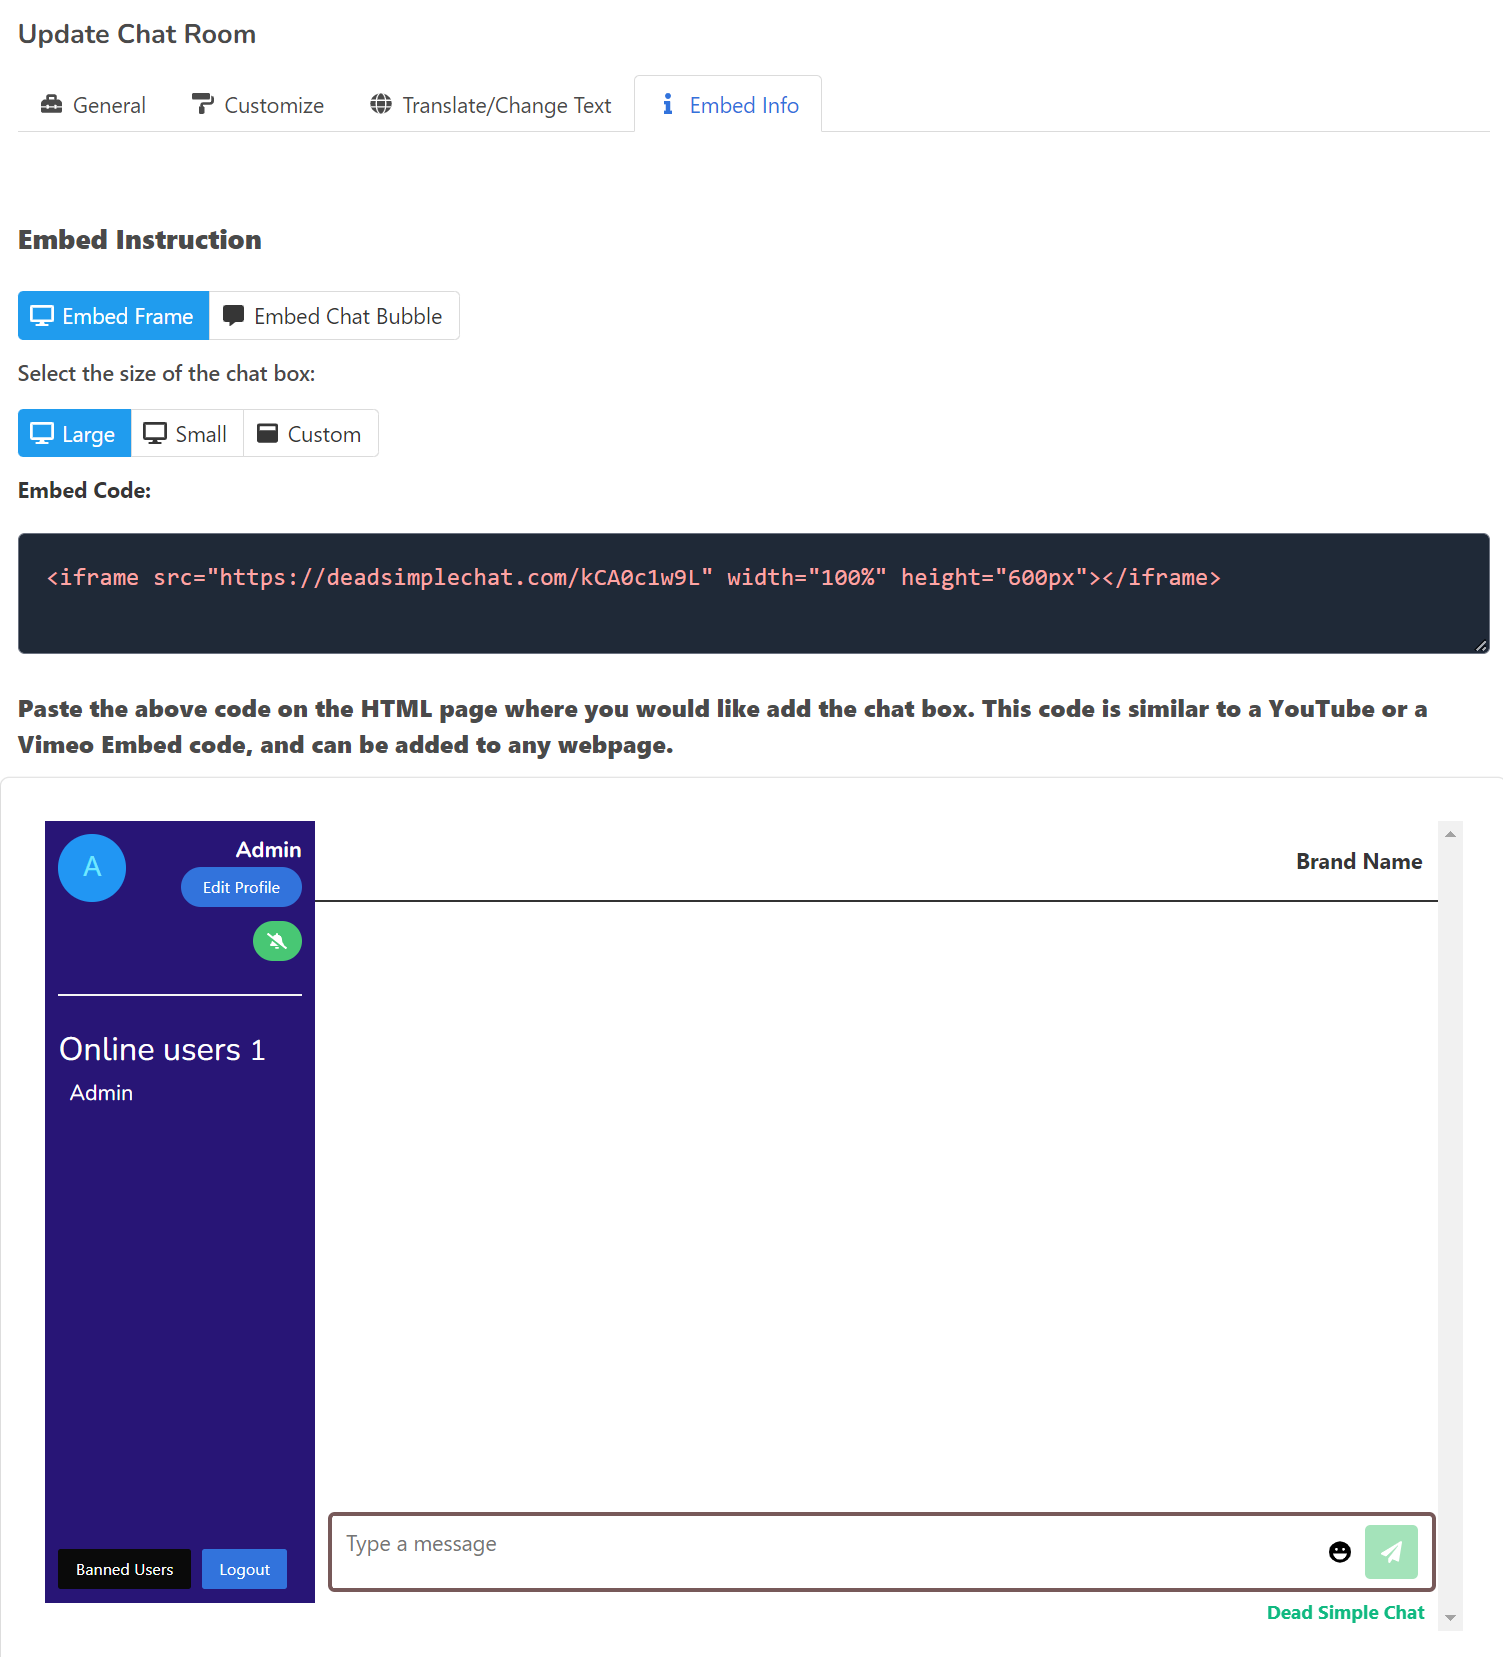
On the Embed Info Page you can resize the chat room according to your needs as well.
Copy the embed code from the Embed Info page and move on to your Angular application in step 2
Step 2: Paste the Embed Code in your Angular Application
Go to your Angular Application
On the page where you want the chat to appear paste the code that we copied in the step 1.
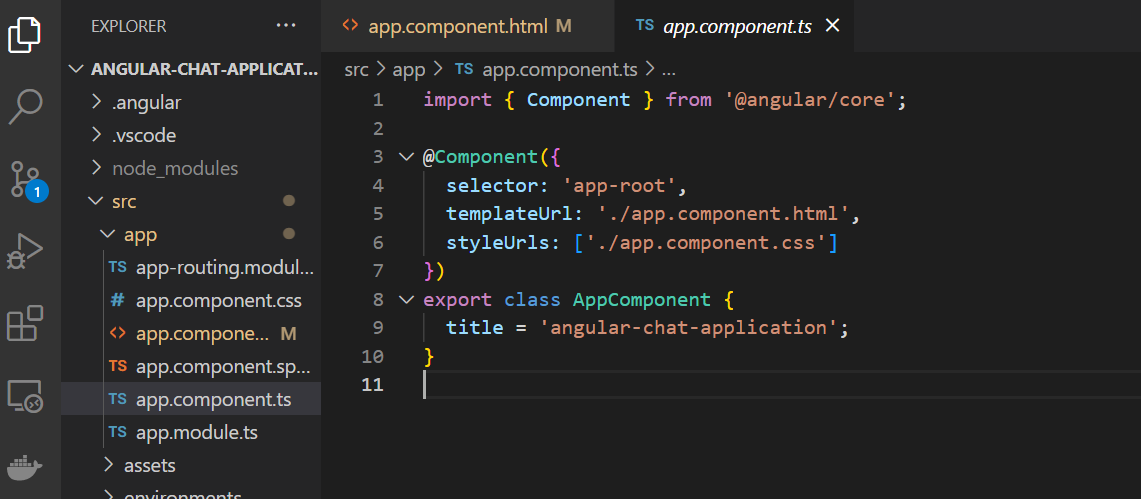
For me I have create a new angular application and called it the angular-chat-application
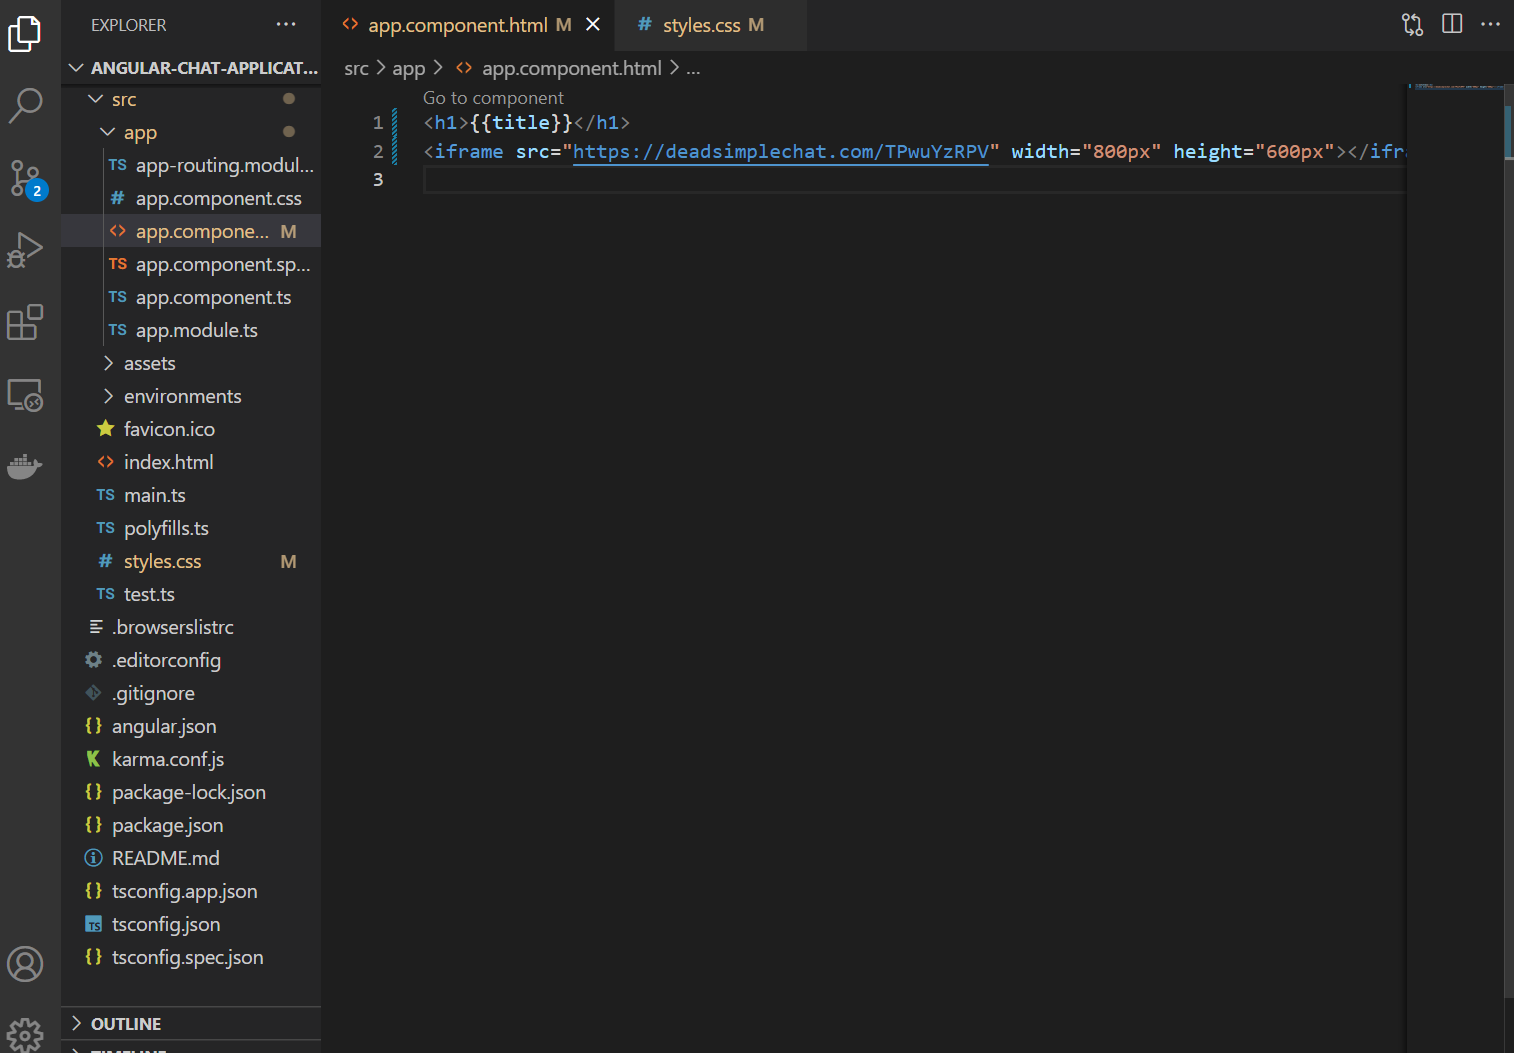
and I want to add the chat on my landing page. So I am going to add the embed code to app.component.html
like this
<h1>{{title}}</h1>

<!--embed code copied from DeadSimpleChat in step 1-->
<iframe src="https://deadsimplechat.com/TPwuYzRPV" width="800px" height="600px"></iframe>
for reference here is also my index.html
<!doctype html>
<html lang="en">
<head>
  <meta charset="utf-8">
  <title>AngularChatApplication</title>
  <base href="/">
  <meta name="viewport" content="width=device-width, initial-scale=1">
  <link rel="icon" type="image/x-icon" href="favicon.ico">
</head>
<body>
  <app-root></app-root>
</body>
</html>
Step 3: Now you have added Chat to your Angular Application
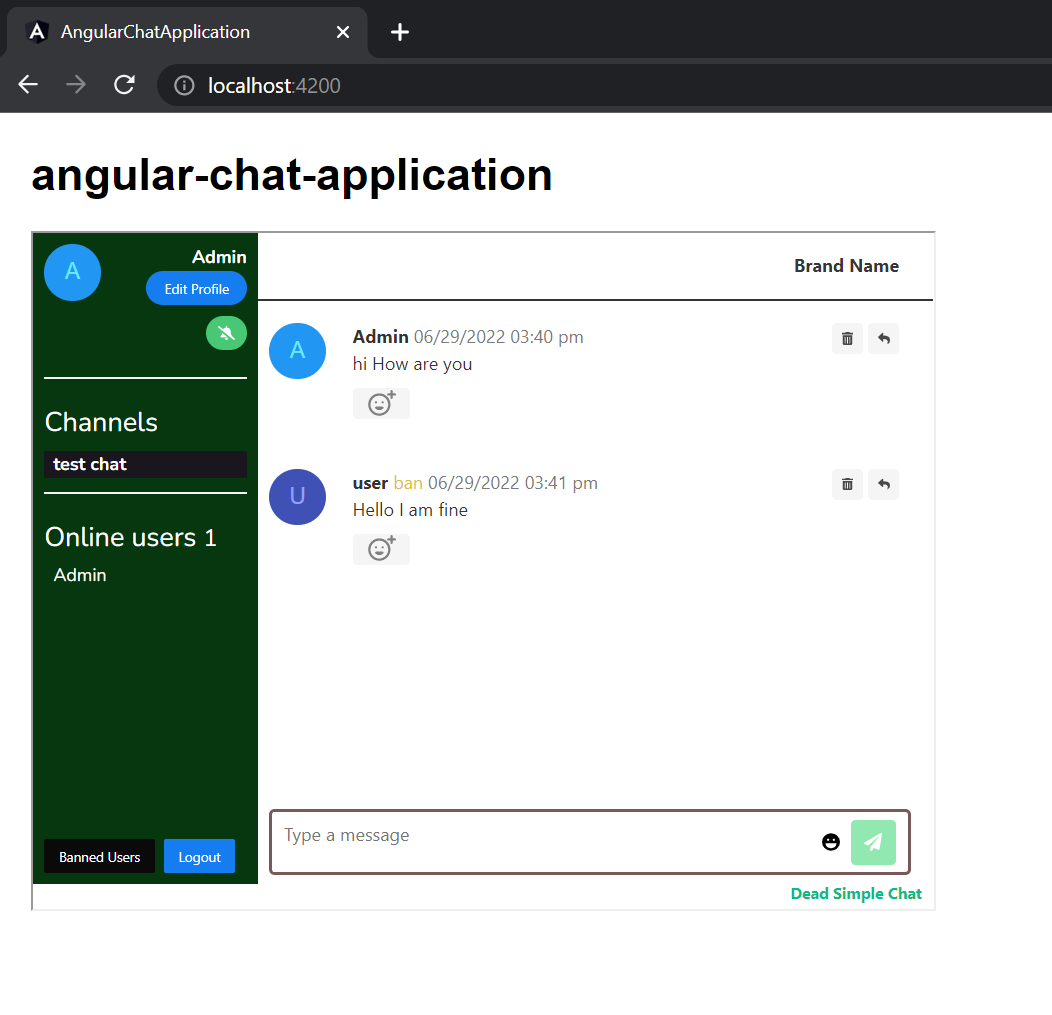
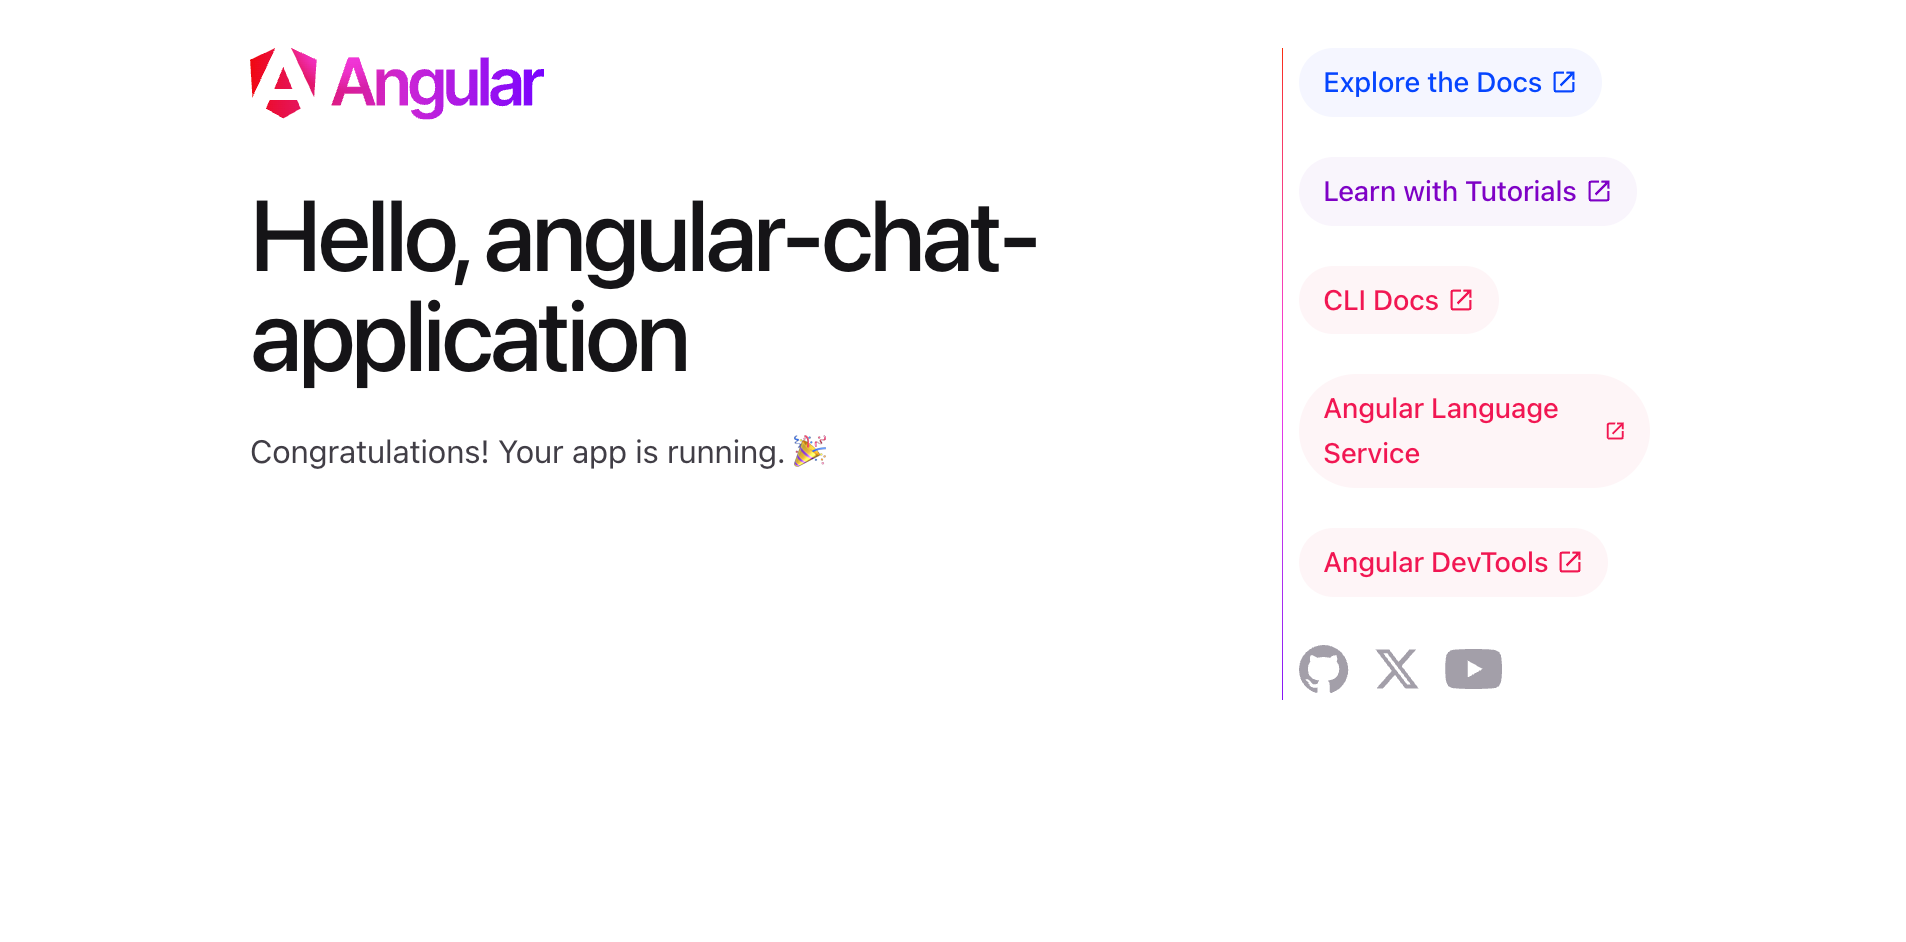
That is it. Now you have added chat to your Angular Application. go to your localhost port where your application is running to see the chat added to your application
My application is running at localhost:4200 . And this is what we see:

Adding Chat to New Angular Application
In this section we will build a new angular application and add chat to it from scratch.
first we need to install angular
Installing Angular
Make sure you have the Angular installed in your computer. Use this command to install angular cli
npm install -g @angular/cliScaffolding the project
Open the terminal and go to the directory where you and type the code:
ng new angular-chat-applicationThis will create a new project.
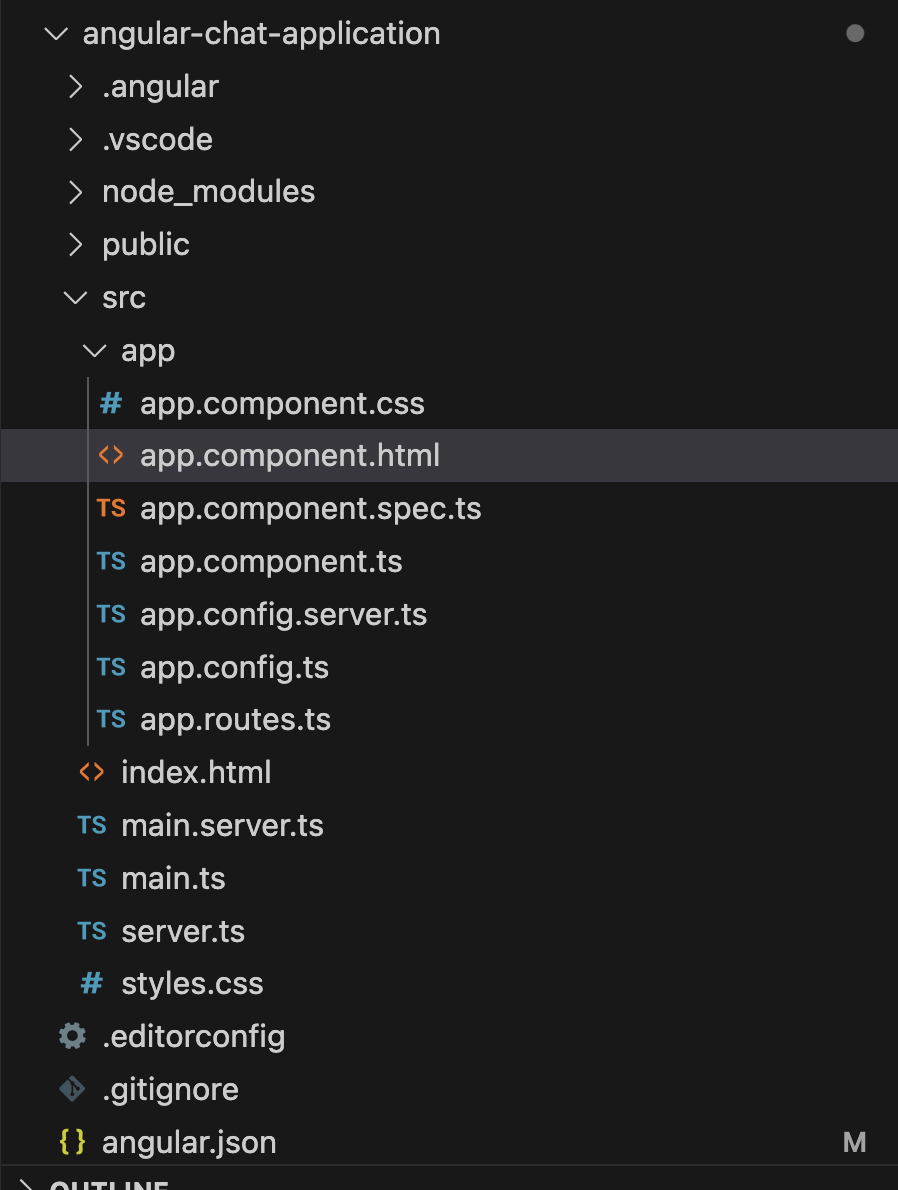
Once you have installed all the dependencies, open the app in the code editor of your choice. I am using VSCode.
The code would look something like this:
open the application using
npm startThis will start the application server on port 4200. the application would look something like this:
Now, for the next step go to
app.component.htmlfile and delete the contents
and write the below code in the app.component.html file
<h1>{{title}}</h1>Now go to :
app.component.tsfile and there under app component change the title to angular-chat-application

The application would look something like this:
Now lets add some css on a global level. Nothing much just to give the application some width and height
go to
src/styles.cssand paste the below code:
/*Application-wide Styles */
h1 {
    font-family: Arial, Helvetica, sans-serif;
    font-size: 250%;
  }
  h2, h3 {
    font-family: Arial, Helvetica, sans-serif;
    font-weight: lighter;
  }
  body {
    margin: 2em;
  }

  /* everywhere else */

  * {
    font-family: Arial, Helvetica, sans-serif;
}Now let us move on to creating a chat account.
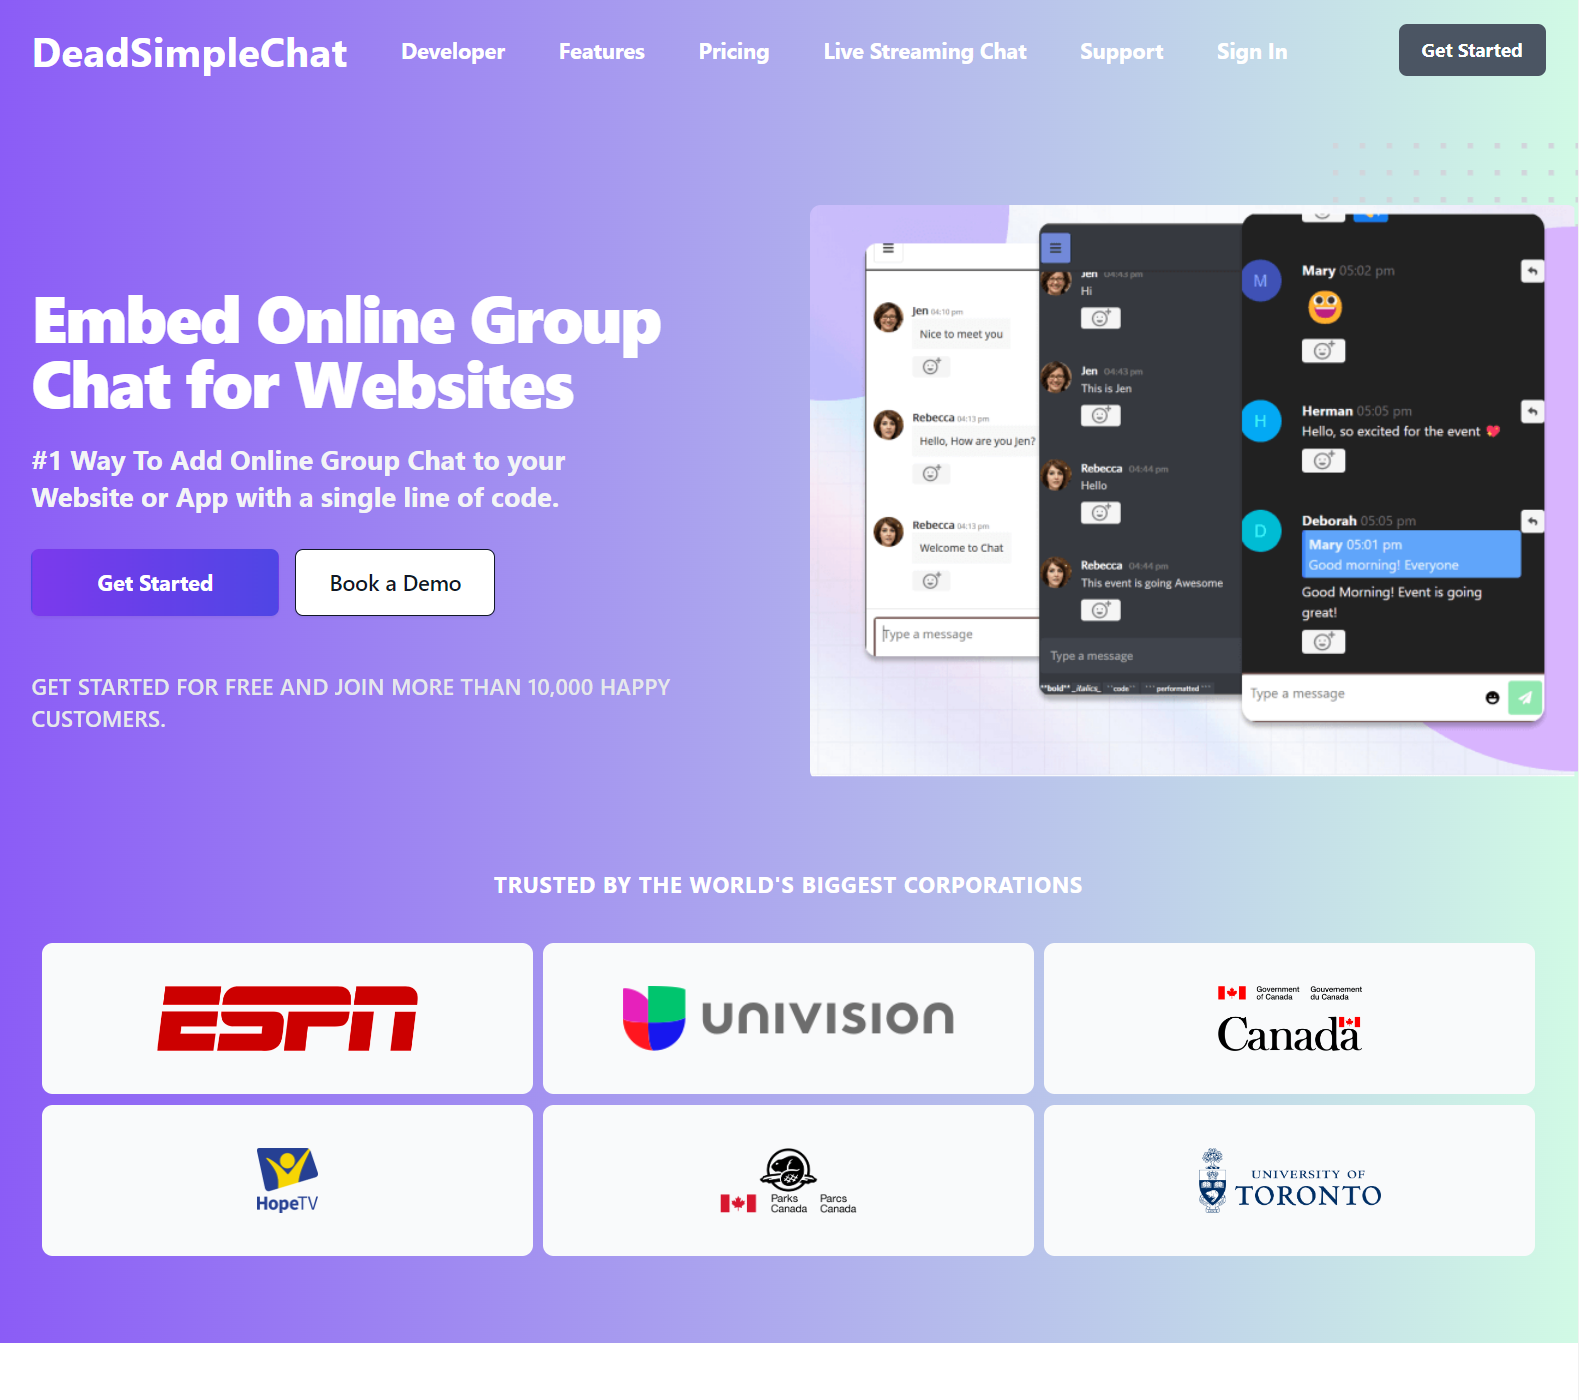
Create a Dead Simple Chat Account
go to DeadSimpleChat.com and click on the "Get Started for Free" button to create a free account.
The free account comes with 20 concurrent users and all the features so that we can try everything that the Chat has to offer.
DeadSimpleChat is a no-code chat platform that works with all kinds of web and mobile applications.
The Chat is no-code but you can do all the advanced and precision customizations to the chat platform using APIs and the SDK
All the features of the chat can be controlled via APIs and Webhooks. You can learn more about APIs, SSO, SDK and Webhooks in the developer documentation
Dead Simple Chat can be used for a variety of use-cases for example:
- SaaS Applications
- Social Platforms
- Education
- Virtual Events
- Gaming
After Signing up for the account you will land up in the Dashboard Page. Here we can see there are
- Dashboard
- Chat Rooms
- Moderators
- Settings
- Plans and Pricing
- Developer
- Live Streaming
Create A Chat Room
On the Dashboard page you can see analytics and a side bar.
On the Dashboard page left hand side top corner you can see the "Create Chat room" button
Create the chat room
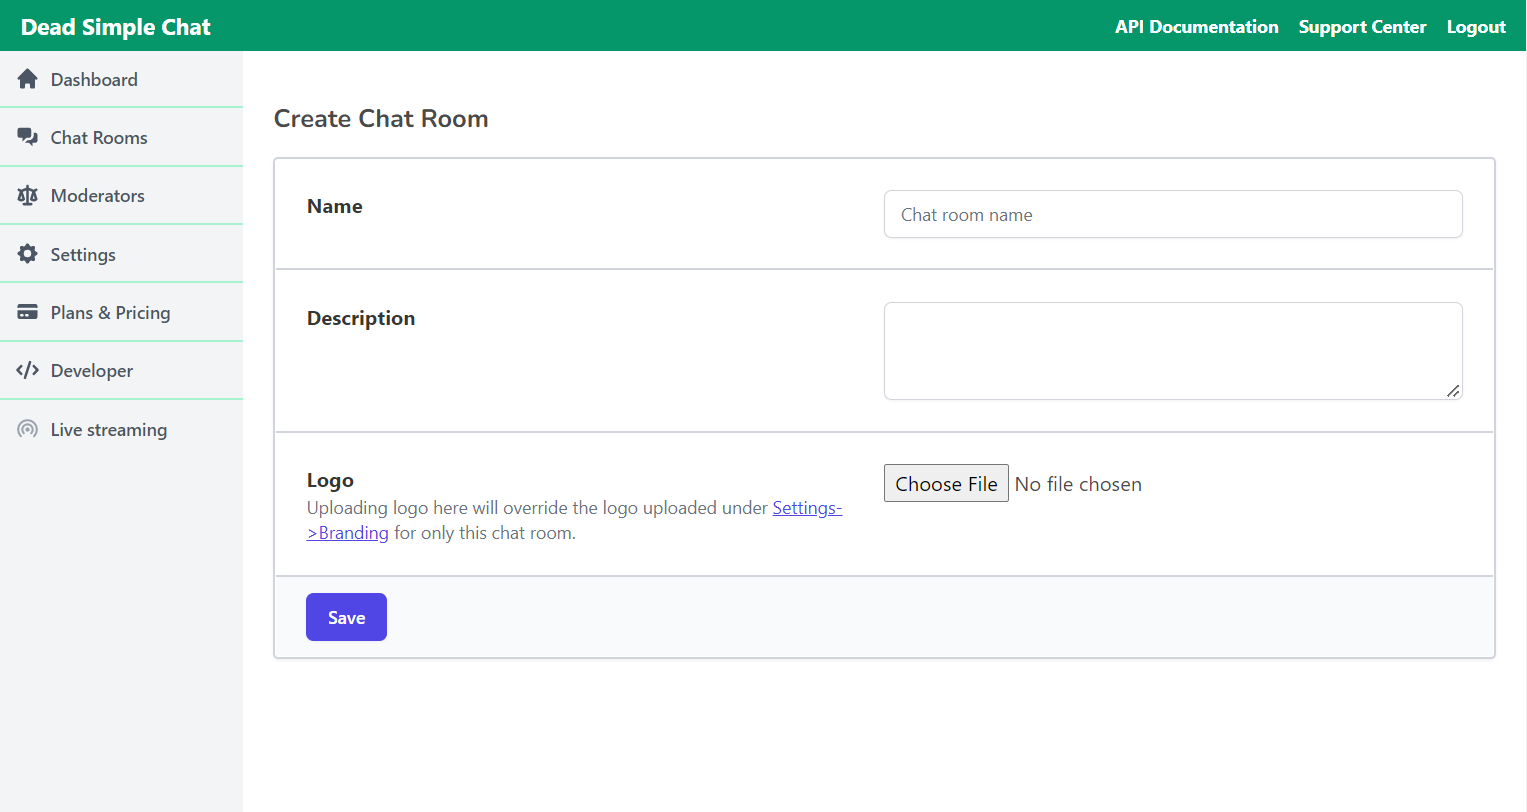
Clicking on the save button will create a chat room and will take you to the update chat room page
There are a lot of features that you can enable here.
Here are some of the features available in DeadSimpleChat. If you don't want to do all the settings while creating a chat room.
You can let the default settings be and come back later to edit the chat room by going to
Dashboard -> Chat rooms -> edit
Here are some of the settings that are available. Whatever settings that you do will be available in your Angular Application.
- Name: You can name the chat room. This is for your reference it will not be shown to the users.
- Description: A short description. This is for your reference, so that you know what is the purpose of the chat room
- Logo: You can upload your logo and it will be shown in the top right hand side of the chat room
- Save: Always remember to click the save button to save your settings.
- Ability to like/react to messages: If enabled it gives the users the ability to like and react to messages
- Q &A Mode / Pre-moderated Chat: When enabled all the messages will first appear to the moderator and then only after approval by moderator / admin the messages will appear in the chat room.
- Sub Chat Rooms / Channels: Channels are chat rooms within a chat room for a related topic discussion. You can enable them if you need them
- File and Image Sharing: Allow users to share files and images in the chat room
- 1-1 Private Chat: Allows users to conduct 1-1 private chat with each other
- Moderator Only Private Chat: Only Moderators can conduct 1-1 chat with users. Users cannot chat 1-1 with each other.
- Default Enable message notification and sound: Enable notification and sound alert on users devices such that they get a notification each time a message is sent
- Password Protect the chat room: Set a password and that password will be required to enter the chat room
- Export All messages: Export all the messages in the chat room in a text file
- Delete All Files: Export all the files in the chat room
- Delete All Messages: Delete All the messages from the chat room
There is also customization available
We will come to that later.
First click on the Embed Info button to go to the Embed Info page.
Embedding the Chat Room in your Angular Application
Embedding the Chat in your application is easy. In the previous step we were on the embed info page.
There you can see the embed instructions. As well as a preview of how the chat room will look like when added to your Angular App
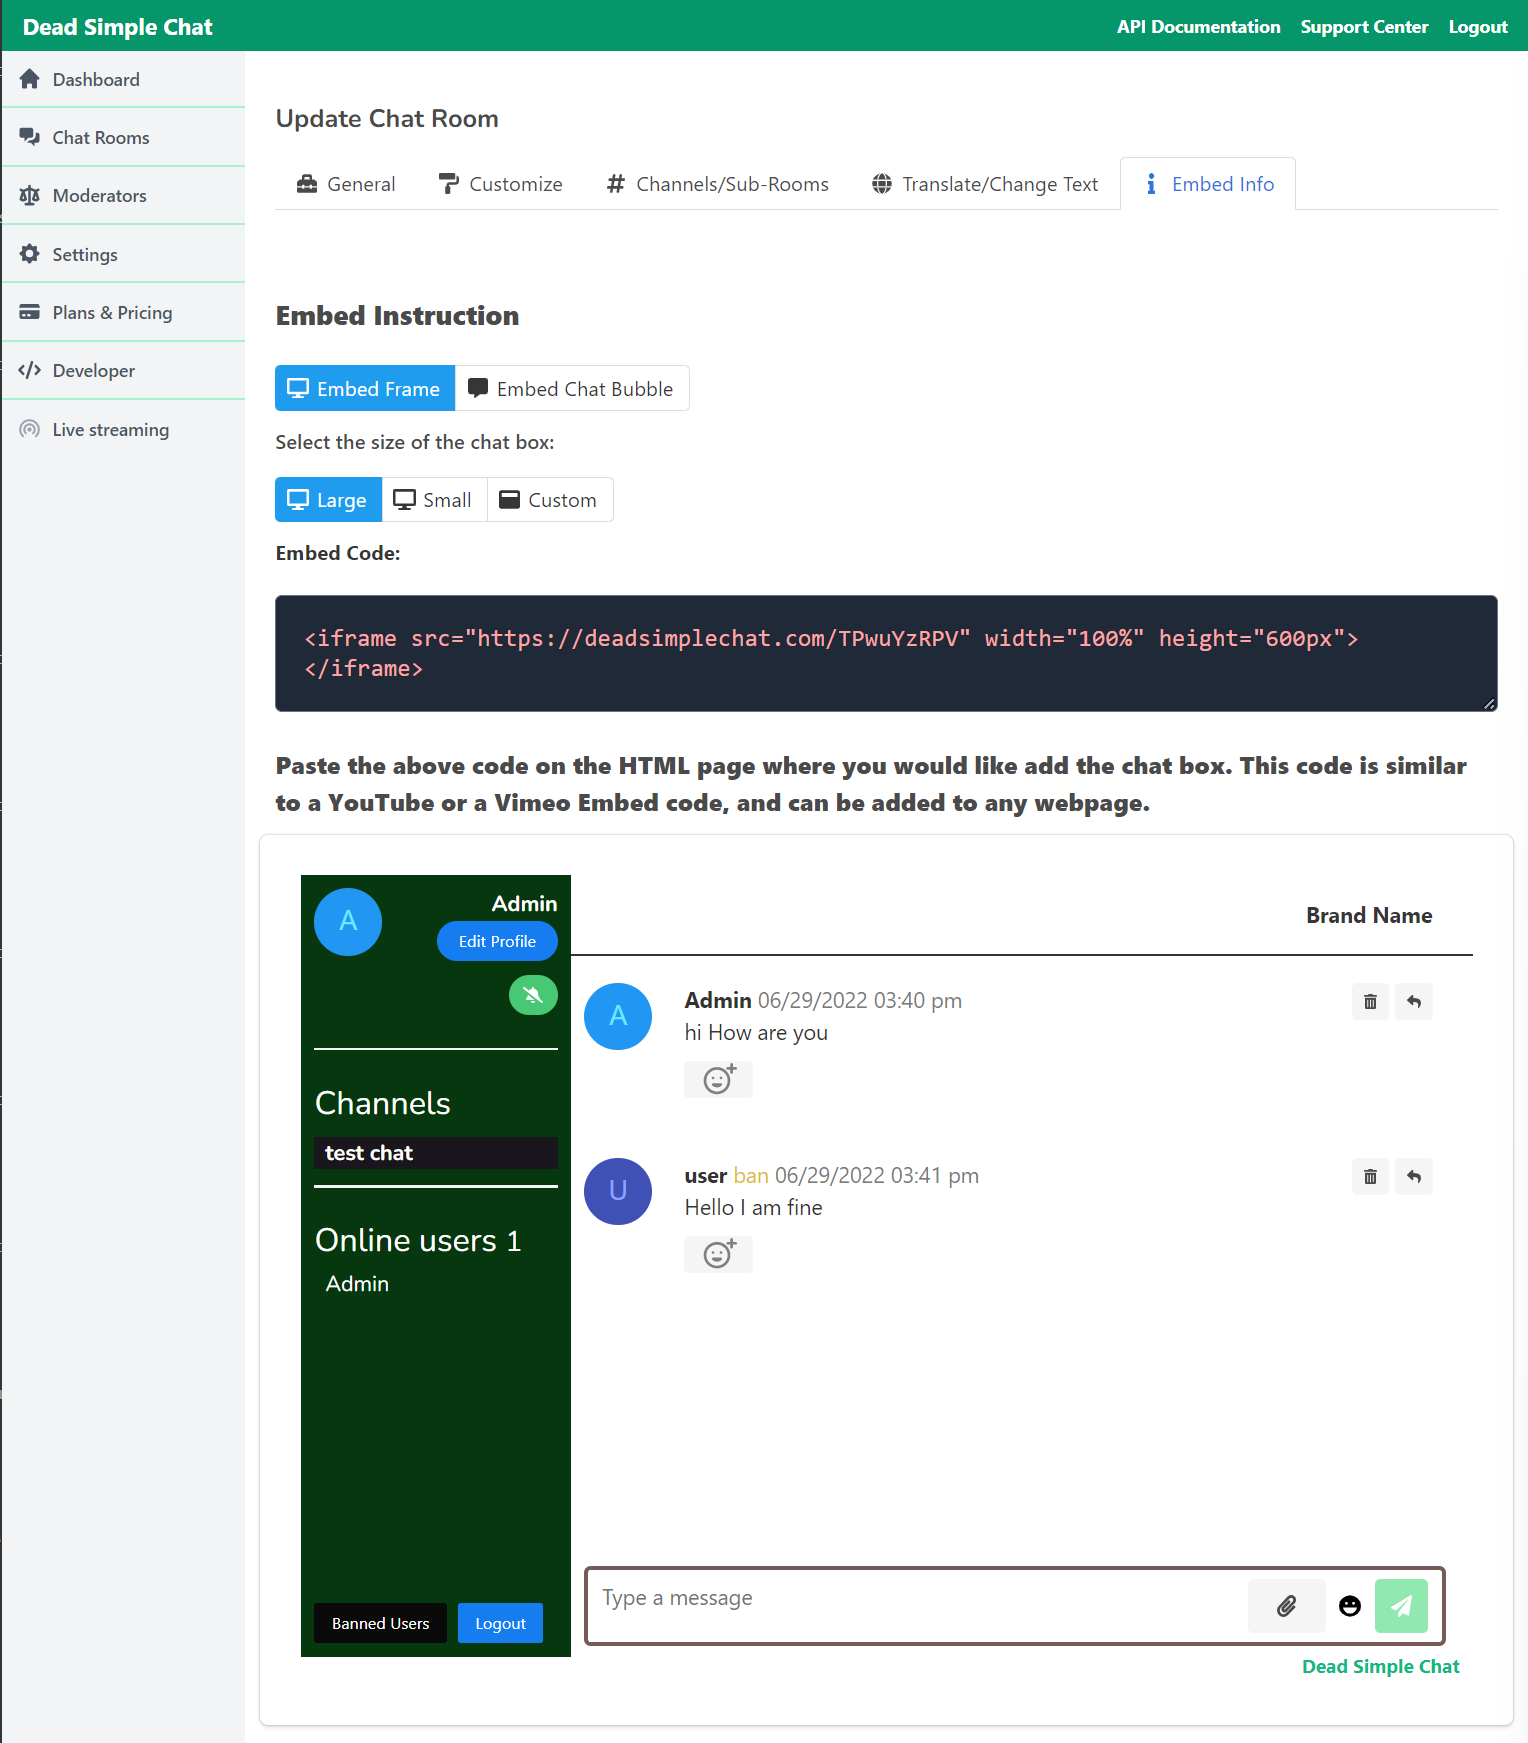
Copy the embed code and go to your angular application.
Open the app.component.html file and paste the embed code
and you have now created an Angular chat application. Your chat app will look like this:
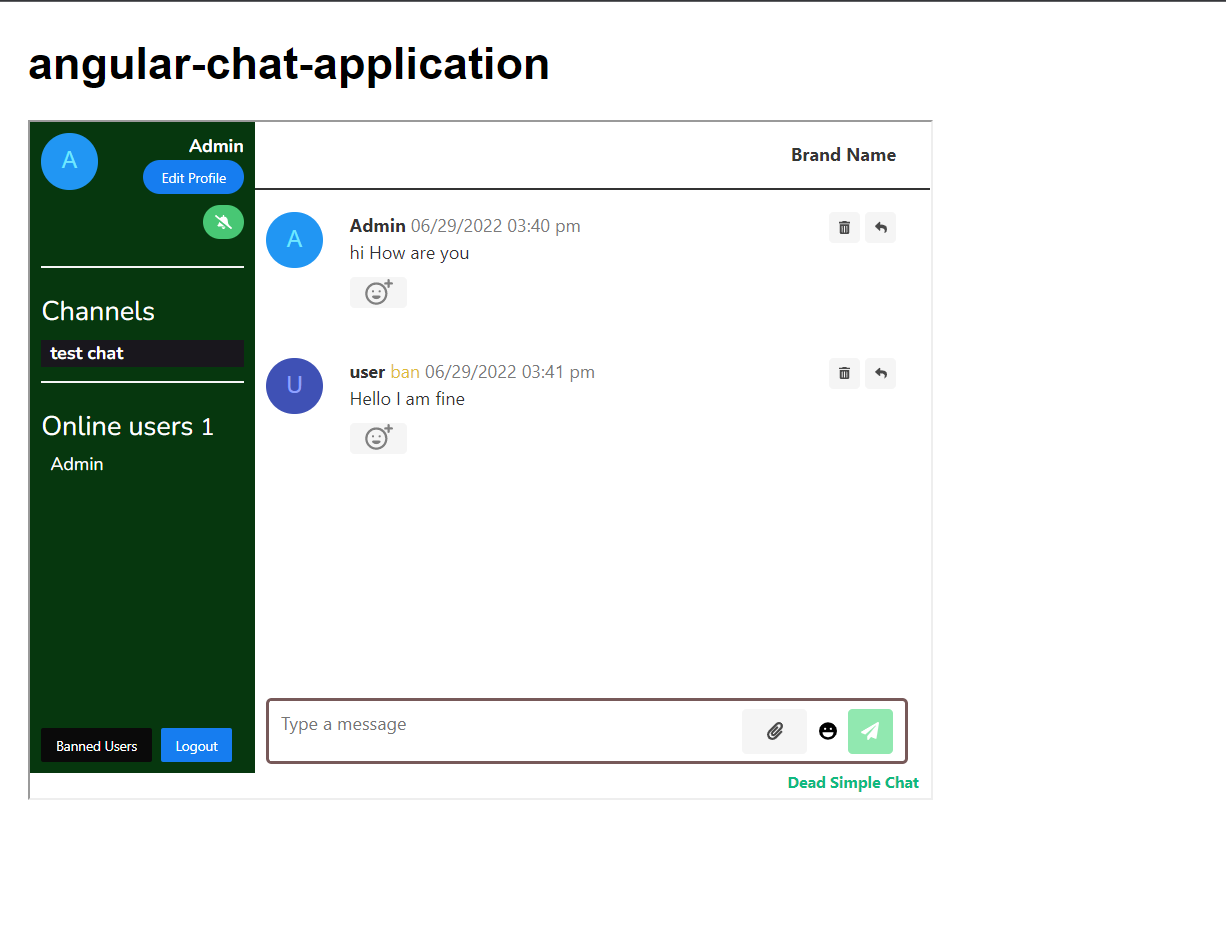
You have successfully created an Angular Chat application using DeadSimpleChat.
Let us learn How we can create different types of chat with angular and DeadSimpleChat
Creating a 1 on 1 Chat
Creating 1 on 1 Chat is pretty simple with DeadSimpleChat. Limit the number of users in the chat room to 2 users and you have a 1 on 1 chat.
Lets try creating one
Go to Dashboard and create a chat room
here lets you give our chat room a name of 1 to 1 chat room and click on the save button.
and on the next general settings page click on channels to switch them off because we don't need them for 1 on 1 chat
Now let's move on to the Embed page
here on the Embed instructions page we have 2 options either go with the pop up window or use the embed frame
I am going to go with the pop up window:
Lastly I have the option of letting users create a username and enter the chat room or I can enter them automatically once they are on my website using the DeadSimpleChat SSO functionality. You can learn more about the SSO functionality here: https://deadsimplechat.com/developer/single-sign-on/basic-sso
We can use APIs and SDK to precision customize the chat functionality to our use-case
All the chat features are available in the API
- sending a message
- adding users to chat
- banning users
- creating chat rooms
- exporting messages
Creating a Group Chat
Dead Simple Chat by default creates a Group Chat application. The Angular Chat app that we created is a group chat application.
DeadSimpleChat supports up to 10 million concurrent users in the Group chat and hence it is massively scalable.
Customizing the Chat Room
There are two ways of customizing the chat room
- Using the UI based customization tool
- By writing Custom CSS
To customize a chat room go to Dashboard and create a new chat or edit and existing chat room by going to the chat rooms section and clicking on the edit button next to the chat room
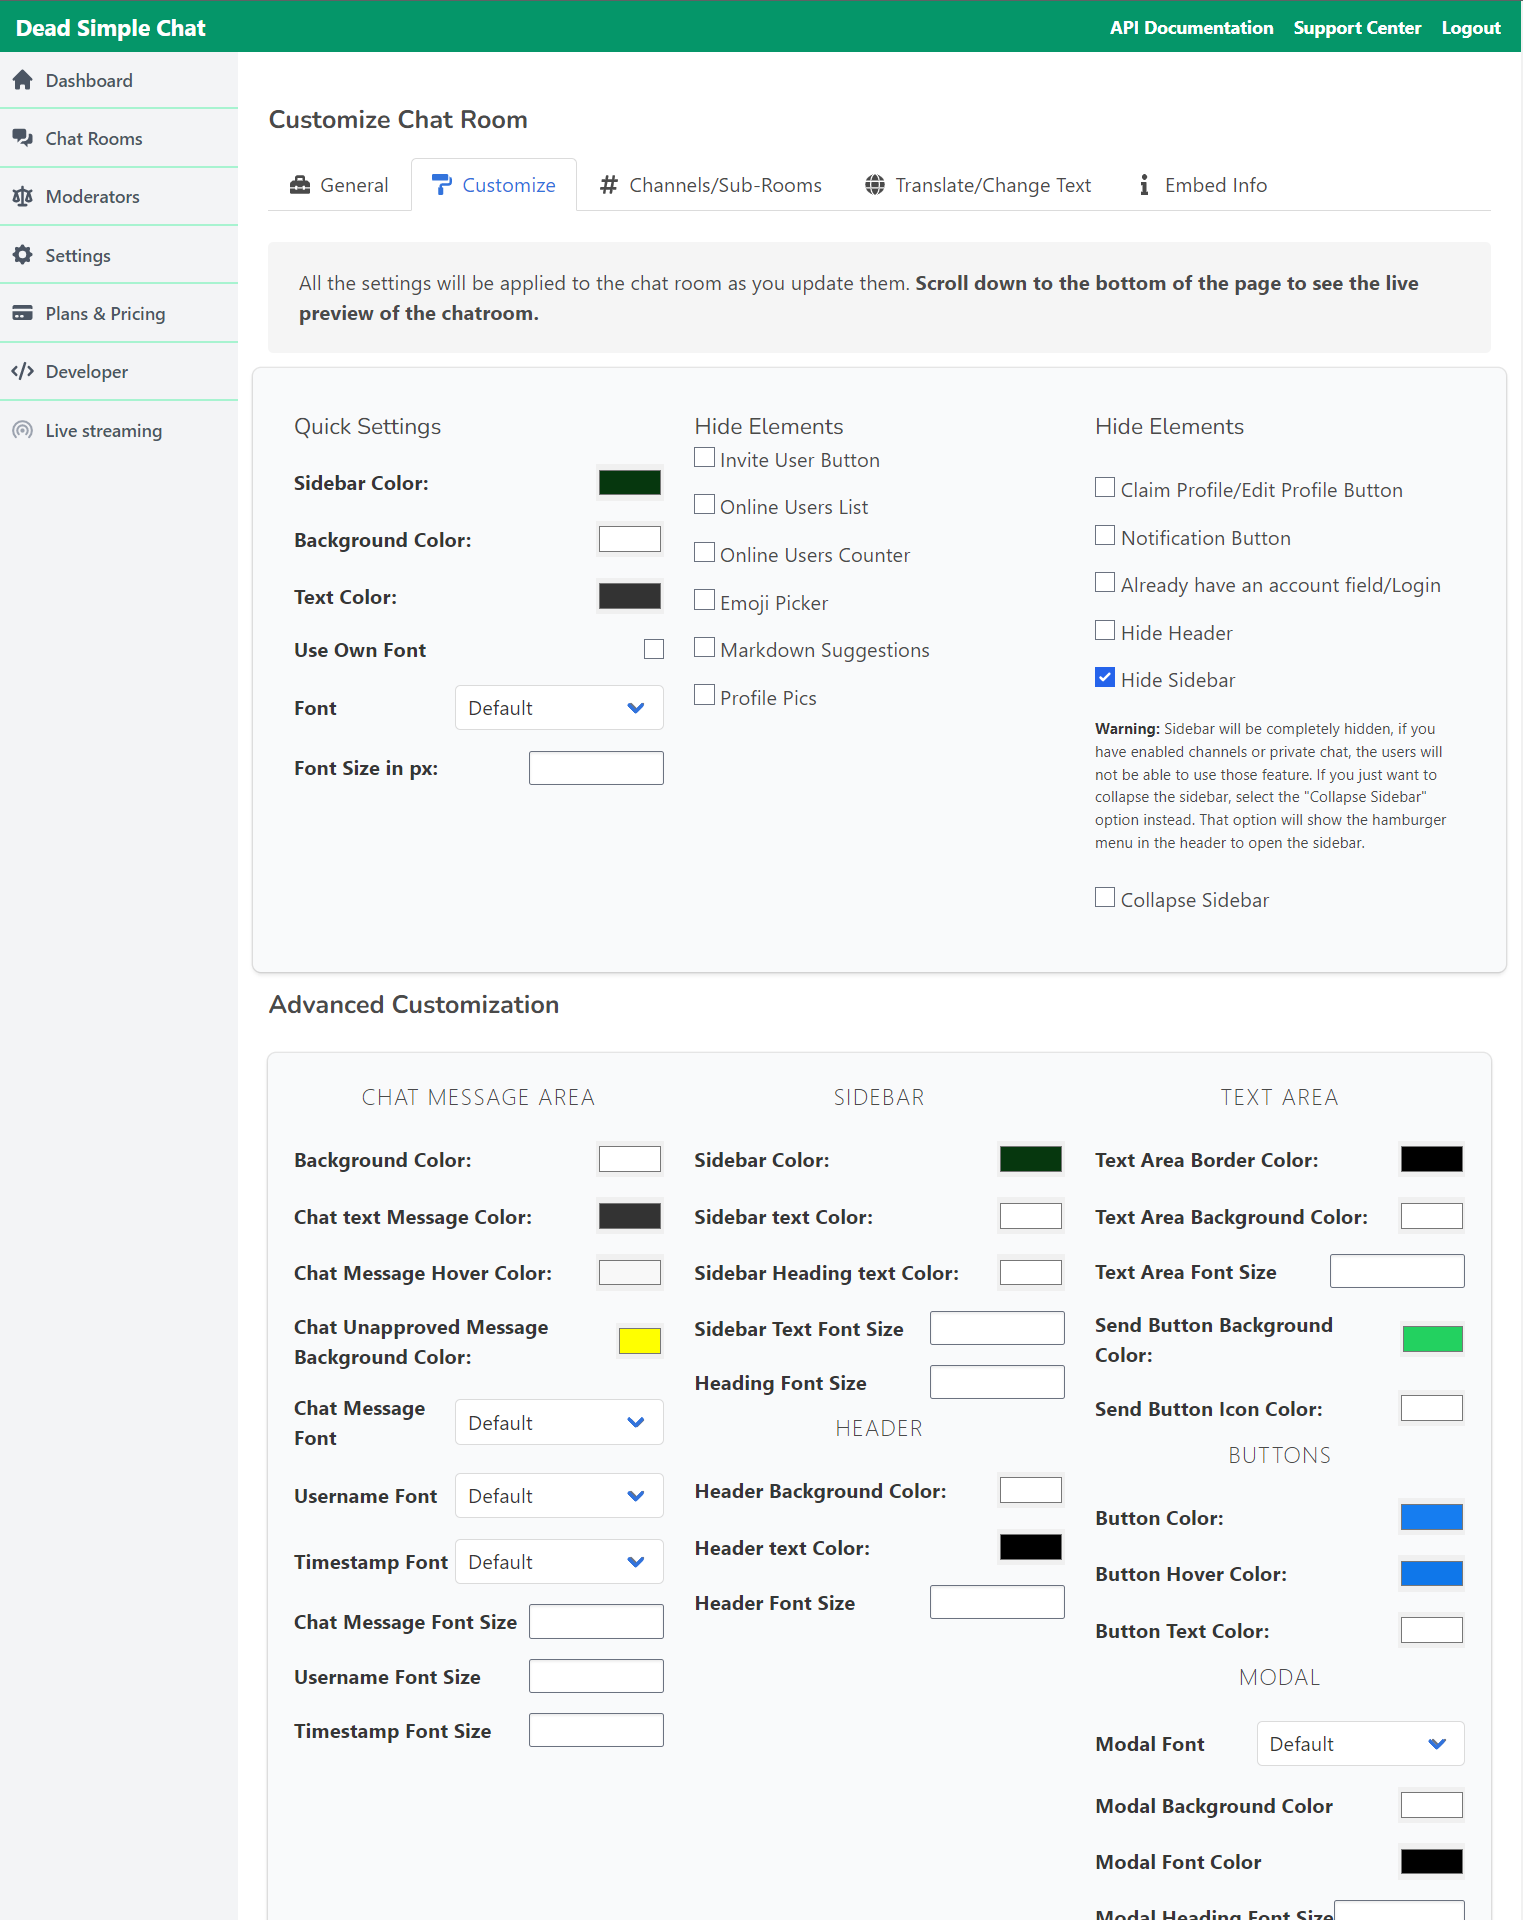
once you are in the chat room settings page click on the customization button to go to the customization section.
There you can see huge UI based customization section where you can change everything from
- Sidebar color
- Background color
- text color
- Fonts
- Add custom fonts
- refer to the image below for all the options
You can also write your own custom CSS for pixel perfect look and feel of your chat room and make it feel like a part of your app
To write your custom CSS simple scroll down to the custom CSS section and write your custom CSS. You can refer to our custom CSS guide to CSS class reference
You can also easily copy the customization to other chat rooms using the copy customizations tools
simply select the chat rooms to which you want to copy the customization.
Adjusting the height and Width
Adjusting the height and width is pretty simple. Go to the embed page and there you can adjust the height and width of the chat room
There are 2 standard options available plus a custom option
- Large
- Small
- Custom
You can click on the custom option and set the height and width according to your requirements.
Changing the Colors
There are 2 methods of changing the colors with DeadSimpleChat
- UI based Customization
- Write Custom CSS
You can use our UI based customization tool to easily change colors and fonts, You can change almost every thing, change the background color, text color, side bar color, change font size etc
For even more customization you can write your own custom css to precision customize the chat experience
refer to our CSS Class reference and Custom CSS guide to learn more.
Translating the Chat
You can translate the chat interface to any language you want. Just change the words to any other that you want.
you can also change the words to say anything you want in the chat interface
Bonus: APIs and Webhooks
Some of the API features include:
SSO
With SSO you can automatically login the users that are on your website into your chat room and assigning them a username.
You can also login users as anonymous users.
The whole point of SSO is to login users automatically that is without them manually logging in.
Users can manually login as well by assigning themselves any username and if you have disabled the SSO functionality
There are 2 types of SSO functionality available
- Basic SSO: This is an easy to implement SSO but lacks authentication features.
- Advanced SSO: This is a bit advanced SSO and has authentication features
Chat Room
APIs for Chat Room include the following
- Get all chat rooms: Get the list of all the chat rooms in an array
- Get a Chat room: Get all the details about a single chat room. Room Id is required.
- Delete a Chat Room: Delete chat rooms through the API. Room Id is required
- Delete Chat Room Messages: Delete all the messages from a chat room.
- Create Chat Room: Send a post request to create a chat room. You can pass customizations and authentication as well when creating a chat room.
- Update Chat Room: Update the Customizations with the Update chat room
- Create Channel: Create a sub-chat room / channel with the API. Send a post request to create a channel within the chat room.
- Get a list of all the channels: Send a Get request to get a list of all the channels in the chat room.
- Update channel: Update the channels from the API. Change channel name enable disable channels.
- Delete channel: Delete a channel using the API. Send a delete request with the Channel Id to delete the channel.
- Presence: Get information about the online users in the chat room.
- User and Moderator:
- Create a User: Send a post request to create a user in the chat room
- Create Moderator: Send a post request to create a moderator. Assign the moderator to a chat room. Moderators created through the API can be logged in the chat room by passing the generated access token to the chat room.
- Validate access token: send a post request with the access token to validate the access token
- Send messages to the chat room: send a post request to send messages to the chat room via the API
- Send messages to a specific channel: send a post request to send messages to a specific channel
- Export messages: Get all the messages sent in the chat room
- Export files: Get all the files sent in the chat room
- Webhooks: Go to DeadSimpleChat Dashboard -> Settings -> Webhooks to enable the Webhooks
With Webhooks you can receive events into your systems. There are webhooks for the follow events
Specify a webhook URL
- New Chat Room Messages
- User Joined Chat Room
- User Left Chat Room
- Chat Message Deleted
- Chat Room Message Reaction
- Chat Room Message Approved
- New Channel Message
- Channel Joined
- Channel Message Deleted
- Channel Message Reaction
Useful links
This article is about Angular Chat application tutorial. But if you want to learn more about how to make a chat app with react native, refer to React Native Chat App Tutorial in 3 steps.
Conclusion
In this article I have explained how to build an Angular Chat Application. The code for this app can be found on github.
You can also run this in a docker container.
If you need help with the implementation you can always contact support: support [at] deadsimplechat.com
Ready to Add Chat to Your Website?
Get started for free. No credit card required.
Start a Free Trial
![Webinar Chat: The Complete Guide to Engaging Your Audience [2026]](/blog/content/images/size/w600/2026/02/article-hero-webinar-chat.svg)
