Dead Simple Chat offers prebuilt Chat that can be added in minutes to any app or website. Can be completely customized and offers powerful API and SDK.
With Online communities and live events on the rise an embedded chat box on your website is essential for community building and audience engagement
with this understanding let us learn more about the chat box and its importance in community engagement
What is an embedded chat box widget?
An embedded group chat widget is a chat box that is on your website.
Chat box is a part of your website where your website visitors and community audiences can interact with each other and with the website and event organizer
An embedded chat box can be added to your website and made to exactly match how your website looks and feels
Benefits of Embedded chat box widget on your website
There are many benefits of having an embedded chat widget on your website. here I have listed some of the important benefits
- Build Trust
- Eliminate guesswork
- Get feedback
- Engage your audience
- Gauge Satisfaction
- Ask survey questions
- Conduct Q&A sessions
How to Embed DeadSimpleChat box widget on your website
Embedding a Chat Box on your website is a simple thing to do. Here are the steps
Table of Contents
Step 1: Go to DeadSimpleChat.com
Step 2: Click on the Get Started button to create a free account
Step 3: On the Dashboard click on the Create Chat room button
Step 4: Customize the chat room to your liking
Step 5: Click on the Embed code section
Step 6: Copy the Embed code
Step 7: Paste the embed code on your website where you want to embed the chat
Now you have a embedded chat widget on your website
Step 1: Go to DeadSimpleChat.com
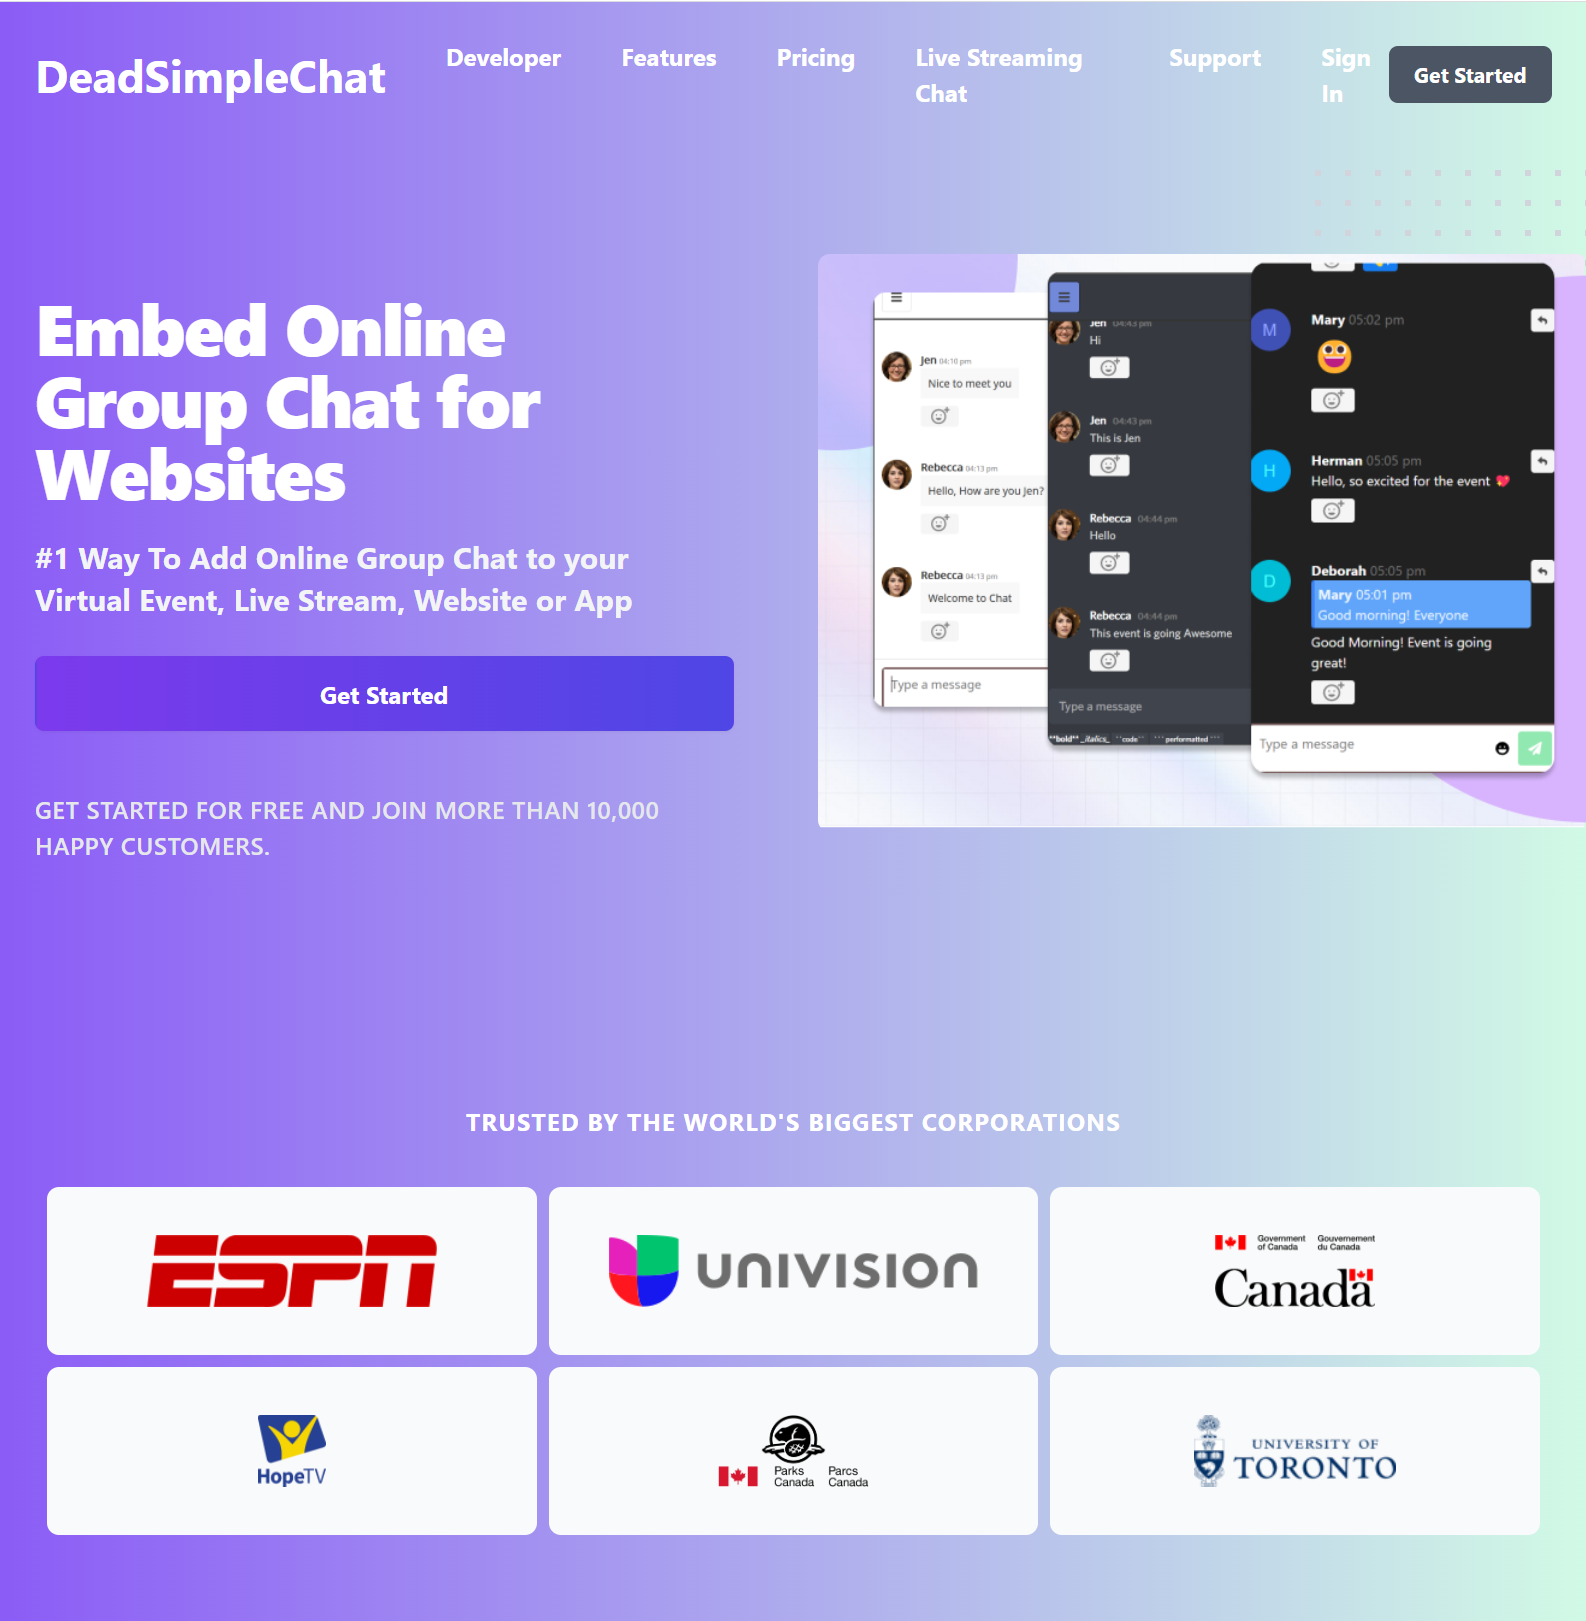
Dead Simple Chat is a chat for community and live events.
All the features are designed for live and virtual events and community. You can create a free account to test out all the features Dead Simple Chat has to offer
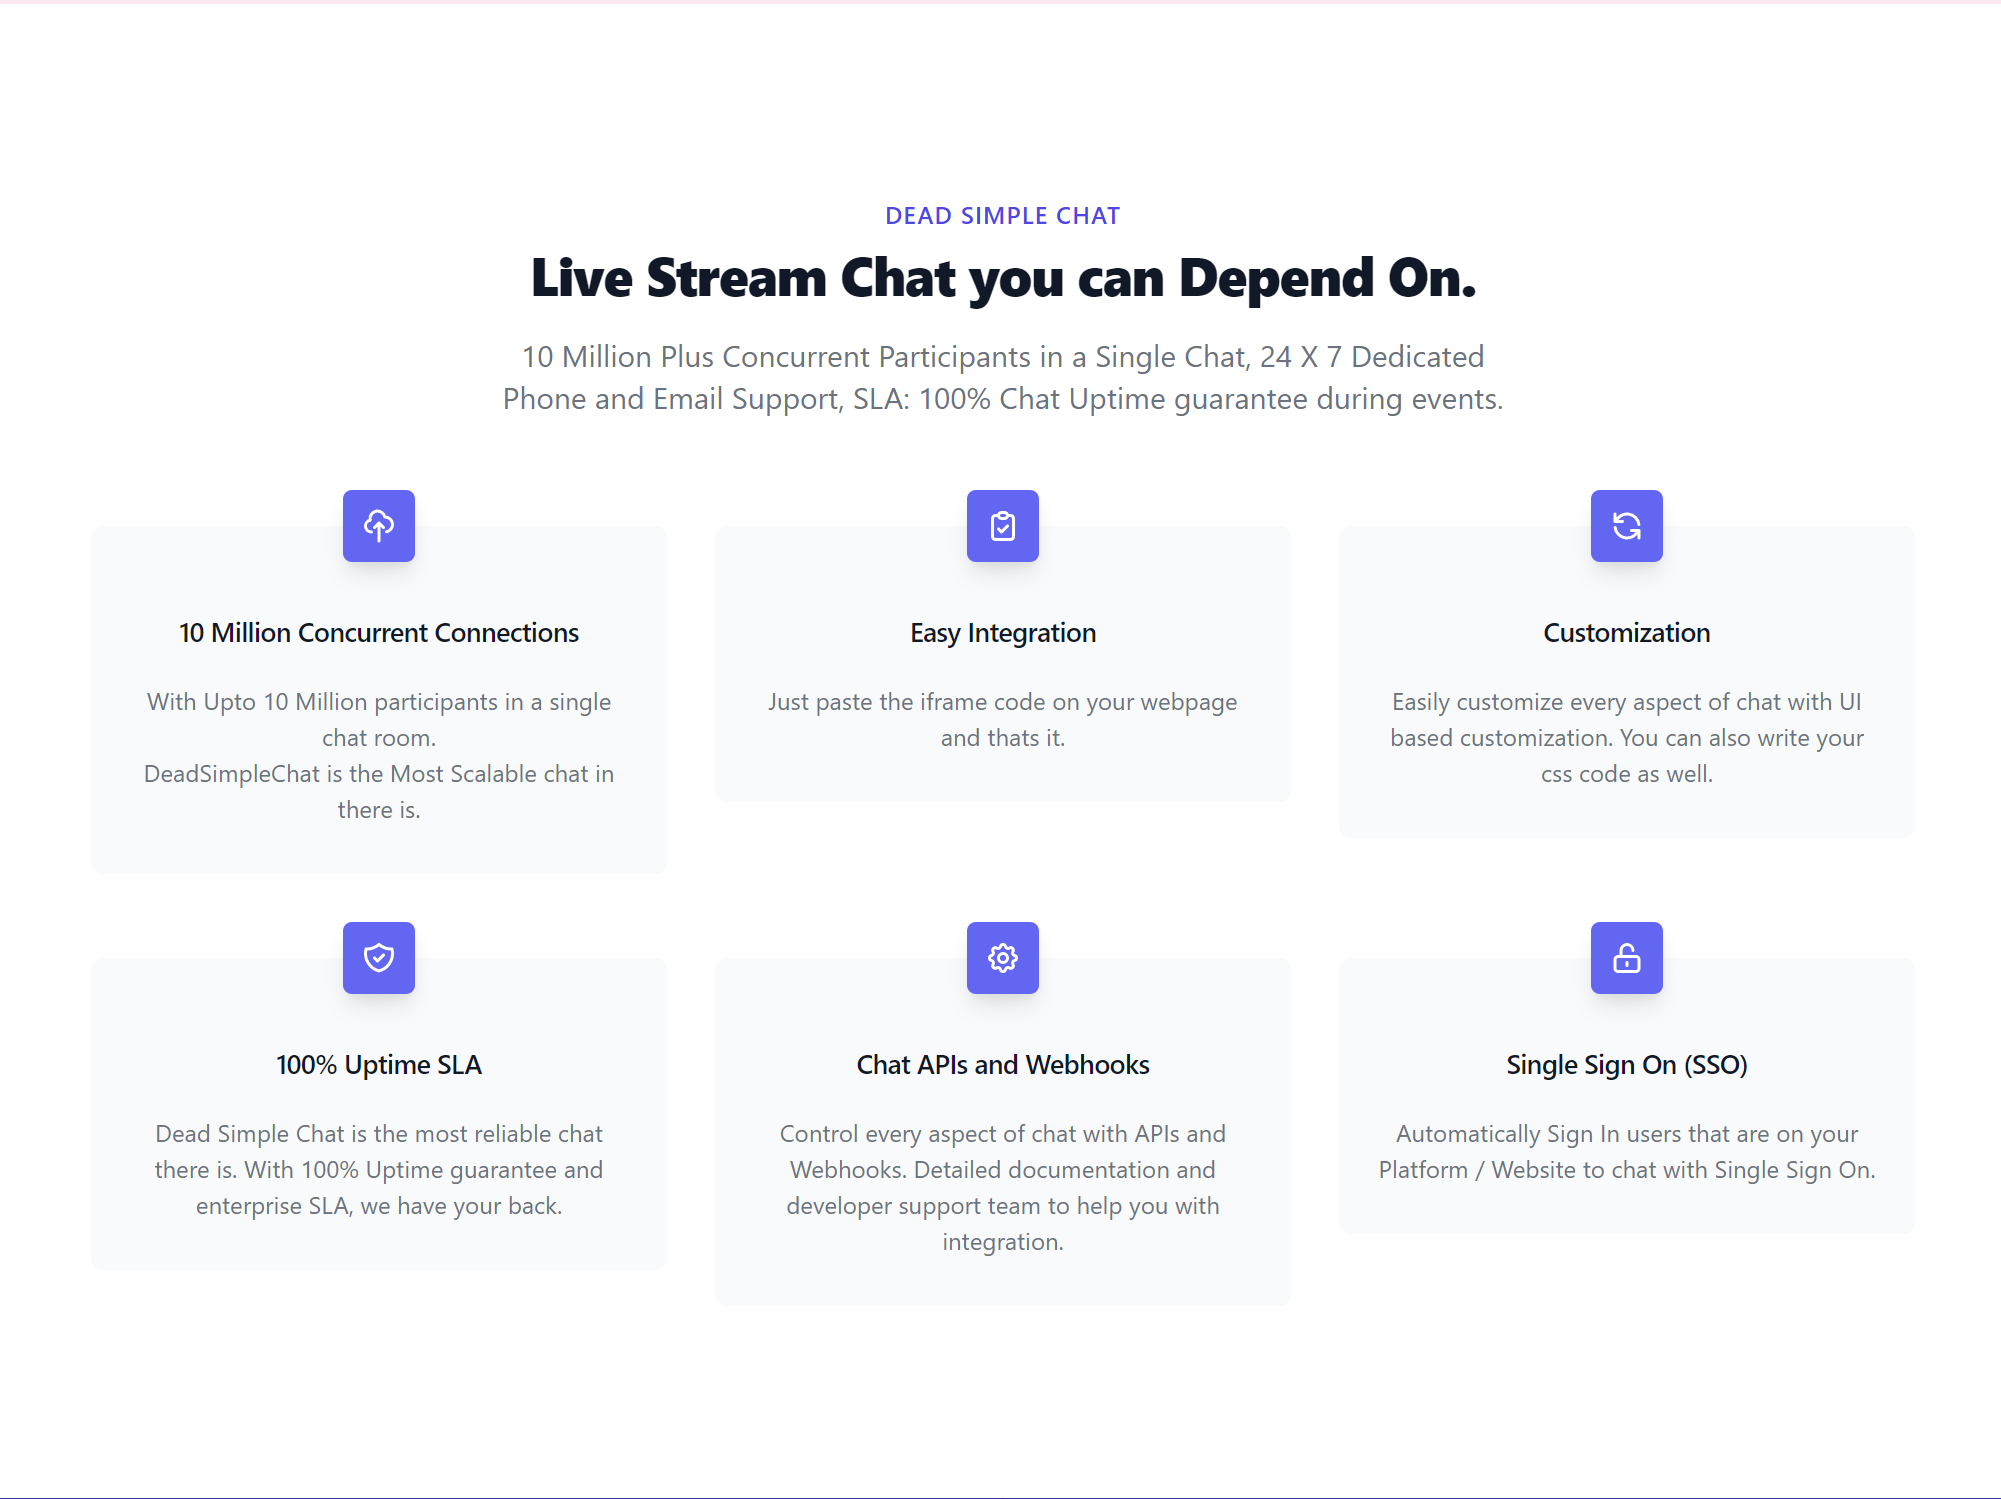
Here are some of the features:
- Up to 10 million concurrent users
- Ability to customize the look of the chat
- Add Chat next to your live stream
- Image Sharing
- File Sharing
- Moderation
- ban users
- delete messages
- create multiple moderators
- Secure chat with TLS
- Customize Chat
- Write your own CSS
- Phone and email support
- Download Chat history
- API for chat ( send chat, create moderators and many more via api)
- Chat Analytics
Step 2: Create a free account
On the DeadSimpleChat website click on the Get Started button to create a free account.
A free account comes with all the features of DeadSimpleChat and 20 participants which is good for a small event.
You can purchase more users if you want DeadSimpleChat supports upto 10 million online users
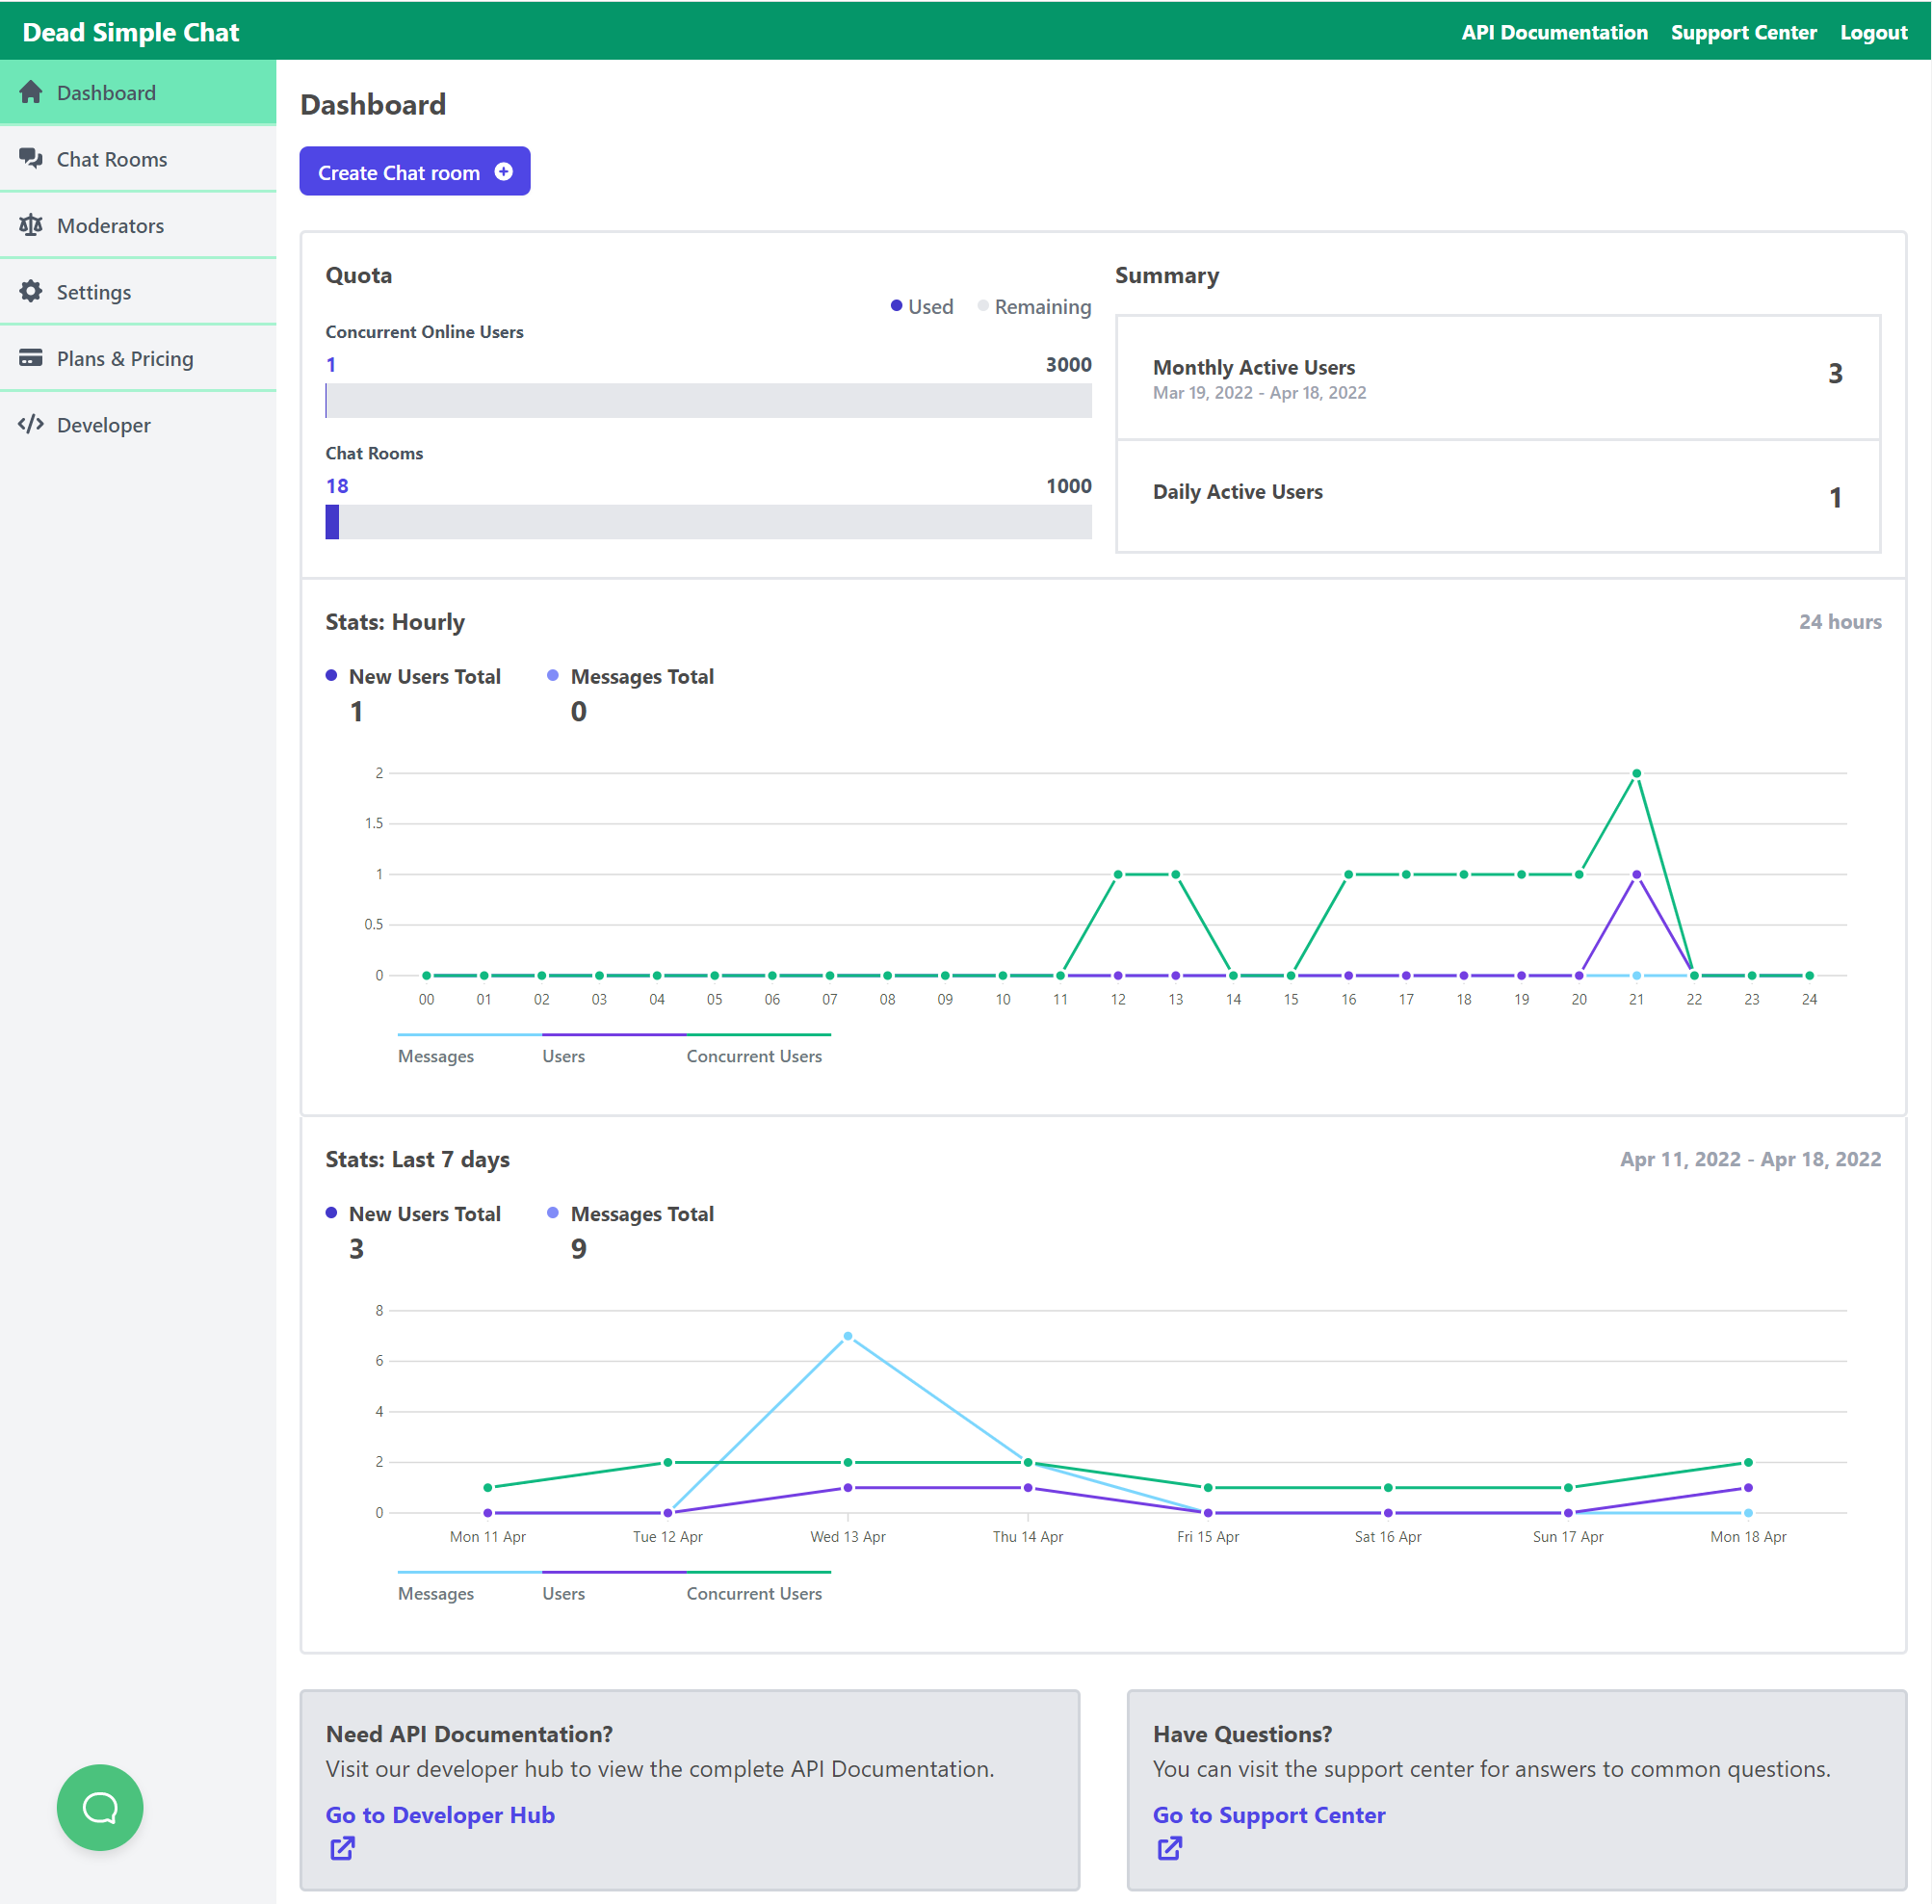
When you create an account the chat first takes you to the Dashboard
There you can create a chat room and look at the analytics dashboard
Analytics dashboards also shows you how many chat room visitors you have and how many chat room visitors over the past month and on different events that you have
Step 3 Creating a chat room
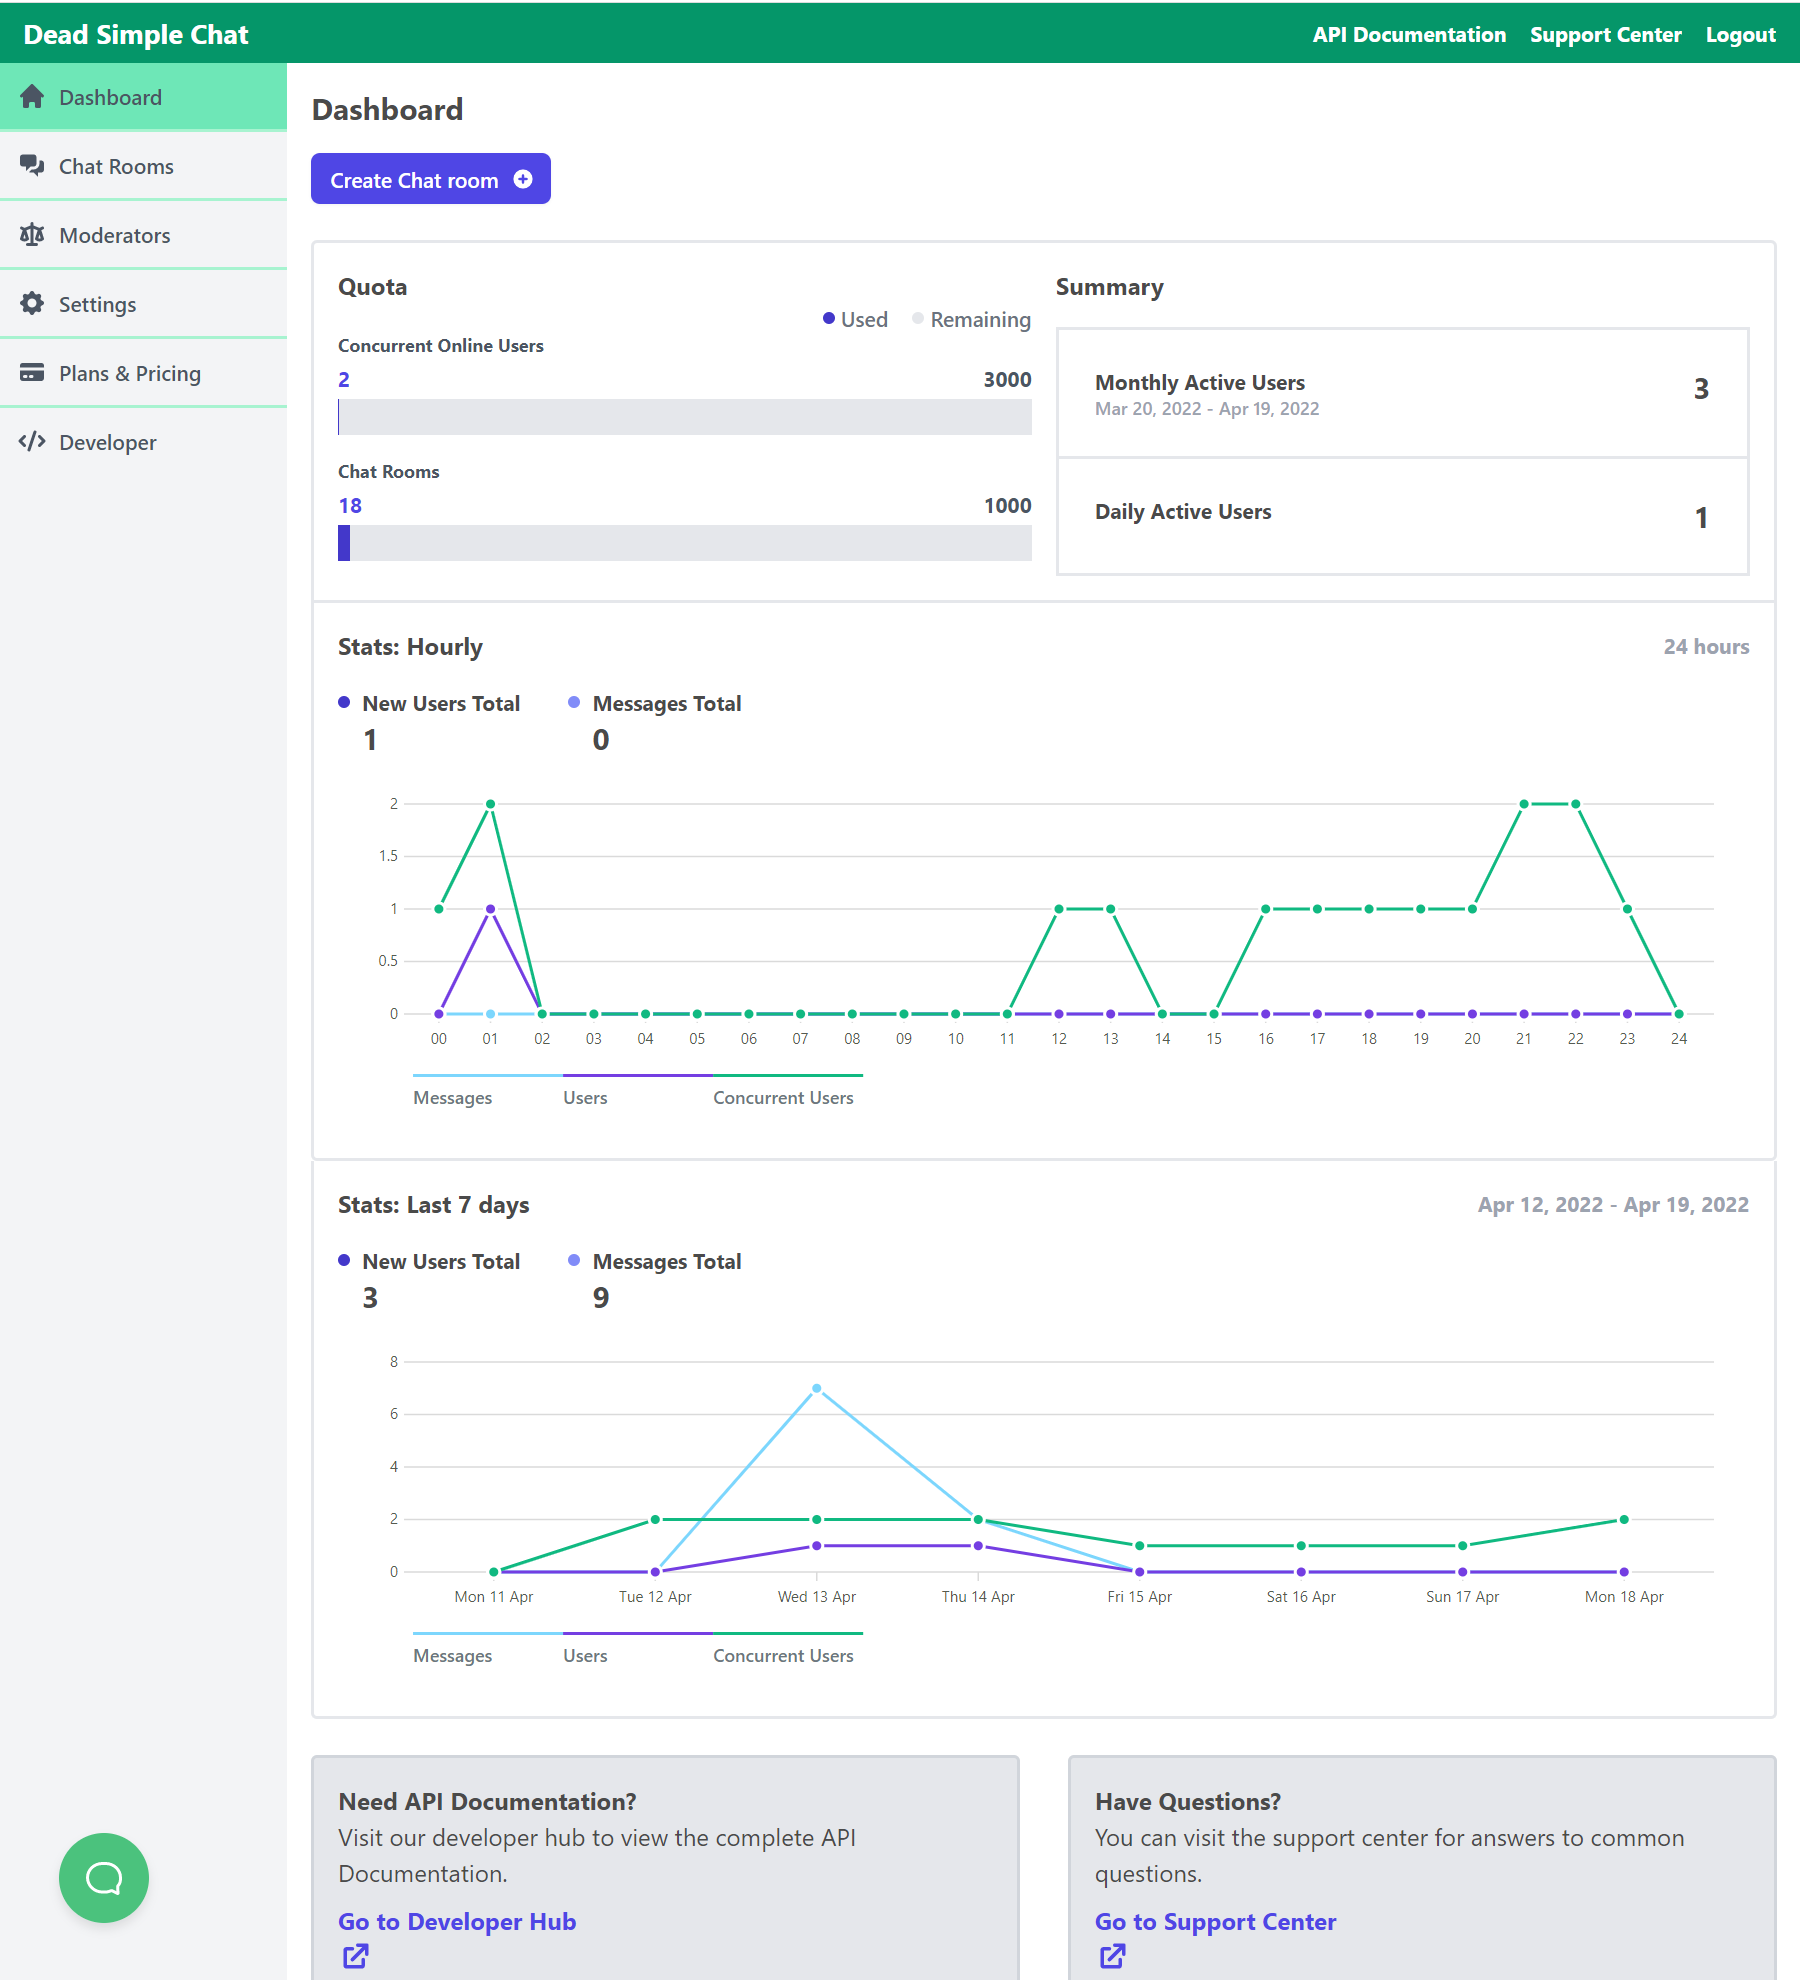
Once you create an account you land on the dashboard
On the dashboard there is a create chat room button click on it to create a chat room.
You can also create a chat room by clicking on the chat rooms button on the left hand side section
click on the create chat room button and then it goes to
general section
Where you can give a name to your chat room
Give a description to your chat room (optional)
give a logo to your chat room (optional)
- Room ID
- Name
- Description
- Logo
- Ability to like / React to messages
- Q&A mode / Pre-moderated chat room
- Sub Chat Room / Channels
- File and Image Sharing
- 1-1 Chat (Private Chat)
- Default Enable message notifications and sound
- Password protect chat room
- Export all messages
- Export All files
- Delete all messages
- Delete chat room
Step 4: Customize the chat room to your liking
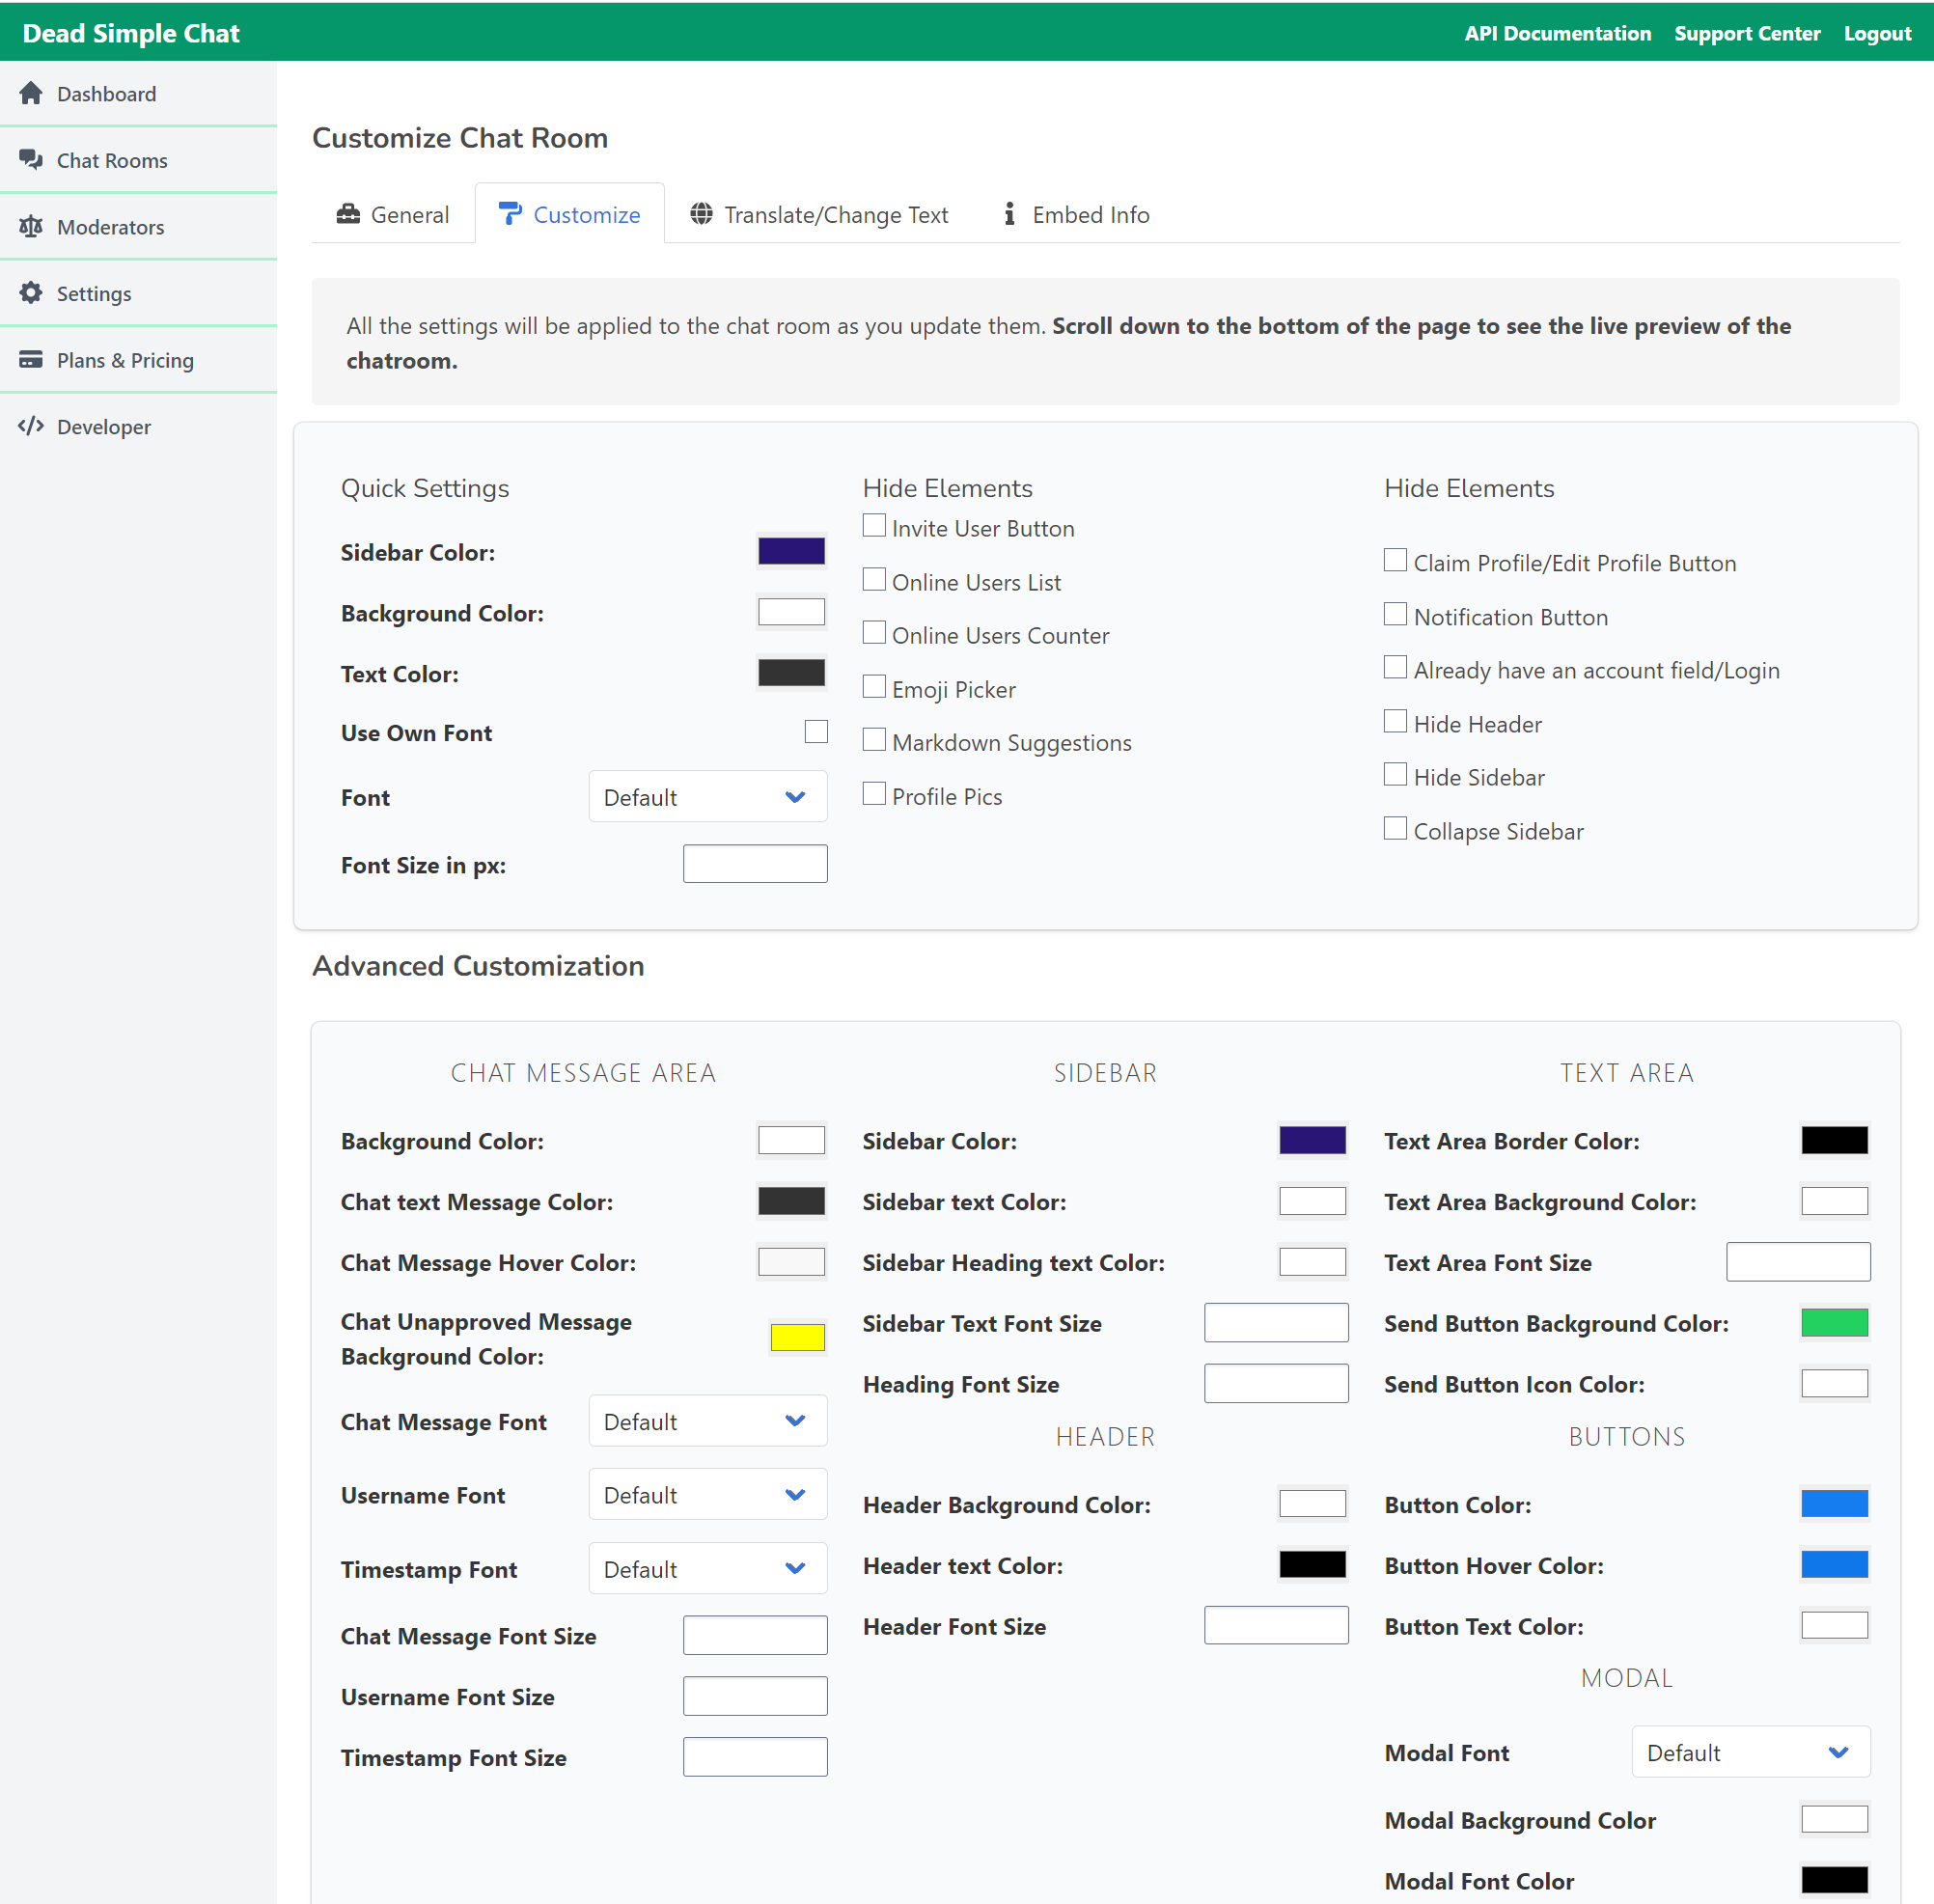
Then click on the customize section
You can customize the chat using the UI interface, for even more customizations you can even write you own custom CSS
If you scroll down you can see the embed instruction to add chat to your website
then click on the translate tab to translate the chat or change the headings to what you want
Embed info section also provides information about the embed information to embedded chat box on your website
Step 5: Click on the Embed code section
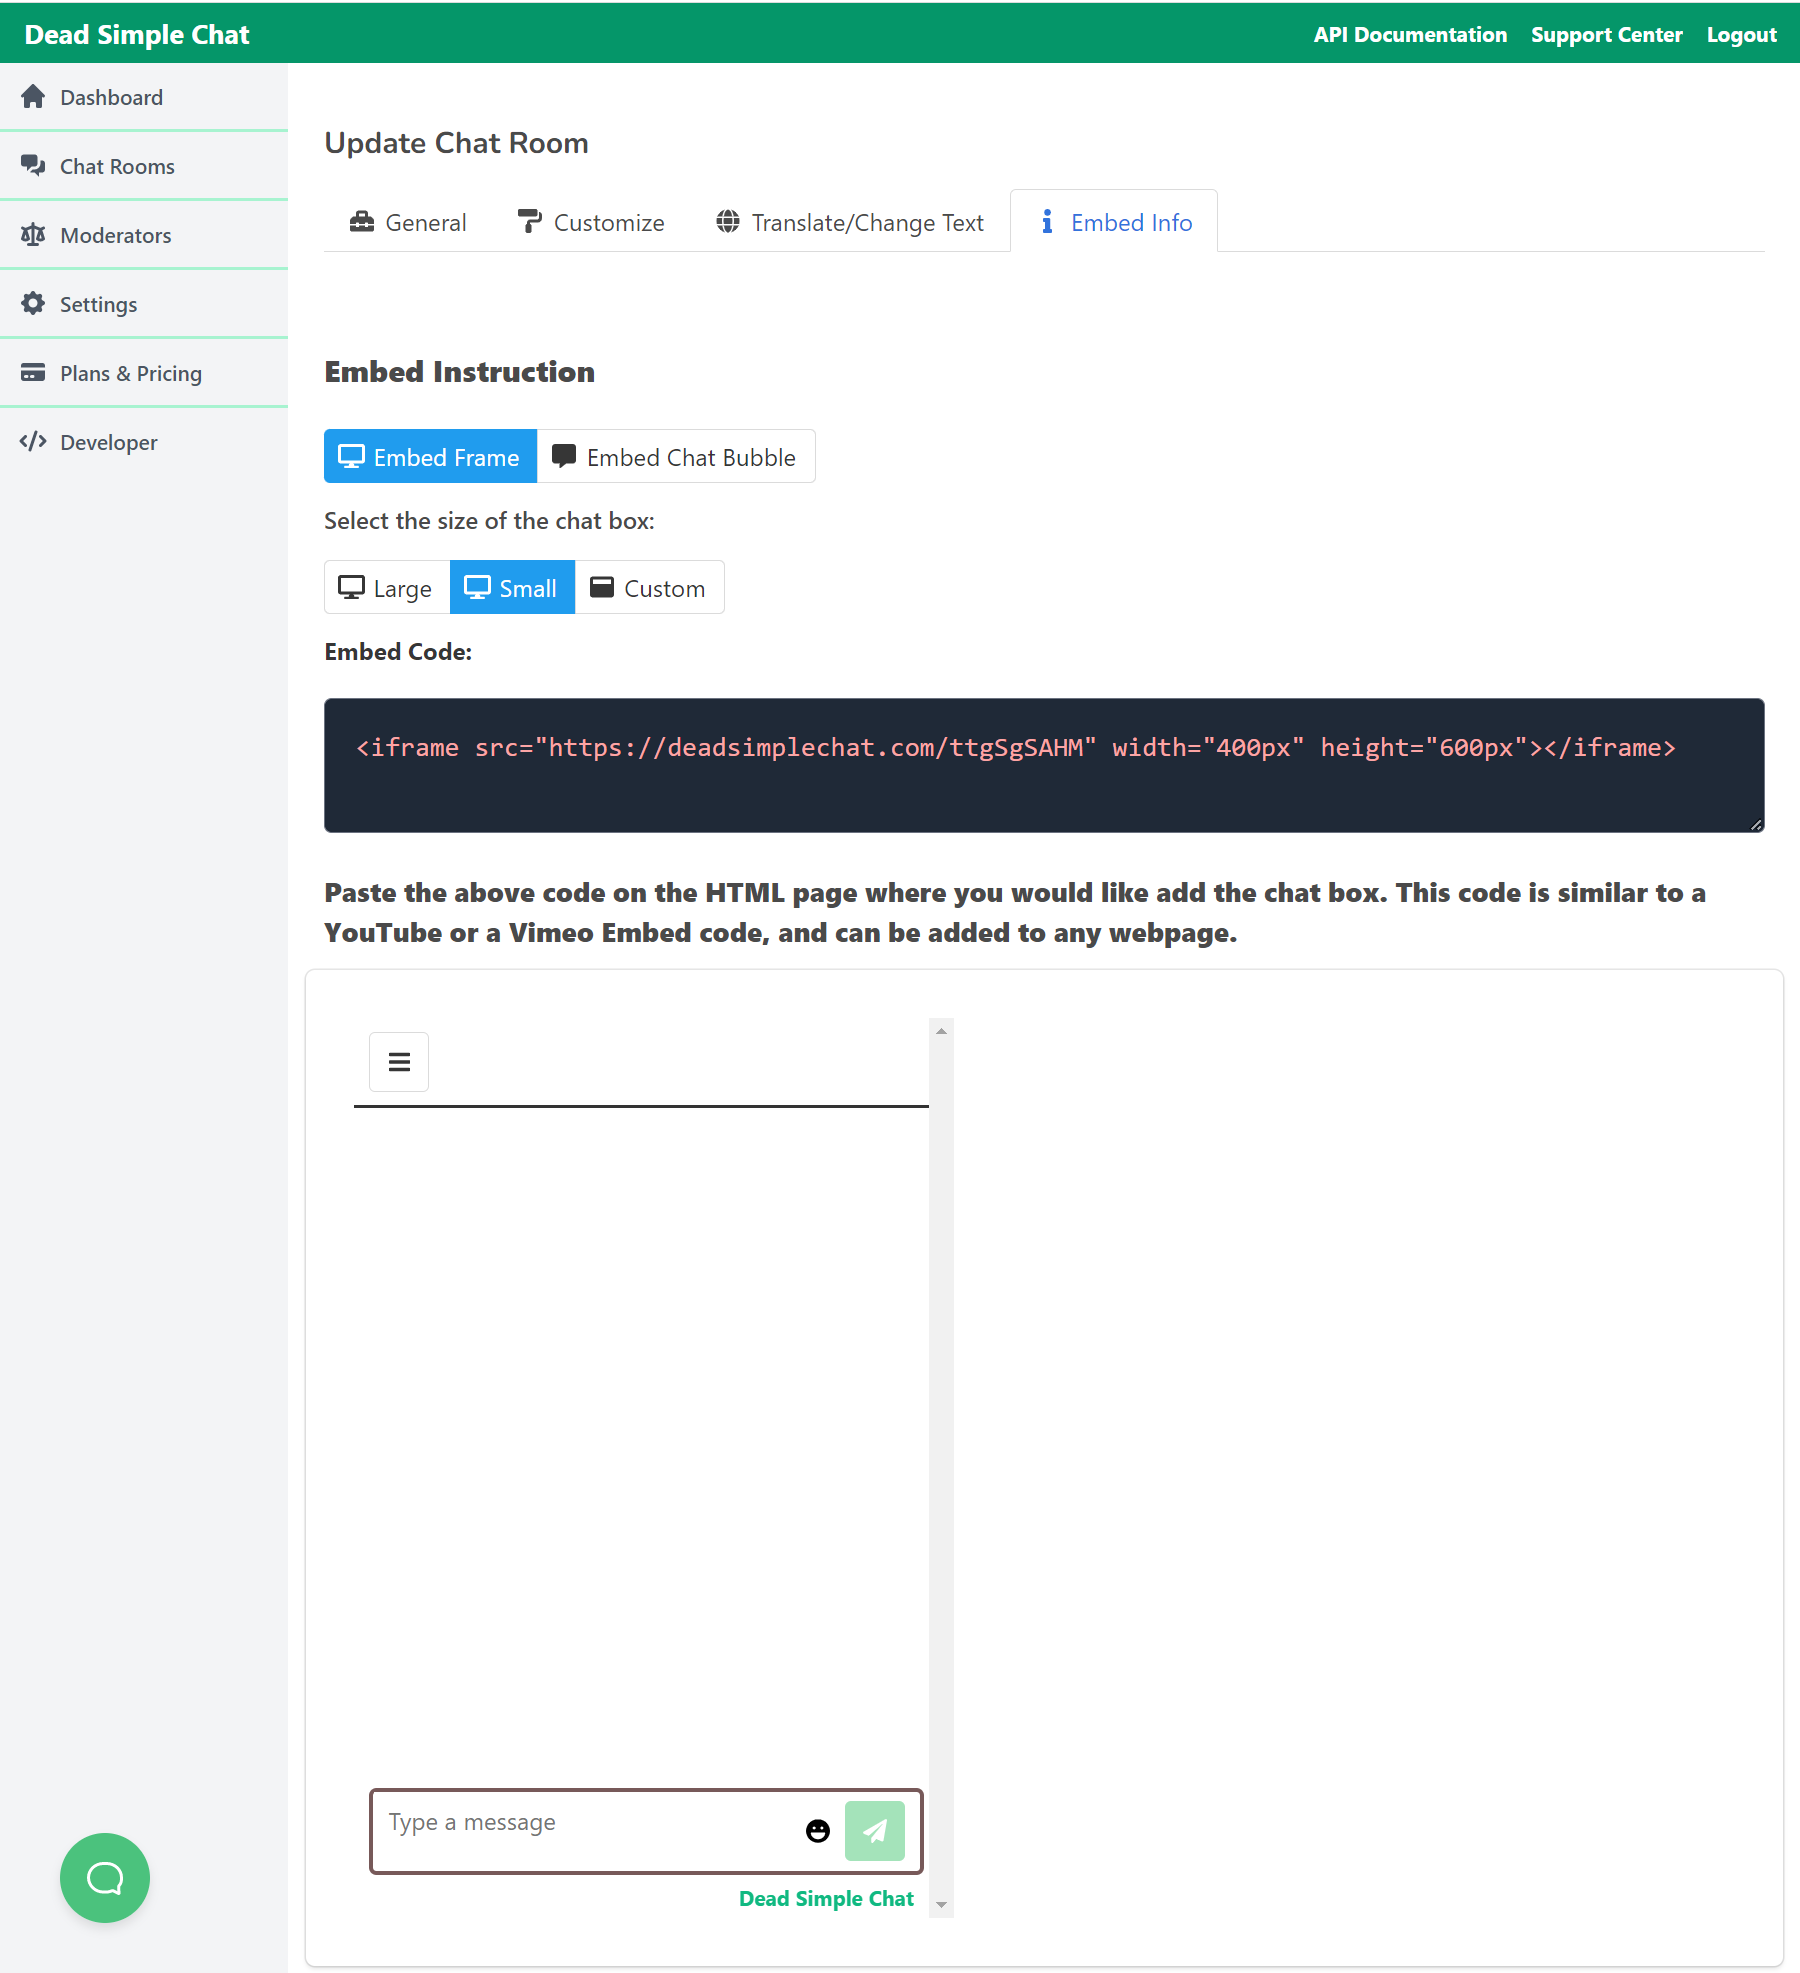
Clicking on the embed section gives you the code for the embed section.
Here you can change the size of the chat room and customize the how the chat room looks
there are three options here
large
small and
custom
you can also have chat bubble as well as chat added to your website
refer to the image below for details
Bonus:
Create Moderators

You can create multiple moderators who moderate the chat can talk with your audiences, delete messages and ban unruly visitors
to create a moderator go to
Dashboard -> Moderators
Set the username of the moderator
set a password for the moderator
and assign chat rooms to the moderator, you can assign a single chat room to a moderator or you can assign multiple chat rooms to a single moderator
and click on the save button
note: You can also create moderators using the chat platform APIs
Using APIs
Dead Simple Chat comes with APIs. With APIs you can use all the features of DeadSimpleChat programatically
So you can
- send a message
- Create a Moderator
- Login the users
- Customize the chat room and more
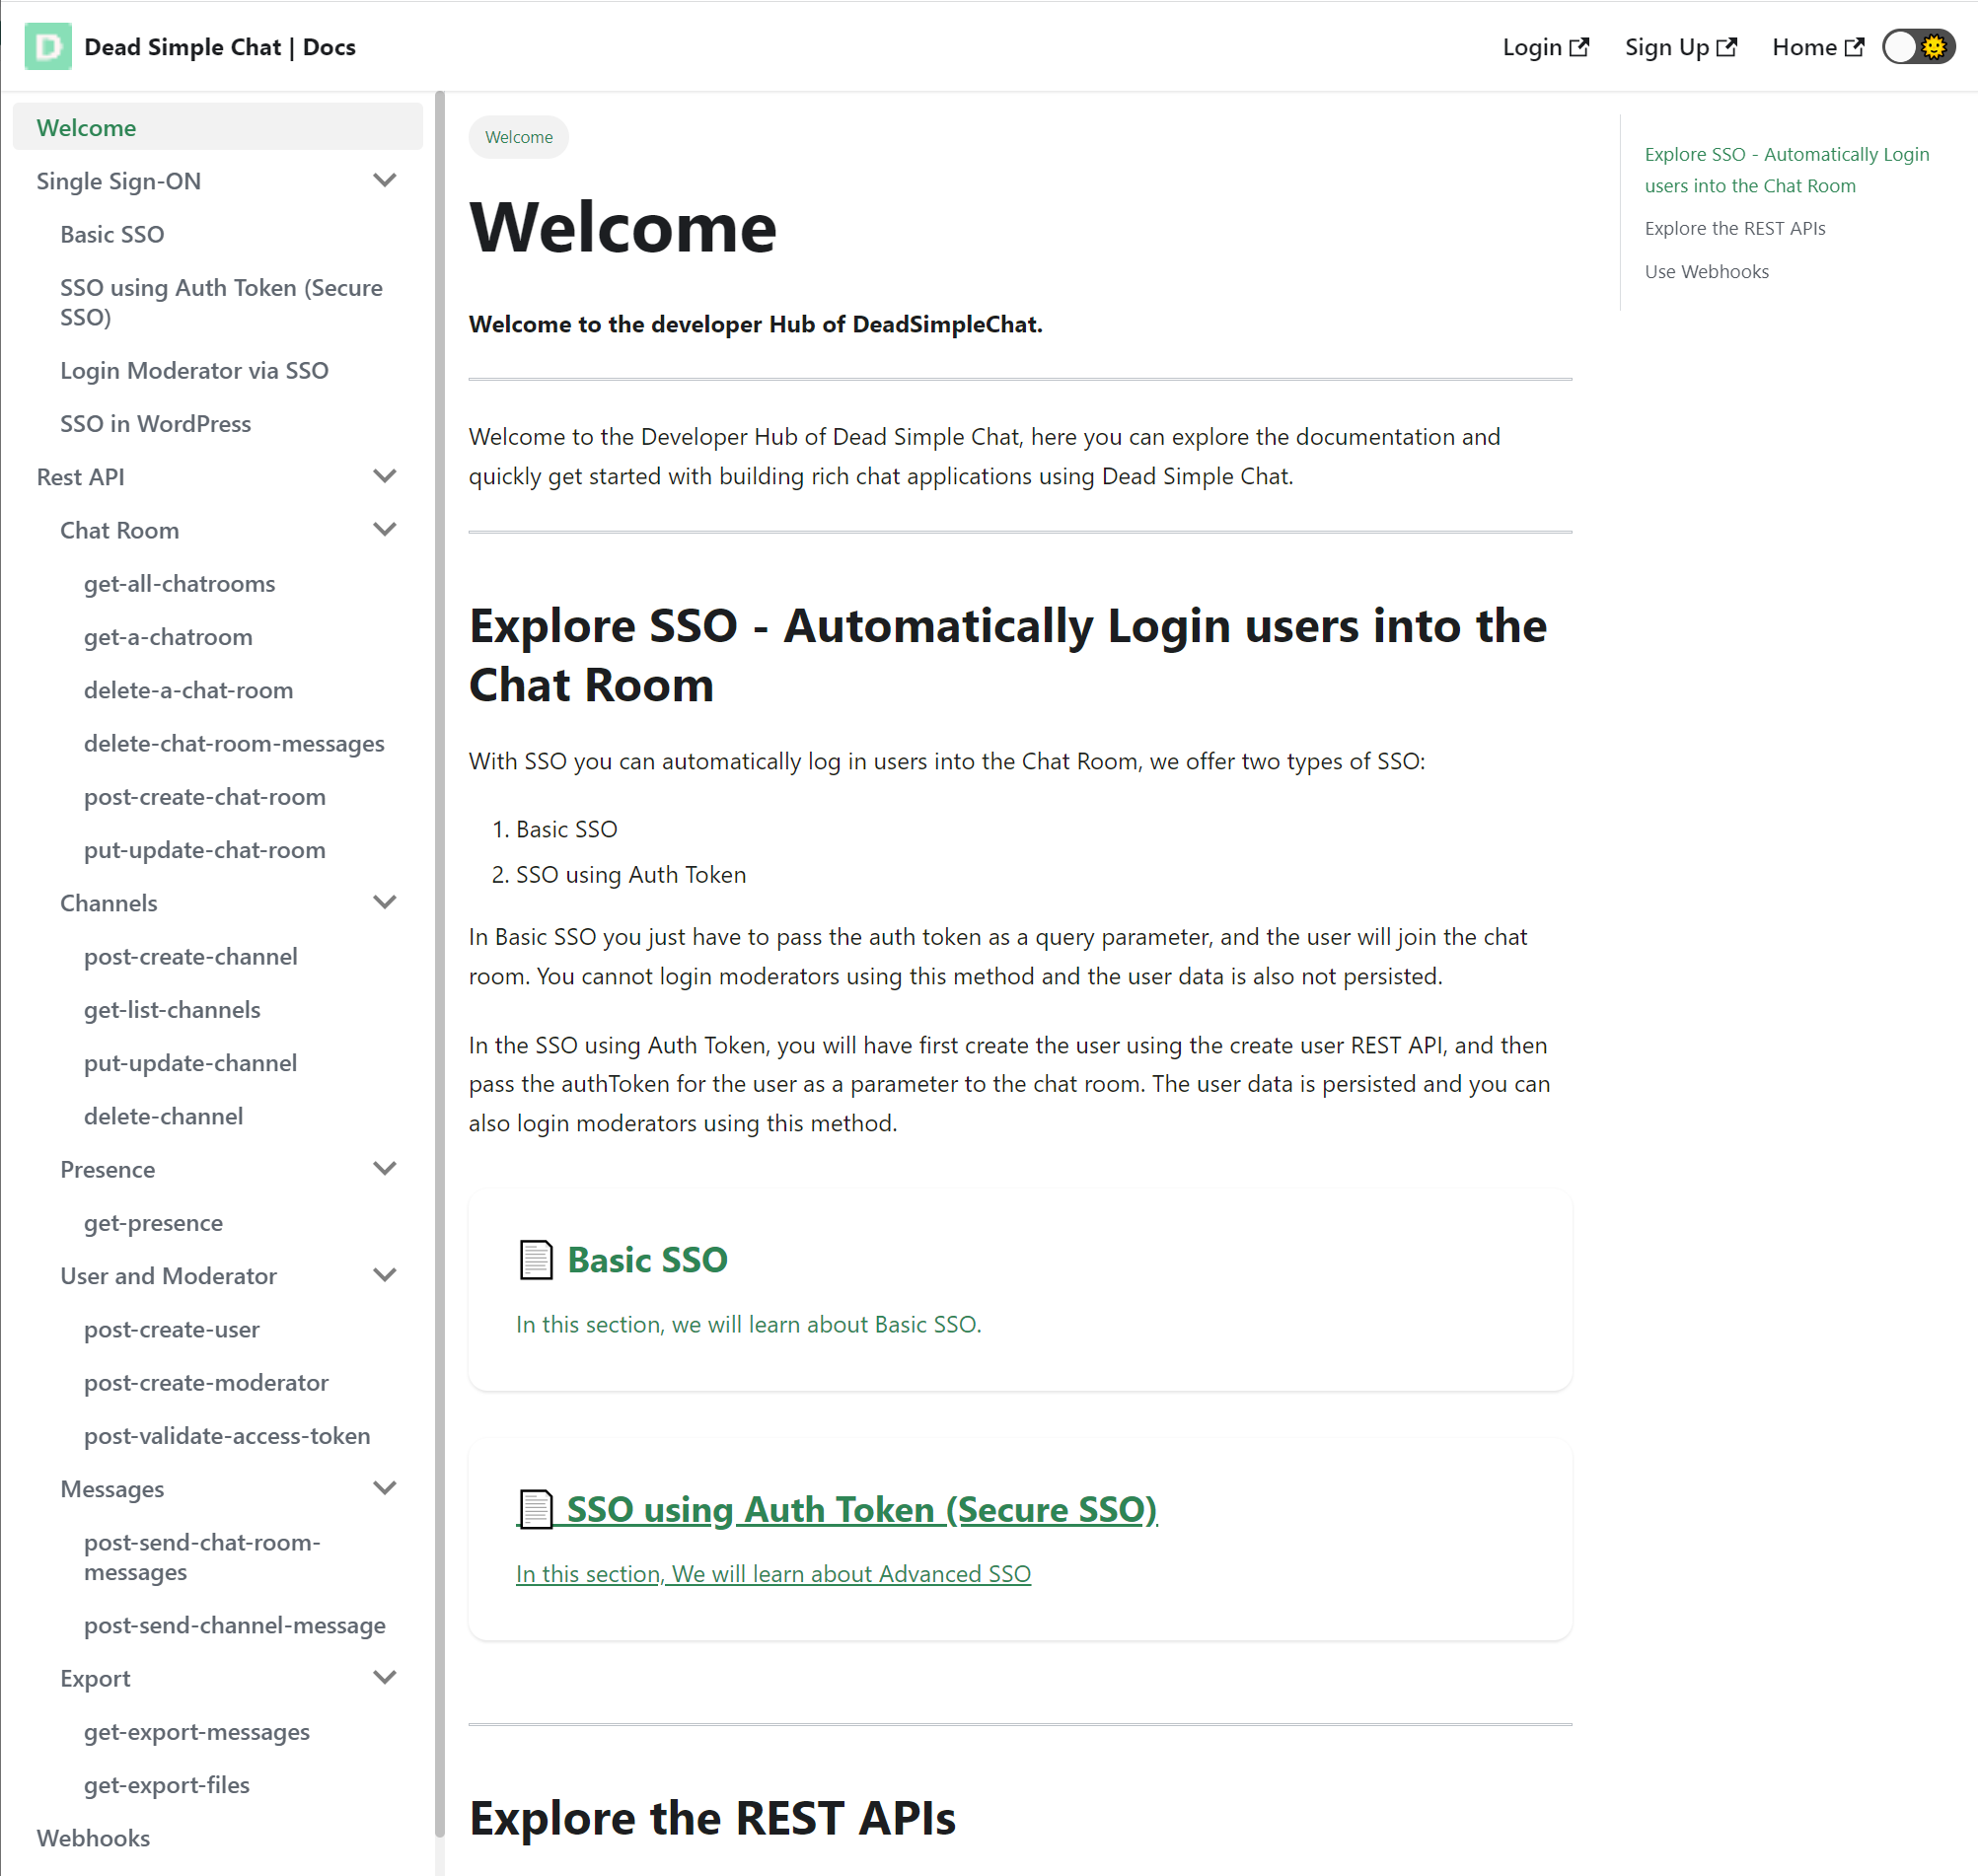
Using Single Sign On
Single Sign On is an awesome tool that comes with DeadSimpleChat
With SSO you can automatically sign in users that are on your website or app into DeadSimpleChat without them noticing anything
It makes it look like chat is really a part of your website and not some thing you have added from outside.
You can learn more about SSO here: https://deadsimplechat.com/developer/
Using Webhooks
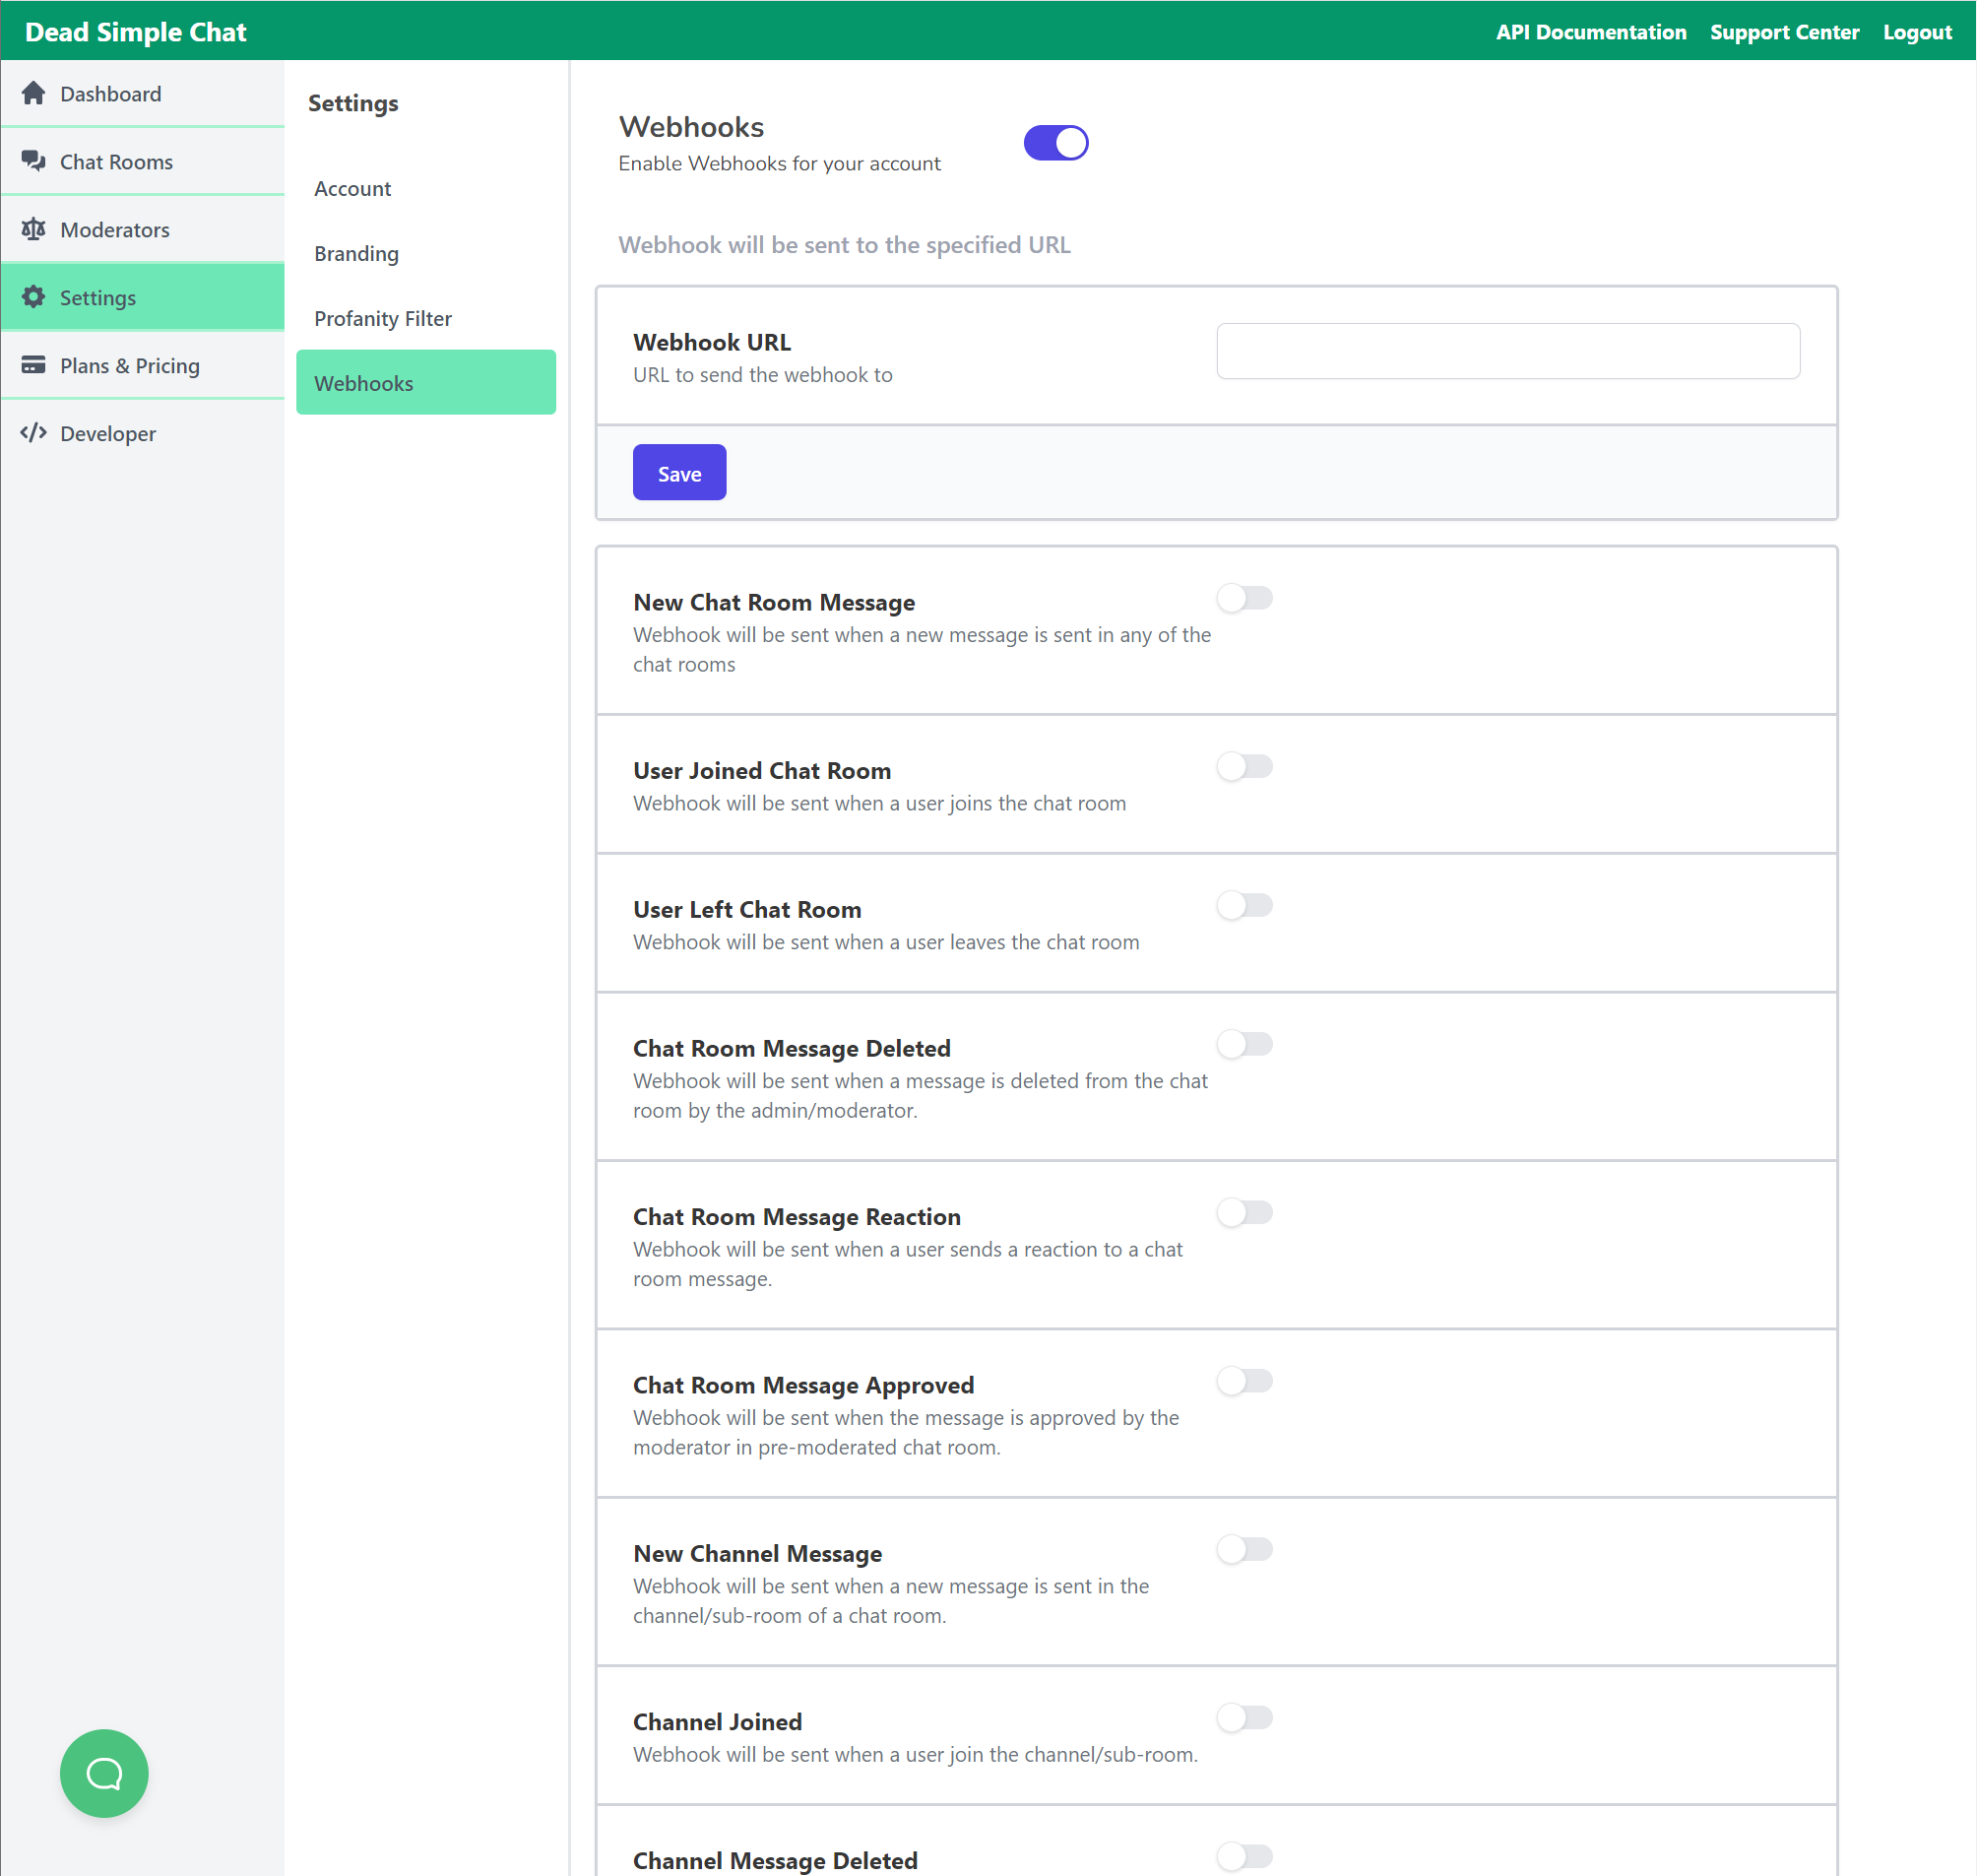
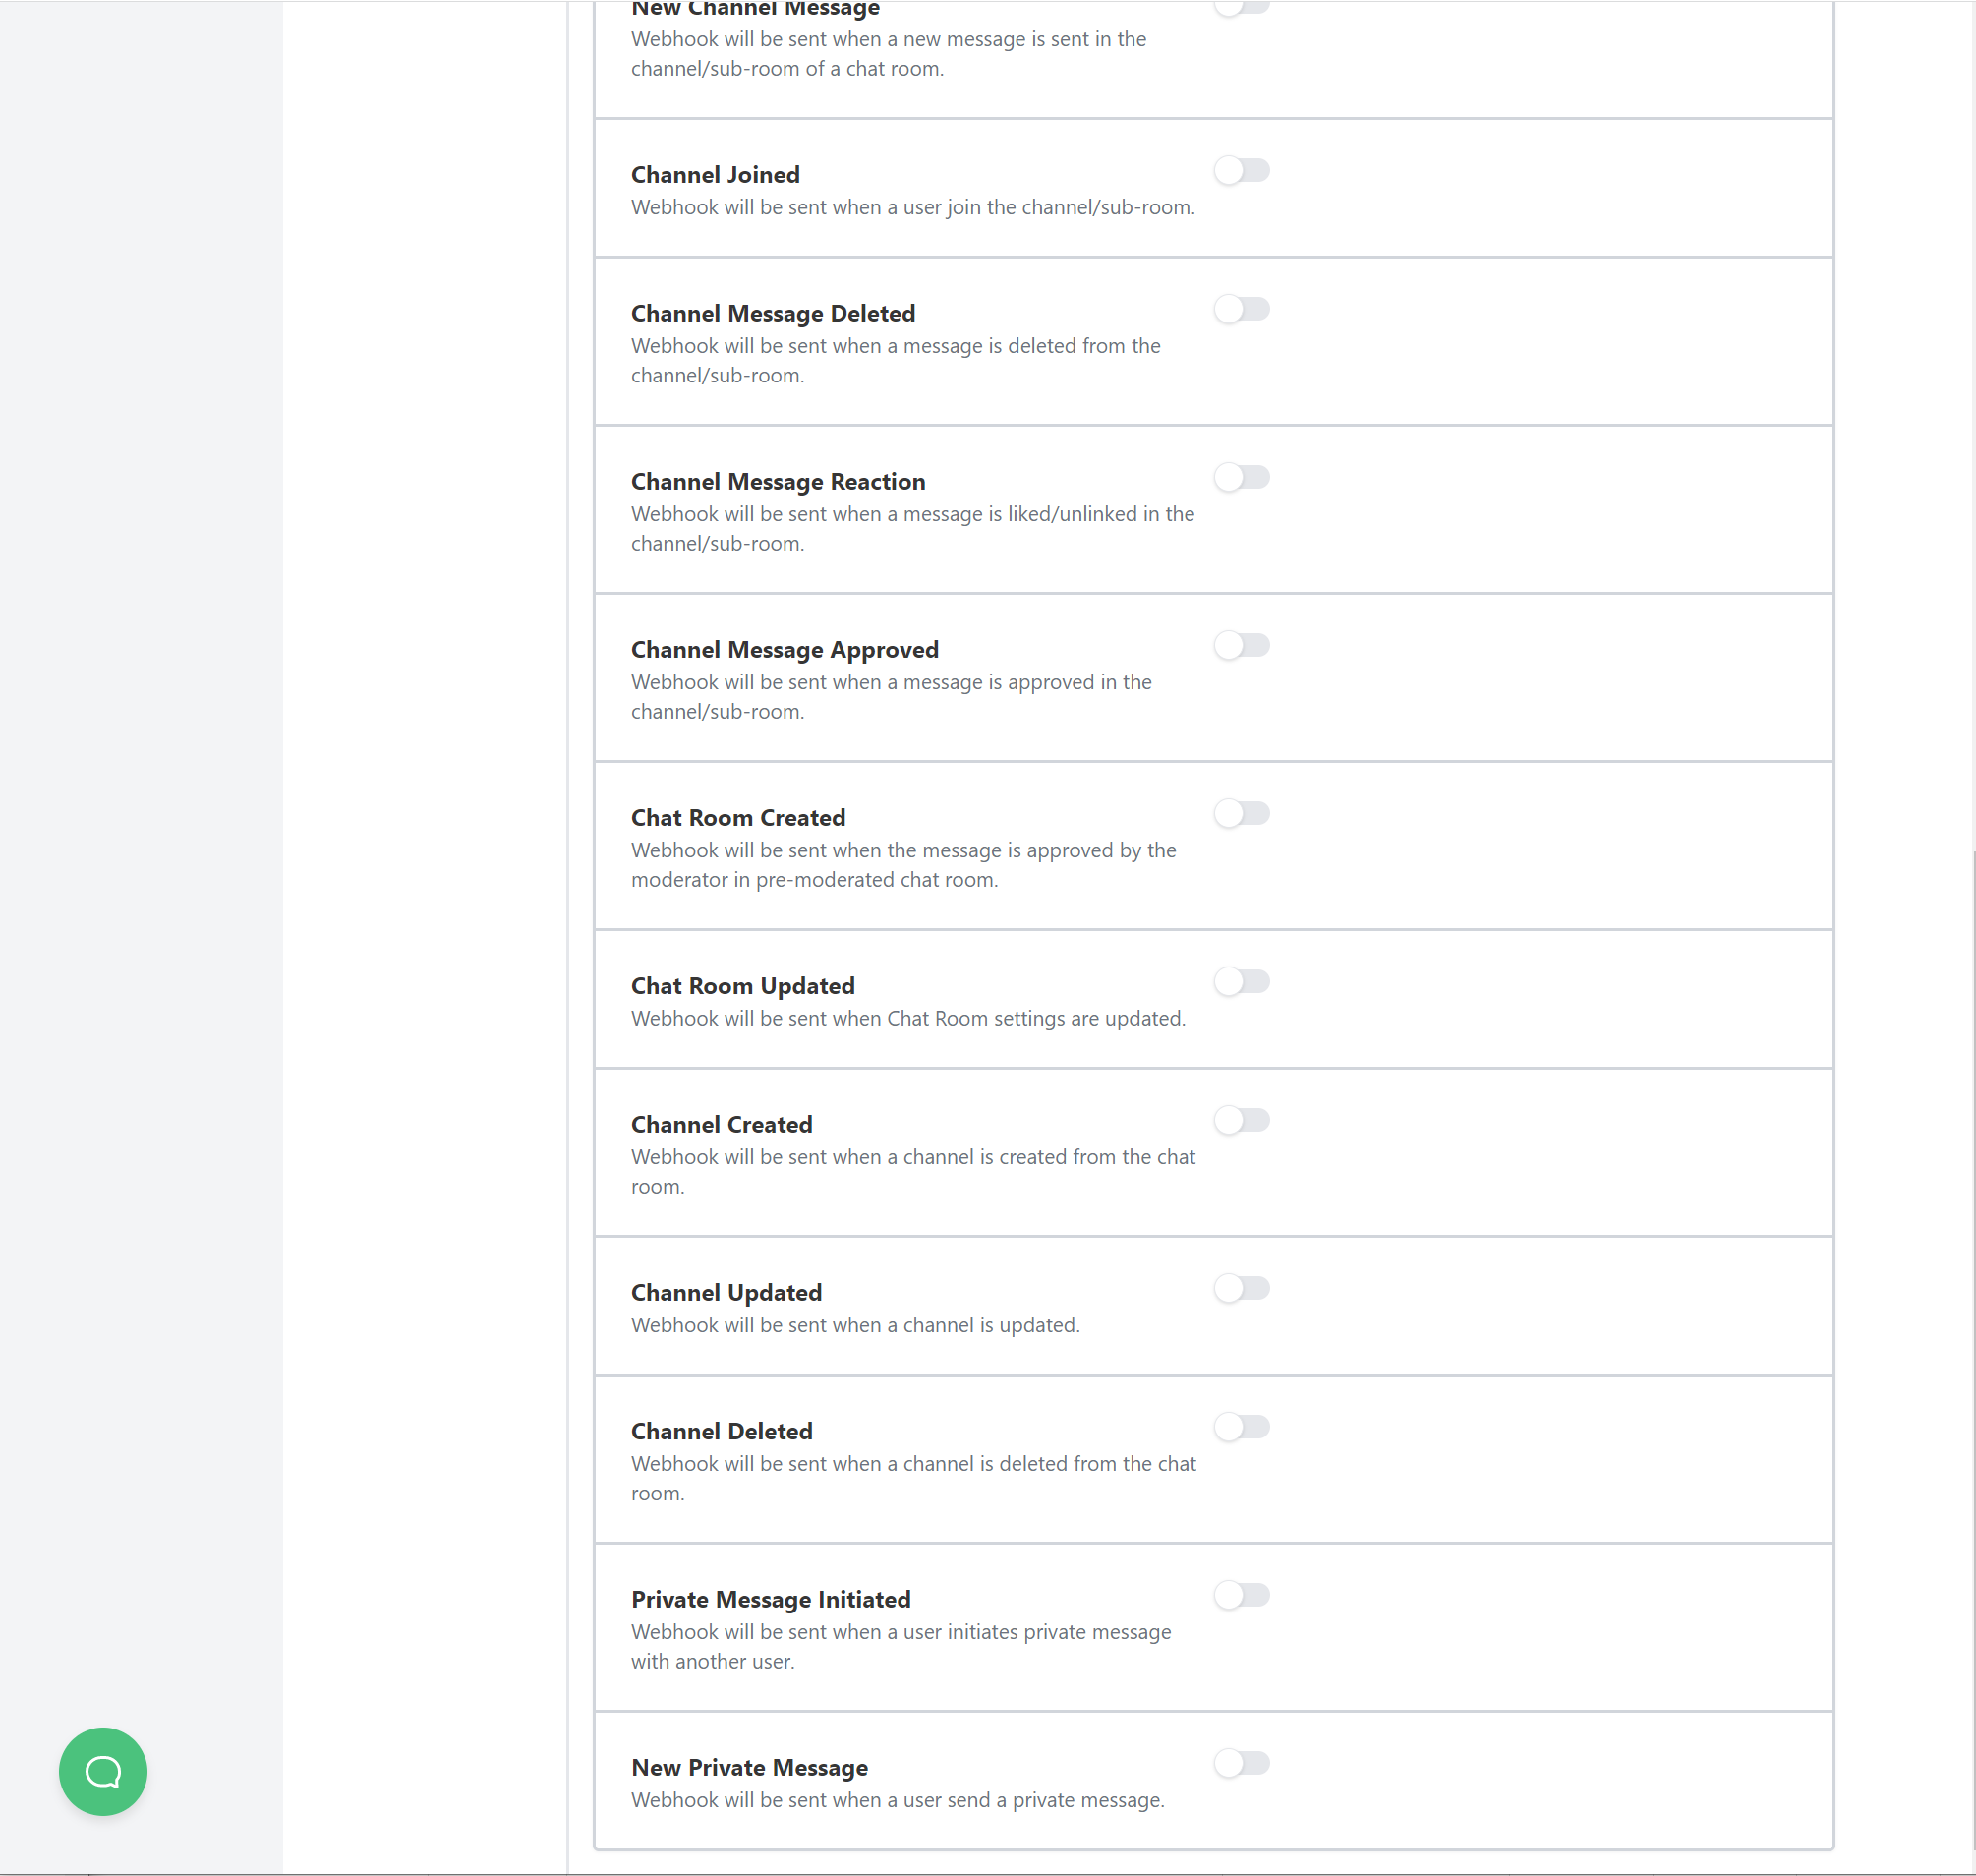
You can enable webhooks for your account
Webhooks will be sent for various actions that happen in the chat room you can enable web hooks to listen to a host of pre defined actions in the chat room
First you will have to set up the Web hook url that is the url where the webhook will be sent
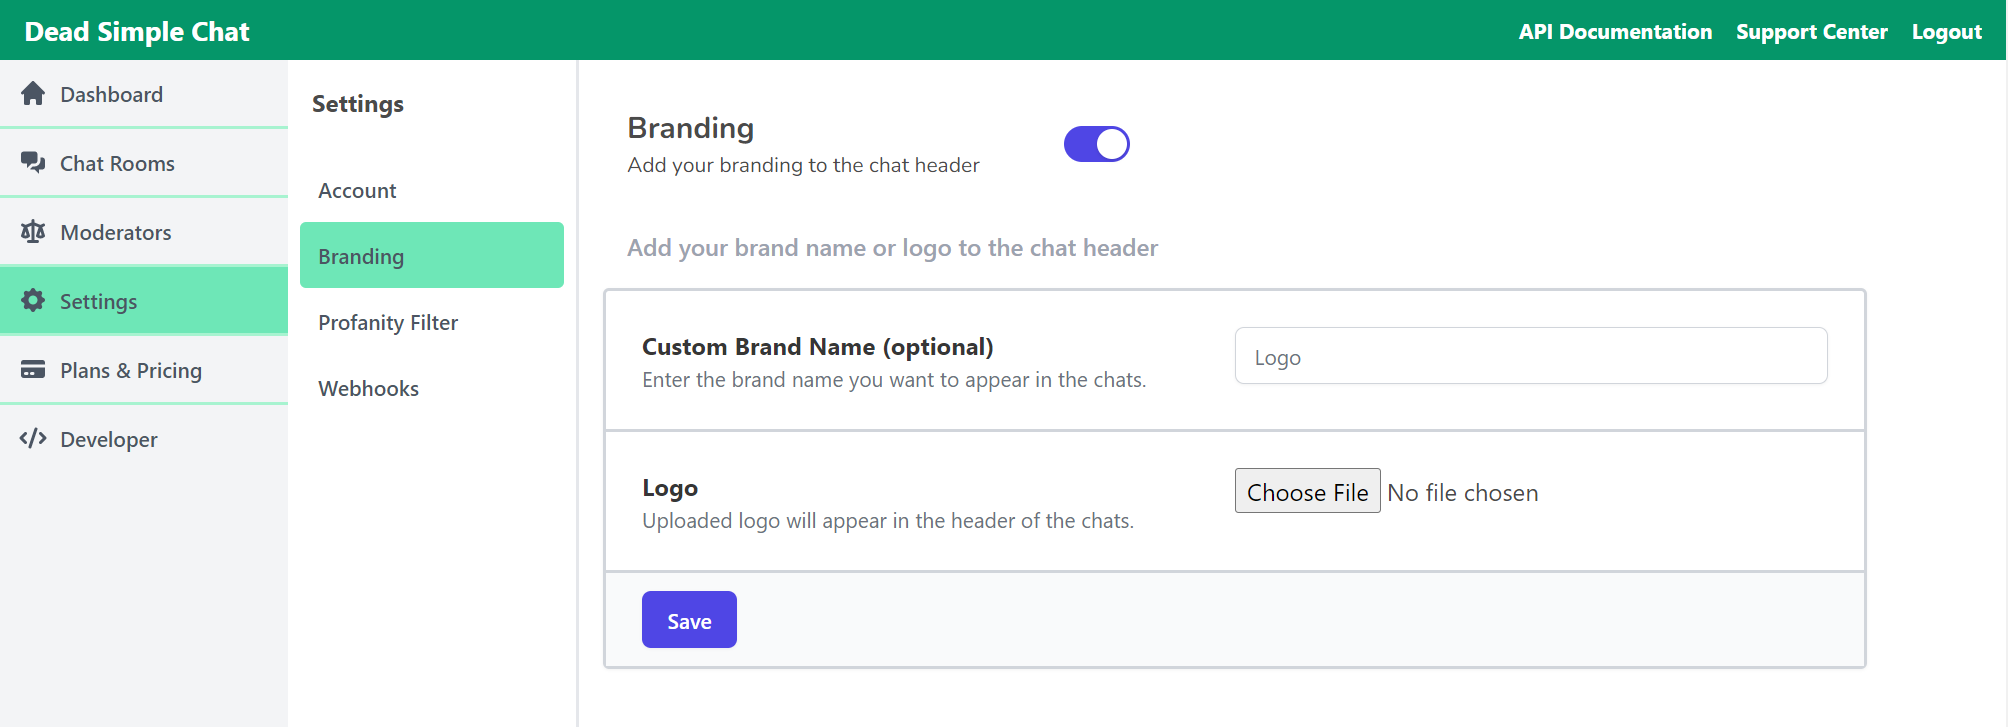
Adding Custom Branding
You can add your own branding to DeadSimpleChat to do this go to
Dashboard-> Settings -> Branding
Add your custom brand name (optional)
Add your logo (optional)
Your brand name and logo will appear at the header of the chat room
Using Profanity Filter

There is an automatic Image sharing profanity filter that is built into DeadSimpleChat, it checks for profanity and does not allow anyone to upload images that are not suitable
You can also enable profanity filter to filter out bad words, you can select from our pre filled list of words or you can add your own words
To enable profanity filter go to
Dashboard -> Settings -> Profanity filter
Conclusion
In this article we have explained hot to add an embedded chat box on your website
and what are the main benefits of having a embedded chat box on your website
I hope this article was informative
Have a chat embedded on your website create a platform for you to communicate with your audiences
Chat also increases engagement and create a sense of belonging among participants
Dead Simple Chat is a truly a chat that is designed for Live streaming. virtual events and community
Ready to Add Chat to Your Website?
Get started for free. No credit card required.
Start a Free Trial
![Webinar Chat: The Complete Guide to Engaging Your Audience [2026]](/blog/content/images/size/w600/2026/02/article-hero-webinar-chat.svg)
