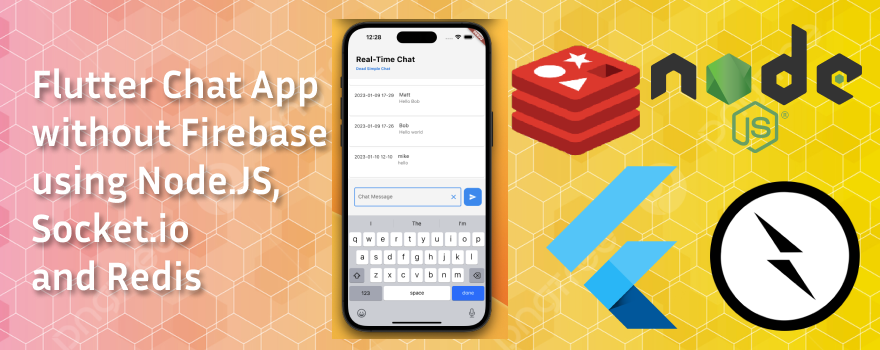
using Node.JS, Socket.io and Redis
Dead Simple Chat offers prebuilt Chat that can be added in minutes to any app or website. Can be completely customized and offers powerful Flutter Chat SDK.
In this guide, we will build a Real-Time Chat application in Flutter without using Firebase. We will discuss two strategies in build our chat application:
- Building Chat App from Scratch with Custom Backend: Here we will build a custom chat backend using Node.JS, Socket.io and Redis. We will hook up the chat backend with our Flutter chat app. Here we would have to host the code somewhere, like in AWS or in Heroku and manage the maintenance and scalability of the server ourselves.
- Integrating Pre-Built Chat from Chat Provider: We will use Dead Simple Chat's prebuilt chat and add it to our Flutter application. By using this option, we would have a highly scalable and powerful chat that we just need to add to our application. We do not need to manage the backend and scalability of the chat.

So now let's get started in building our chat application in Flutter without using Firebase.
Scaffolding the Application
We first need to scaffold our application, we will use the flutter cli to scaffold our application.
If you don't have the Flutter Cli setup follow the Getting Started Guide on the flutter official website and setup your Flutter development environment.
We will run the following command to scaffold a starter flutter application.
flutter create my_chat_appAfter scaffolding the application we will cd into our application directory and launch the project in vscode.
cd my_chat_appcode .To run our flutter application we will type the command
flutter runThis will launch the application in iOS or Android simulator, but you need to have the simulator running. If you want to learn how to launch a simulator you can learn more about it here Launching iOS Simulator and Launching Android Simulator.
A. Building Chat App from Scratch with Custom Backend
In this guide, we will build a chat application from scratch including the Flutter App and the Node.JS backend for our Flutter Chat application.
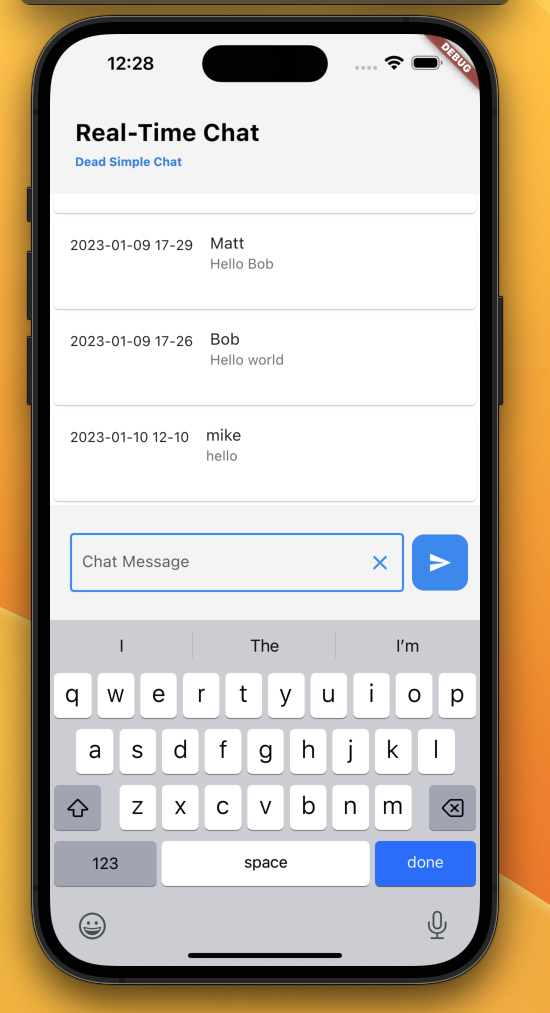
Our Final app will look like this:
Our Tech Stack
We will use the following technologies and packages to build our Chat:
- Flutter: Flutter will be used in the front end of our application
- NodeJS: Our Chat backend will be in Node.JS
- Socket.IO: We will use socket.io to transmit messages in real-time
- Redis: We will store all the chat messages in Redis
Step 1: Designing our Chat Message Model
We will design a very simple model to store our chat messages
{
	"id": String,
  	"user": {
    		"id": String,
        	"username": String
    	},
    	"message": String,
    	"created": Timestamp
}The username field will contain the actual username of the user, the message field will contain the actual chat message and the created field will contain the timestamp when the message was sent.
Step 2: Setting up the Chat Backend
Now we will build our Node.JS + Redis + Socket.io chat backend. It will allow us to store and fetch chat messages and also transmit chat messages in real-time.
Installing Redis
If you have docker installed, then you can quickly launch the redis docker with the following commands:
docker pull redisdocker run -d -p 6379:6379 --name redis redisSetting up Node.JS Project
Create a directory called as chat-backend and we will cd into the directory.
Then run the command:
npm init -yThis will create a package.json file for our project, now we will install node.js dependencies.
npm install ioredis --savenpm install express --savenpm install socket.io --savenpm instal uuid --savenpm install joi --saveioredis: Ioredis is a powerful redis client for Node.JS, we will use this to connect to our redis store using our Node.JS backend
express: Express is a web application framework, we will use express to create APIs for our chat backend
socket.io: Socket.IO is a Websocket wrapper that will allow us to send and receive messages in real-time using websockets.
uuid: We will use this to generate ids for our chat messages.
joi: Joi will be used to validate chat message schema
Step 3: Importing Dependencies
In our chat-backend folder we will create a file named index.js this will contain all our code.
Let's start by importing our dependencies:
// Importing redis client
// By default the redis client connects to redis instance running at localhost:6379
const Redis = require("ioredis");
const redisClient = new Redis();

// Importing socket.io, http and express
// and initializing express and socket.io
const { Server } = require("socket.io");
const express = require("express");
const http = require("http");
const app = express();
const server = http.createServer(app);
const io = new Server(server);

// Importing Joi and uuid
const { v4: uuidv4 } = require("uuid");
const Joi = require("joi");
Next we will define an Chat Message Schema in Joi, it will be used to validated incoming chat messages.
// Defining a basic schema to validate
// incoming chat messages
const chatMessageSchema = Joi.object({
  username: Joi.string().min(3).max(30).required(),
  message: Joi.string().min(1).max(1000).required(),
});
Here in the schema, we have specified that the username field should be of max 30 characters and the message should be of max 1000 characters.
Starting the server on port 3000.
server.listen(3000, () => {
  console.log("App started on port 3000");
});
Step 4: Handling New Messages
When a new client connects via socket.io, the io.on("connection", () => { }) is triggered:
io.on("connection", async (socket) => {
	// Handle connection
});
And to send a message to the connected socket we can all the method socket.emit as shown in the example below:
io.on("connection", async (socket) => {
	// Handle connection
    socket.emit("eventName", { "hello": "world" });
});
Inside the connection handler, we will listen for the message event, when the client wants to send a new message, it will emit a message event.
We will save the new message in Redis and also send it to all the other connected clients.
  socket.on("message", (data) => {
    console.log(data);
    // Validating the message
    const { value, error } = chatMessageSchema.validate(data);

    // If the message is invalid, then sending error
    if (error) {
      console.log("Invalid message, error occurred", error);
      // Triggering an error event to the user
      socket.emit("error", error);
      return;
    }

    // If message is valid, then creating a new message object
    const newMessage = {
      id: uuidv4(), // Generating a unique id for the message
      username: value.username,
      message: value.message,
      created: new Date().getTime(), // Creating timestamp for the message
    };

    // Saving message in redis in list named "chat_messages"
    redisClient.lpush("chat_messages", JSON.stringify(newMessage));

    // Sending the new message to call the connected clients
    io.emit("message", newMessage);
  });
In the above code snippet we are listening for the message event. Then we are validating the message using our Joi schema that we have created.
If there is an error, then we are emitting an error event to the user.
If the schema is valid, then we are creating a message object, giving message a unique id using our uuidv4 package.
And we are then saving the message in redis in a list, and then send the message to call the connected clients using the io.emit function.
Step 5: Sending Previous Messages
When a new user joins the chat we want to send the old messages that were sent in the chat room to the new user.
To do this we will fetch all the previous messages from the Redis, and emit a messages event that will contain an array of messages.
In this tutorial we are fetching all the messages from Redis and sending it to the user. In the production scenario you should only fetch a subset of latest messages and send it to the user, and then create an API to fetch the previous messages.
// Fetching all the messages from redis
const existingMessages = await redisClient.lrange("chat_messages", 0, -1);

// Parsing the messages to JSON
  const parsedMessages = existingMessages.map((item) => JSON.parse(item));

// Sending all the messages to the user
 socket.emit("messages", parsedMessages);
Step 6: Putting the Backend all together
Here is the complete index.js file, it contains our minimal chat backend
// Importing redis client
// By default the redis client connects to redis instance running at localhost:6379
const Redis = require("ioredis");
const redisClient = new Redis();

// Importing socket.io, http and express
// and initializing express and socket.io
const { Server } = require("socket.io");
const express = require("express");
const http = require("http");
const app = express();
const server = http.createServer(app);
const io = new Server(server);

// Importing Joi and uuid
const { v4: uuidv4 } = require("uuid");
const Joi = require("joi");

// Defining a basic schema to validate
// incoming chat messages
const chatMessageSchema = Joi.object({
  username: Joi.string().min(3).max(30).required(),
  message: Joi.string().min(1).max(1000).required(),
});

app.get("/", (req, res) => {
  res.send("hello world");
});

io.on("connection", async (socket) => {
  console.log("user connected");

  const existingMessages = await redisClient.lrange("chat_messages", 0, -1);
  const parsedMessages = existingMessages.map((item) => JSON.parse(item));
  socket.emit("messages", parsedMessages);

  socket.on("message", (data) => {
    console.log(data);
    // Validating the message
    const { value, error } = chatMessageSchema.validate(data);

    // If the message is invalid, then sending error
    if (error) {
      console.log("Invalid message, error occurred", error);
      // Triggering an error event to the user
      socket.emit("error", error);
      return;
    }

    // If message is valid, then creating a new message object
    const newMessage = {
      id: uuidv4(), // Generating a unique id for the message
      username: value.username,
      message: value.message,
      created: new Date().getTime(), // Creating timestamp for the message
    };

    // Saving message in redis in list named "chat_messages"
    redisClient.lpush("chat_messages", JSON.stringify(newMessage));

    // Sending the new message to call the connected clients
    io.emit("message", newMessage);
  });
});

server.listen(3000, () => {
  console.log("App started on port 3000");
});
We can start the chat backend by running the command
node index.js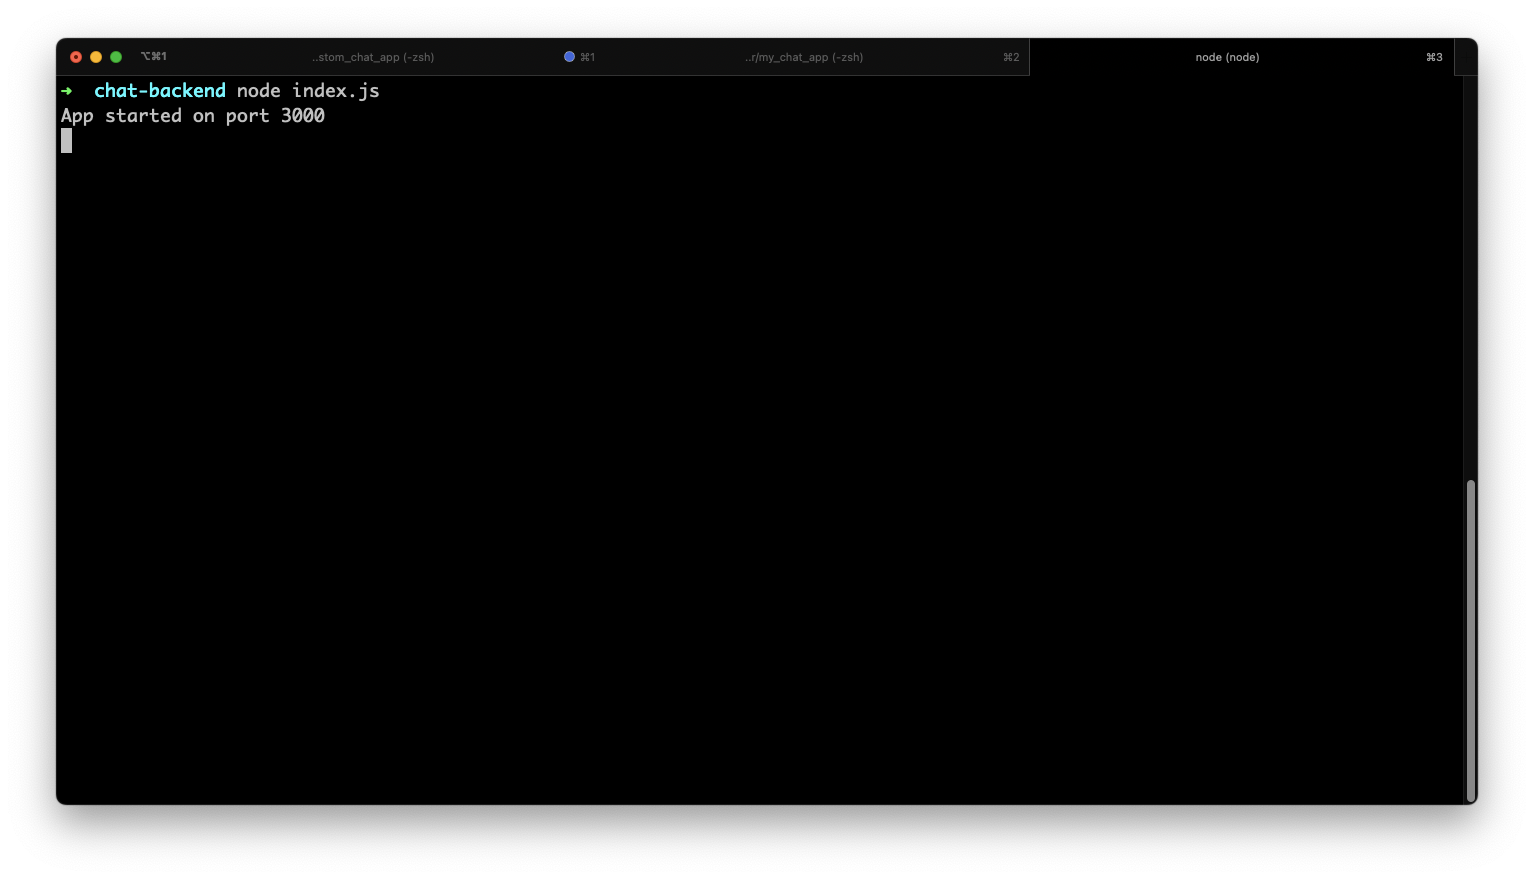
Step 7: Setting up the Flutter App
Now let's build the flutter application. We have our backend ready now, we need to build our app that will connect to our backend to send and receive messages.
On the Server we are using socket.io so we will have to install socket_io_client package in the Flutter App to connect to our socket.io server.
flutter pub add socket_io_clientRun the above command to install the dependency.
Step 8: Importing Socket.io client in Flutter
Open the lib/main.dart file and delete everything in that file.
Now update the file, and import the socket.io client
import 'package:flutter/material.dart';
import 'package:socket_io_client/socket_io_client.dart' as IO;
Then create a StatefulWidget named ChatWidget this will contain the code for your chat application.
void main() {
  runApp(
    const MaterialApp(
      title: 'Flutter Chat',
      home: ChatWidget(),
    ),
  );
}

class ChatWidget extends StatefulWidget {
  const ChatWidget({super.key});

  @override
  State<ChatWidget> createState() => _ChatWidgetState();
}

class _ChatWidgetState extends State<ChatWidget> {
  late IO.Socket socket;

  @override
  void initState() {
    initSocket();
    super.initState();
  }

  initSocket() {
    socket = IO.io('http://192.168.1.134:3000',
        IO.OptionBuilder().setTransports(['websocket']).build());
    socket.connect();

    socket.onConnect((_) {
      print('connection established');
    });

    socket.on("messages", (messages) {
      print(chatMessages)
    });

    socket.on("message", (message) {
      print(message);
    });
  }
}
In the above code, we have imported the flutter socket.io client and we are listening to the message and messages event from our server.
In the code replace http://192.168.1.134:3000 with the IP address of your server, if you are running the server on your local machine you replace it with IP address of your computer.
Step 9: Getting the username
Before the user can send a message, we want to ask the user to enter the username.
We will do this, by calling an AlertDialog with a TextField and ask the user, for the username.
We will save the username in a variable, and when a new message is sent by the user, we will pass the username to the server.
I know this is not the best technique, but as this is an anonymous chat without any authentication, for this tutorial handling the username like this would suffice.
class _ChatWidgetState extends State<ChatWidget> {
 String username = "";

  Future openUsernameDialog() => showDialog(
      context: context,
      builder: ((context) => AlertDialog(
            title: Text("Enter your name to Join Chat"),
            content: TextField(
              onChanged: (value) => username = value,
              decoration: InputDecoration(hintText: "Enter your name"),
            ),
            actions: [
              TextButton(
                  onPressed: () {
                    Navigator.of(context).pop();
                  },
                  child: Text("Join Chat"))
            ],
          )));
....
And we will call the openUsernameDialog in the onConnect method of socket.io client
    socket.onConnect((_) {
      openUsernameDialog();
      print('connection established');
    });
Step 10: Building and Wiring up the UI
We will show individual messages in a ListTile and wrap the ListTile inside of the Card component.
We will show the list of messages inside of ListView.
Let's build our ChatMessageWidget, the ChatMessageWidget represents and individual chat message
class ChatMessageWidget extends StatelessWidget {
  const ChatMessageWidget(
      {required this.username,
      required this.message,
      required this.timestamp,
      super.key});

  final String username;
  final String message;
  final String timestamp;

  @override
  Widget build(BuildContext context) {
    return Container(
      child: Card(
        child: ListTile(
          leading: Text(timestamp),
          title: Text(username),
          subtitle: Text(
            message,
            style: TextStyle(fontSize: 14),
          ),
          isThreeLine: true,
        ),
      ),
    );
  }
}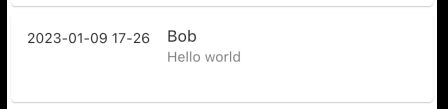
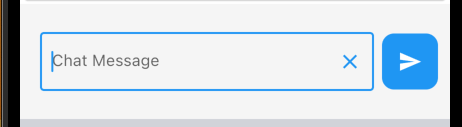
The message accepts the username, timestamp and actual message and render the card as shown in the image above.
We will store call the Messages in chatMessages list which is list of ChatMessageWidgets
List<Widget> chatMessages = [] Each time a new message is sent, we will add the message in the chatMessages list
    socket.on("message", (message) {
      print(message);
      setState(() {
        chatMessages = [
          ...chatMessages,
          ChatMessageWidget(
              username: message['username'],
              message: message['message'],
              timestamp: convertTimeStamp(message['created']))
        ];
      });
    });
We have also created a helper method convertTimeStamp that converts the UNIX timestamp to a date string.
  String convertTimeStamp(int timestamp) {
    var dateTime = DateTime.fromMillisecondsSinceEpoch(timestamp);
    String convertedDateTime =
        "${dateTime.year.toString()}-${dateTime.month.toString().padLeft(2, '0')}-${dateTime.day.toString().padLeft(2, '0')} ${dateTime.hour.toString().padLeft(2, '0')}-${dateTime.minute.toString().padLeft(2, '0')}";
    return convertedDateTime;
  }
Step 11: Sending Messages
To handle sending of the messages. we have created a _textController and then added the TextEditingController to the TextField.
  final _textController = TextEditingController();

....
             Padding(
                padding: EdgeInsets.all(12),
                child: Row(
                  children: [
                    Expanded(
                        child: Padding(
                      padding:
                          EdgeInsets.symmetric(horizontal: 8, vertical: 16),
                      child: TextField(
                          controller: _textController,
                          decoration: InputDecoration(
                              border: OutlineInputBorder(),
                              hintText: 'Chat Message',
                              suffixIcon: IconButton(
                                icon: Icon(Icons.clear),
                                onPressed: () {
                                  // Handle clear
                                  _textController.clear();
                                },
                              ))),
                    )),
                    GestureDetector(
                      onTap: () {
                        String message = _textController.text;
                        socket.emit("message",
                            {"username": username, "message": message});
                        _textController.clear();
                      },
                      child: Container(
                        decoration: BoxDecoration(
                            color: Colors.blue,
                            borderRadius: BorderRadius.circular(12)),
                        padding: EdgeInsets.all(16),
                        child: Icon(
                          Icons.send,
                          color: Colors.white,
                        ),
                      ),
                    )
                  ],
                ),
We have also created a send button and added a onTap GestureDetector and in that handler, we will socket.emit and emit the message event and send the message to the backend.
             GestureDetector(
                      onTap: () {
                        String message = _textController.text;
                        socket.emit("message",
                            {"username": username, "message": message});
                        _textController.clear();
                      },
Step 11: Putting Flutter App together
Here is the complete main.dart file it contains the complete code for our chat application
// ignore_for_file: prefer_const_constructors
import 'package:flutter/material.dart';
import 'package:flutter/scheduler.dart';
import 'package:socket_io_client/socket_io_client.dart' as IO;

void main() {
  runApp(
    const MaterialApp(
      title: 'Flutter Chat',
      home: ChatWidget(),
    ),
  );
}

class ChatWidget extends StatefulWidget {
  const ChatWidget({super.key});

  @override
  State<ChatWidget> createState() => _ChatWidgetState();
}

class ChatMessageWidget extends StatelessWidget {
  const ChatMessageWidget(
      {required this.username,
      required this.message,
      required this.timestamp,
      super.key});

  final String username;
  final String message;
  final String timestamp;

  @override
  Widget build(BuildContext context) {
    return Container(
      child: Card(
        child: ListTile(
          leading: Text(timestamp),
          title: Text(username),
          subtitle: Text(
            message,
            style: TextStyle(fontSize: 14),
          ),
          isThreeLine: true,
        ),
      ),
    );
  }
}

class _ChatWidgetState extends State<ChatWidget> {
  final _textController = TextEditingController();
  final _scrollController = ScrollController();

  String username = "";
  String message = "";

  late IO.Socket socket;

  @override
  void initState() {
    initSocket();
    super.initState();
  }

  initSocket() {
    socket = IO.io('http://192.168.1.134:3000',
        IO.OptionBuilder().setTransports(['websocket']).build());
    socket.connect();

    socket.onConnect((_) {
      openUsernameDialog();
      print('connection established');
    });

    socket.on("messages", (messages) {
      List<Widget> _chatMessages = [];
      for (var message in messages) {
        print(message);

        _chatMessages.add(ChatMessageWidget(
            username: message['username'],
            message: message['message'],
            timestamp: convertTimeStamp(message['created'])));
      }
      setState(() {
        chatMessages = _chatMessages;
      });
    });

    socket.on("message", (message) {
      print(message);
      setState(() {
        chatMessages = [
          ...chatMessages,
          ChatMessageWidget(
              username: message['username'],
              message: message['message'],
              timestamp: convertTimeStamp(message['created']))
        ];
      });
      SchedulerBinding.instance.addPostFrameCallback((_) {
        _scrollController.animateTo(_scrollController.position.maxScrollExtent,
            curve: Curves.easeOut, duration: const Duration(milliseconds: 50));
      });
    });
  }

  String convertTimeStamp(int timestamp) {
    var dateTime = DateTime.fromMillisecondsSinceEpoch(timestamp);
    String convertedDateTime =
        "${dateTime.year.toString()}-${dateTime.month.toString().padLeft(2, '0')}-${dateTime.day.toString().padLeft(2, '0')} ${dateTime.hour.toString().padLeft(2, '0')}-${dateTime.minute.toString().padLeft(2, '0')}";
    return convertedDateTime;
  }

  List<Widget> chatMessages = [
    Card(
      child: ListTile(
        leading: Text("26 Jan, 2022"),
        title: Text("Mohammed"),
        subtitle: Text(
          "Hello world, today is good day",
          style: TextStyle(fontSize: 14),
        ),
        isThreeLine: true,
      ),
    )
  ];

  Future openUsernameDialog() => showDialog(
      context: context,
      builder: ((context) => AlertDialog(
            title: Text("Enter your name to Join Chat"),
            content: TextField(
              onChanged: (value) => username = value,
              decoration: InputDecoration(hintText: "Enter your name"),
            ),
            actions: [
              TextButton(
                  onPressed: () {
                    Navigator.of(context).pop();
                  },
                  child: Text("Join Chat"))
            ],
          )));

  @override
  Widget build(BuildContext context) {
    return Scaffold(
        backgroundColor: Colors.grey[100],
        body: SafeArea(
          child: Column(
            children: [
              Padding(
                padding: const EdgeInsets.all(25.0),
                child: Row(
                  mainAxisAlignment: MainAxisAlignment.spaceBetween,
                  children: [
                    Column(
                      crossAxisAlignment: CrossAxisAlignment.start,
                      children: [
                        Text(
                          "Real-Time Chat",
                          style: TextStyle(
                              fontSize: 24,
                              color: Colors.black,
                              fontWeight: FontWeight.bold),
                        ),
                        SizedBox(
                          height: 8,
                        ),
                        Text("Dead Simple Chat",
                            style: TextStyle(
                                color: Colors.blue[600],
                                fontSize: 12,
                                fontWeight: FontWeight.bold))
                      ],
                    ),
                  ],
                ),
              ),
              Expanded(
                child: Container(
                  color: Colors.white,
                  child: ListView(
                      controller: _scrollController, children: chatMessages),
                ),
              ),
              Padding(
                padding: EdgeInsets.all(12),
                child: Row(
                  children: [
                    Expanded(
                        child: Padding(
                      padding:
                          EdgeInsets.symmetric(horizontal: 8, vertical: 16),
                      child: TextField(
                          controller: _textController,
                          decoration: InputDecoration(
                              border: OutlineInputBorder(),
                              hintText: 'Chat Message',
                              suffixIcon: IconButton(
                                icon: Icon(Icons.clear),
                                onPressed: () {
                                  // Handle clear
                                  _textController.clear();
                                },
                              ))),
                    )),
                    GestureDetector(
                      onTap: () {
                        String message = _textController.text;
                        socket.emit("message",
                            {"username": username, "message": message});
                        _textController.clear();
                      },
                      child: Container(
                        decoration: BoxDecoration(
                            color: Colors.blue,
                            borderRadius: BorderRadius.circular(12)),
                        padding: EdgeInsets.all(16),
                        child: Icon(
                          Icons.send,
                          color: Colors.white,
                        ),
                      ),
                    )
                  ],
                ),
              )
            ],
          ),
        ));
  }
}
Step 12: That's it!
We have successfully built our chat application in flutter without using firebase. We have built our custom chat backend in Redis, Node.JS and Socket.io
Here is the demo of our application running in Android and iOS simulator.
Further Improvements
The app that we have made can be improved a lot, here are some of the things that can be improved:
- Adding authentication: Currently, this is an anonymous chat, anyone can join with a username.
- Ability to show online users: Right now we are passing username as part of the message, we can authenticate the user and assign an ID to a user and keep track of the online users in Redis. Socket.io has a disconnect event as well, when the disconnect event fires we can remove the online user from the list.
- Sanitizing the username and message field: Before storing the message in the database, we should sanitize the input string to cross-browser scripting and HTML elements.
- Run the service behind a load-balancer with TLS Encryption: You can use something like Caddy and run the Node.JS app behind Caddy. Caddy also generates SSL certificate using LetsEncrypt for your backend, by doing thing all the messages to and from the server get encrypted.
- Adding Pagination for Messages: Right now we are sending all the messages to the client. This is not a good approach, we should only send a subset of messages and create a REST API to fetch historical messages, and use the
ListViewevents to fetch previous messages via the API.
The app can be improved greatly in many ways, these are some that I could think of that should be a must in a production application.
Github
You can find the complete code including the front and backend in this
B. Integrating Pre-Built Chat from Chat Provider
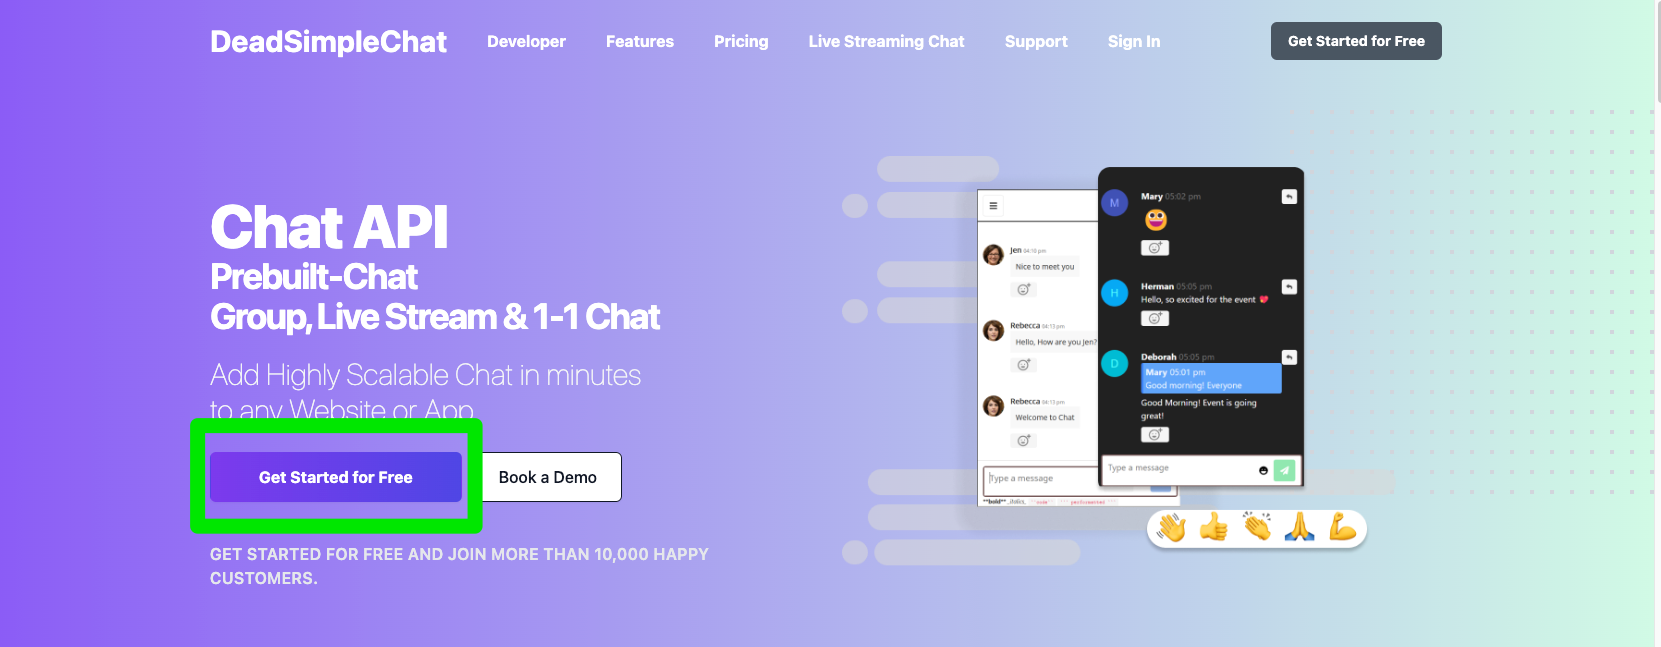
If you don't want to build the app yourself, you can easily add chat using a Chat Provider like Dead Simple Chat.
Dead Simple Chat offers a highly scaleable chat solution that is pre-built and can be easily integrated into any flutter app.
It is very reliable and highly scalable, and offers all the modern Chat features including file and image sharing, emoji, reactions, moderation and more.
It provides a powerful Chat API that allows us to integrate chat easily into any web or mobile application.
Step 1: Signup for a free account
Go to https://deadsimplechat.com and click "Get Started for free" and signup for a free account.
Step 2: Create a Chat Room
Click on the "Create Chat Room" button on the dashboard to create a new chat room for our flutter application.
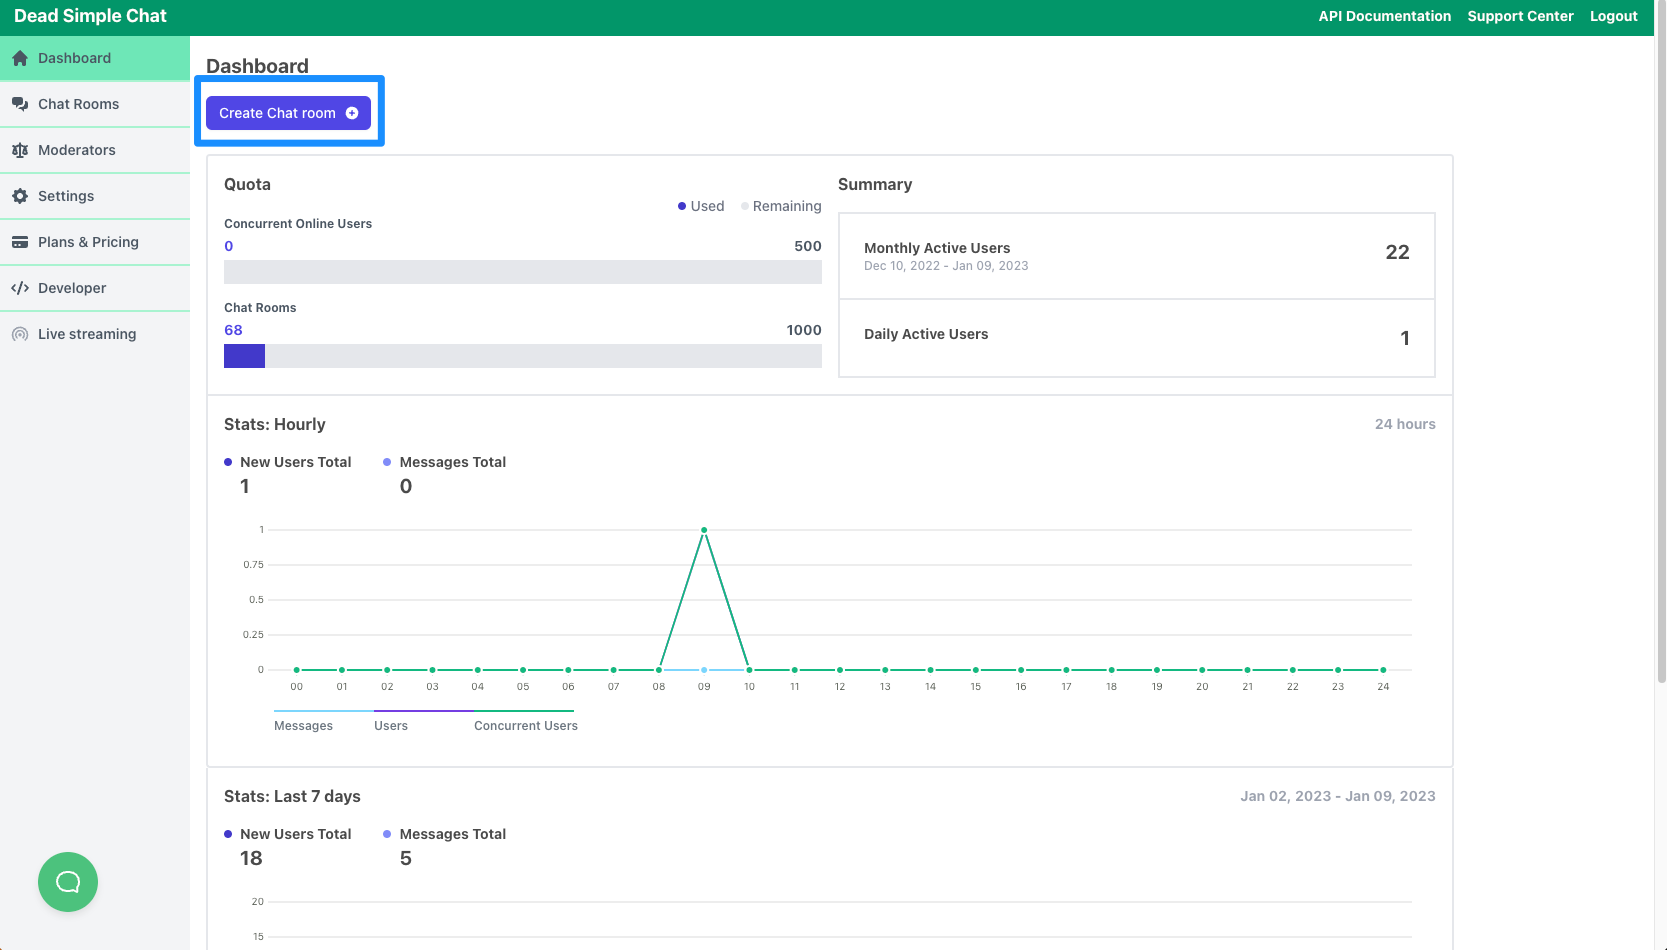
We can also dynamically create chat rooms using the Create Chat Room API.
We will name the chat room anything we like, for now, we will call it "Flutter Chat Room" and we will press the "Save" button.
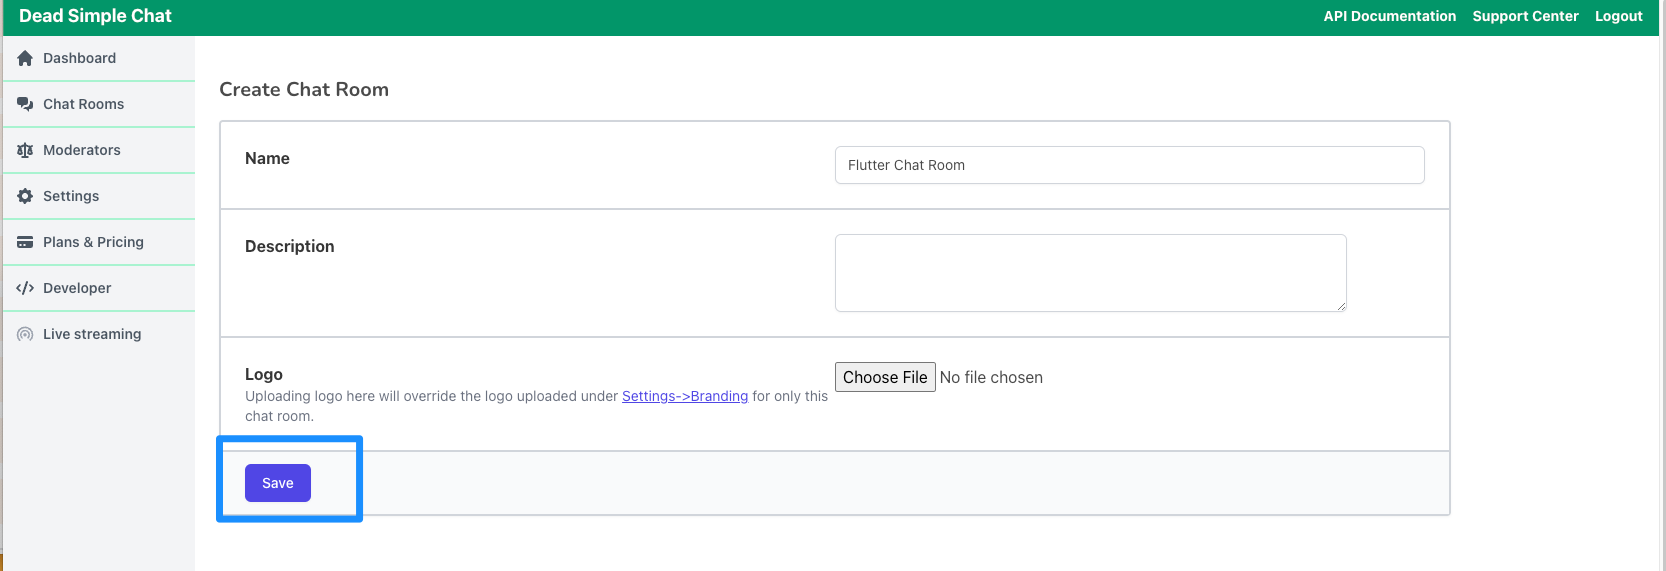
That's it! It will create a chat room for us, that we can connect to or embed in our application
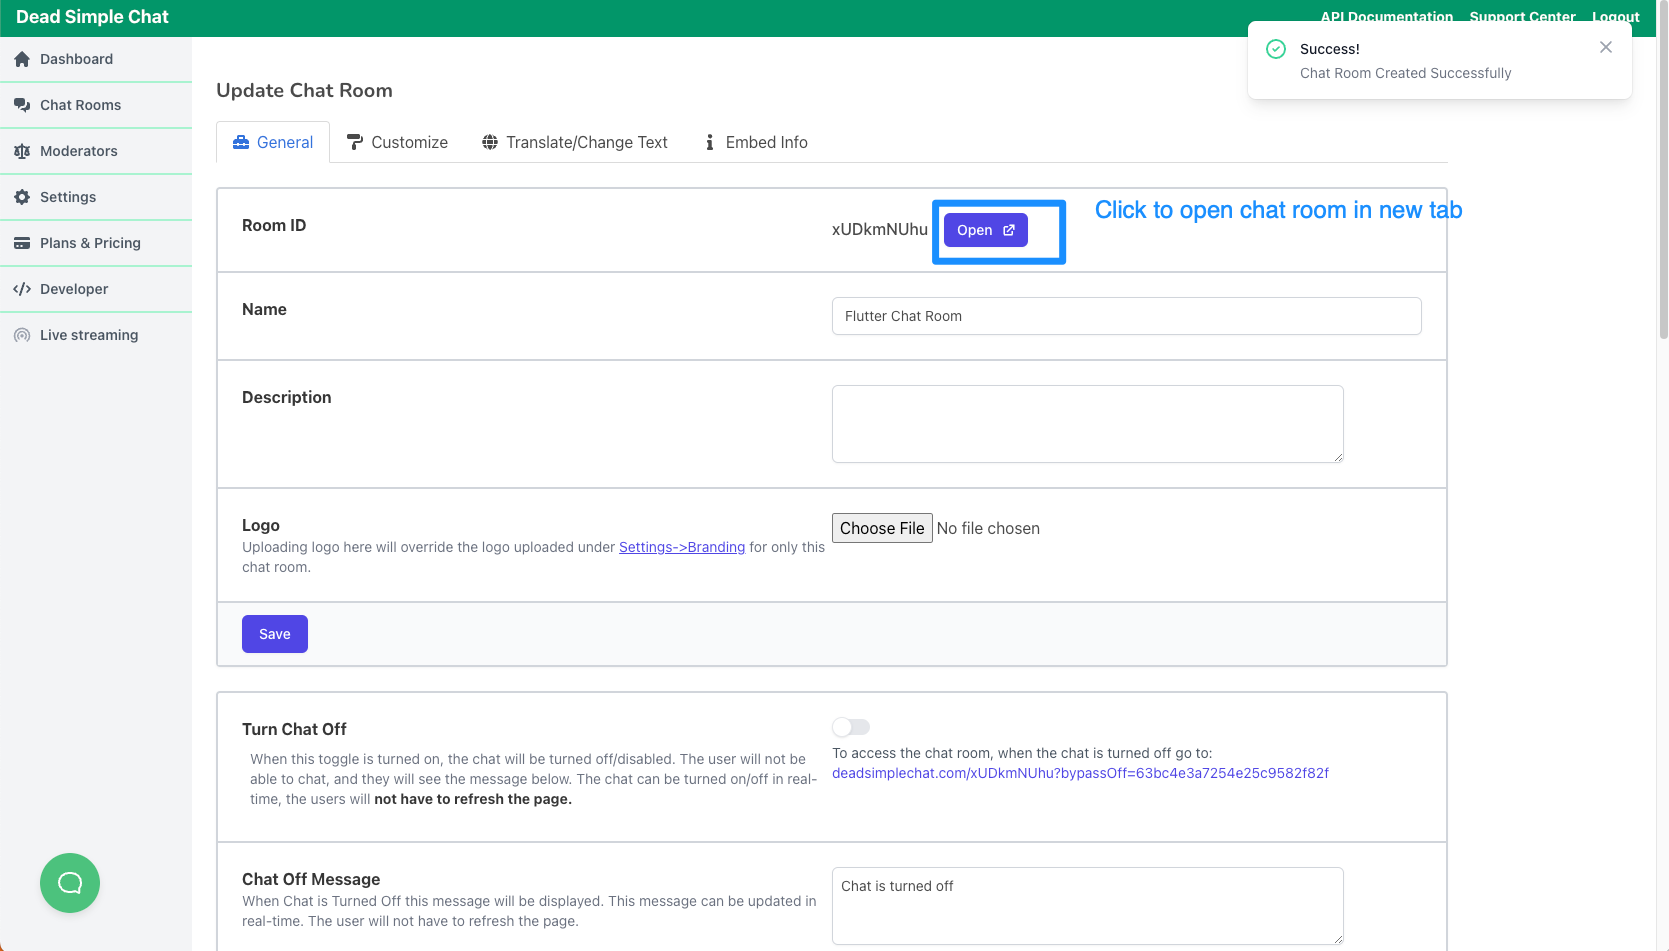
Step 3: Obtaining Chat Room URL
Once the chat room is created, Dead Simple Chat will take you to the create chat room page. From there click on the "Open" button to open the chat room in a new tab.
Copy the Chat Room URL from the browser, we will need it in our app.
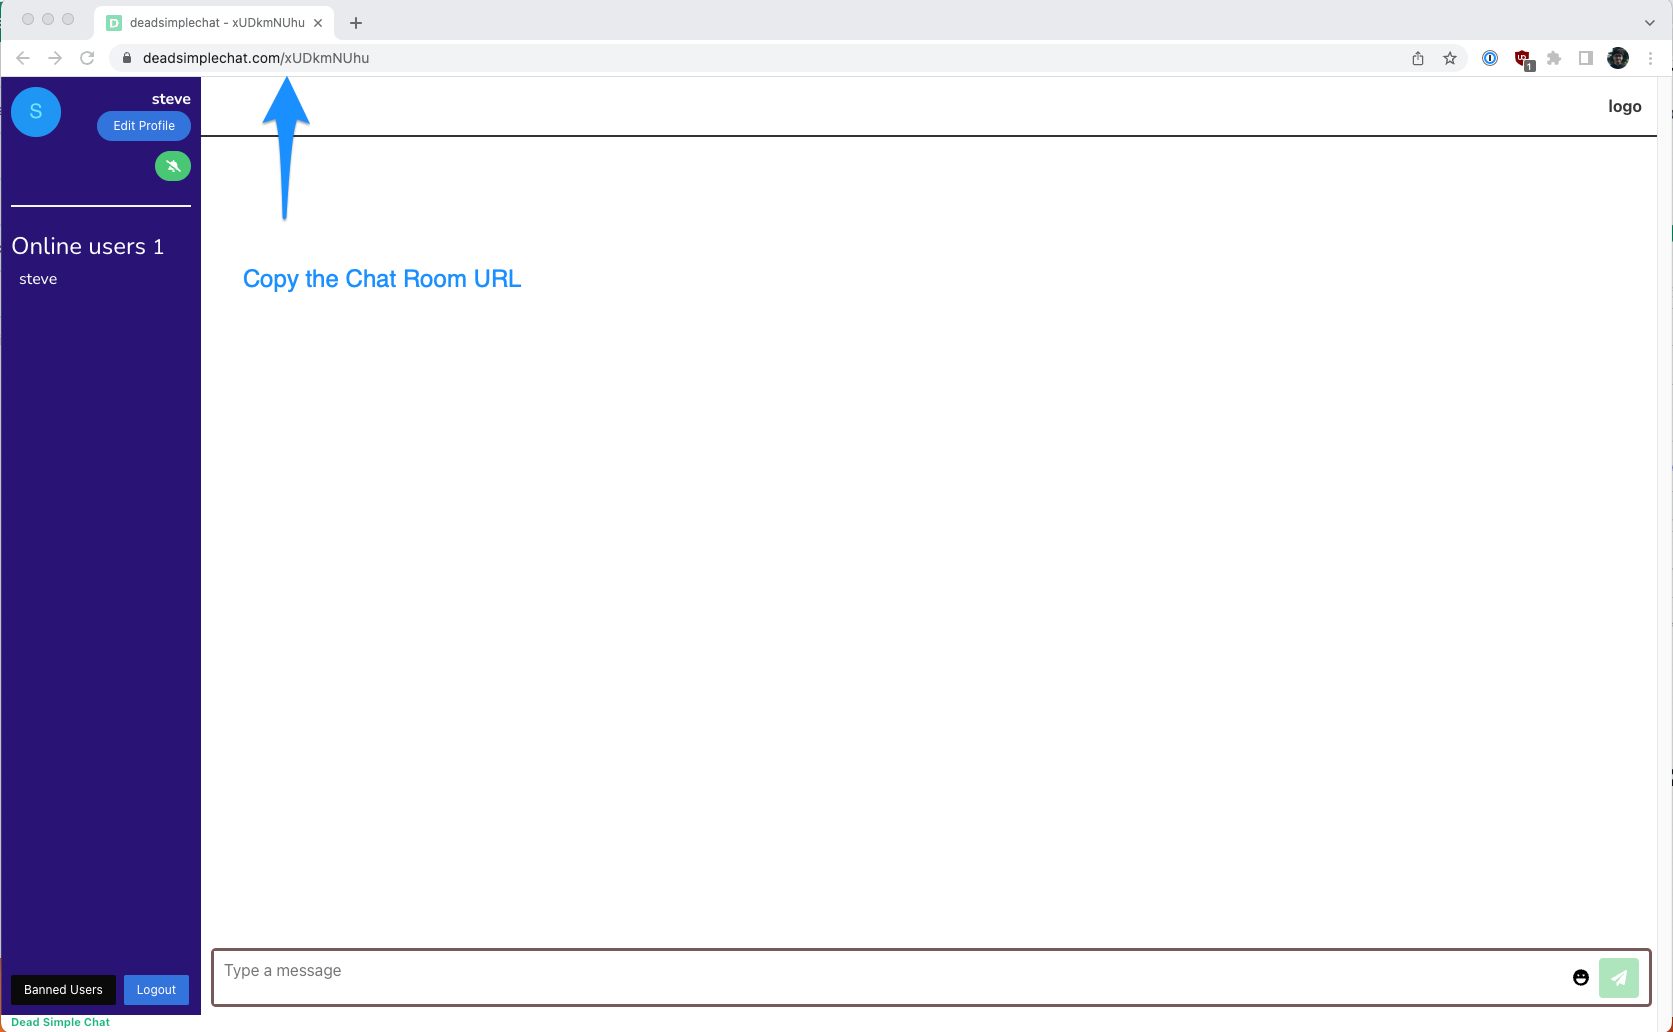
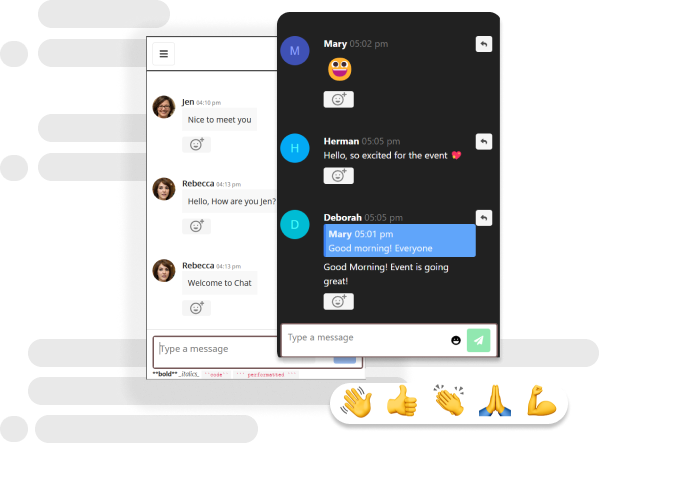
The above image is of the desktop view, Dead Simple Chat also has a mobile view, which looks like the image below. We will integrate this mobile view into our application.

Step 4: Integrating the Chat Provider
Now we will integrate the chat provider into our application. To add the Chat Provider we will use the Flutter Webview and specify the Chat Room URL into the Flutter Web View.
If you want to learn more about Flutter WebView, you can read about it here: Flutter WebView Tutorial.
To add the WebView in our flutter application we will add the package webview_flutter.
To install the package run the command:
flutter pub add webview_flutter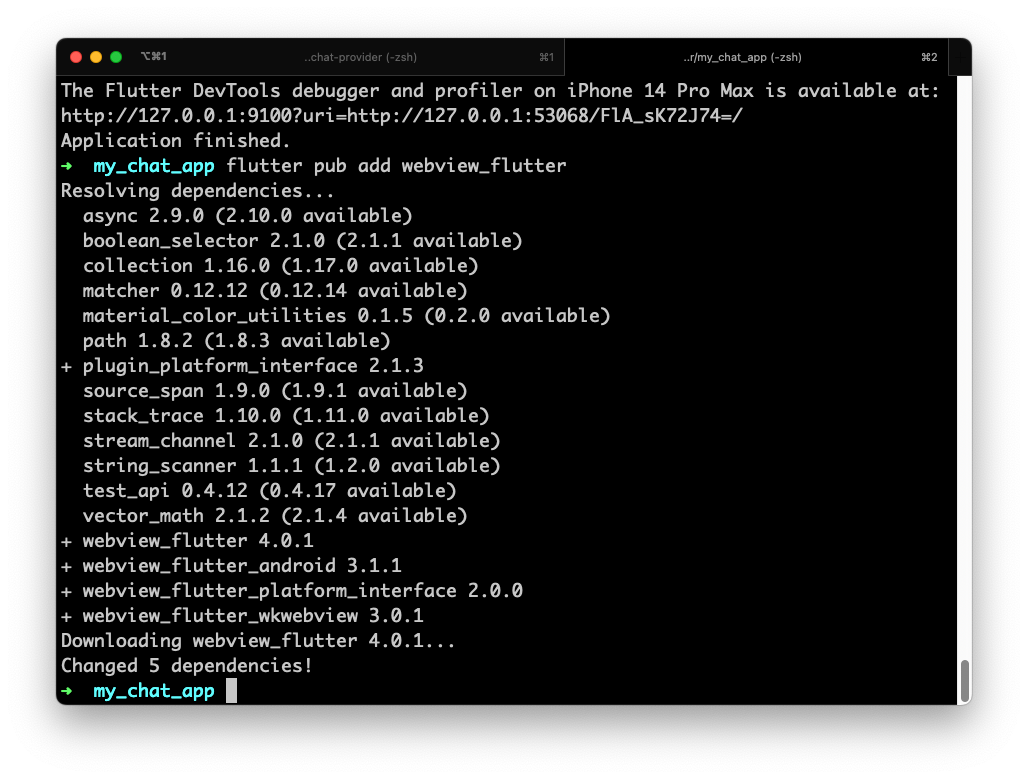
Once the package is installed you can check the pubspec.yaml file to see that the package has been added as a dependency.

Now we will edit our lib/main.dart file and add import the WebView and point it to our chat room URL that we have obtained in Step 3.
We will update the code in the file lib/main.dart replace it with the following code:
import 'package:flutter/material.dart';
import 'package:webview_flutter/webview_flutter.dart';

void main() {
  runApp(const MaterialApp(home: MyApp()));
}

class MyApp extends StatefulWidget {
  const MyApp({super.key});

  State<MyApp> createState() => _MyAppState();
}

class _MyAppState extends State<MyApp> {
  final webViewController = WebViewController()
    ..loadRequest(Uri.parse('https://deadsimplechat.com/xUDkmNUhu'));

  @override
  Widget build(BuildContext context) {
    return Scaffold(
        appBar: AppBar(
          title: const Text("Flutter WebView"),
        ),
        body: WebViewWidget(controller: webViewController));
  }
}
Let's understand the code above, we are first importing our WebView package
import 'package:webview_flutter/webview_flutter.dart';Then we are creating a WebViewController() and passing it the chat room URL that we have obtained from Step 3.
  final webViewController = WebViewController()
    ..loadRequest(Uri.parse('https://deadsimplechat.com/xUDkmNUhu'));
Step 5: That's it
We will run the command flutter run and our application will be launched in the running simulator.
In the above video, you can see the chat messages are being received in real-time.
Ready to Add Chat to Your Website?
Get started for free. No credit card required.
Start a Free Trial
![Webinar Chat: The Complete Guide to Engaging Your Audience [2026]](/blog/content/images/size/w600/2026/02/article-hero-webinar-chat.svg)
