Dead Simple Chat offers prebuilt Chat that can be added in minutes to any app or website. Can be completely customized and offers powerful Flutter Chat SDK.
If you want to display a webpage inside of your Flutter application you can follow this guide to learn how. We will have complete Flutter WebView example.
Displaying a Webpage inside of a Flutter application is incredibly useful as you can use it to display live info that updates in real-time, or you can use it to embed YouTube videos inside of your Flutter application.
It is like adding an iFrame to your flutter application and is very easy and powerful way to embed Web Content into your apps.
In this Guide we will add In-App Chat using Dead Simple Chat, inside of the flutter application to easily build a chat app with Flutter.
Prerequisite
- Have the Flutter Cli Setup: Follow theGet Started Guide
- As we will be adding a In-App Chat, using Dead Simple Chat, Signup for a free Dead Simple Chat Account
Step 1: Create a starter Flutter application
If you don't have a flutter application already created, you can use the flutter cli to scaffold a starter application.
If you don't have the Flutter Cli already setup then follow the Get Started Guide on the Flutter Website
Once you have Flutter Cli setup, come back to this guide.
To scaffold the app using the Flutter Cli run the following command:
flutter create my_iframe_appThen we will cd into the app directory and run the command to launch the application.
cd my_iframe_app
Running App on iOS Simulator
Now before we run the application, we want to make sure that the iOS Simulator is running.
To Launch the iOS Simulator launch Xcode -> Xcode Menu -> Open Developer Tool -> Simulator

Then wait for the iOS Simulator to fully launch and then run the application using the following command:
flutter run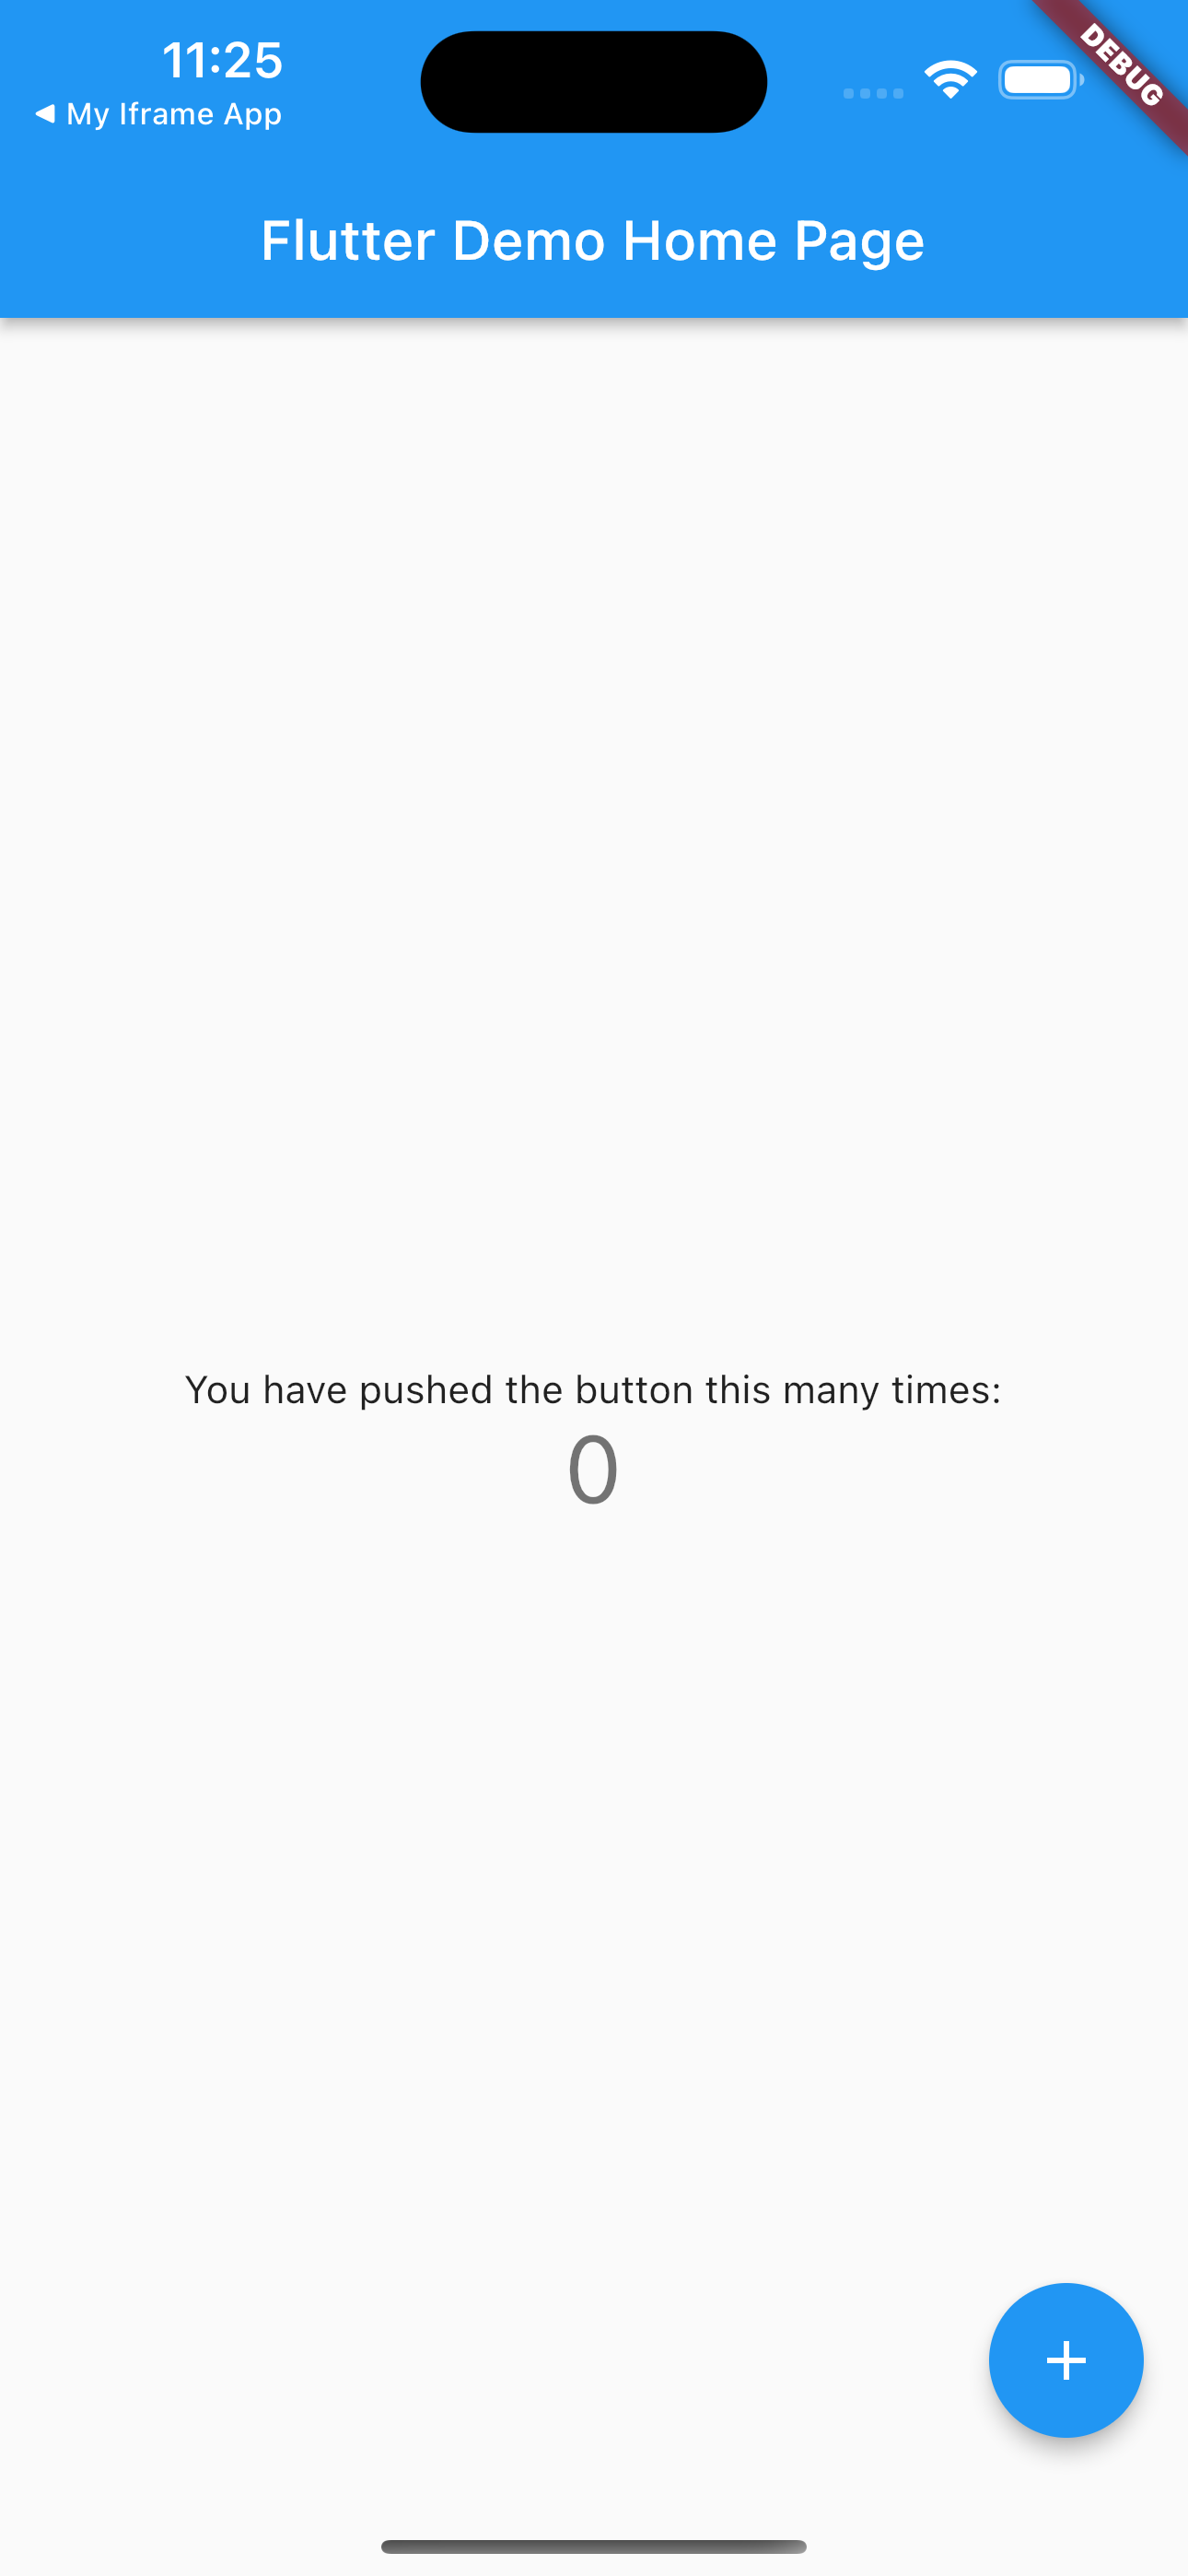
Running the App on Android Simulator
To run the app on Android Simulator, close the iOS Simulator if it is already running.
The Launch Android Studio Application, then Click on Virtual Device Manager
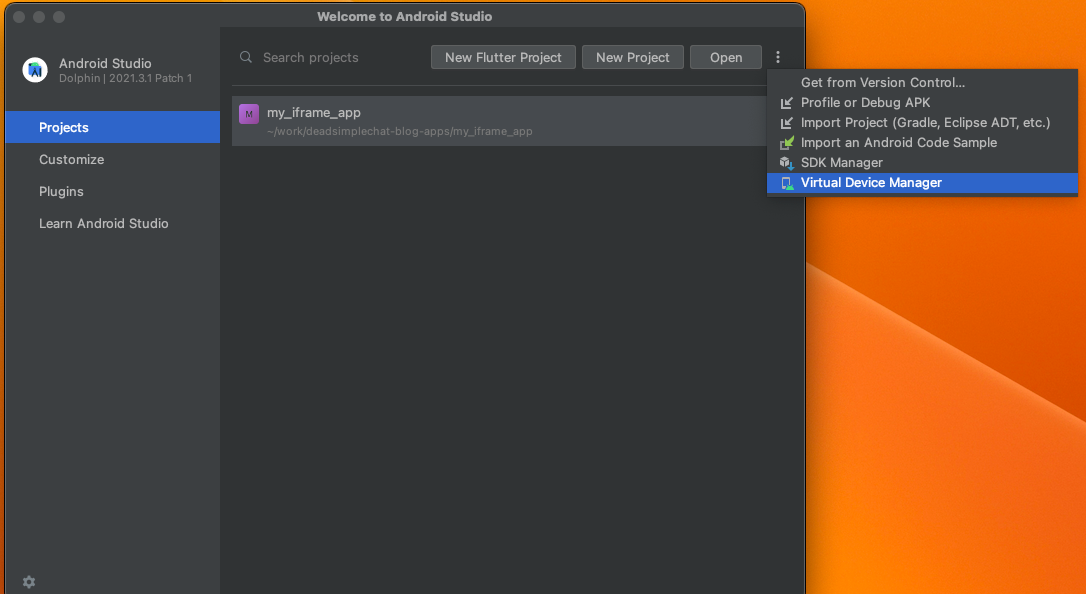
If you have already created a device, it will show in the "Device Manage" window, if you have not created a device, then you can click the "Create Device" button to easily create a Android Virtual Device.
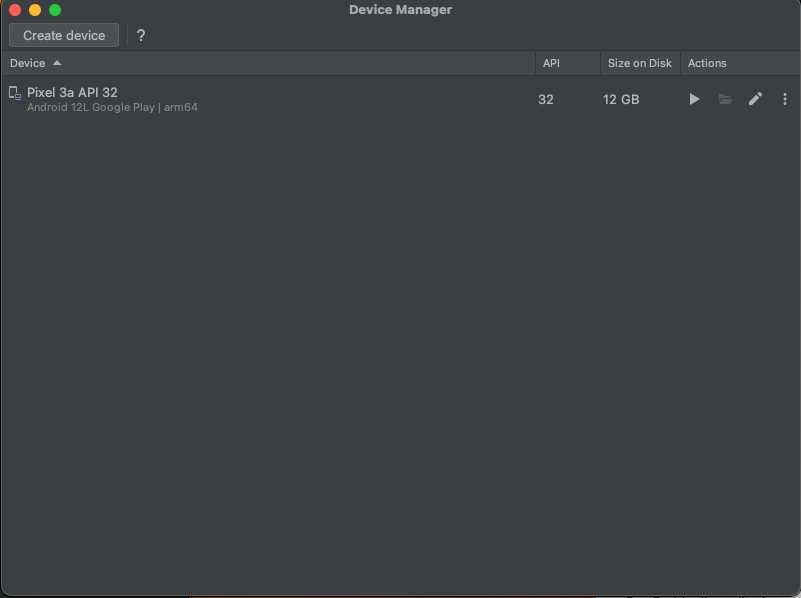
Once Done, press the "Play" icon to Launch the Emulator.
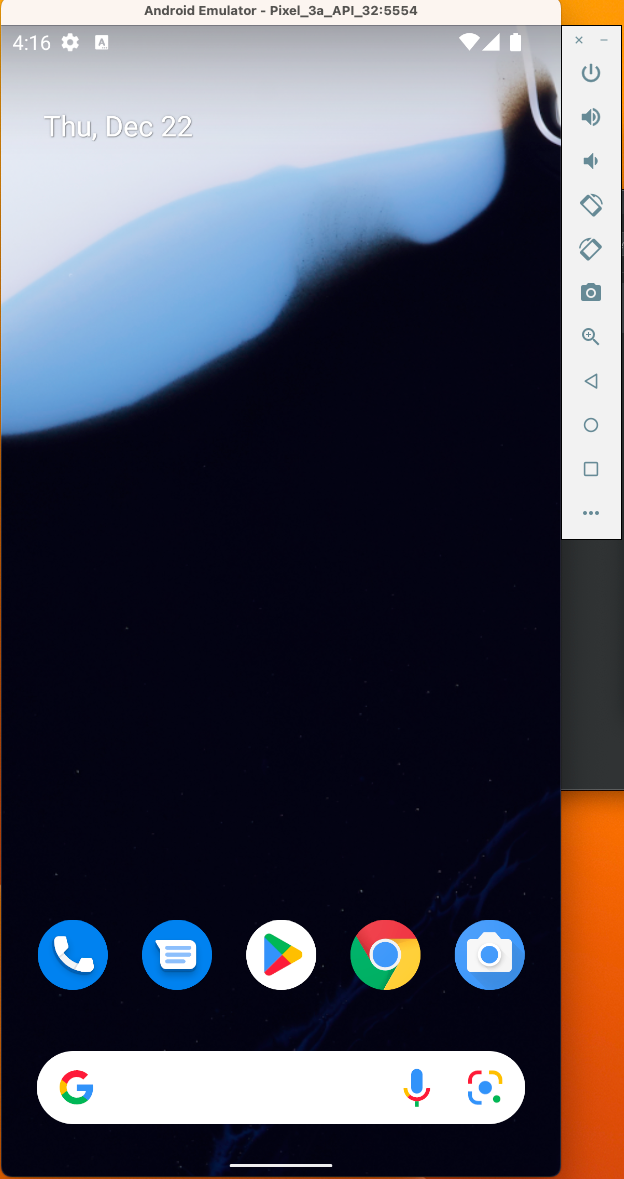
Once the Emulator is fully launched, run the command
flutter run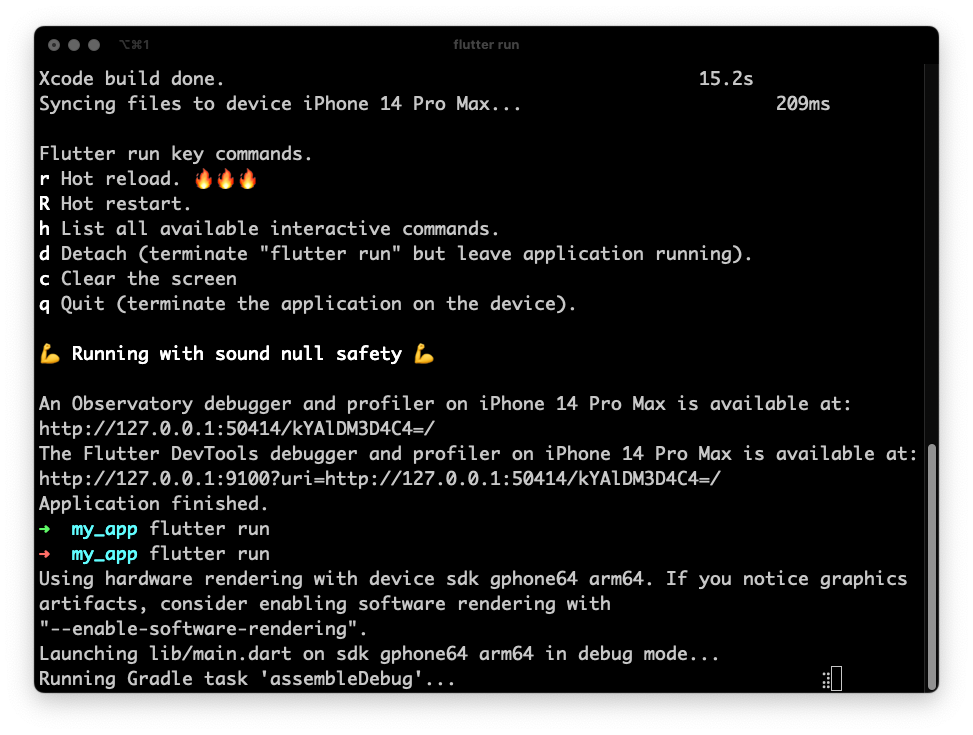
Flutter will build the app for Android and once the build is done it will launch the app in the Android Emulator.
Step 2: Installing the WebView Package
Now we have the starter app running, we will edit the application to add the WebView.
The WebView will be used to display the Webpage inside of our Flutter Application.
We will use webview_flutter package to add the WebView inside of our application.
To install the package in the terminal type the command
flutter pub add webview_flutter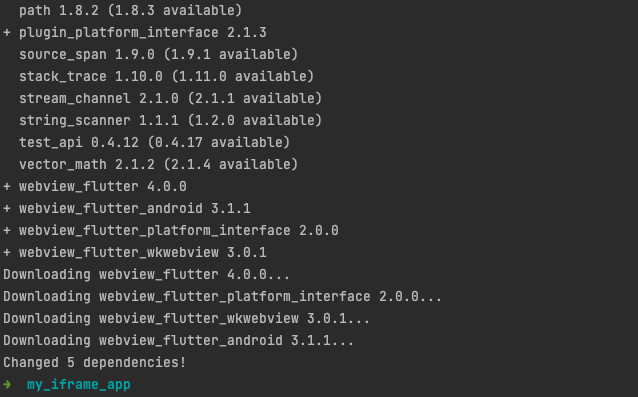
The command will run and it will install the webview_flutter dependency.
You can open the pubspec.yaml file to find the dependency have been added
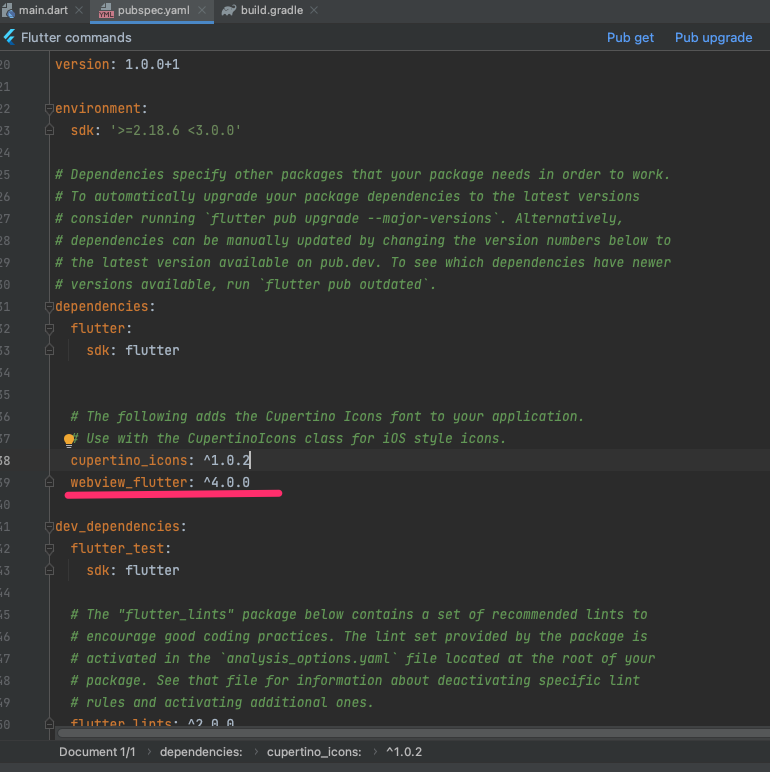
Step 3: Adding the WebView
Now once the WebView Package is installed, we are ready to add the code to display the WebView inside of our application.
Open the file lib/main.dart this file contains the following code
import 'package:flutter/material.dart';
import 'package:webview_flutter/webview_flutter.dart';

void main() {
  runApp(const MaterialApp(home: MyApp()));
}

class MyApp extends StatefulWidget {
  const MyApp({super.key});

  @override
  State<MyApp> createState() => _MyAppState();
}

class _MyAppState extends State<MyApp> {
  final webViewController = WebViewController()
    ..loadRequest(Uri.parse('https://deadsimplechat.com/IyL5YkDM3'));

  @override
  Widget build(BuildContext context) {
    return Scaffold(
        appBar: AppBar(
          title: const Text("Flutter WebView"),
        ),
        body: WebViewWidget(controller: webViewController));
  }
}
We will delete everything that inside the main.dart file and paste the above code
First we have imported the package
import 'package:webview_flutter/webview_flutter.dart';Then we create the webViewController and gave the URL that we want to display in the WebView.
final webViewController = WebViewController()
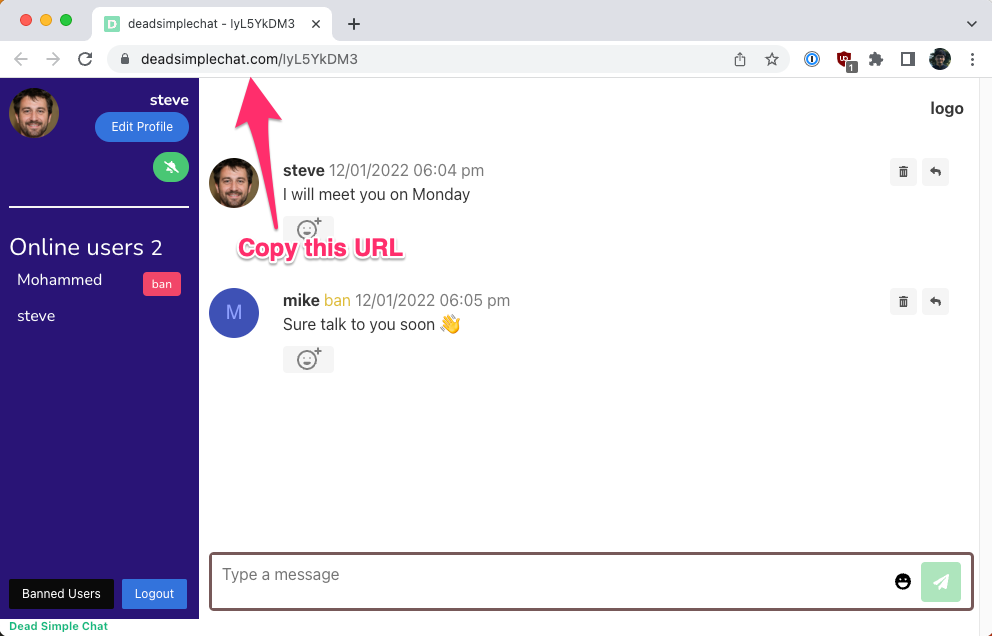
..loadRequest(Uri.parse('https://deadsimplechat.com/IyL5YkDM3'));In the above code sample we have provided the Dead Simple Chat, Chat Room URL.
To Obtain this URL, login to your Dead Simple Chat account -> Chat Rooms -> Options -> Open
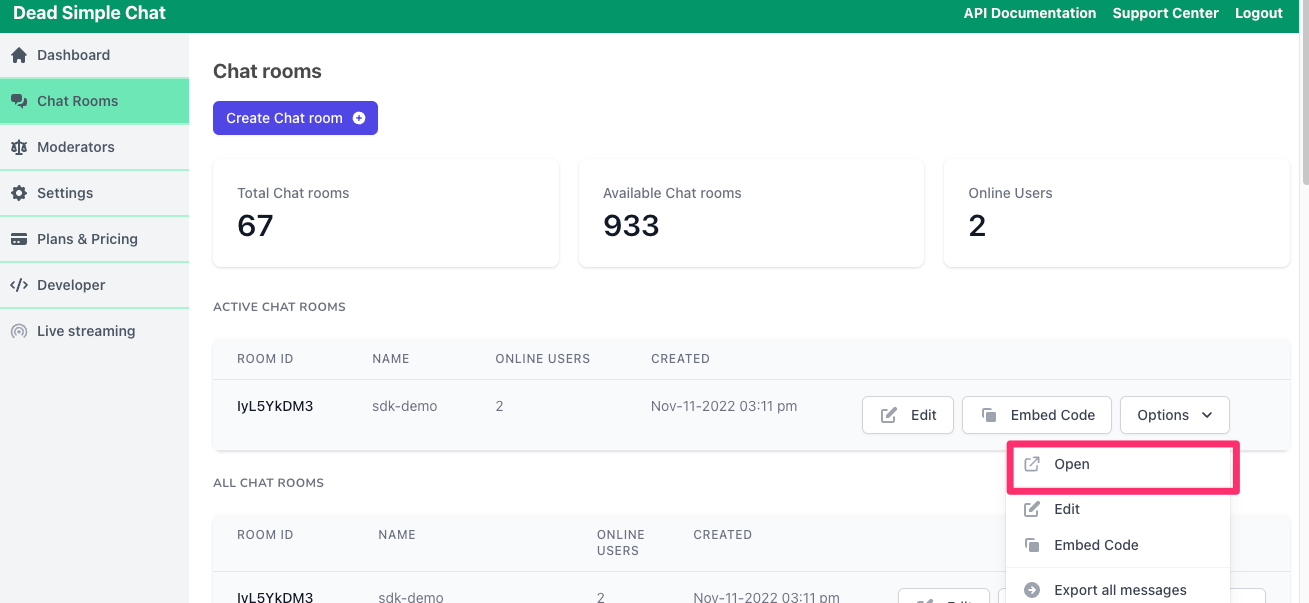
It will open the chat room in a new tab, from the new tab copy the chat room url
Now we will run the application, to run the application type the command
flutter run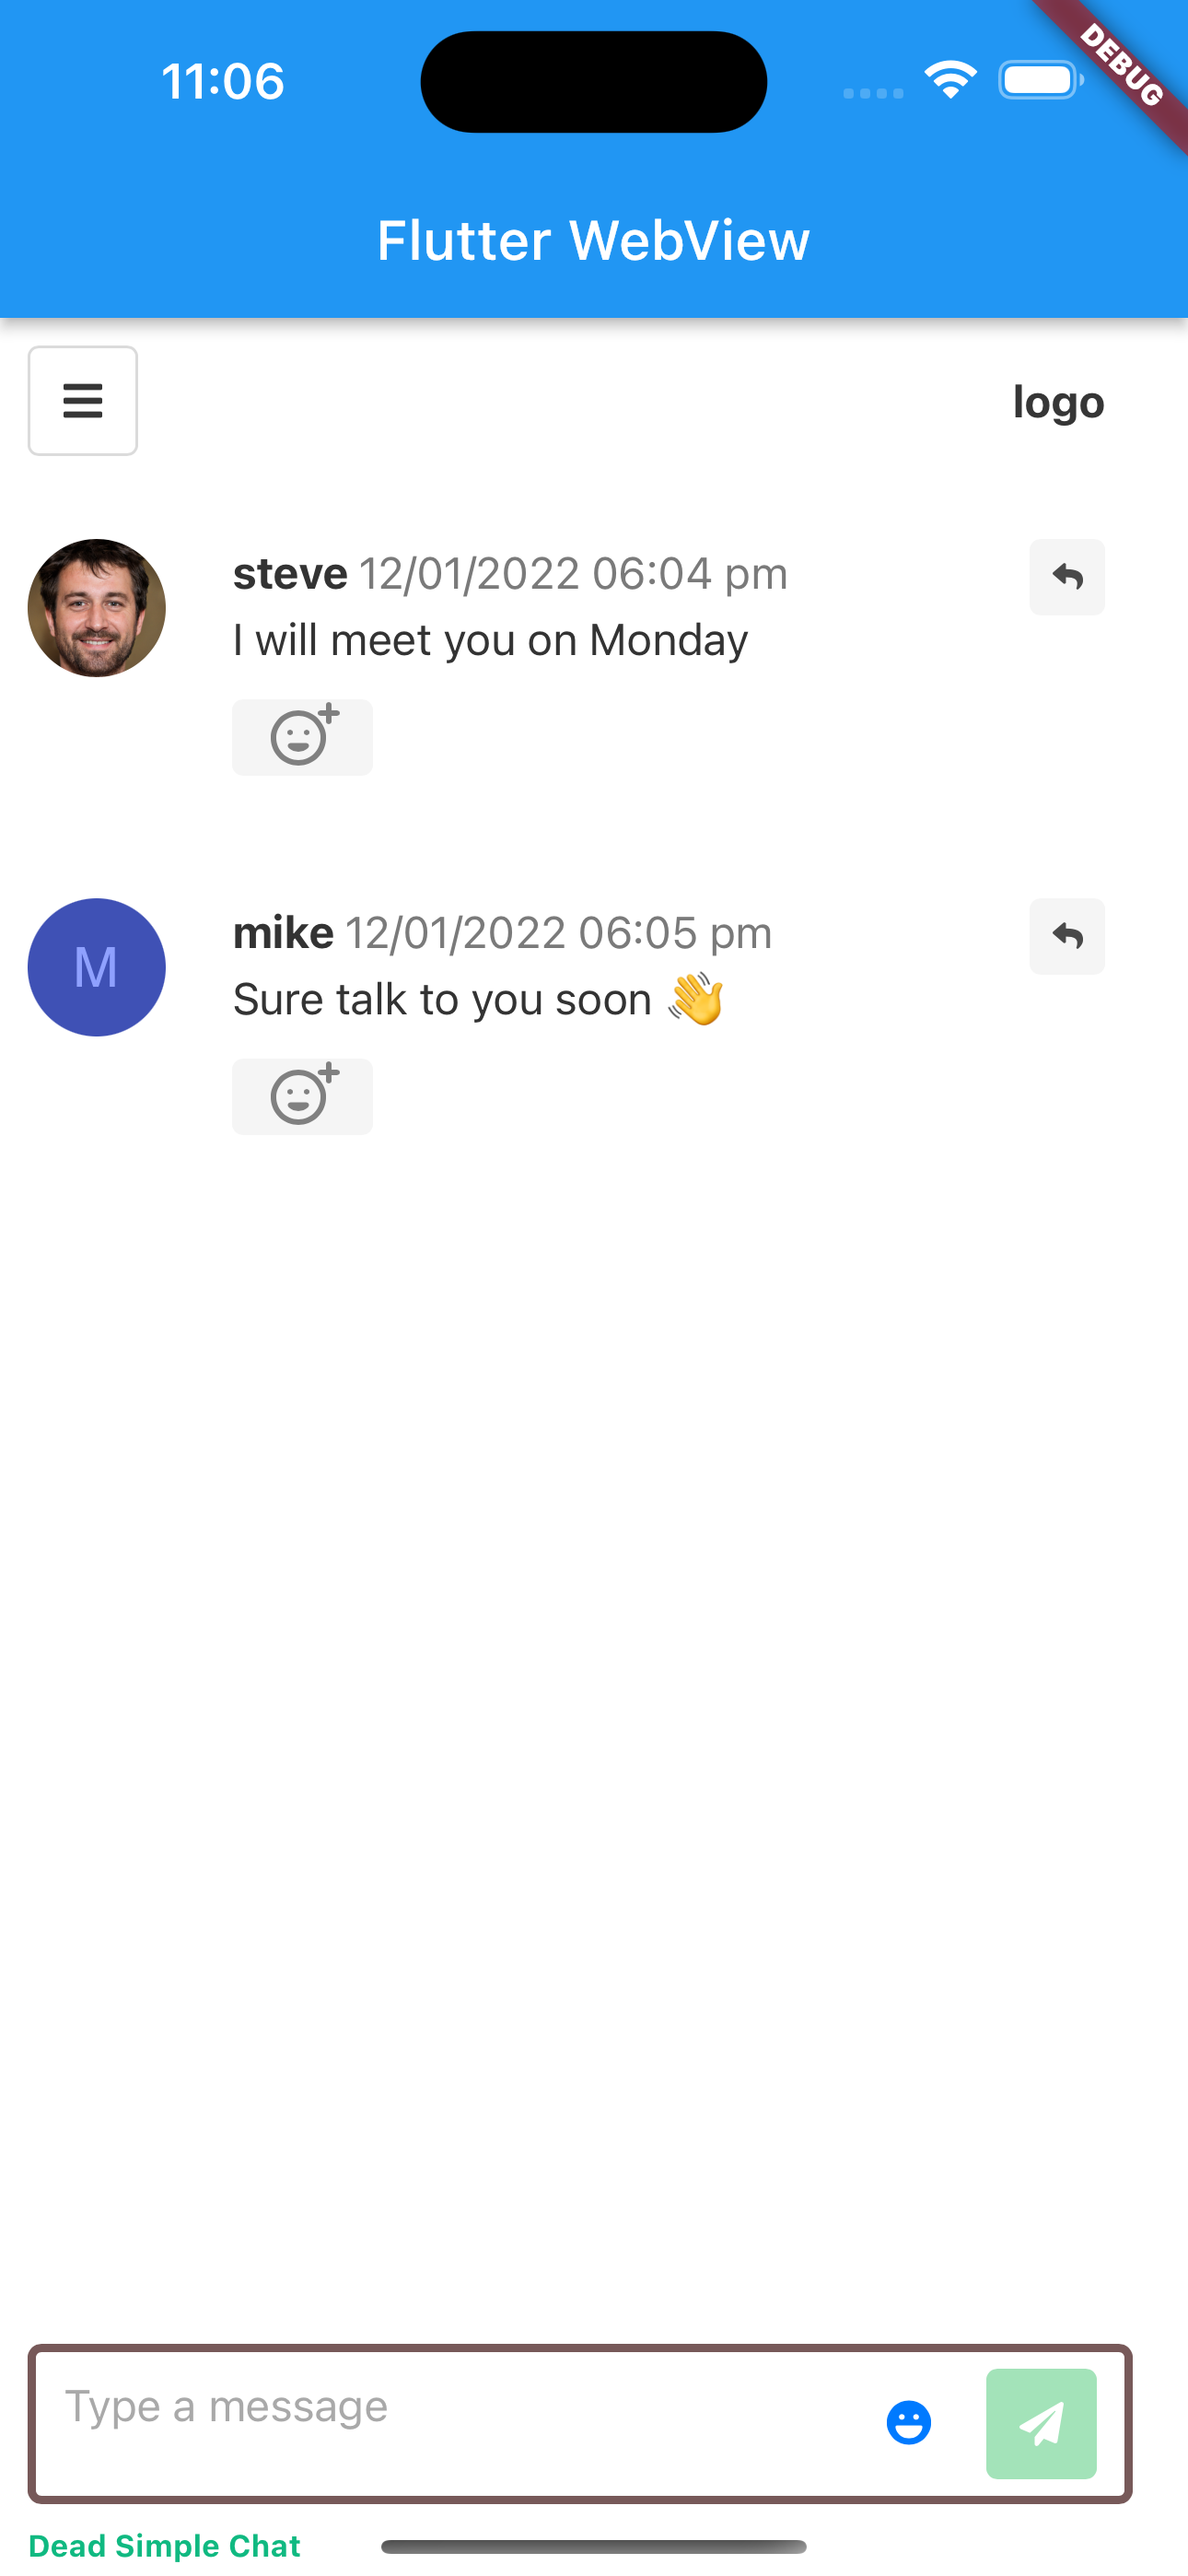
And as you can see we have added the Chat in the WebView in a Flutter Application.
Step 4: That's it!
That's how easy it is to add to display a WebPage like an iFrame inside your Flutter application.
We have used the offical Flutter WebView plugin to accomplish this. The WebView plugin automatically uses the Android WebView in case of Android applications and WKWebView in case of iOS applications.
Over the years the WebView on both Android and iOS has become very powerful, fast and responsive and works seamlessly in tandem with the Native Code, and using the WebView is powerful way to augment your applications to add dynamic Web widgets to your apps to reduce the turnaround time.
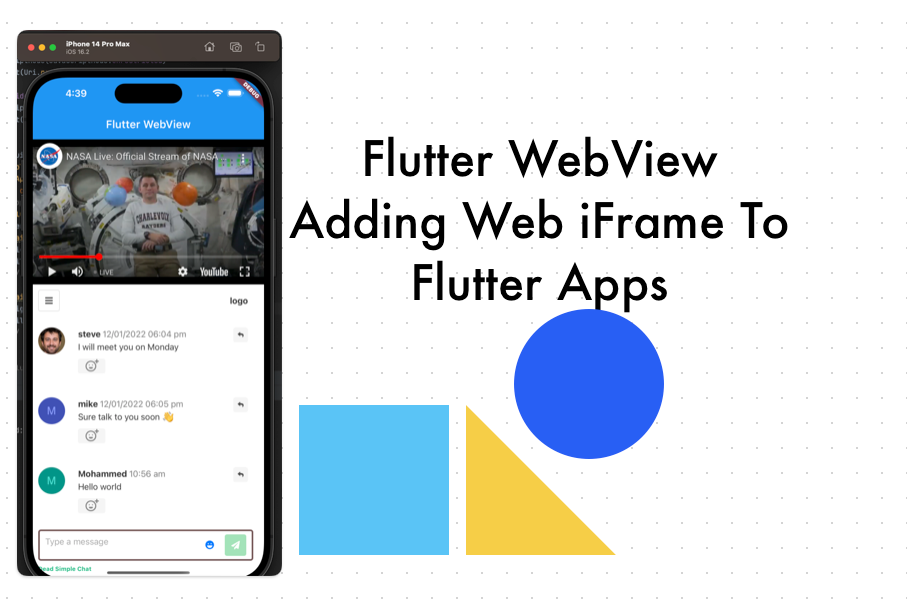
Bonus: Building a Live Stream Chat App
Embed YouTube Live + Chat Below the Live Stream
So basically we will be embedding two WebView one below the another.
In the first WebView we will show the YouTube Video and in the Second WebView we will show the Chat.
Our Final Result will look like the image below:

Here is the complete code for the above application, we will dig deeper into the code to learn how it is put together.
import 'package:flutter/material.dart';
import 'package:webview_flutter/webview_flutter.dart';

void main() {
  runApp(const MaterialApp(home: MyApp()));
}

class MyApp extends StatefulWidget {
  const MyApp({super.key});

  @override
  State<MyApp> createState() => _MyAppState();
}

class _MyAppState extends State<MyApp> {
  final chatWebViewController = WebViewController()
    ..setJavaScriptMode(JavaScriptMode.unrestricted)
    ..loadRequest(Uri.parse('https://deadsimplechat.com/IyL5YkDM3'));

  final youtubeVideoWebViewController = WebViewController()
    ..setJavaScriptMode(JavaScriptMode.unrestricted)
    ..loadRequest(Uri.parse('https://www.youtube.com/embed/nA9UZF-SZoQ'));

  @override
  Widget build(BuildContext context) {
    return Scaffold(
        appBar: AppBar(
          title: const Text("Flutter WebView"),
        ),
        body: Column(
          children: [
            Container(
              height: 270,
              child: WebViewWidget(controller: youtubeVideoWebViewController)
            ),

            Container(
              height: 540,
              child:  WebViewWidget(controller: chatWebViewController),
            )

          ],
        )

    );

  }
}
We have create two WebViewController one for the Chat and another one for YouTube.
  final chatWebViewController = WebViewController()
    ..setJavaScriptMode(JavaScriptMode.unrestricted)
    ..loadRequest(Uri.parse('https://deadsimplechat.com/IyL5YkDM3'));

  final youtubeVideoWebViewController = WebViewController()
    ..setJavaScriptMode(JavaScriptMode.unrestricted)
    ..loadRequest(Uri.parse('https://www.youtube.com/embed/nA9UZF-SZoQ'));
In the Chat WebViewController we have specified our Chat Room URL, that we have learned how to obtain from Step 3.
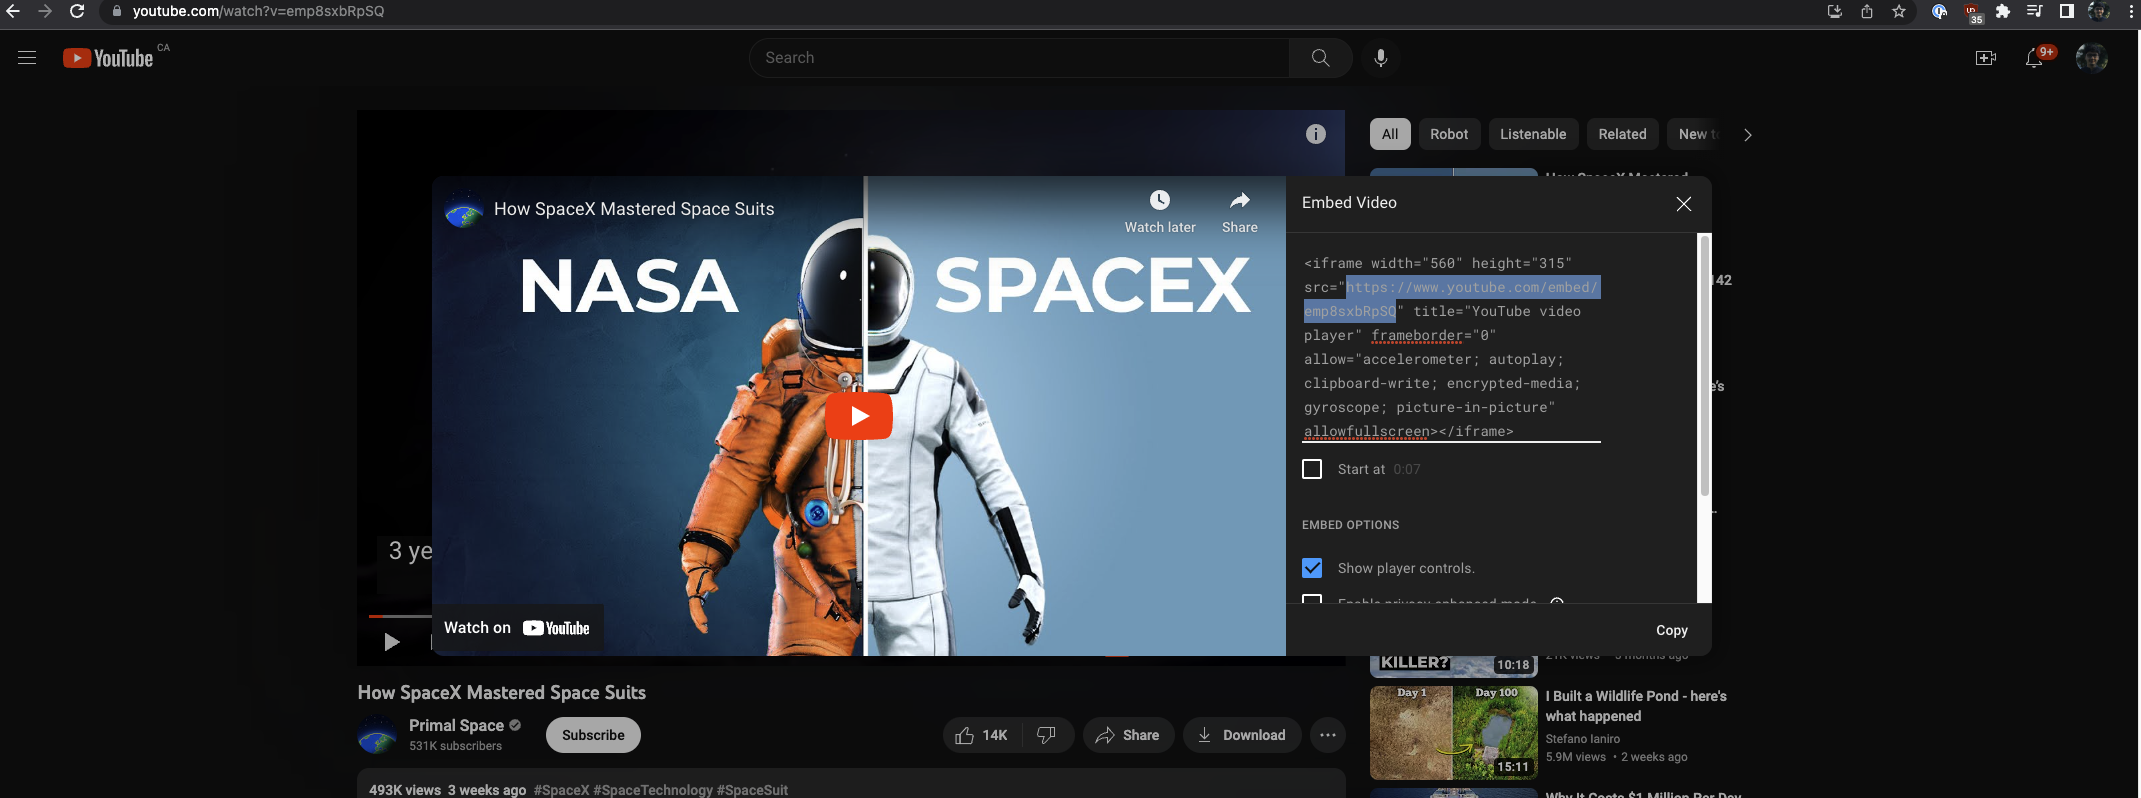
For YouTube video's WebViewController we have specified the Embed URL of the YouTube Video.
To obtain the Embed URL for your YouTube video click on Share -> Embed and the copy the url from inside the iframe tag.
Then we have updated the body parameter of of the Scaffold method
        body: Column(
          children: [
            Container(
              height: 270,
              child: WebViewWidget(controller: youtubeVideoWebViewController)
            ),

            Container(
              height: 540,
              child:  WebViewWidget(controller: chatWebViewController),
            )

          ],
        )
In the Body Parameter we are using the Column widget, using the Column widget we are dividing the app and create two columns one for the YouTube Video and another one for the Chat.
And we have Created two Container widgets to and added the WebViewControllers as child of the Container widgets.
This app manually specifies the height of the video and chat container, hence will not work very well on responsive layouts, but is good enough as a starting point.
You can learn more about Constraints from here. to build a more responive layout for the application.
Conclusion
In this blog post we have learned how to scaffold app using the Flutter Cli and also how to launch the application in Android and iOS Simulators.
We have also learned how to add a Web View into the application, and load our desired webpage into the app.
In the Bouns Content section we have gone through a simple tutorial to add two WebView's inside one application to display Chat and YouTube video one below another.
You can have your YouTube Live Stream running on top with your live chat below, the YouTube video.
Add In-App Chat to your Flutter Apps with Dead Simple Flutter Chat SDK
DeadSimpleChat is a powerful in-app chat solution for flutter applications, it allows you to easily add Chat to your new or existing Flutter Apps and has powerful feature like the the Chat SDK and Webhooks.
With Dead Simple Chat you can add Chat to any app or website in minutes, and it has powerful Chat SDK, Customization and Moderation features to make the chat fit for any chat use-case, be it Live Streaming, Group Chat or 1-1 Chat.
Ready to Add Chat to Your Website?
Get started for free. No credit card required.
Start a Free Trial
![Webinar Chat: The Complete Guide to Engaging Your Audience [2026]](/blog/content/images/size/w600/2026/02/article-hero-webinar-chat.svg)
