Set up and Installation
For start creating app we first need the Node installed on our system. You can check if node is installed and which version of node you have by
node -vYou should have node 16+ for best performance, but 14.8+ will also work with vite.
Scaffolding Your First Vite Project
To start a new project with vite type the below command on your terminal
npm create vite@latestYou can also create Vite project using yarn
yarn create viteYou can also directly speccify options like so
# npm 7+, extra double-dash is needed:
npm create vite@latest my-vue-app -- --template vue
In our case
# npm 7+, extra double-dash is needed:
npm create vite@latest my-vue-app -- --template react
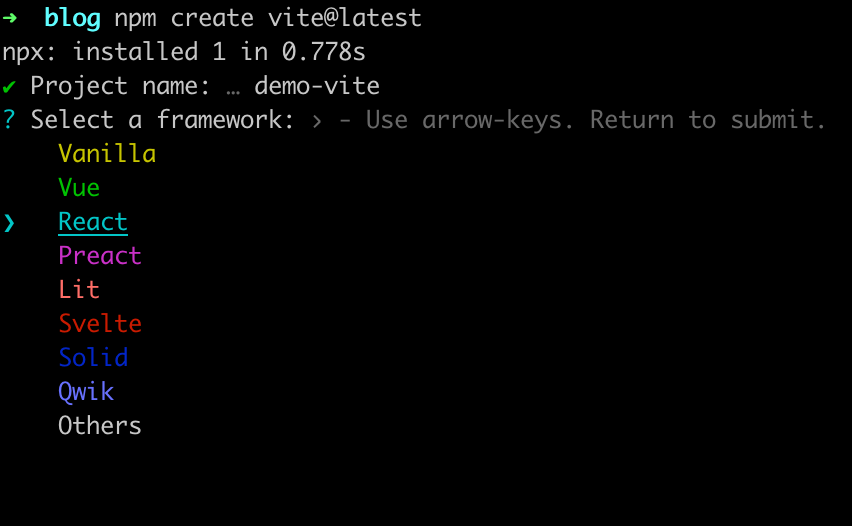
then it will ask you a list of options
- Name of the project (demo-vite)
- Which framework do you want to use (React)
- Select a language (TypeScript)
cdinto the vite project (demo-vite)- npm install
- npm run dev
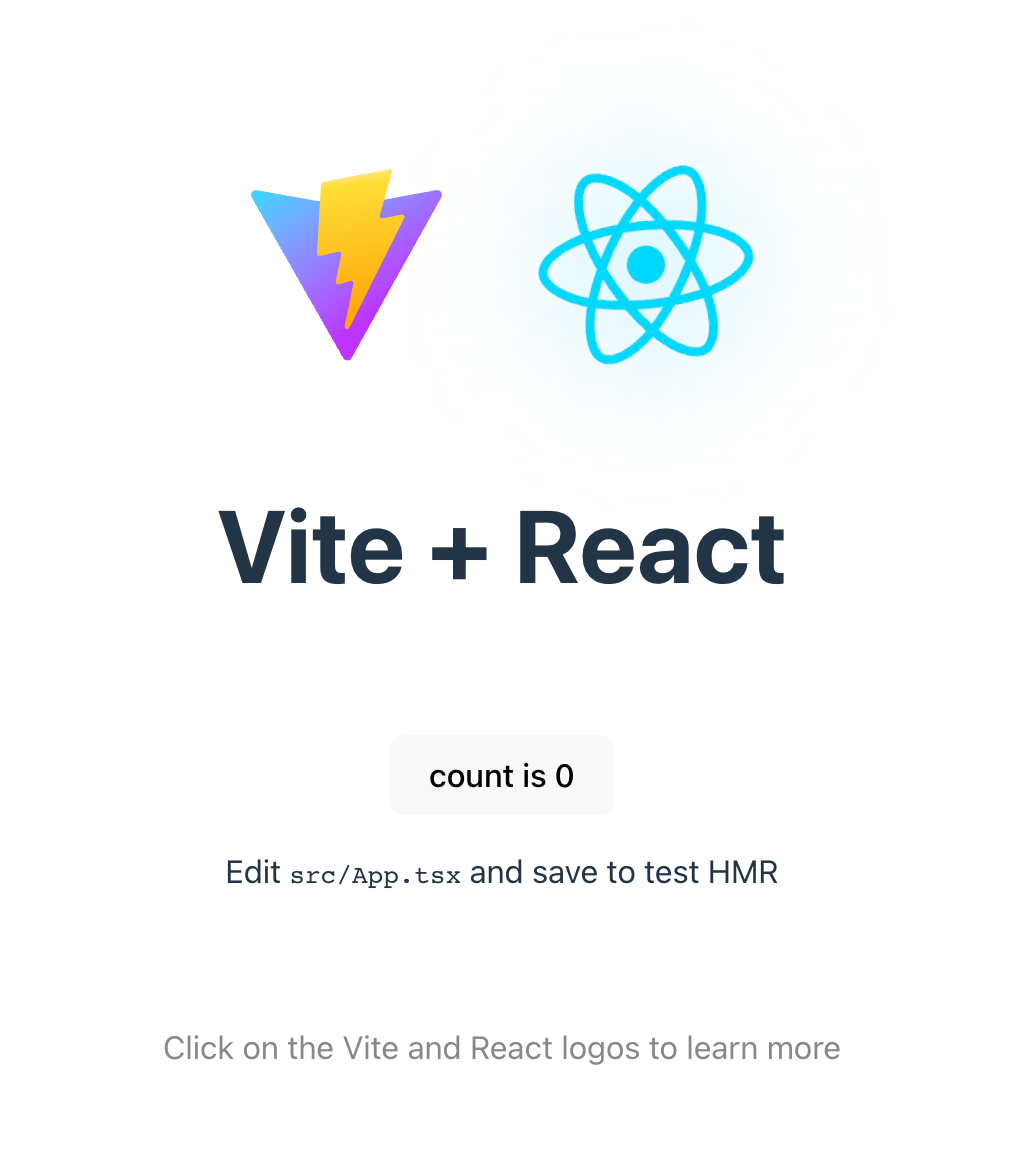
Now that we have created a project, let us explore the project's structure
React + Vite App: Project Structure
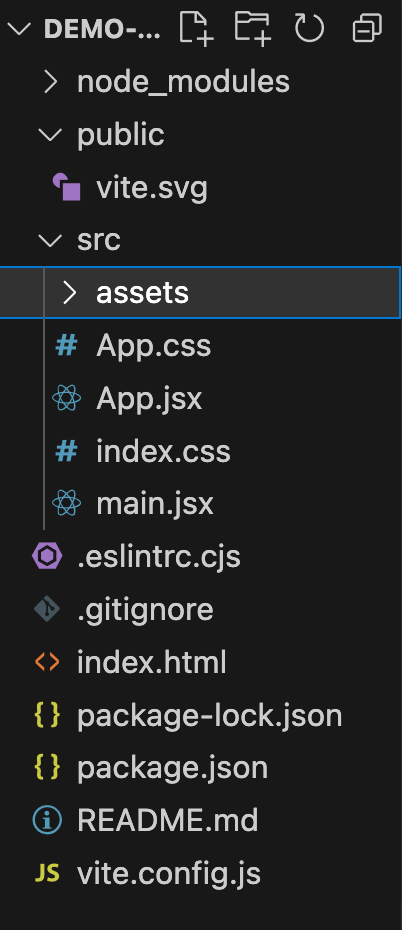
Now that we have our Vite Project up and running. Let us look at the project structure of the application
my-vite-react-app/
├── public/
│   └── index.html
├── src/
│   ├── components/
|	|__App.jsx
│   └── main.jsx
|	|_App.css
|	|_index.css
├── package.json
├── vite.config.js (optional)
└── .gitignore
public/:src/package.jsonindex.htmlsrc/main.jsx
Creating a ToDo App with React and Vite
In this section we will be building a todo application with Vite and React
In the application the users can create new tasks and mark them as complete when they are finished doing the task
If you are looking for a React Native Chat SDK to build in app chat messaging application, you can consider DeadSimpleChat React Native SDK
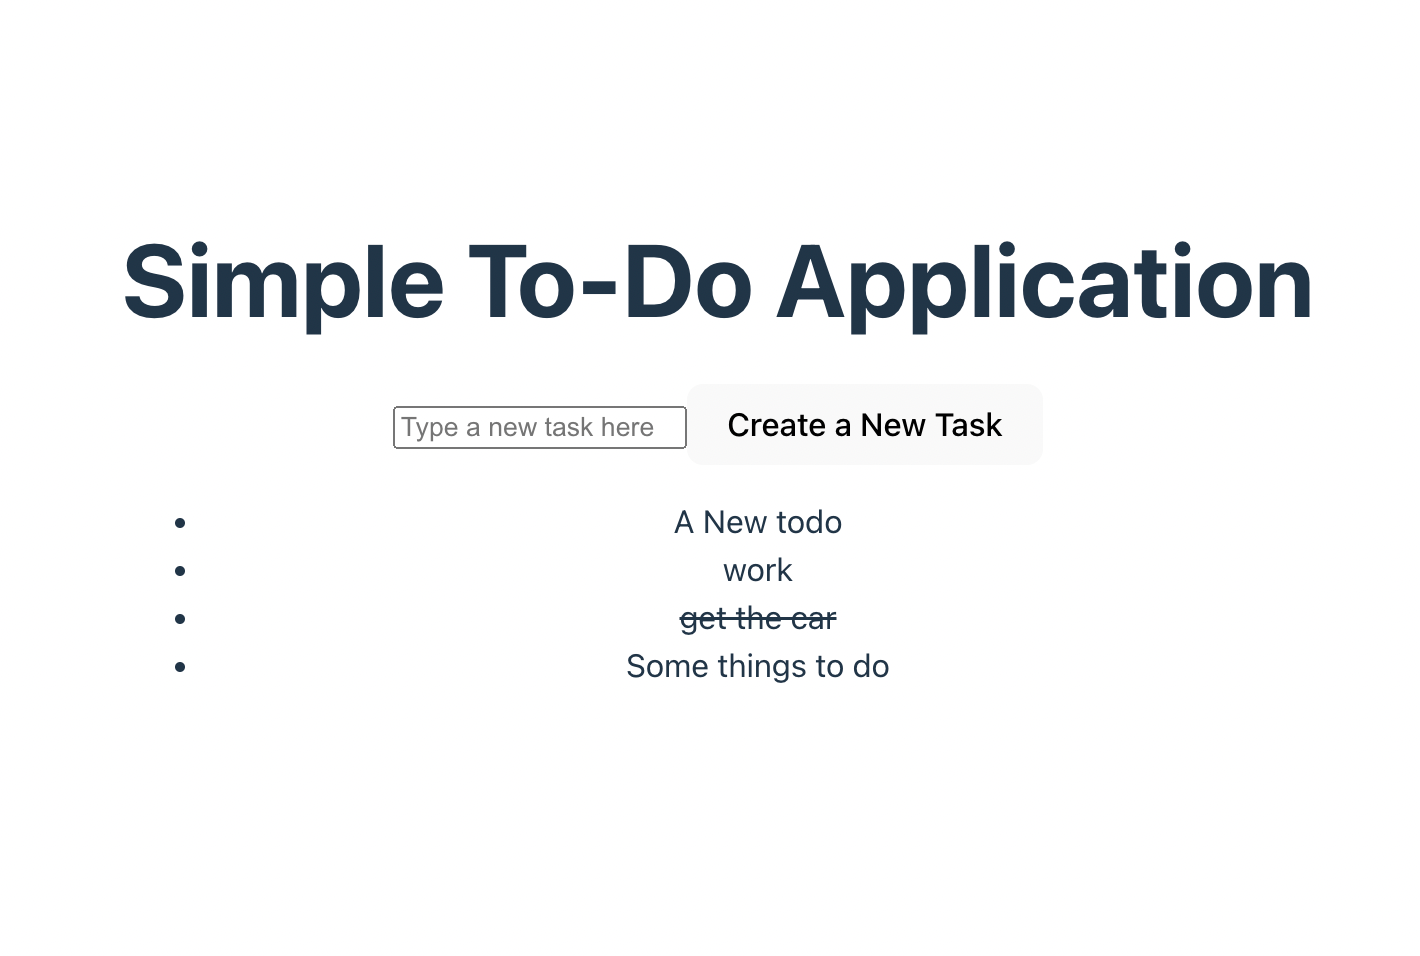
On completion the App would look like this:
What are the required Components and the Application structure
we will be need ing the following components in out todo app
- Form Component
- TodoItem
- TodoList Component

Creating the required components
Step 1: Creating the form component
Let us first create the form component using which users can create a new todo. Create a new file in the src folder and name it Form.js
// src/Form.js
import React, { useState } from 'react';

function Form({ onAddTask }) {
  const [inputValue, setInputValue] = useState('');

  const handleSubmit = (e) => {
    e.preventDefault();
    if (inputValue.trim()) {
      onAddTask(inputValue.trim());
      setInputValue('');
    }
  };

  return (
    <form onSubmit={handleSubmit}>
      <input
        type="text"
        value={inputValue}
        onChange={(e) => setInputValue(e.target.value)}
        placeholder="Enter a new task"
      />
      <button type="submit">Add Task</button>
    </form>
  );
}

export default Form;
What are we doing here:
The form component accepts the user inputs and creates a new task. It has a input field and a submit button to submit the user input. The form component functions through a combination of local state and event handling
state management : The form component stores the user input in local state. It uses the useState react hook to initialize state and store the user input in the state
const [inputValue, setInputValue] = useState('');
// WE are initializing the state here using an empty stringEvent handling We have an onChange function. When a user types a value in the input field the onChange function is called which stores the user input in the local state
onChange={(e) => setInputValue(e.target.value)}Form Submission When the submit button is clicked the handleSubmit function is called which prevents the default behaviour of the page that is to refresh
And handleSubmit also checks if the input value is empty or not. If it is empty then it does nothing. If it is not empty then it triggers onAddTask callback passing the current input value.
const handleSubmit = (e) => {
  e.preventDefault();
  if (inputValue.trim()) {
    onAddTask(inputValue.trim());
    setInputValue('');
  }
};
Creating the TodoItem Component
Next we are going to create the TodoItem Component. The TodoItem consists of a single Todo
// src/TodoItem.js
import React from 'react';

function ToDoItem({ task, onToggle }) {
  return (
    <li
      onClick={() => onToggle(task.id)}
      style={{
        textDecoration: task.completed ? 'line-through' : 'none',
      }}
    >
      {task.text}
    </li>
  );
}

export default ToDoItem;So, what are we doing in the TodoItem Component
- Task Data: This TodoItem component recieves the Task Object as a prop from its parent the TodoList Component
- Rendering the data: The TodoItem component renders the list component within the
<li>element - Based on the whether the task is completed or not it render the task with or with the
textDecorationcss style to show that the task has been completed

style={{
  textDecoration: task.completed ? 'line-through' : 'none',
}}
Handling user interaction An onClick event handler is there for each <li> elememt. Whenever someone clicks the element the event handler onToggle is called which passes the id as an argument,
The onToggle callback is implemented in the parent TodoList component and is responsable for updating the completed status of the task element that was clicked.
onClick={() => onToggle(task.id)}The TodoItem compoenent recieves task data and renders it on the page
TodoList Component
Now, we will create the TodoList component, the todoList manages tasks in the form of an array and render the TodoItem component for each task
// src/TodoList.js
import React, { useState } from 'react';
import Form from './Form';
import ToDoItem from './ToDoItem';

function ToDoList() {
  const [tasks, setTasks] = useState([]);

  const addTask = (text) => {
    const newTask = { id: Date.now(), text, completed: false };
    setTasks([...tasks, newTask]);
  };

  const toggleTask = (taskId) => {
    setTasks(
      tasks.map((task) => (task.id === taskId
        ? { ...task, completed: !task.completed }
        : task)
      )
    );
  };

  return (
    <div>
      <Form onAddTask={addTask} />
      <ul>
        {tasks.map((task) => (
          <ToDoItem key={task.id} task={task} onToggle={toggleTask} />
        ))}
      </ul>
    </div>
  );
}

export default ToDoList;
The TodoList componenet saves the tasks array locally in the state and then passes the functions to Form and TodoItem components to handle the ability to add tasks and to toggle the completed and uncompleted tasks
here is how the TodoList component works
state Management: The component stores the list of tasks in the state. All the tasks are stored in the tasks array.
const [tasks, setTasks] = useState([]);
2. How new tasks are added : We have a addTask function which when called creates a new task with a unique ID, input text, and initial status of completed boolean set to false
const addTask = (text) => {
  const newTask = { id: Date.now(), text, completed: false };
  setTasks([...tasks, newTask]);
};3. Changing task status from completed to uncompleted and back: We have a function toggleTask that is responsable for updating the task status to completed true or false
4. Rendering component on page: The todoList component renders the Form and the TodoItem Component on the screen
App Component
In the app component import the todolist component and that it you have your simple todo App running
// src/App.jsx
import React from 'react';
import ToDoList from './components/ToDoList';

function App() {
  return (
    <div>
      <h1>Simple To-Do Application</h1>
      <ToDoList />
    </div>
  );
}

export default App;
You might be interested in some of our other articles
- React State Management: A Guide 2023
- Links in Next Js: A Detailed Guide
- Bootstrap with React: The Complete Guide
- React useRef: A complete guide with examples
Conclusion
In this article we learnt how to create a todo app with React and Vite. Vite is an great build tool using which you can create different types of apps
I hope you liked the article. Thank you for reading
Here is the complete code:
Form.jsx
// src/components/Form.js
import React, { useState } from 'react';

function Form({ onAddTask }) {
  const [inputValue, setInputValue] = useState('');

  const handleSubmit = (e) => {
    e.preventDefault();
    if (inputValue.trim()) {
      onAddTask(inputValue.trim());
      setInputValue('');
    }
  };

  return (
    <form onSubmit={handleSubmit}>
      <input
        type="text"
        value={inputValue}
        onChange={(e) => setInputValue(e.target.value)}
        placeholder="Type a new task here"
      />
      <button type="submit">Create a New Task</button>
    </form>
  );
}

export default Form;TodoItem.jsx
// src/TodoItem.jsx
import React from 'react';

function ToDoItem({ task, onToggle }) {
  return (
    <li
      onClick={() => onToggle(task.id)}
      style={{
        textDecoration: task.completed ? 'line-through' : 'none',
      }}
    >
      {task.text}
    </li>
  );
}

export default ToDoItem;TodoList.jsx
// src/TodoList.js
import React, { useState } from 'react';
import Form from './Form';
import ToDoItem from './TodoItem';

function ToDoList() {
  const [tasks, setTasks] = useState([]);

  const addTask = (text) => {
    const newTask = { id: Date.now(), text, completed: false };
    setTasks([...tasks, newTask]);
  };

  const toggleTask = (taskId) => {
    setTasks(
      tasks.map((task) => (task.id === taskId
        ? { ...task, completed: !task.completed }
        : task)
      )
    );
  };

  return (
    <div>
      <Form onAddTask={addTask} />
      <ul>
        {tasks.map((task) => (
          <ToDoItem key={task.id} task={task} onToggle={toggleTask} />
        ))}
      </ul>
    </div>
  );
}

export default ToDoList;App.jsx
// src/App.jsx
import React from 'react';
import ToDoList from './TodoList';
import './App.css';

function App() {
  return (
    <div>
      <h1>Simple To-Do Application</h1>
      <ToDoList />
    </div>
  );
}

export default App;App.css
/* src/App.css */
.app-container {
  display: flex;
  flex-direction: column;
  align-items: center;
  min-height: 100vh;
  font-family: 'Arial', sans-serif;
}

h1 {
  margin-top: 2rem;
  margin-bottom: 1.5rem;
}vite.config.js
import { defineConfig } from 'vite'
import react from '@vitejs/plugin-react'

// https://vitejs.dev/config/
export default defineConfig({
  plugins: [react()],
})
package.json
{
  "name": "demo-vite",
  "private": true,
  "version": "0.0.0",
  "type": "module",
  "scripts": {
    "dev": "vite",
    "build": "vite build",
    "lint": "eslint . --ext js,jsx --report-unused-disable-directives --max-warnings 0",
    "preview": "vite preview"
  },
  "dependencies": {
    "react": "^18.2.0",
    "react-dom": "^18.2.0"
  },
  "devDependencies": {
    "@types/react": "^18.2.15",
    "@types/react-dom": "^18.2.7",
    "@vitejs/plugin-react": "^4.0.3",
    "eslint": "^8.45.0",
    "eslint-plugin-react": "^7.32.2",
    "eslint-plugin-react-hooks": "^4.6.0",
    "eslint-plugin-react-refresh": "^0.4.3",
    "vite": "^4.4.5"
  }
}
main.jsx
import React from 'react'
import ReactDOM from 'react-dom/client'
import App from './App.jsx'
import './index.css'

ReactDOM.createRoot(document.getElementById('root')).render(
  <React.StrictMode>
    <App />
  </React.StrictMode>,
)
