How to Create your First Bot
Introduction
In this guide we will create our very first bot in DeadSimpleChat. When this bot is mentioned it will reply the user with a dad joke.
Prerequisites
- DeadSimpleChat Account, if you don't already have it signup for a free plan
- Basic Knowledge of JavaScript for Cloudflare worker
- A Cloudflare account, you can signup for a free account.
How our bot will work
Our bot will work in the following manner:
- We will setup the bot so that it get triggered when it is mentioned in the chat
- Bot requires a Webhook URL, when the bot is triggered a request is sent to the WebhookURL
- We will setup our backend on Cloudflare worker, and set the bot's webhook URL to our Cloudflare worker.
- In the Cloudflare worker when webhook is received will call the
icanhazdadjokeAPI to fetch a Dad Joke. - Then we will use the BOT API to reply to message sent by the user.
Step 1: Creating your Bot
Accessing the Bot Creating Page
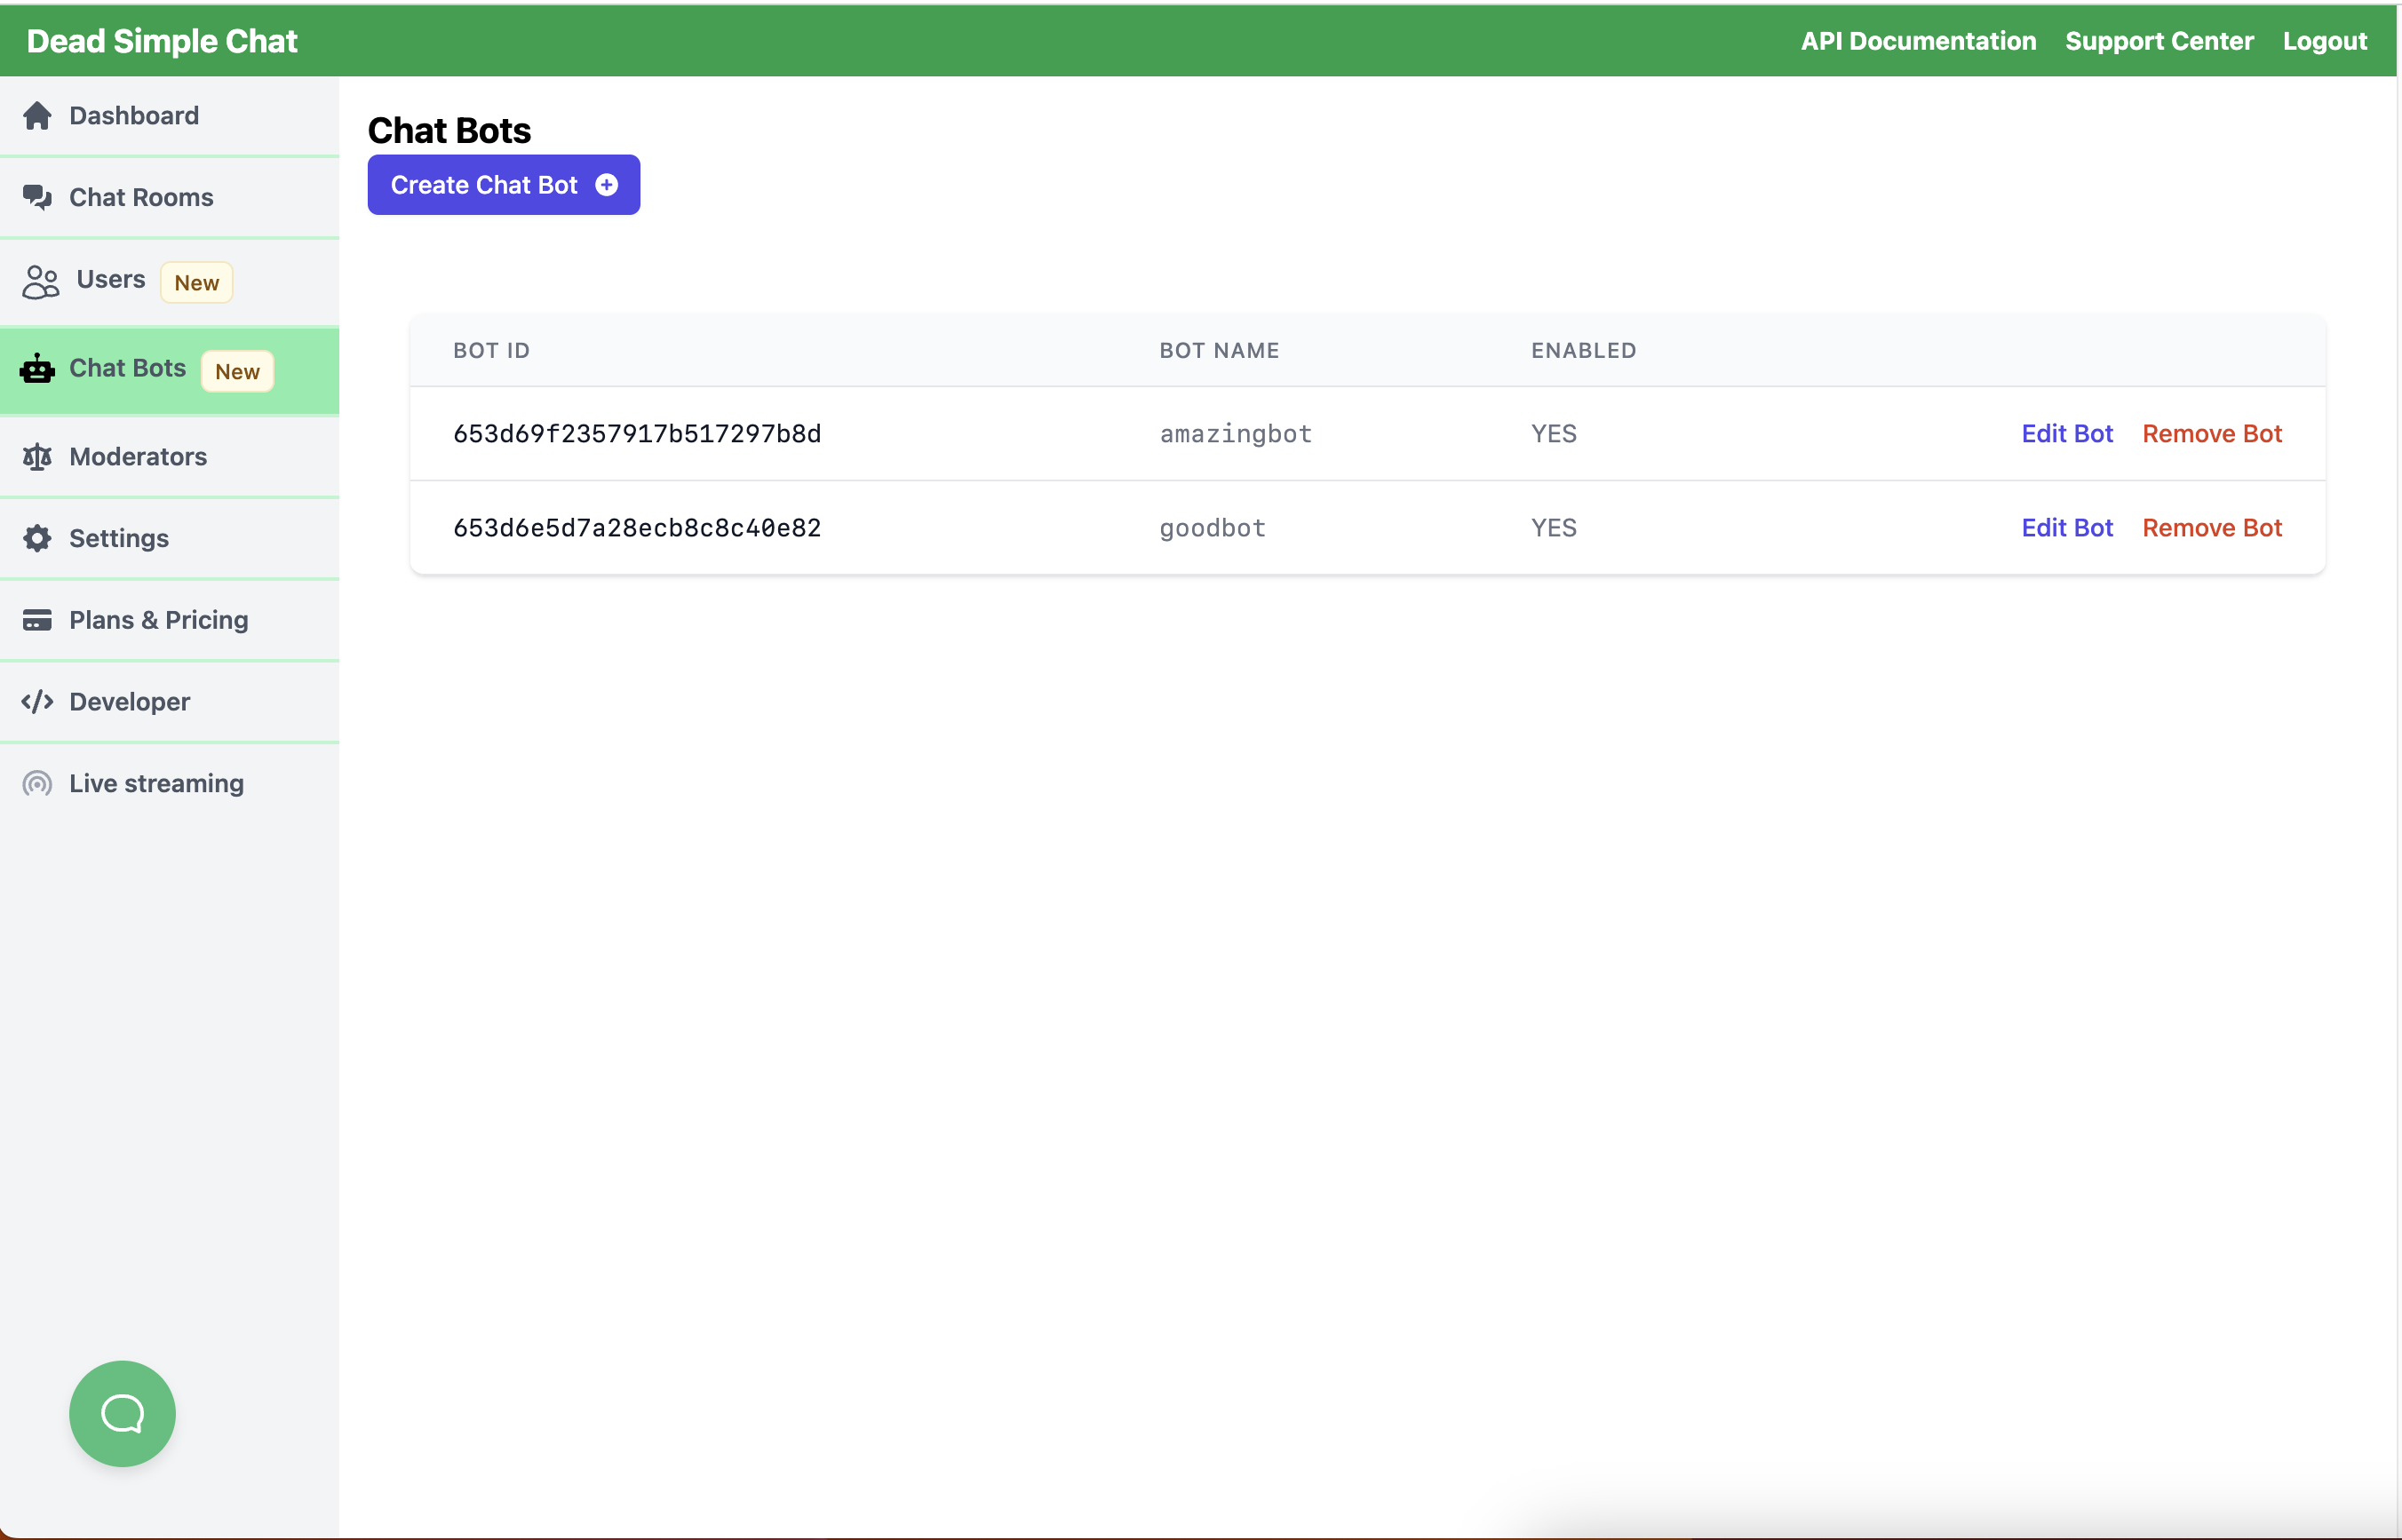
To create the bot go DeadSimpleChat dashboard -> Chat Bots.
Then Click on the "Create Chat Bot" button
It will take you to the "Create Chat Bot" page, we will go through all the options on the "Create Chat Bot" page.
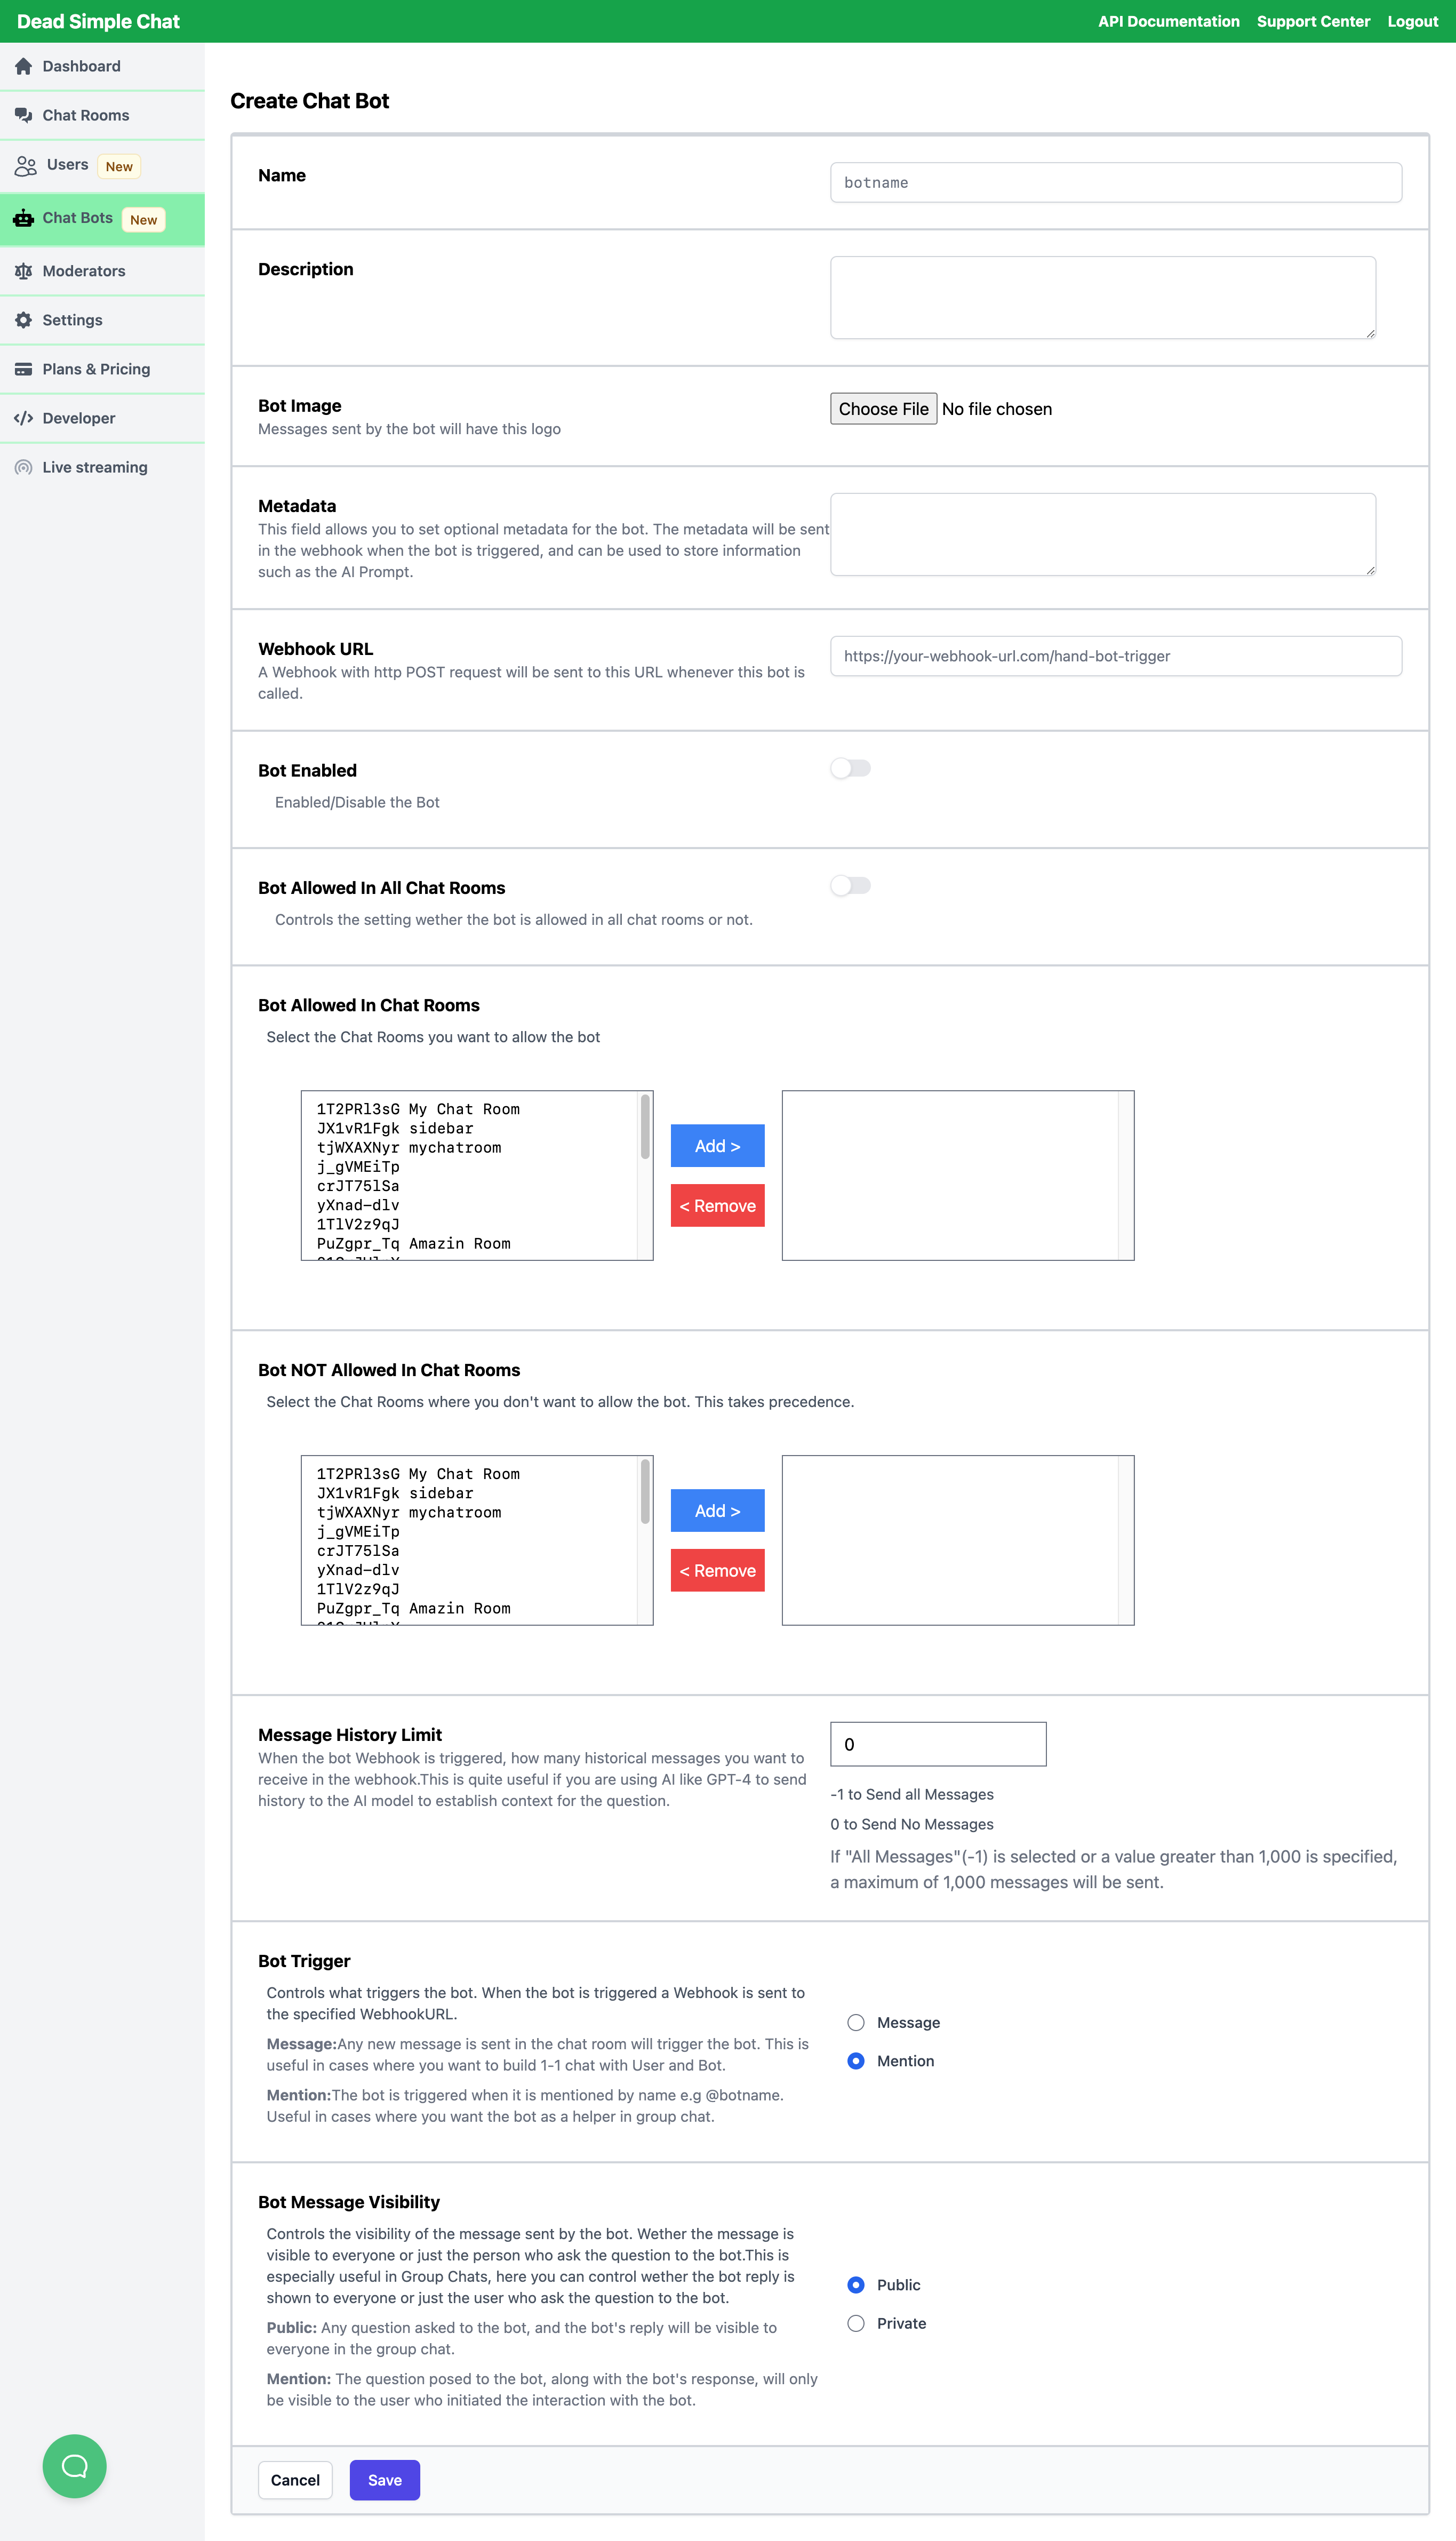
Name: (required) The unique identifier for your bot. This name can be used to mention
or call the bot in chat rooms. To call the bot in the chat room the name of the
bot should be preceded with an @ symbol. For e.g: if you name the bot
welcomebot you can call the bot using @welcomebot.
Description: A brief description about the bot's functionalities and purpose. This helps other admins or users understand what the bot does.
Bot Image: An image or logo that represents the bot. This image will be displayed next to messages sent by the bot, giving a visual identifier in the chat.
Metadata: Optional information about the bot. This data will be sent with the webhook when the bot is triggered. It can be used to store additional information, or JSON or AI prompt for the bot.
Webhook URL: (required) The URL to which an HTTP POST request will be sent when the bot is triggered. This URL should handle the bot's logic, such as sending responses or interacting with external services.
Bot Enabled: A toggle switch to enable or disable the bot. When disabled, the bot will not respond to triggers or function in the chat.
Bot Allowed In All Chat Rooms: A setting that determines whether the bot is accessible in all chat rooms by default. If turned off, you need to specify which rooms the bot is allowed in.
Bot Allowed In Chat Rooms: When Bot Allowed In All Chat Rooms is off then
this setting is display, it allows you to select the chat rooms where you want
to allow the bot.
Bot NOT Allowed In Chat Rooms: A list where you can select chat rooms where the bot is explicitly forbidden from operating. This setting takes precedence over the "Bot Allowed In Chat Rooms" setting. So if the Chat Room is present in both the lists, the "Bot NOT Allowed In Chat Rooms" list will take precedence.
Message History Limit: Define the number of historical messages that should be sent in the Webhook when the bot is triggered. This is particularly useful if your bot uses AI like GPT-4 to provide context-aware responses. If set to "-1", all messages are considered. A maximum of 1,000 messages can be sent if a greater value is specified.
Bot Trigger: This specifies how the bot gets triggered.
- Message: The bot is triggered every time a new message appears in the chat room.
- Mention: The bot is triggered when it's specifically mentioned by name (e.g., @botname).
Bot Message Visibility: Determines who can see the messages sent by the bot.
- Public: Every user in the chat can see the bot's message.
- Private: Only the user who triggered or interacted with the bot can see the bot's response.
If the bot visibility is set to private then the message that triggered the bot
will also be private.
Filling in Bot Details
Fill in the following details
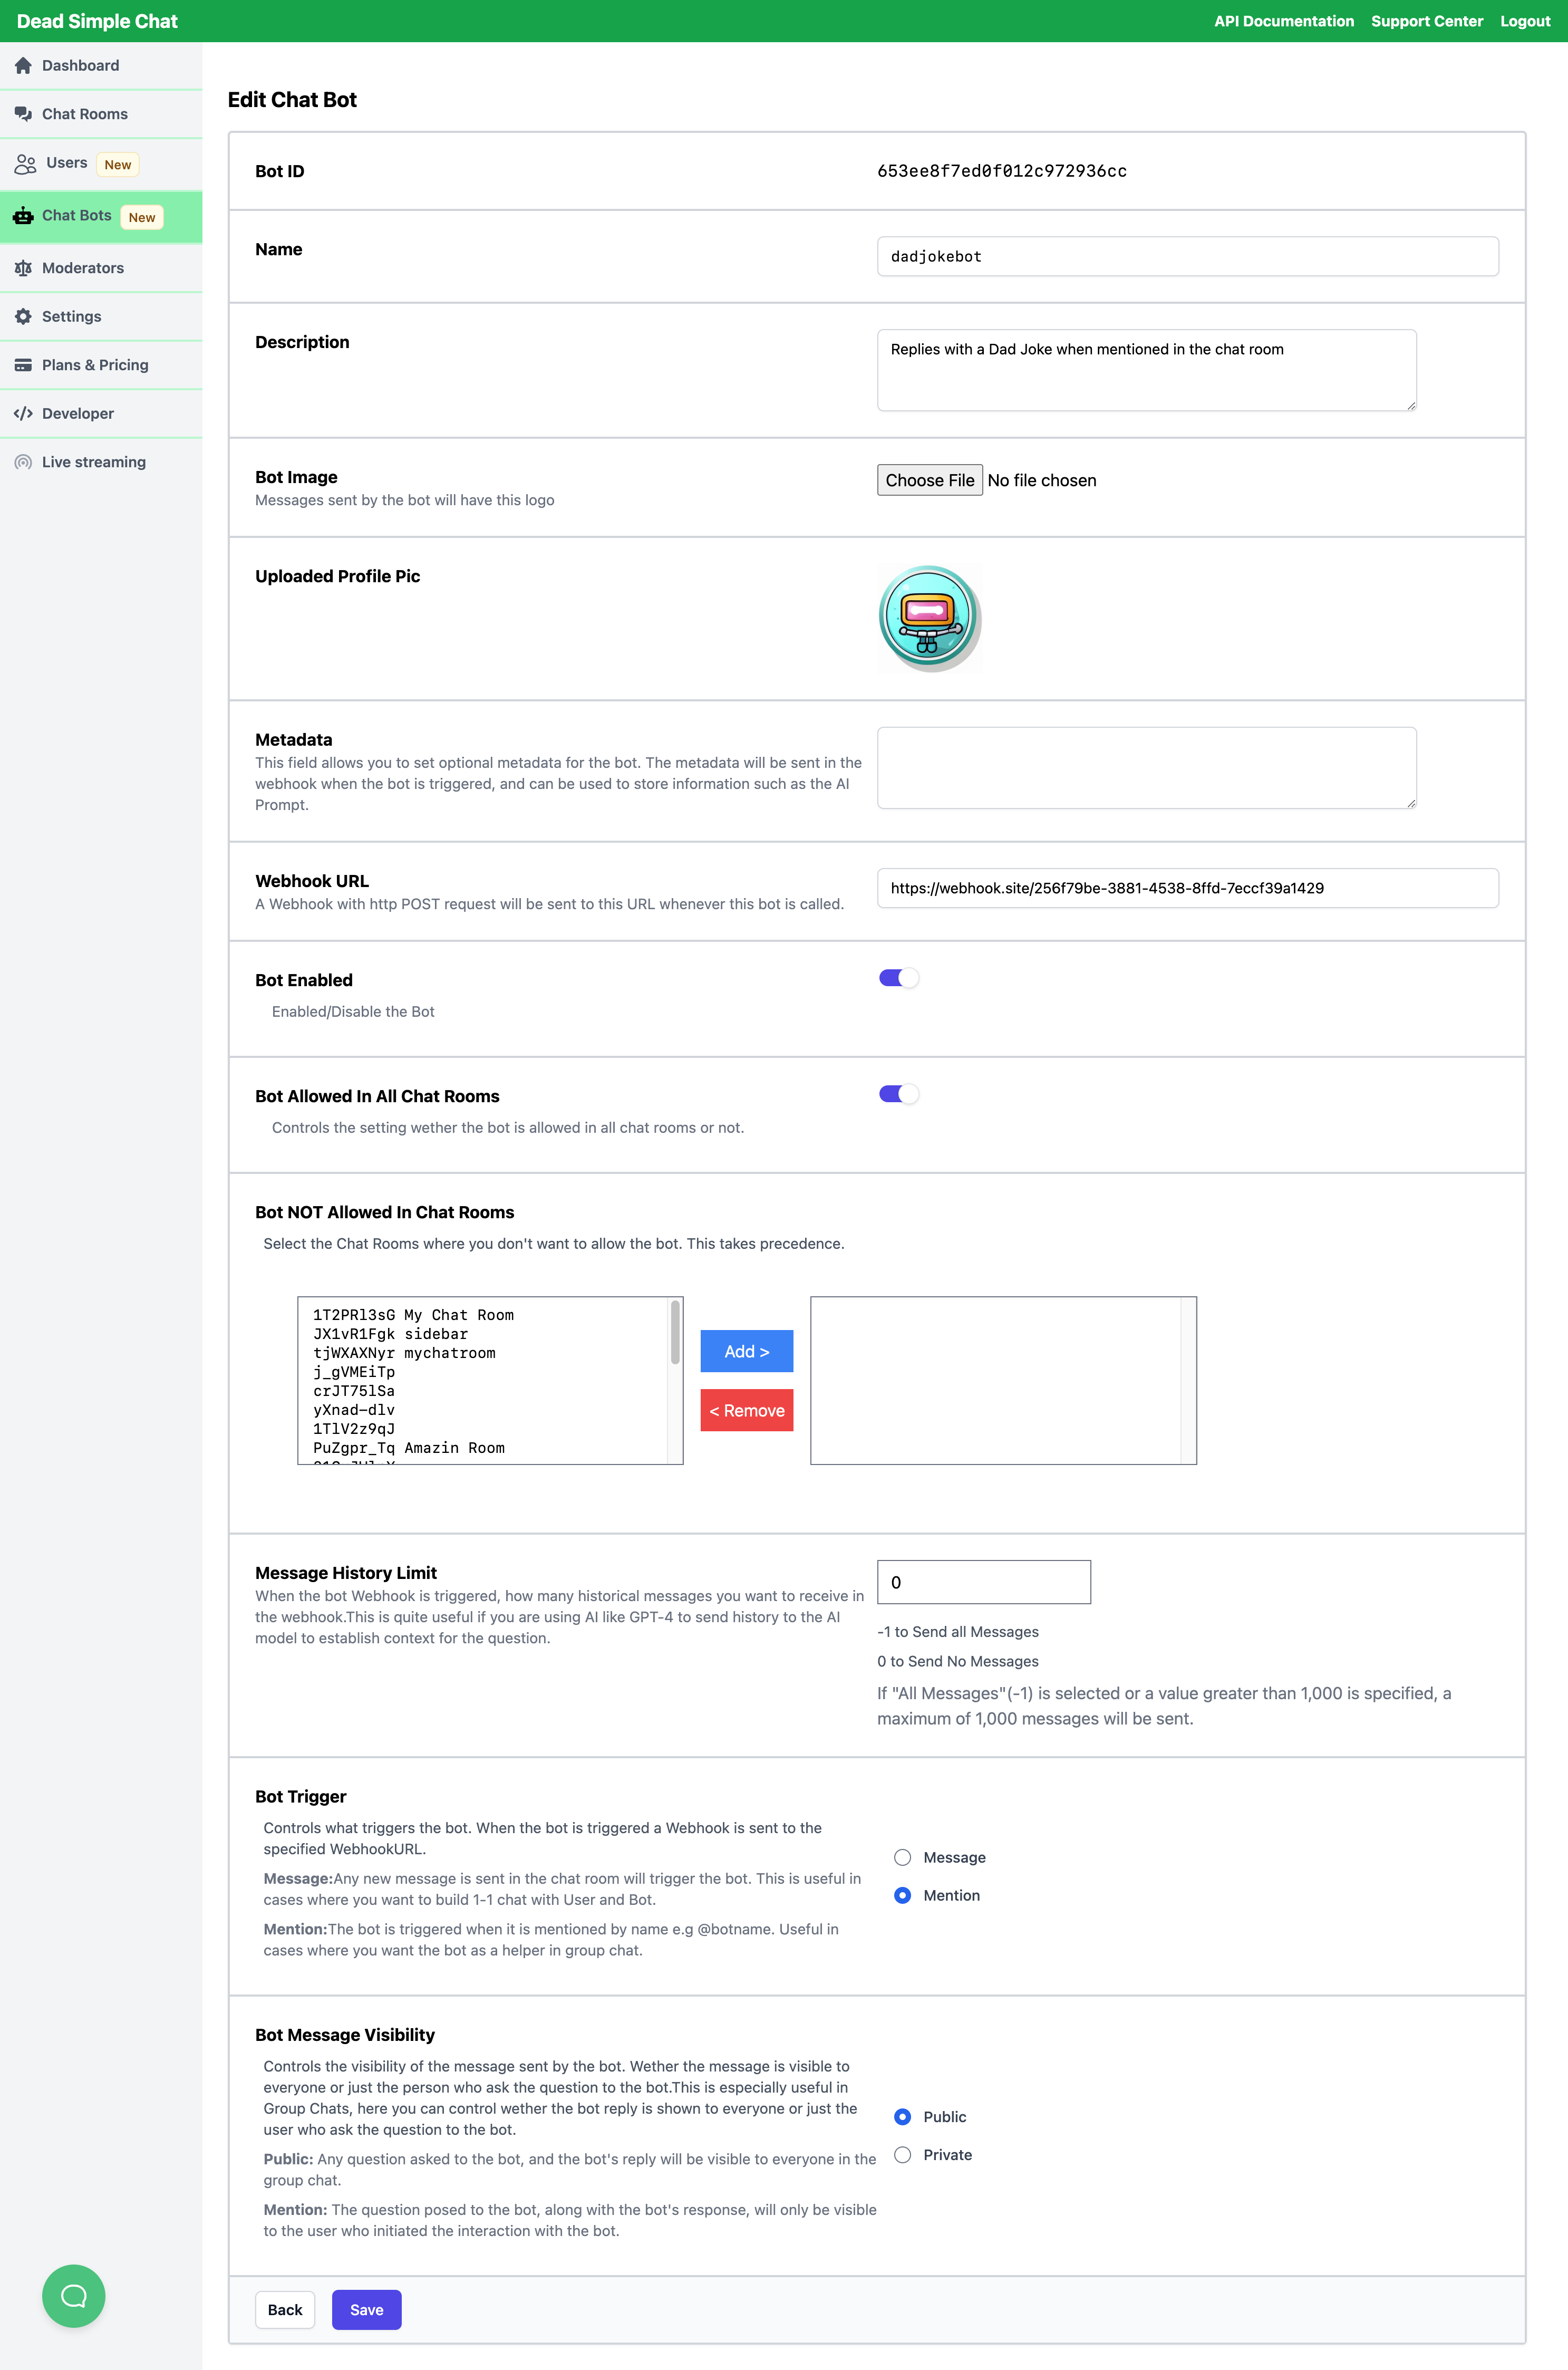
Name: dadjokebot
We will name our bot dadjokebot, enter Name field enter dadjokebot
Profile Picture: Next we will upload a profile picture for our bot, it is optional you are not required to upload profile picture.
Webhook URL:
Now under Webhook URL go to https://webhook.site it will give you a unique URL
that you can paste here.
We are using this just for testing, on the https://webhook.site we can inspect
the webhook received by the bot to write the code for our cloudflare worker.
Once our Cloudflare worker is built we will replace the WebhookURL with the URL of our Cloudflare worker.
Bot Enabled: We will enable the bot
Bot Allowed In All Chat Rooms: We will enable this option.
Message History Limit: We will set the "Message History Limit" to 0, because our bot does not require any history, if you want to build AI bot then you can increase the History Limit to allow sending contextual messages to AI.
Bot Trigger: We will set it to mention
Bot Message Visibility: We will set the "Bot Message Visibility" to "Private"
We will then press the "Save" button to create our bot, and it will look something like the image below:
As you can see we have created a new bot, and we also get an Bot ID
653ee8f7ed0f012c972936cc for our Bot.
Step 2: Inspecting the Webhook
Next we will inspect the Webhook data we get from the bot, to inspect the data we will first invoke the bot in the chat room, then on webhooks.site we will view the data sent by our bot. We will use this info to create our backend in CloudFlare Workers.
a. Triggering the Bot
We have set our bot to trigger on mention, and we have allowed it in all chat rooms.
We can go to any chat room or create a new one to test, to create chat room go to "Chat Rooms" and click on the create button.
Then click on the "Open" button to launch the chat room page.
On the chat room page we will send a message
Please tell me a joke @dadjokebot
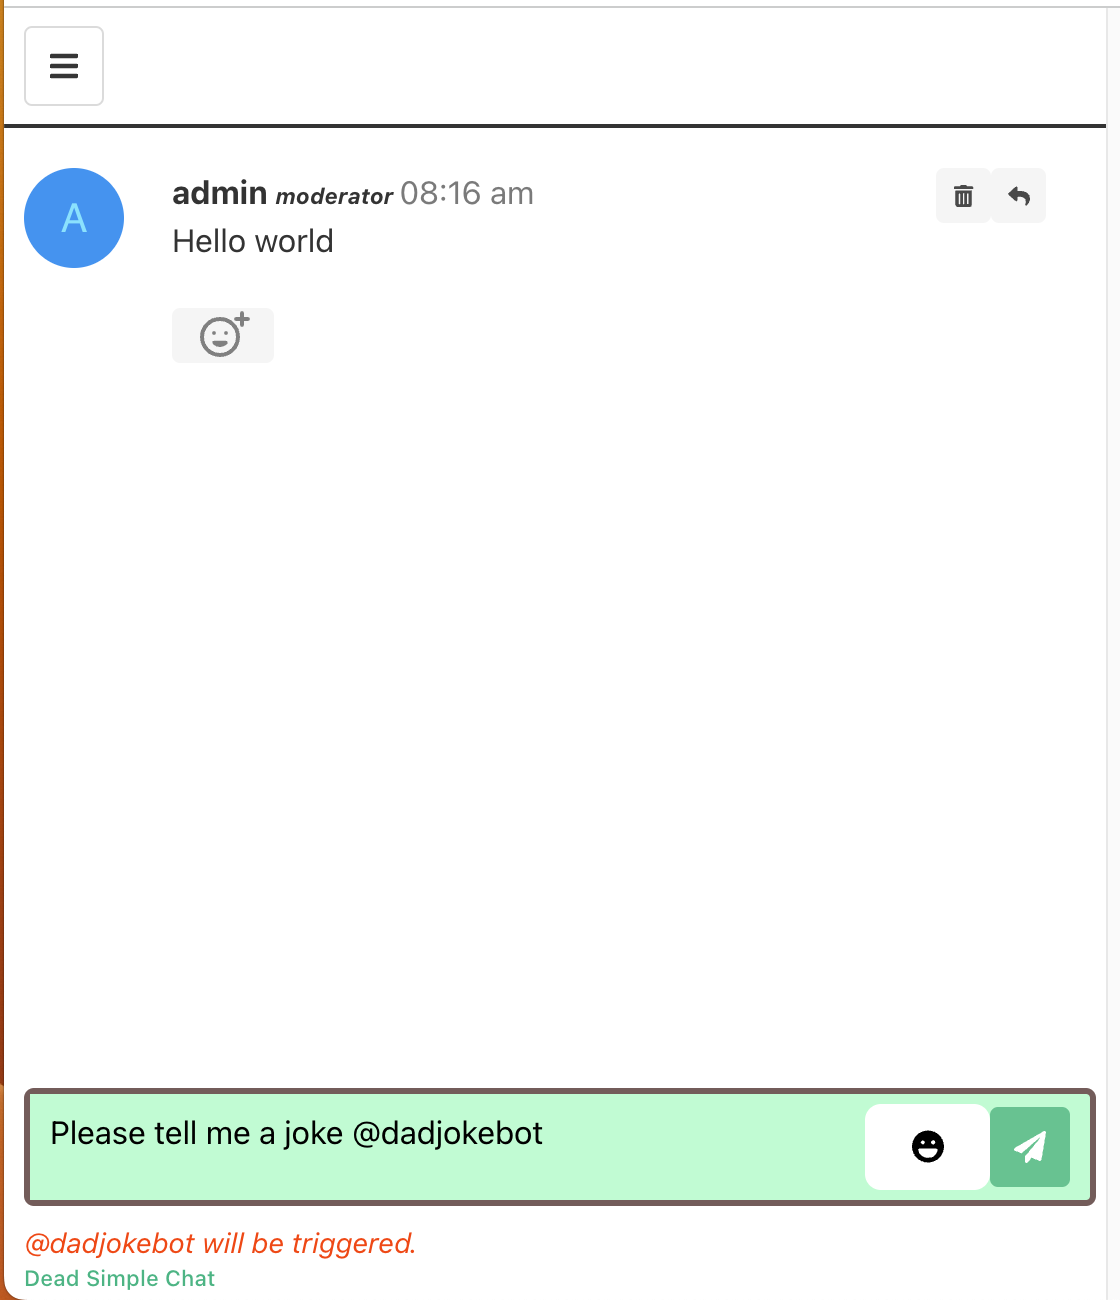
As you can see in the image above, when we have mentioned the name of the bot,
the input area turns green, and there is a message displayed that @dadjokebot
will be triggered.
When we will send this message, a webhook will be sent to the Webhook URL, we
have specified. We have specified the webhooks.site URL which allows us to
easily inspect the webhook.
b. Inspecting the Bot
After we have sent the message let go to webhooks.site and it shows that it has
received the webhook.
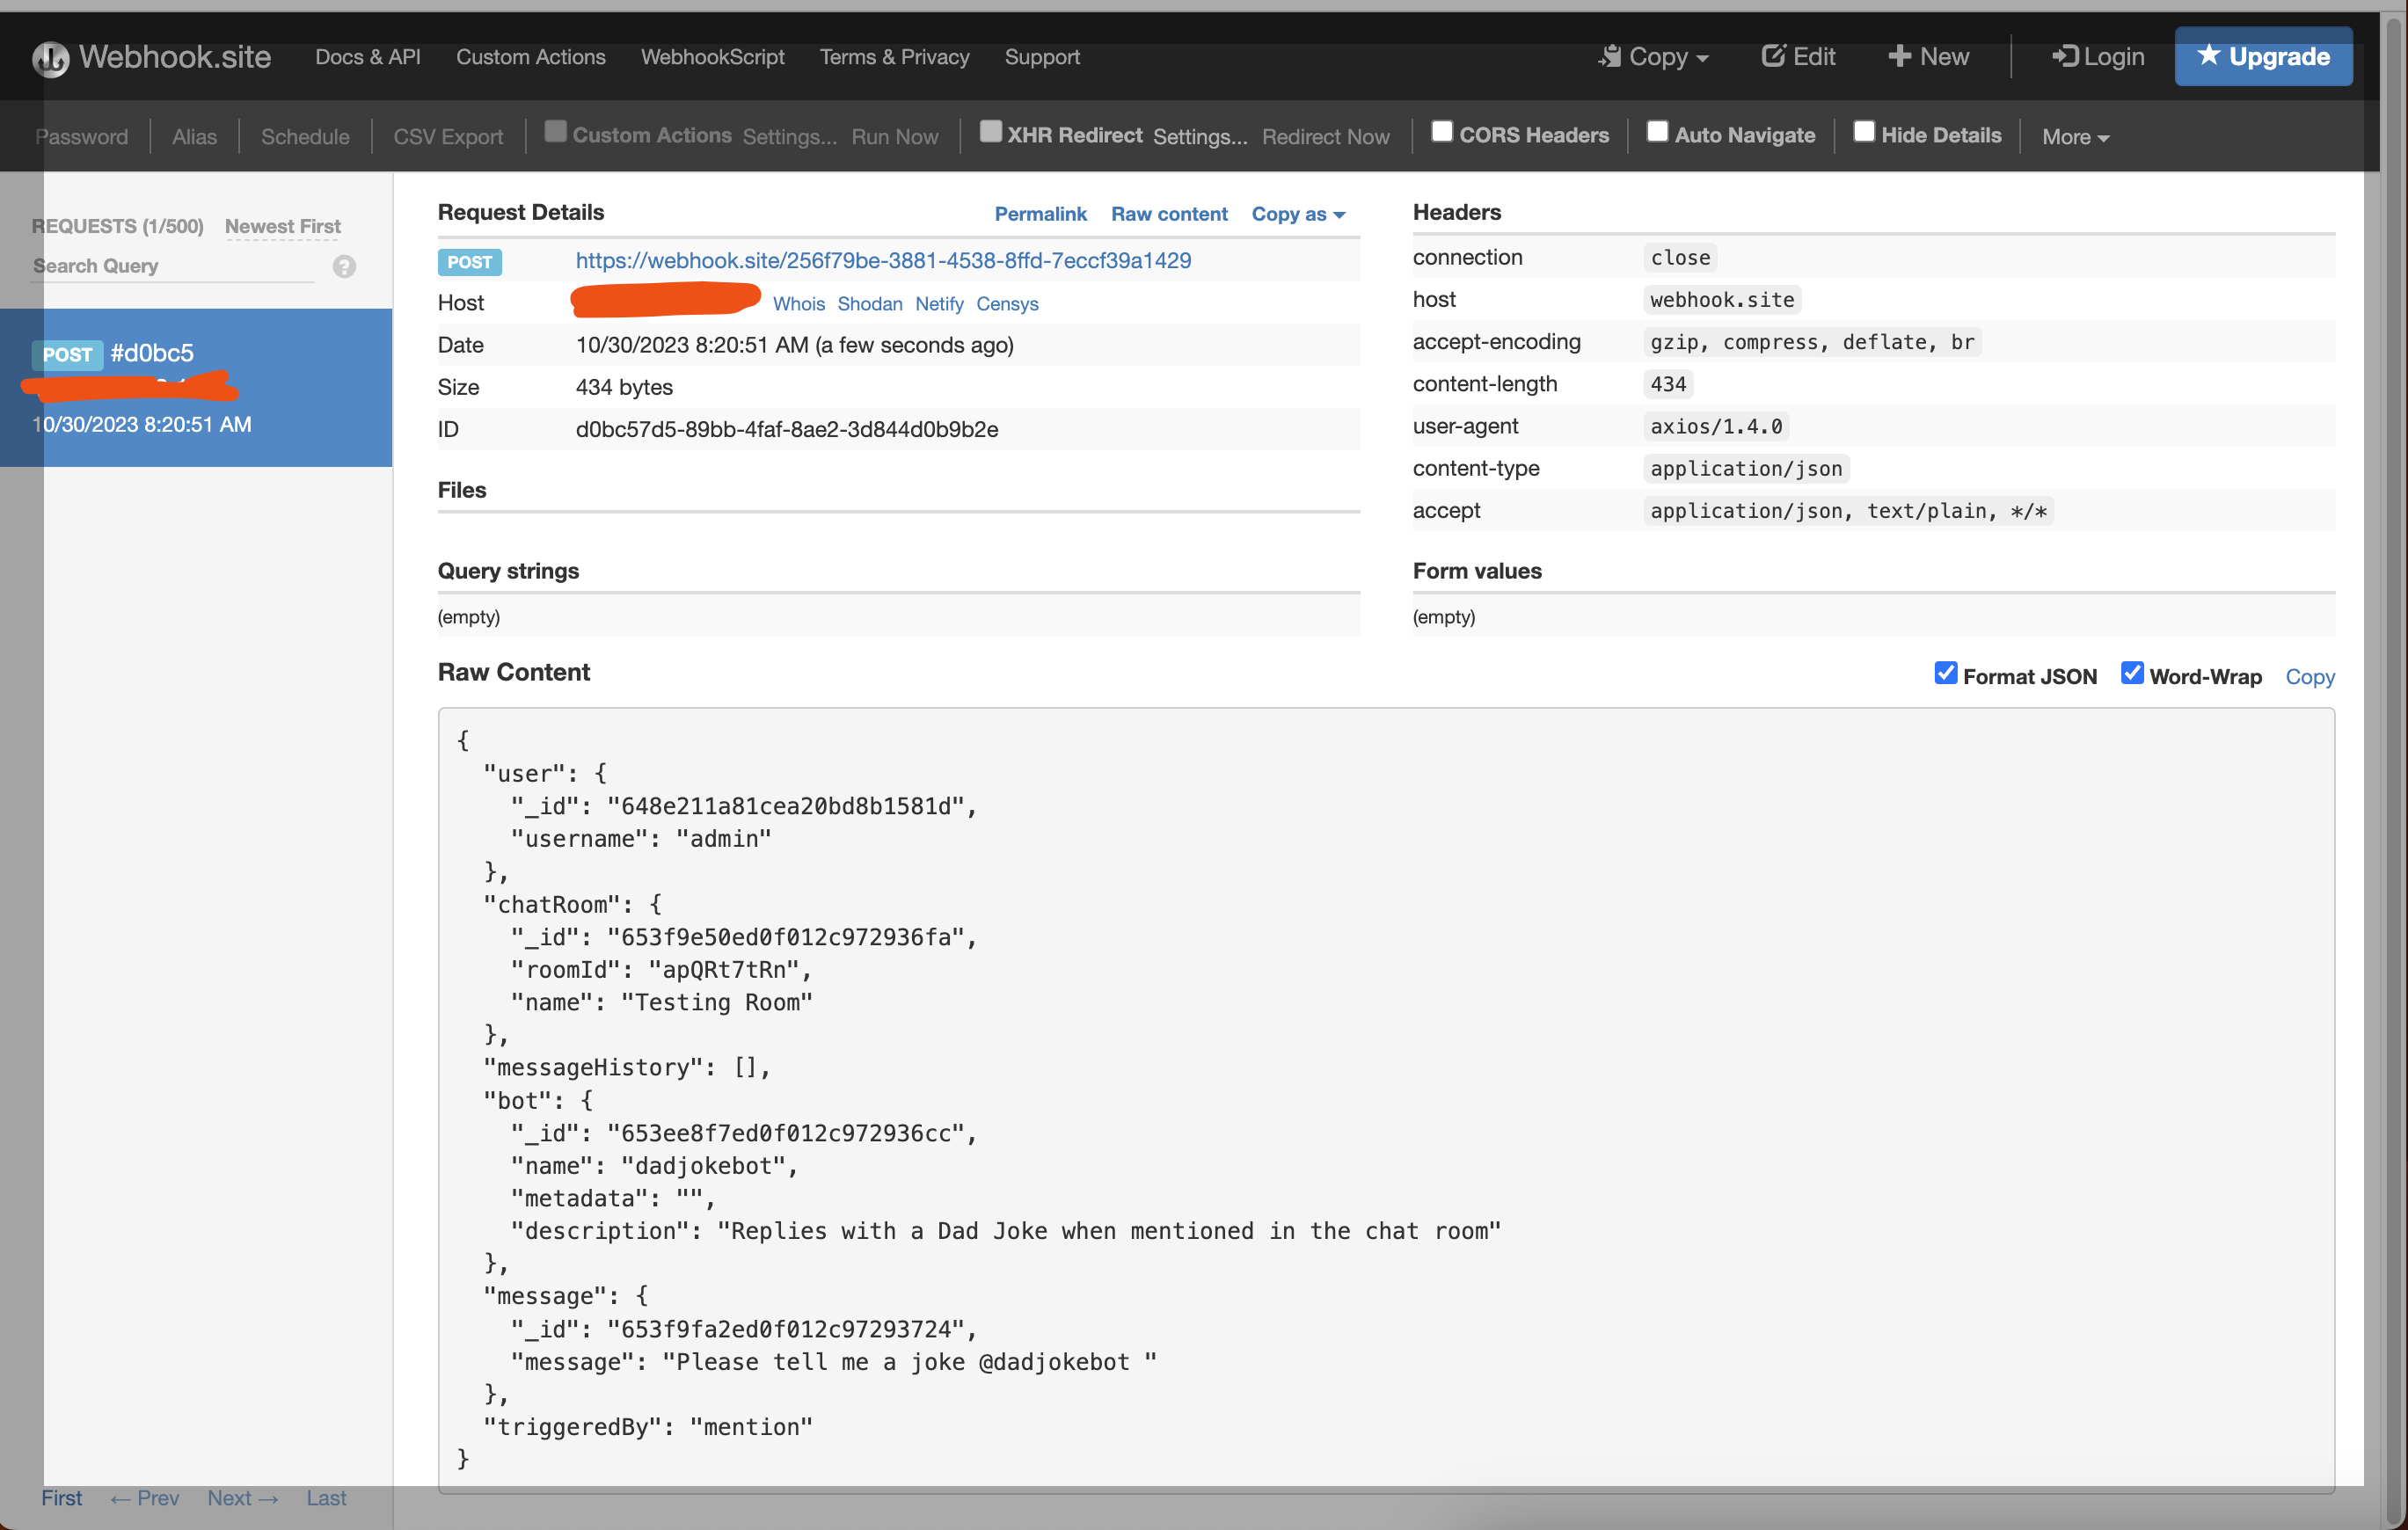
Here is the JSON data of the webhook:
{
  "user": {
    "_id": "648e211a81cea20bd8b1581d",
    "username": "admin"
  },
  "chatRoom": {
    "_id": "653f9e50ed0f012c972936fa",
    "roomId": "apQRt7tRn",
    "name": "Testing Room"
  },
  "messageHistory": [],
  "bot": {
    "_id": "653ee8f7ed0f012c972936cc",
    "name": "dadjokebot",
    "metadata": "",
    "description": "Replies with a Dad Joke when mentioned in the chat room"
  },
  "message": {
    "_id": "653f9fa2ed0f012c97293724",
    "message": "Please tell me a joke @dadjokebot "
  },
  "triggeredBy": "mention"
}
The above JSON schema is very stright forward.
userobject contains the info about the User who triggered the bot.chatRoomobject contains the info about Chat Room where the bot was triggered.messageHistorycontains the array of previous messages, we have set it to0hence it is an empty array.botcontains the info about the botmessagecontains the message that triggered the bottriggeredBycan bemention,messageoractionButtonPressed.mentionthe bot is triggered by mentioning the name of the botmessagethe bot is triggered by messageactionButtonPressedthe bot is triggered by pressing the action button. in the next guide we will see how we can send action buttons in the bot message.
Step 3: Setting up the Cloudflare Worker
Now let's build the backend for our bot, we have used Cloudflare Worker in this tutorial. It is not necessary to use Cloudflare Worker you can use any backend.
If you already have backend service for your application then you can create a route in your backend to handel the webhook.
a. Creating a Cloudflare New Worker
To create a new Worker, goto Clouflare website, and signup for you new account, if you already have an account then login.
From the Cloudflare Dashboard go to Workers & Pages and select "Overview" from there Click on "Create Application" and then Click on "Create Worker" button.
It will show you a page like the screenshot. Click on the "Deploy" button.
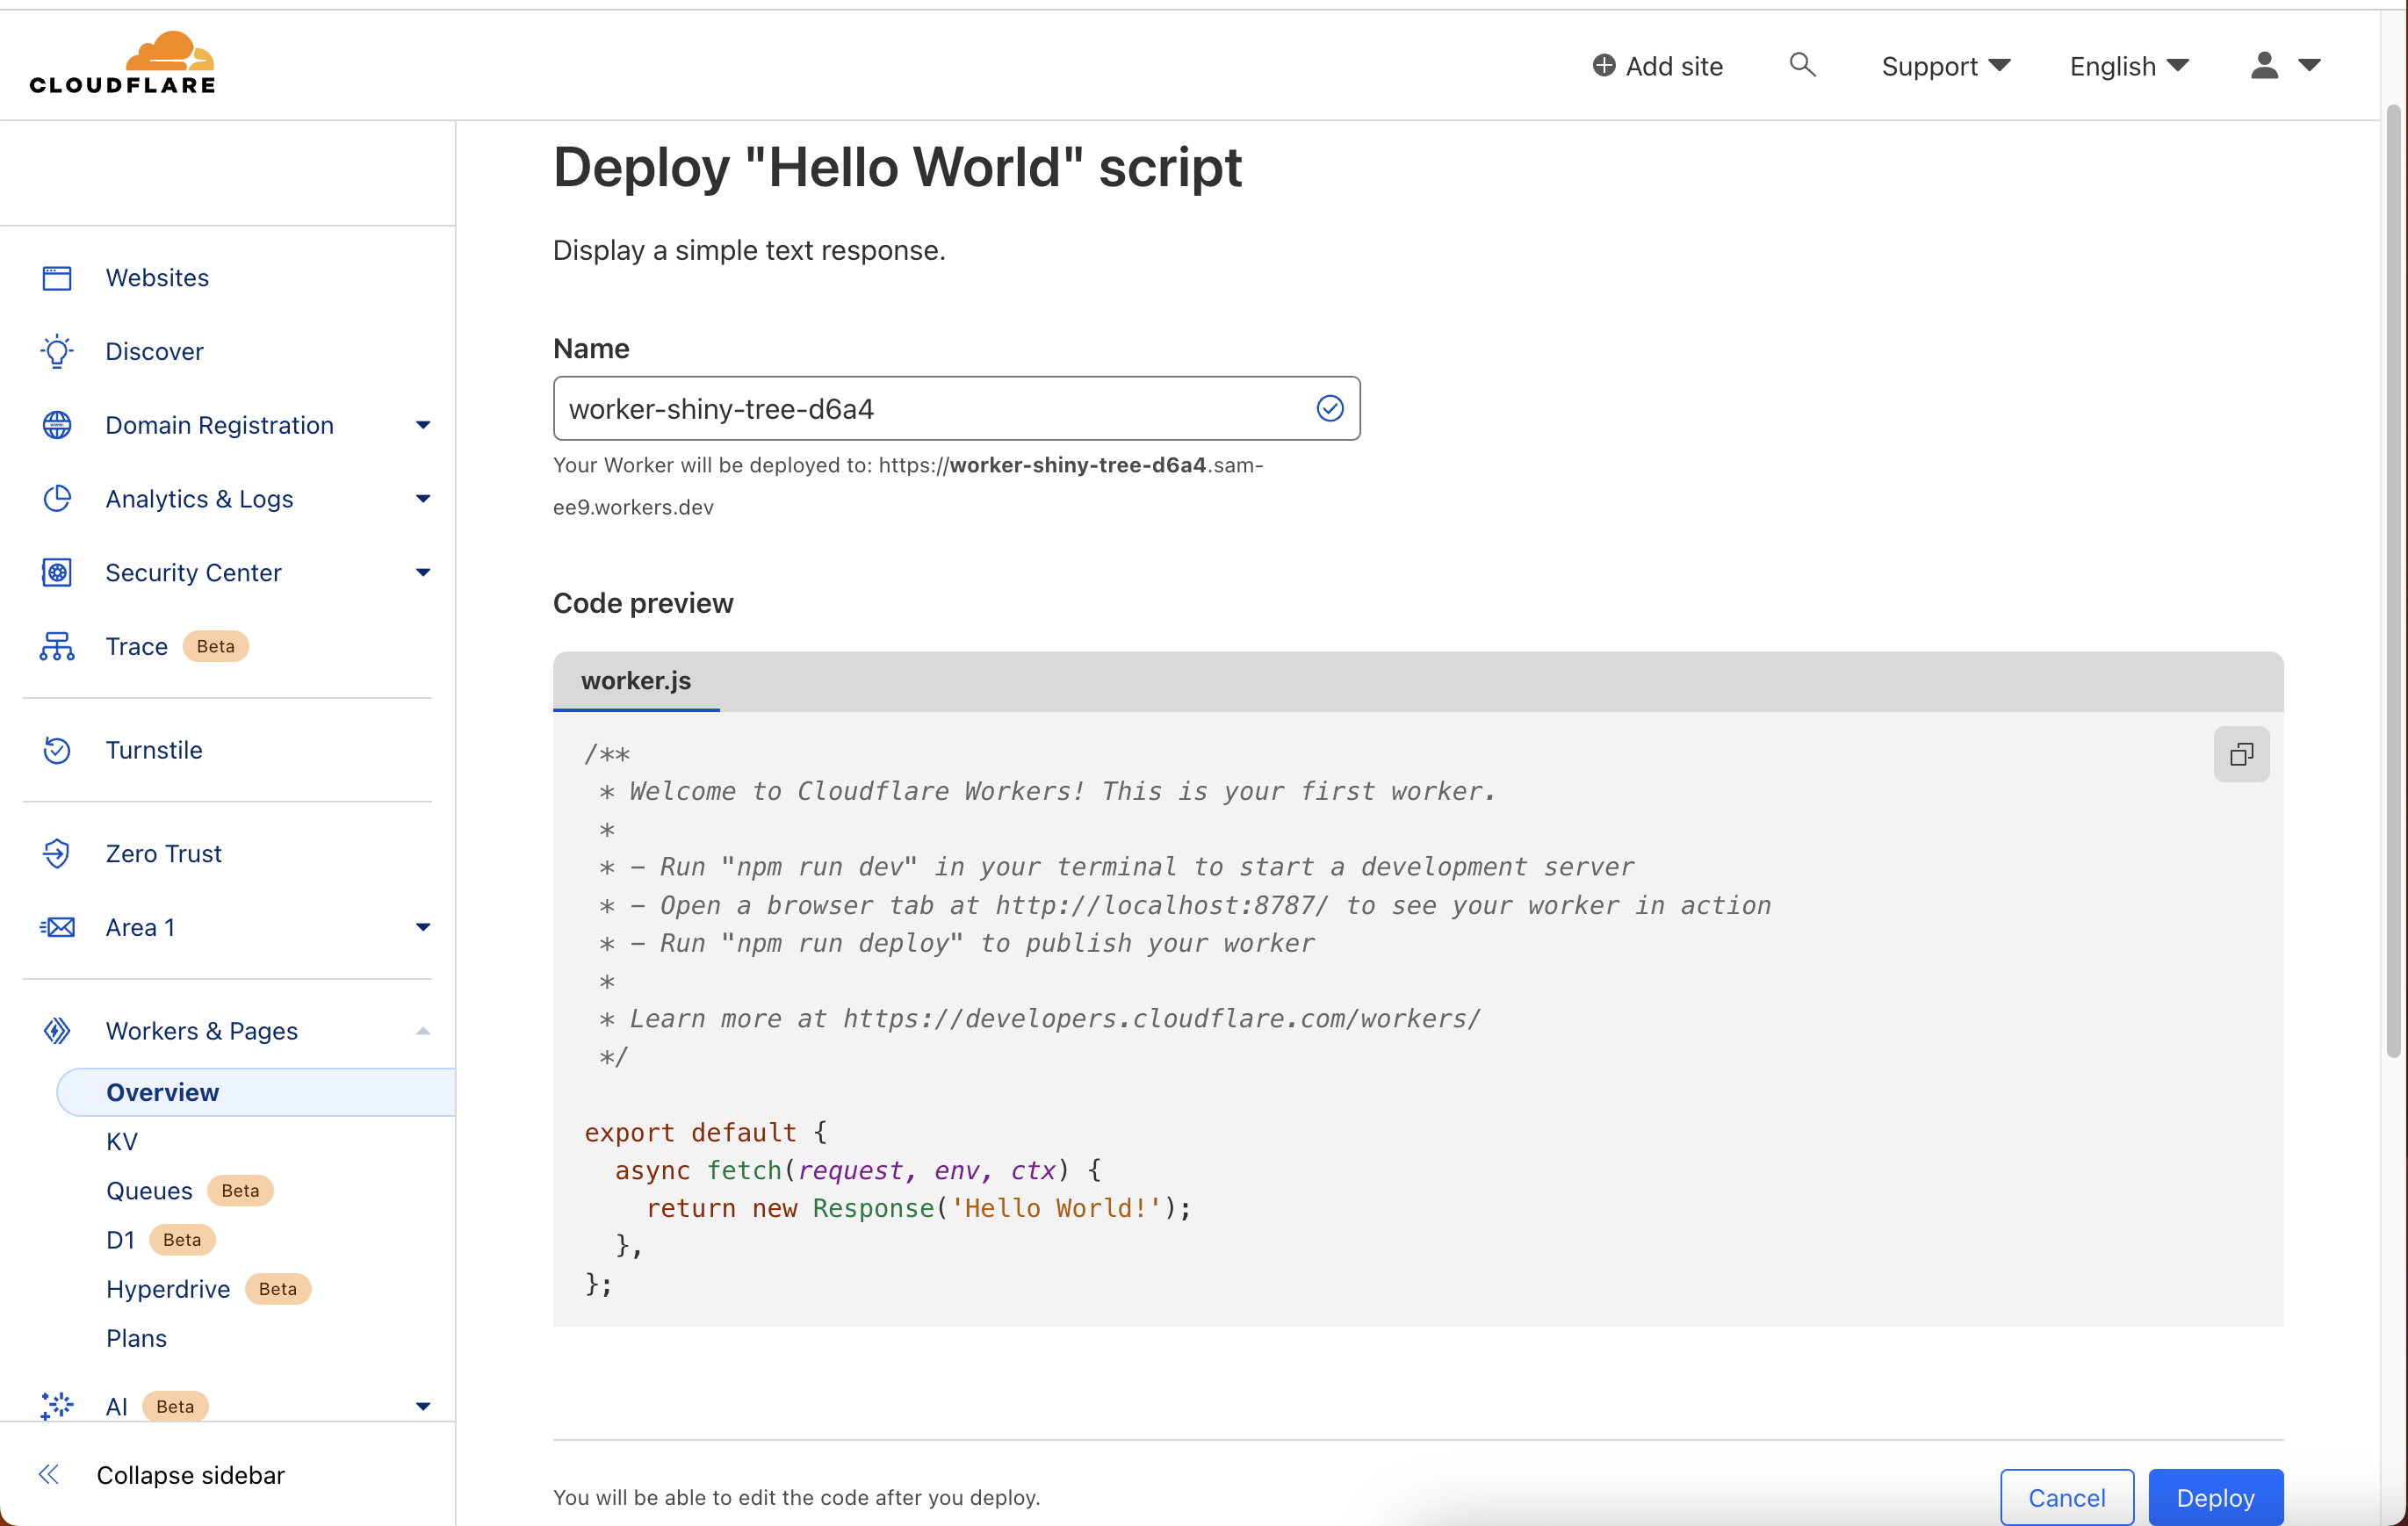
Then Click on the "Edit Code" button to edit the code for the worker.
b. Writing the Worker Logic
After click on the "Edit Code" button, it will take you to the worker code editor, here we will add the code to handle the logic for our bot.
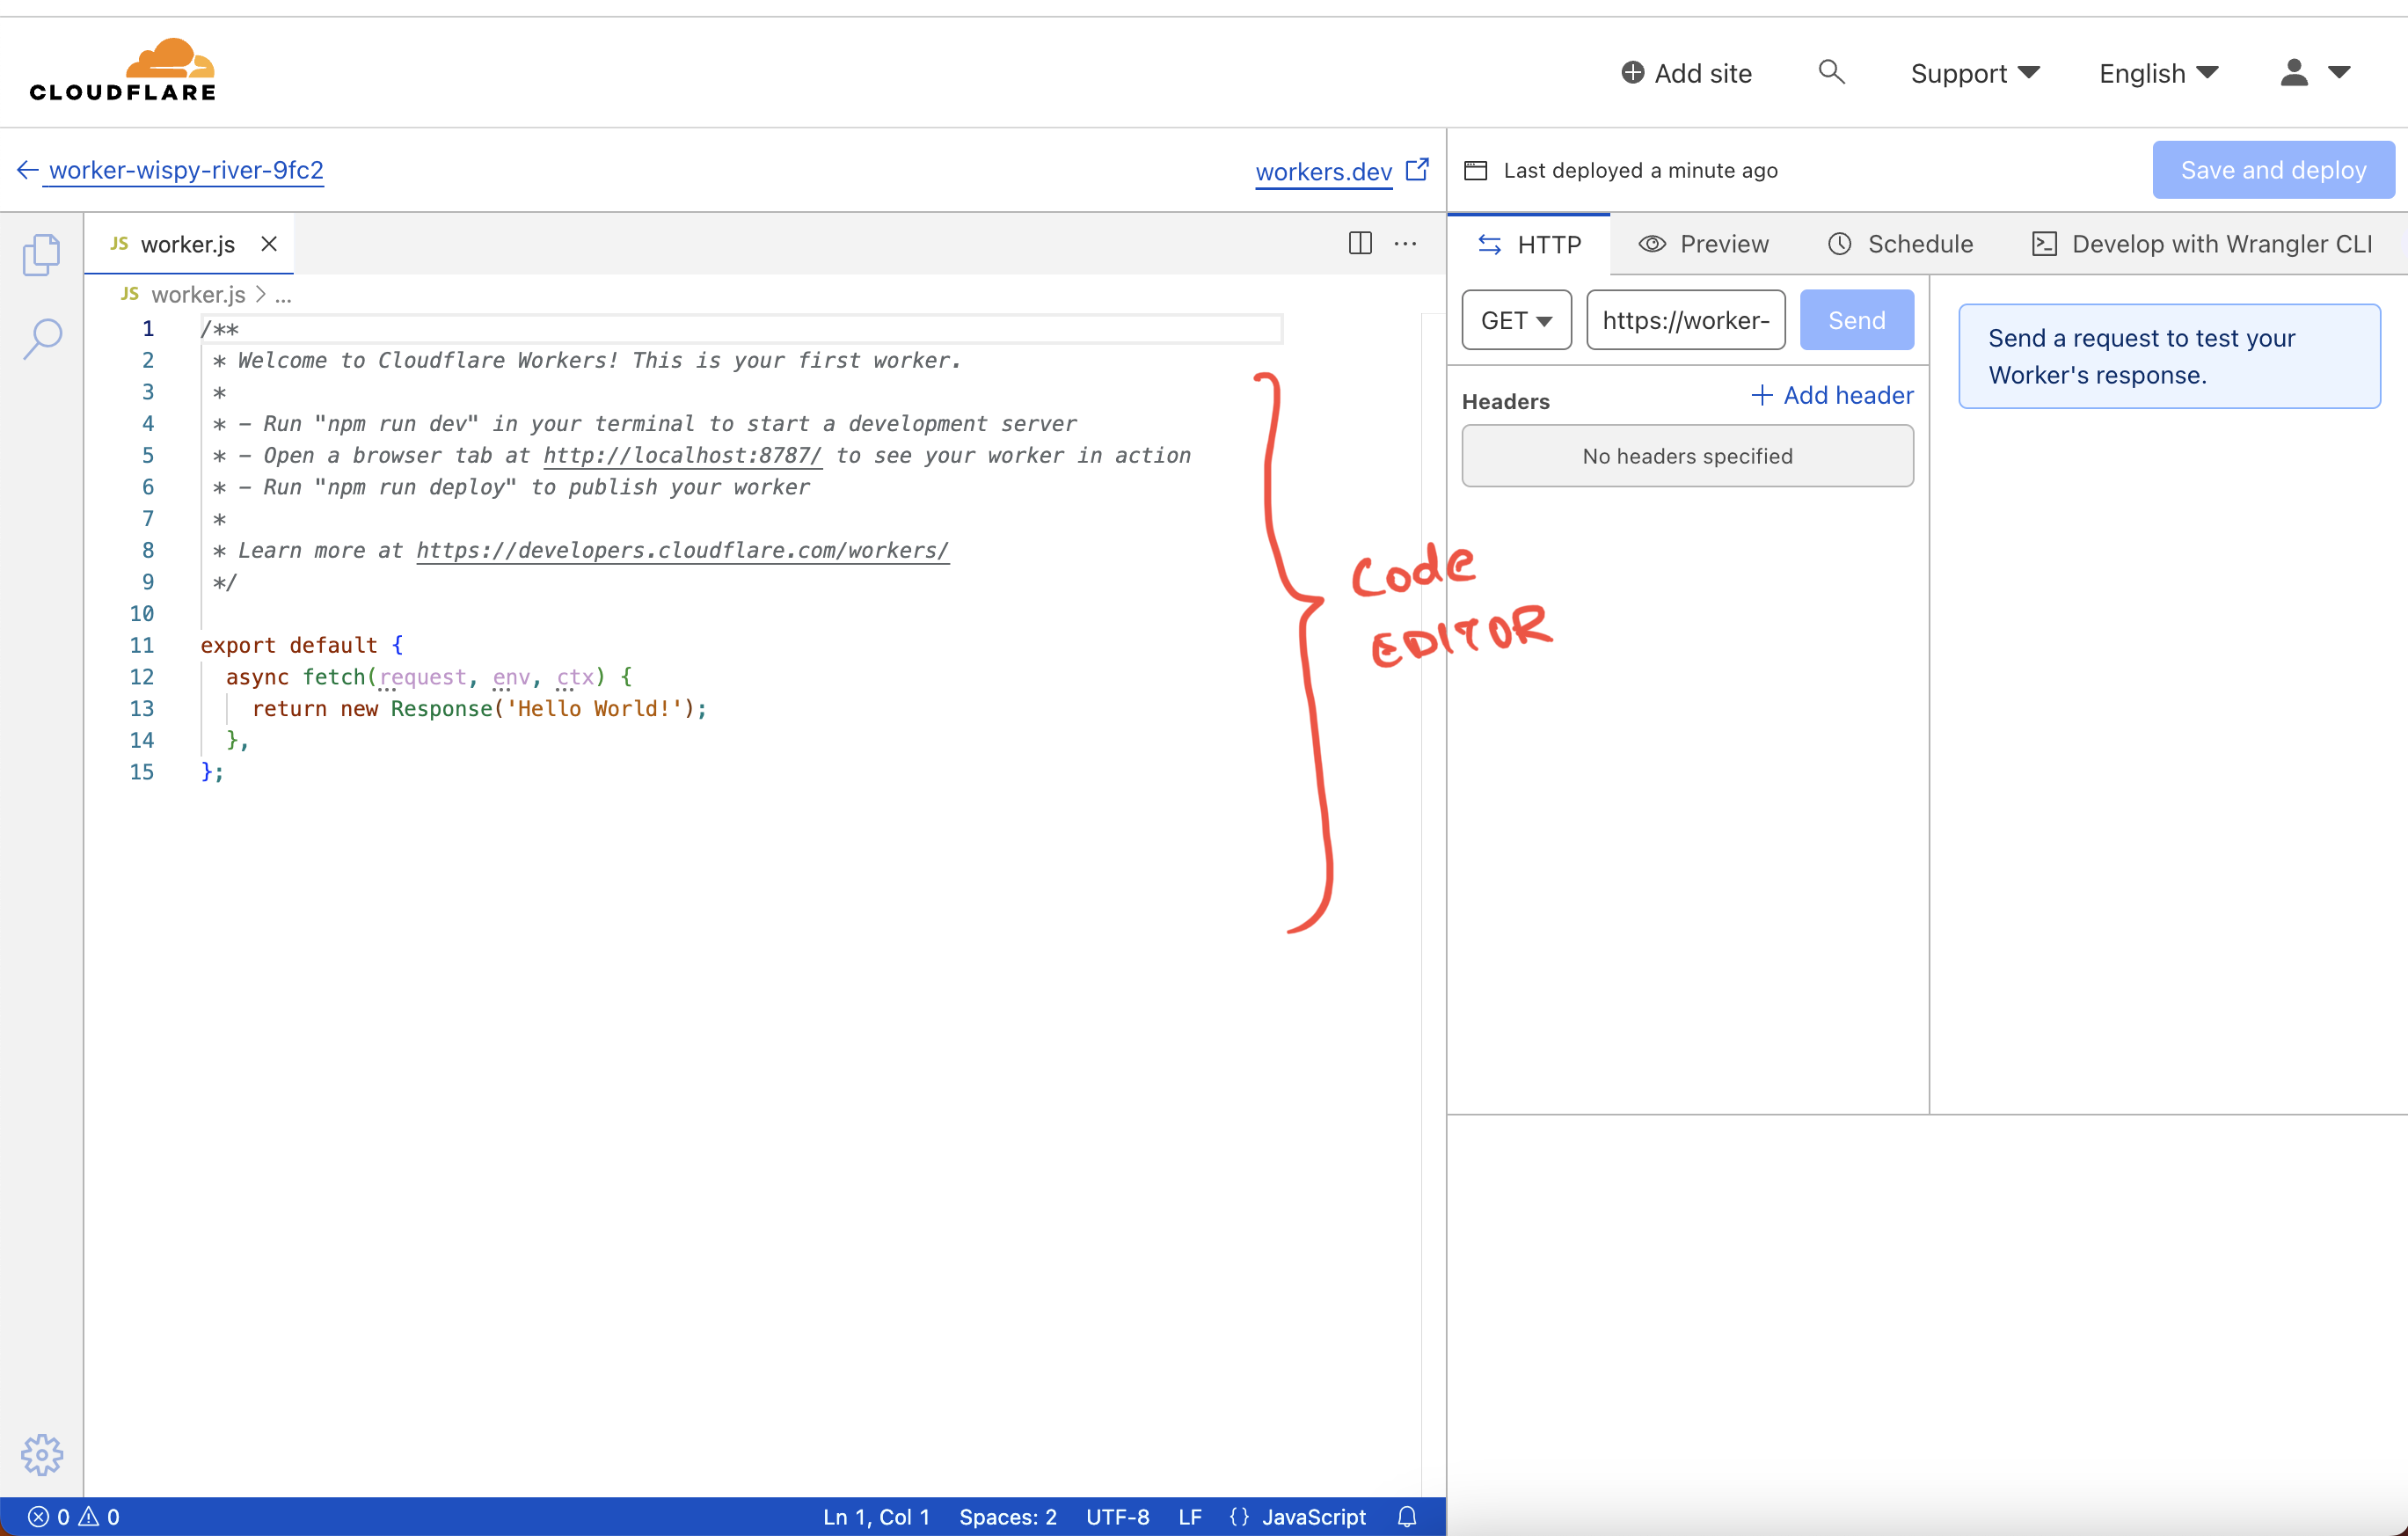
Paste the following code:
export default {
    // `fetch` function handles incoming requests, with access to `request`, `env`, and `ctx`.
    async fetch(request, env, ctx) {

        // Handling POST requests only
        if (request.method == "POST") {
            // Parse JSON data from the request
            const data = await request.json();

            // Extract Bot ID from the incoming data
            // Useful for identifying which bot should respond
            const botId = data.bot._id;

            // Extract room ID from the incoming data
            // Tells us where the bot should send the message
            const roomId = data.chatRoom.roomId;

            // Fetch a joke from icanhazdadjoke API
            // Fetching with GET method and setting appropriate headers
            const jokeResponse = await fetch("https://icanhazdadjoke.com/", {
                method: "GET",
                headers: {
                    "Accept": "application/json",
                    "content-type": "application/json;charset=UTF-8",
                }
            });

            // Parse the joke into a JSON object
            const joke = await jokeResponse.json();
            console.log(joke); // Logging for debug purposes

            // Prepare message body for the bot response
            const botBody = {
                message: joke.joke // Assign the fetched joke to the message field
            }

            // Send message via deadsimplechat API
            // You can obtain the `SECRET_KEY` by going to the DeadSimpleChat
            // Dashboard -> Developers page.
            await this.fetch(
                `https://api.deadsimplechat.com/consumer/api/v2/bot/${botId}/chatroom/${roomId}/message?auth=${SECRET_KEY}`, {
                    body: JSON.stringify(botBody),
                    method: "POST",
                    headers: {
                        "content-type": "application/json"
                    }
                });

            // Respond with a success status and the joke
            return new Response(JSON.stringify({
                success: true,
                joke: joke.joke
            }));
        } else {
            // Respond with a failure status if the request is not a POST
            return new Response(JSON.stringify({
                success: false,
            }));
        }
    },
};
In the above code we are using the Send Bot Message API to the send the message back to the chat room.
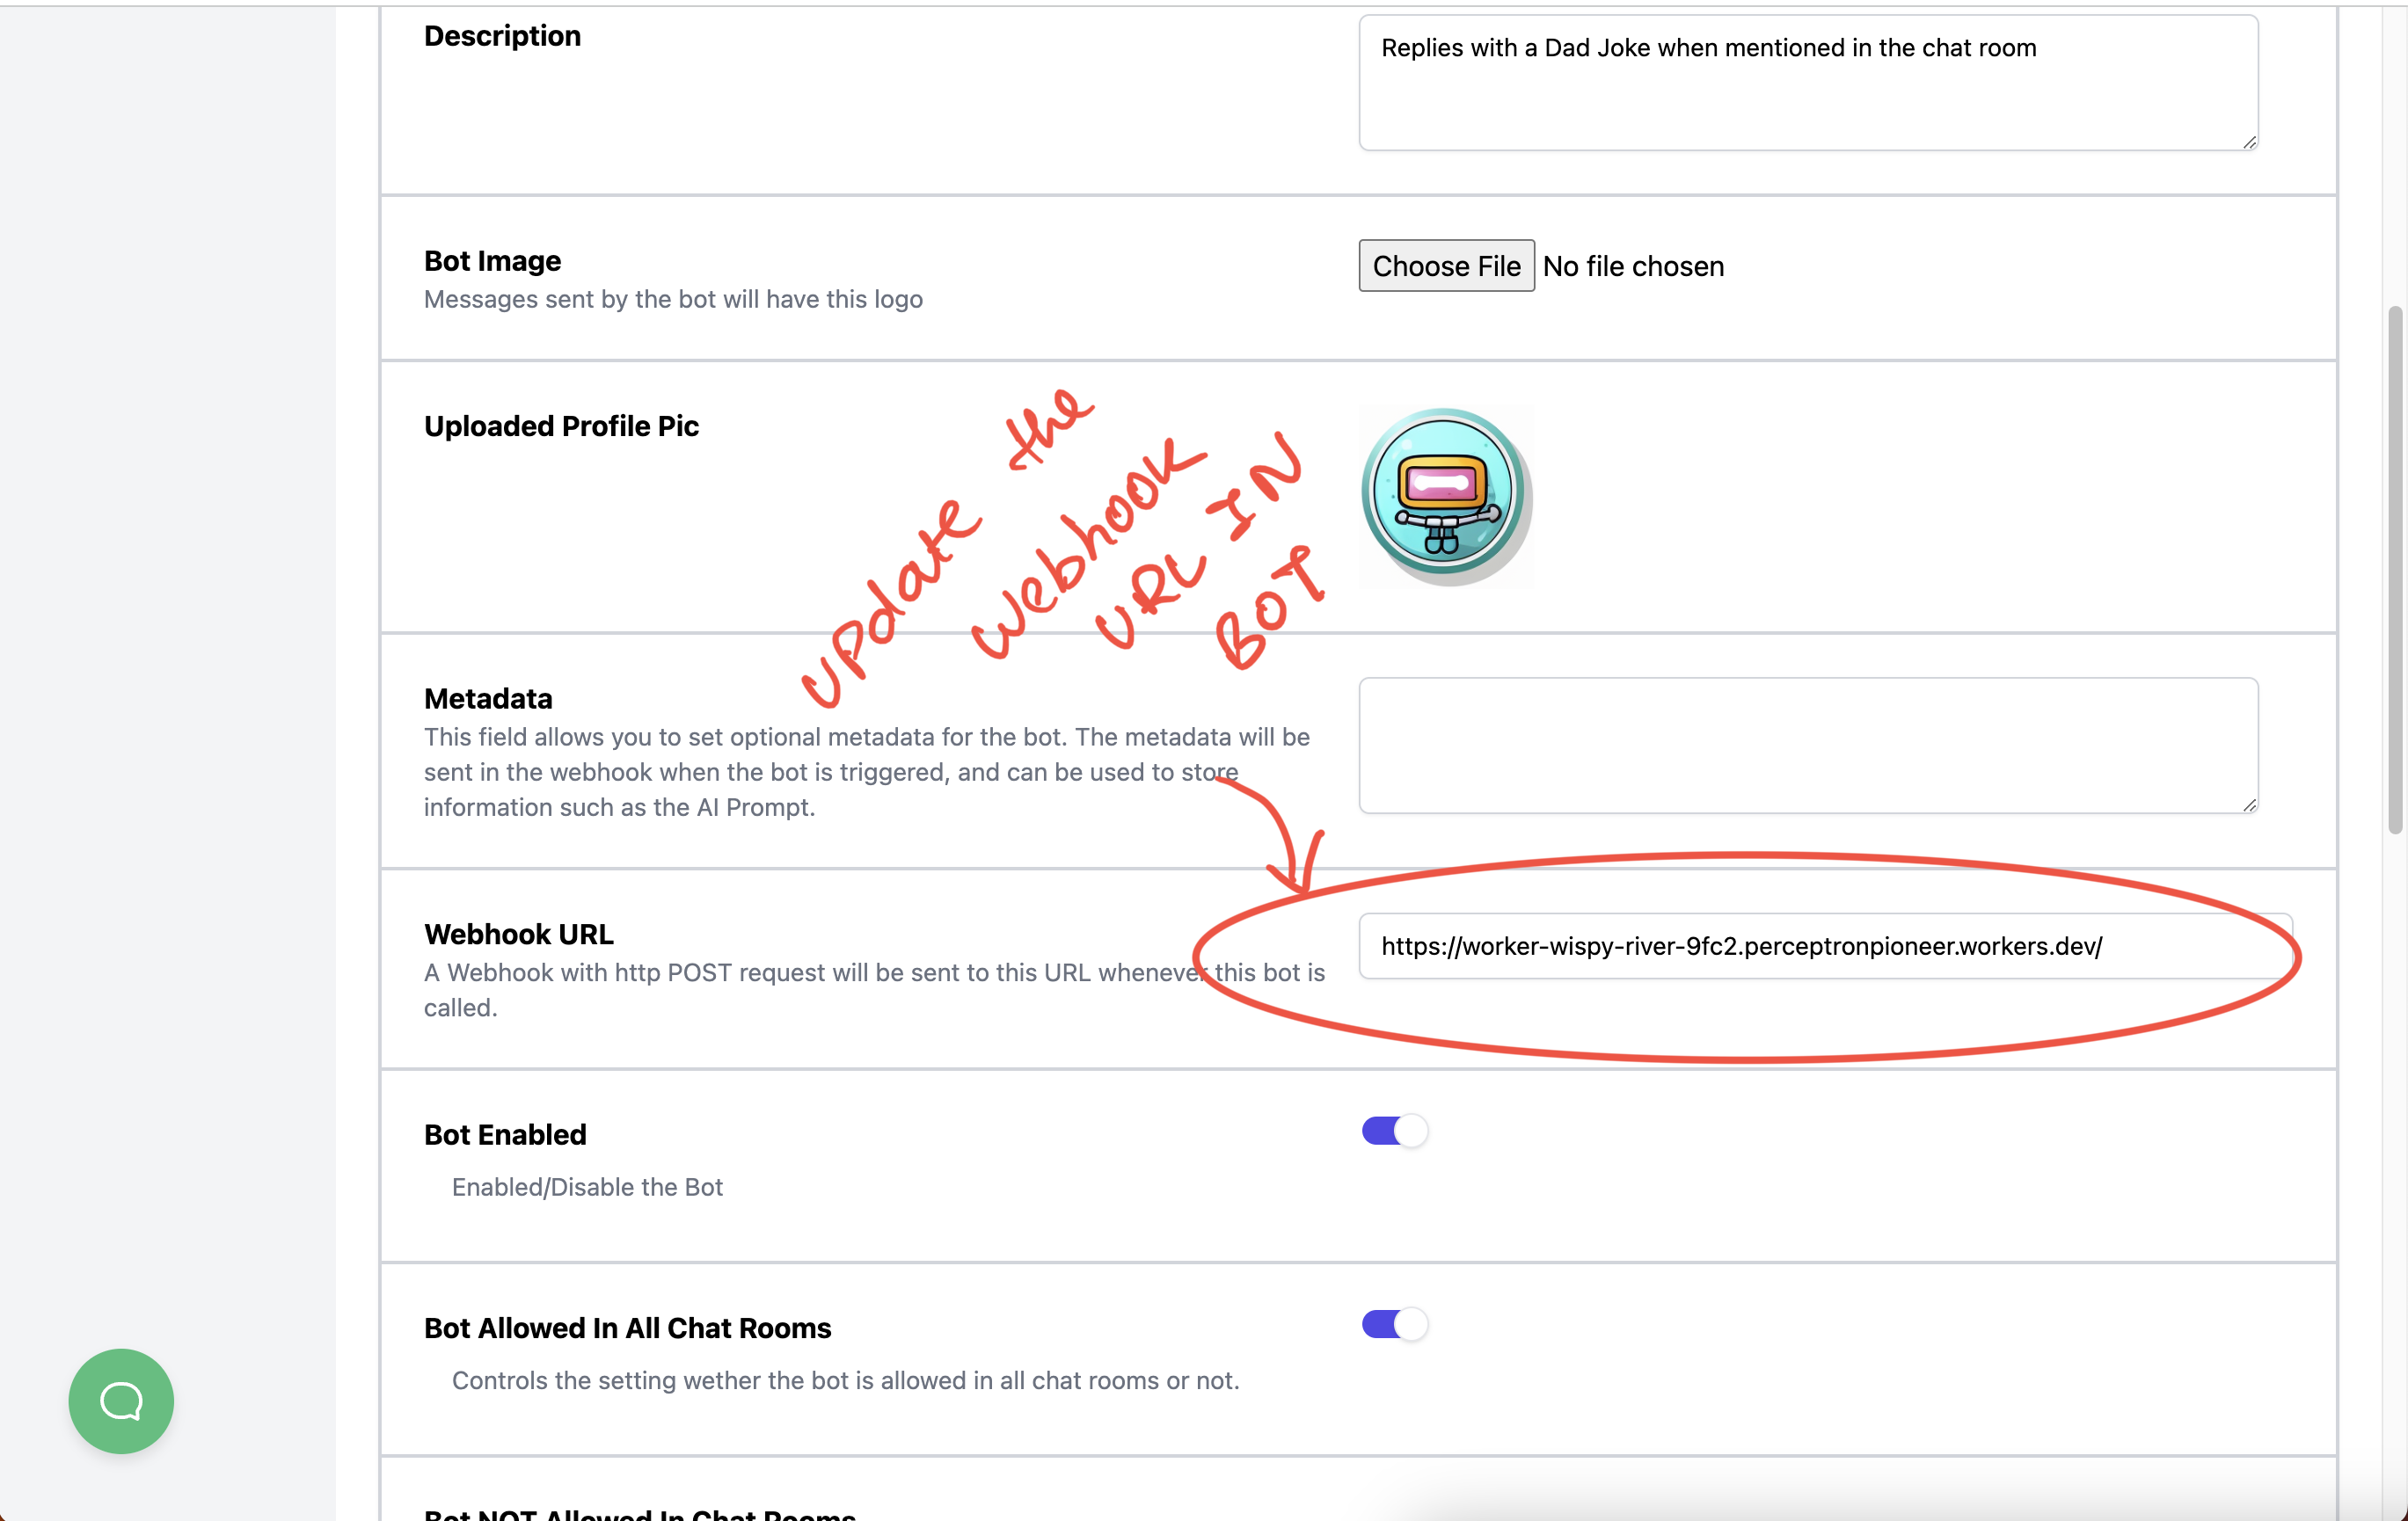
c. Updating the Webhook URL in DeadSimpleChat
Now go back to DeadSimpleChat -> Dashboard -> Edit Bot and update the "Webhook URL" to the URL of our Cloudflare function.
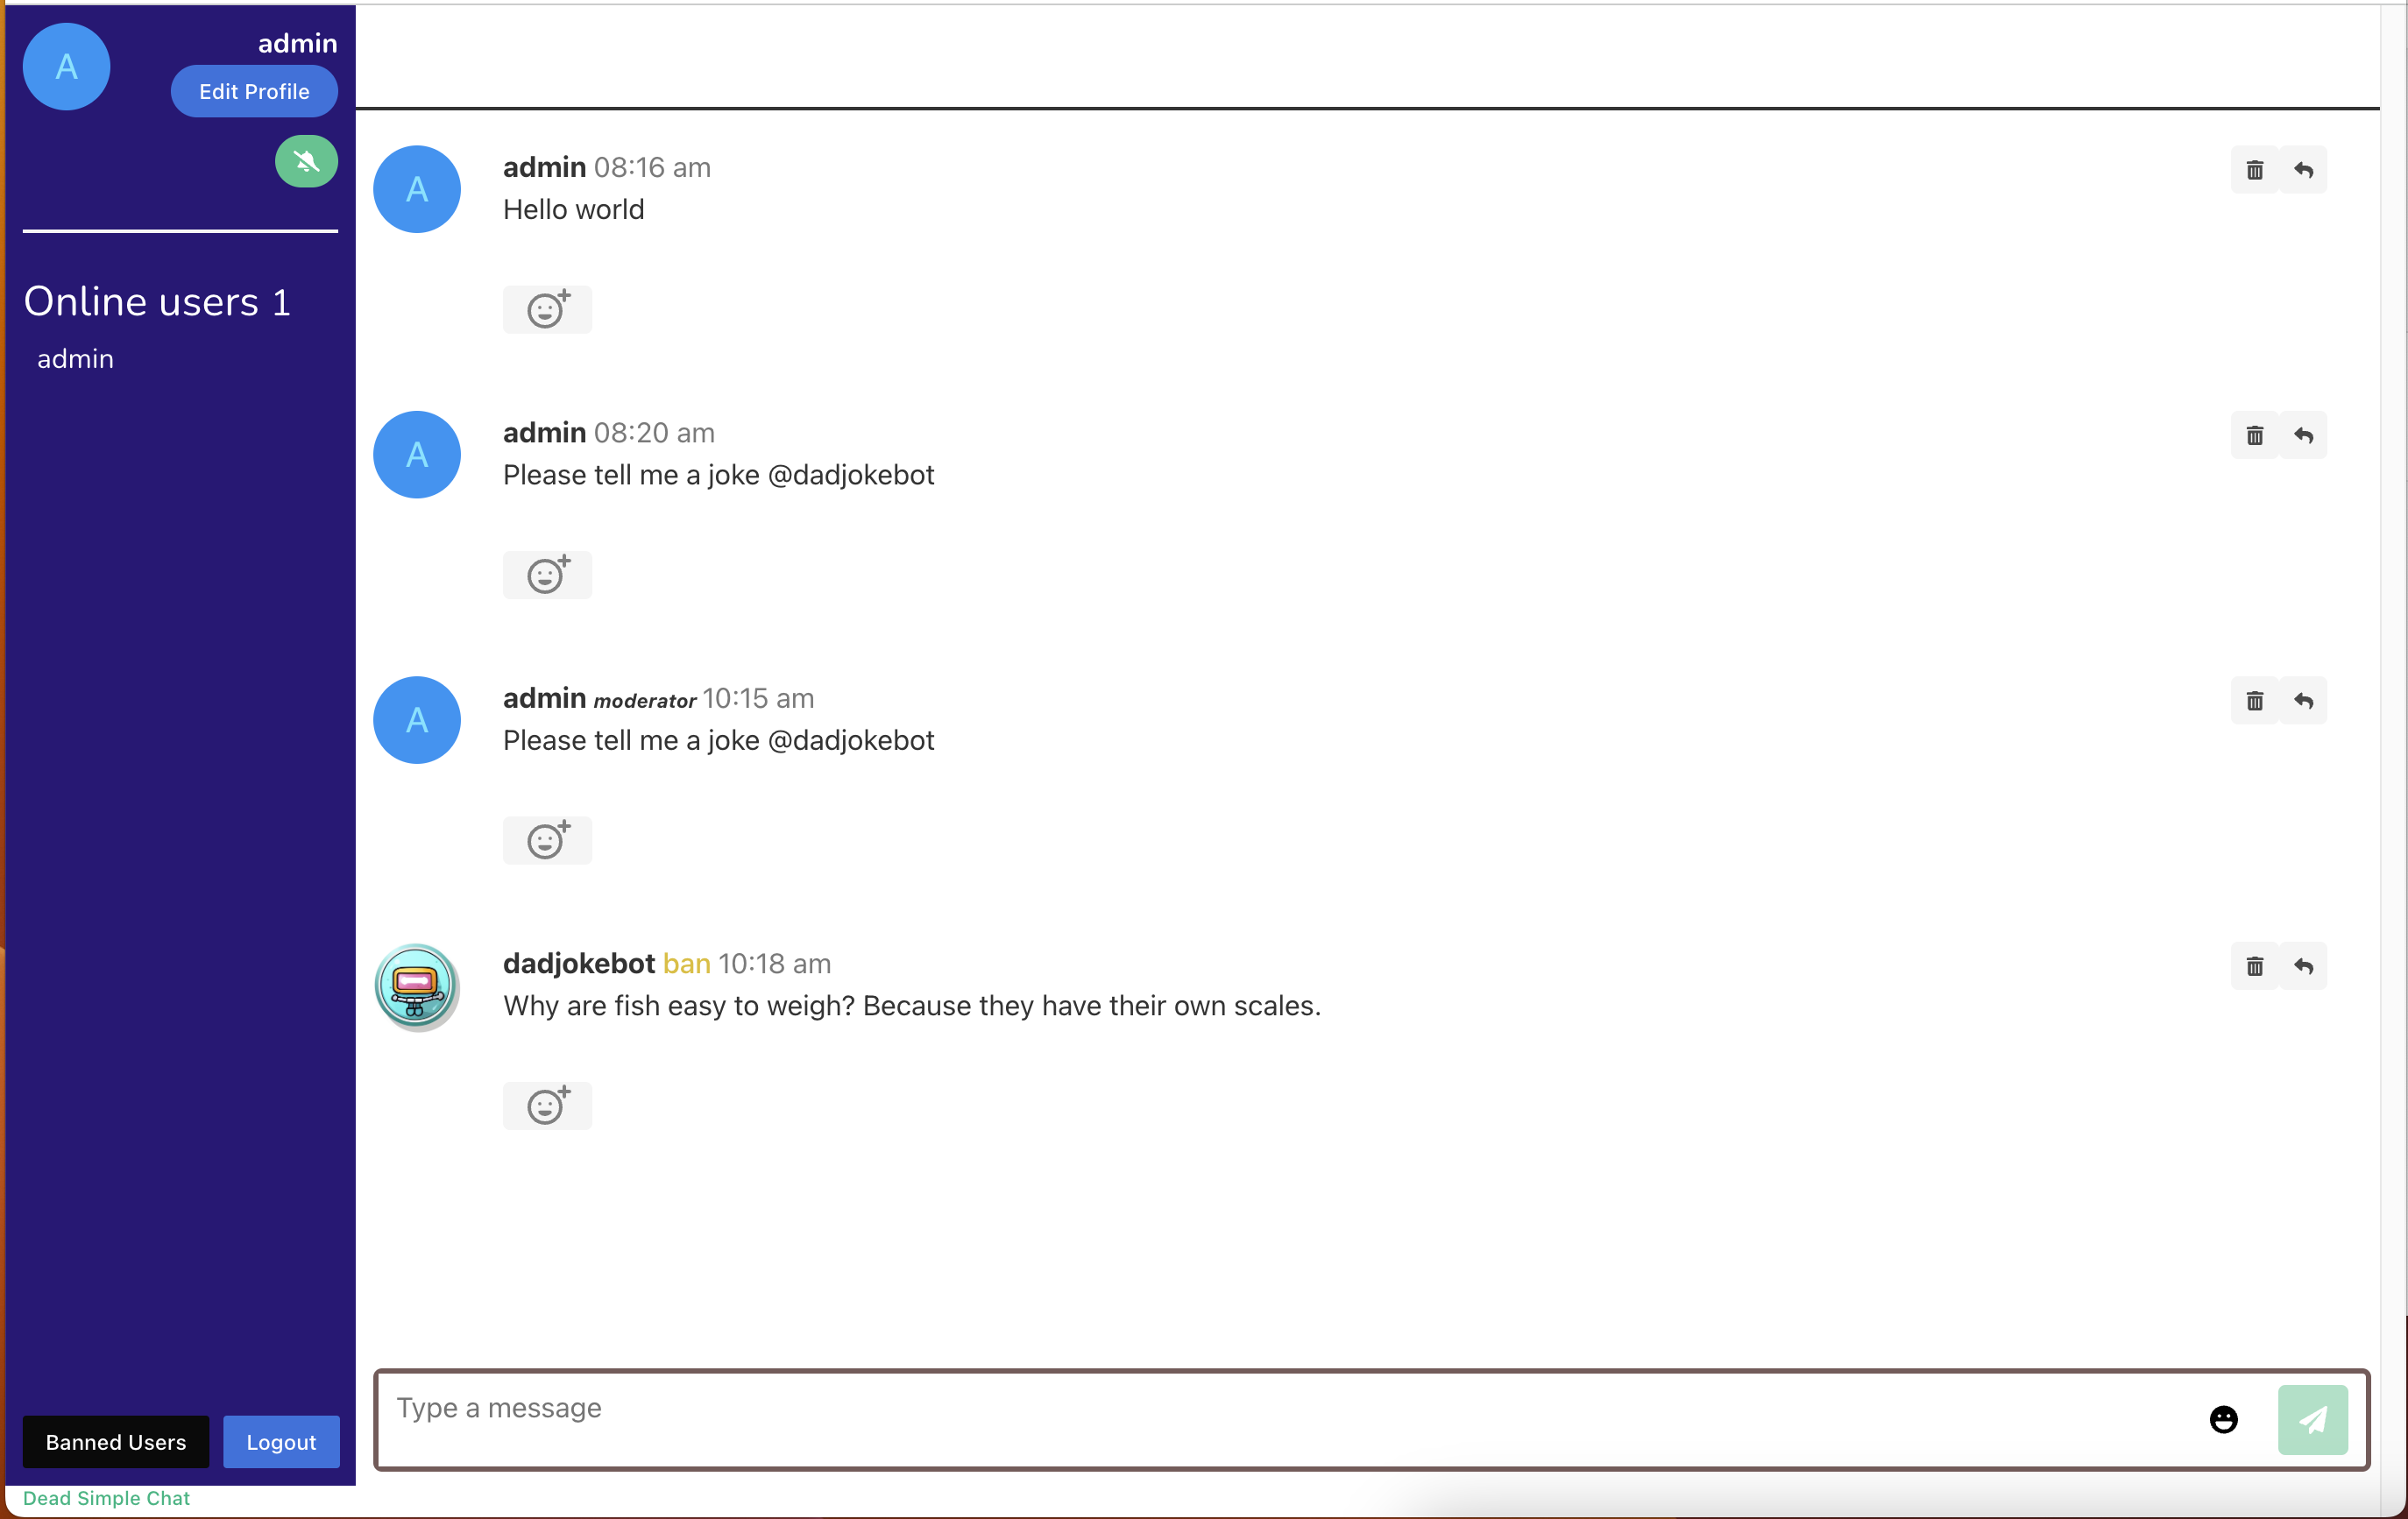
Step 3: Testing our Bot
We will invoke the bot my mentioning its name in the chat room, and bot should reply with a Dad Joke.
Conclusion & Next Steps
In this guide we have looked at how we can create a simple bot using DeadSimpleChat and Cloudflare functions.