Dead Simple Chat offers prebuilt Chat that can be added in minutes to any app or website. Can be completely customized and offers powerful API and SDK.
In this article we will be building a react js chat component. You can easily add the chat component to your react application and add chat to your react app.
let us first build a new react js application. type the below code to create to create a new reactjs application.
npx create-react-app my-appopen the code in your favorite editor. I am using visual studio code.
There go to index.js file it looks like this
import React from 'react';
import ReactDOM from 'react-dom/client';
import './index.css';
import App from './App';
import reportWebVitals from './reportWebVitals';

const root = ReactDOM.createRoot(document.getElementById('root'));
root.render(
  <React.StrictMode>
    <App />
  </React.StrictMode>
);

// If you want to start measuring performance in your app, pass a function
// to log results (for example: reportWebVitals(console.log))
// or send to an analytics endpoint. Learn more: https://bit.ly/CRA-vitals
reportWebVitals();
It renders an App.js component, we will create a new component called Chat.js and render that component in the index.js file
You can also add that component in your application to add chat to your app
Step 1: Create Chat.js
In the src folder create a new file and name it Chat.js In that file paste the following code
function Chat() {
  return (
    <div className="Chat">
      <header className="App-header">
        React Js Chat Application
      </header>
    </div>
  );
}

export default Chat;Here we have created a functional component and used the className App-header to add a bit of css to our page.
We have also written React Js Chat Application to show that we are building a chat component
Now, go to your index.js file and delete the lines
import App from './App'

<App />this would delete the app component from the index.js file and now in place of app component we need to add chat component
Add these lines in the index.js file
import Chat from './Chat'

<Chat />The completed index.js should look like this
import React from 'react';
import ReactDOM from 'react-dom/client';
import './index.css';
import Chat from './Chat'
import reportWebVitals from './reportWebVitals';

const root = ReactDOM.createRoot(document.getElementById('root'));
root.render(
  <React.StrictMode>
    <Chat />
  </React.StrictMode>
);

// If you want to start measuring performance in your app, pass a function
// to log results (for example: reportWebVitals(console.log))
// or send to an analytics endpoint. Learn more: https://bit.ly/CRA-vitals
reportWebVitals();
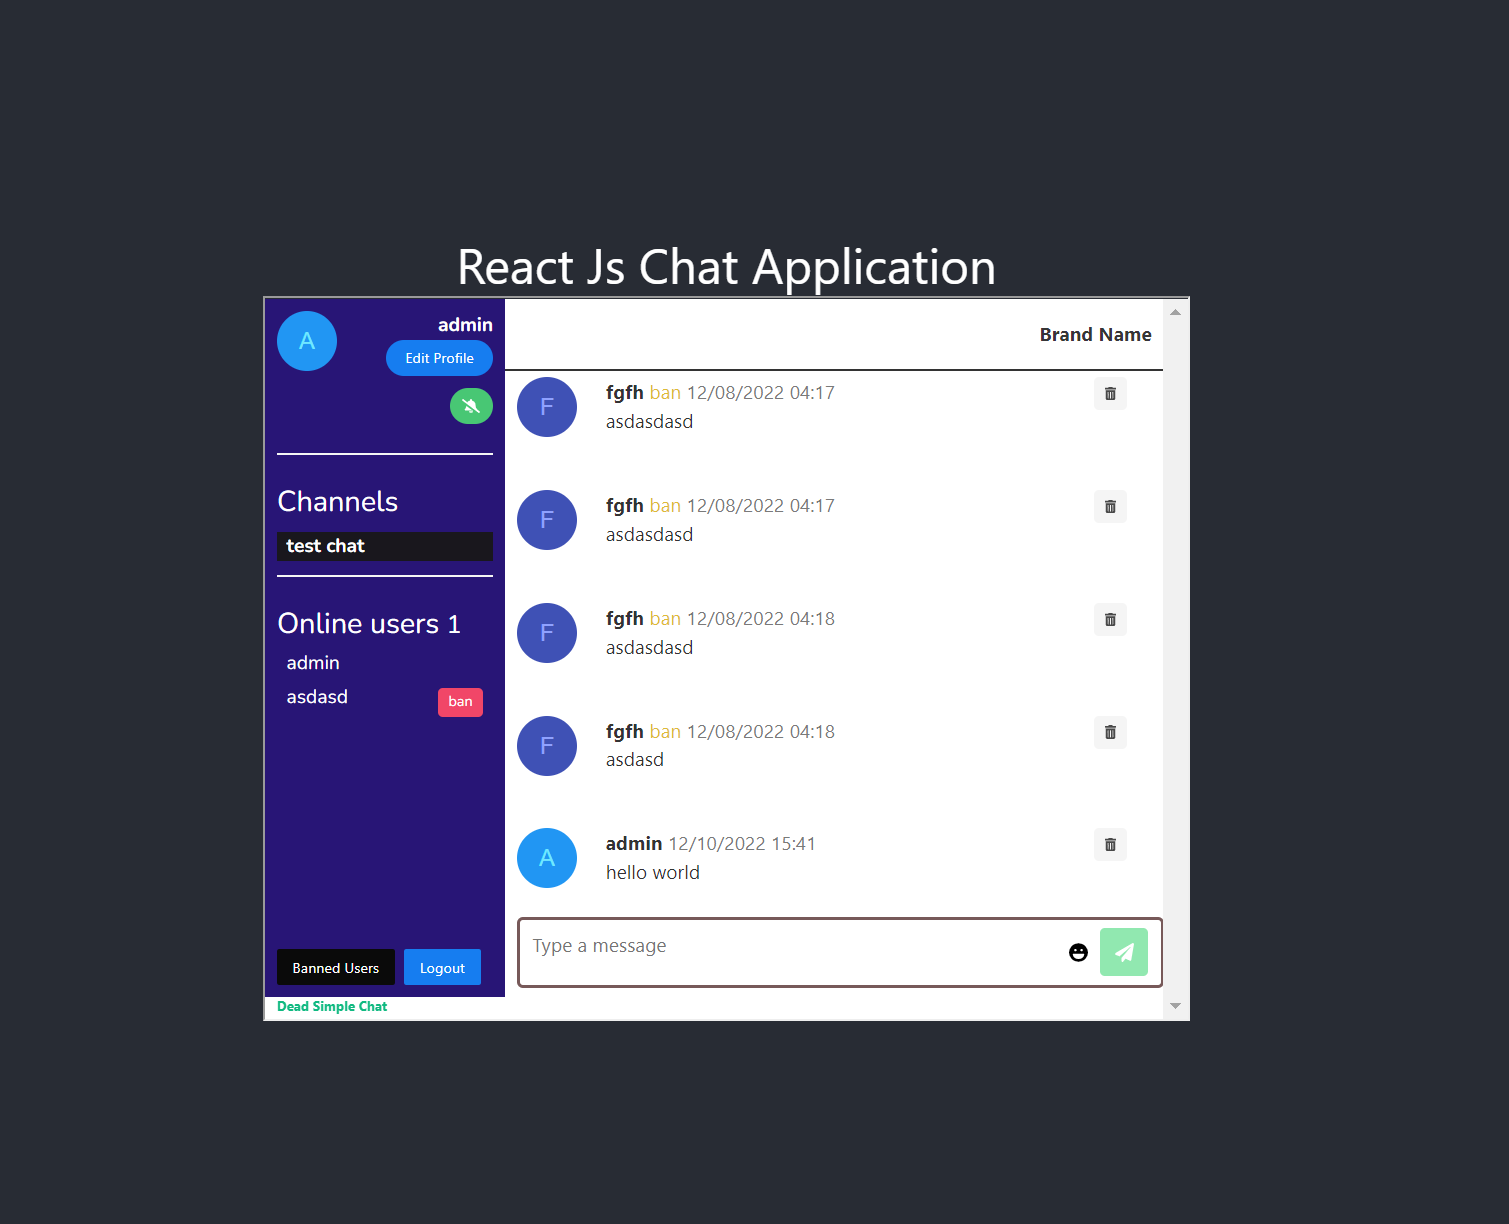
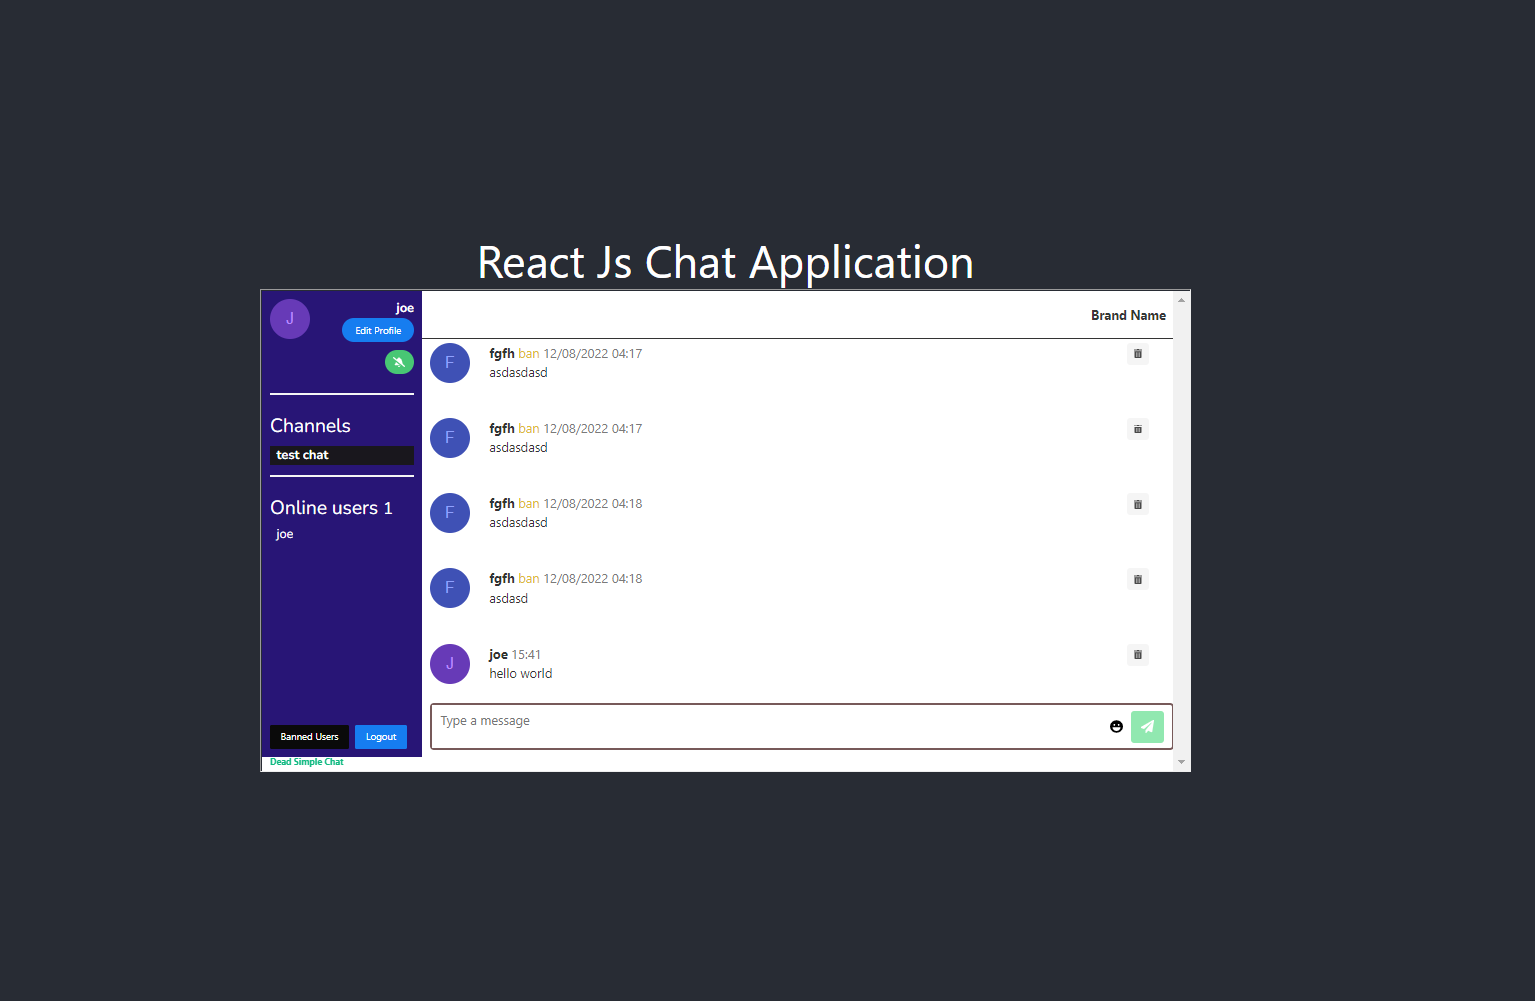
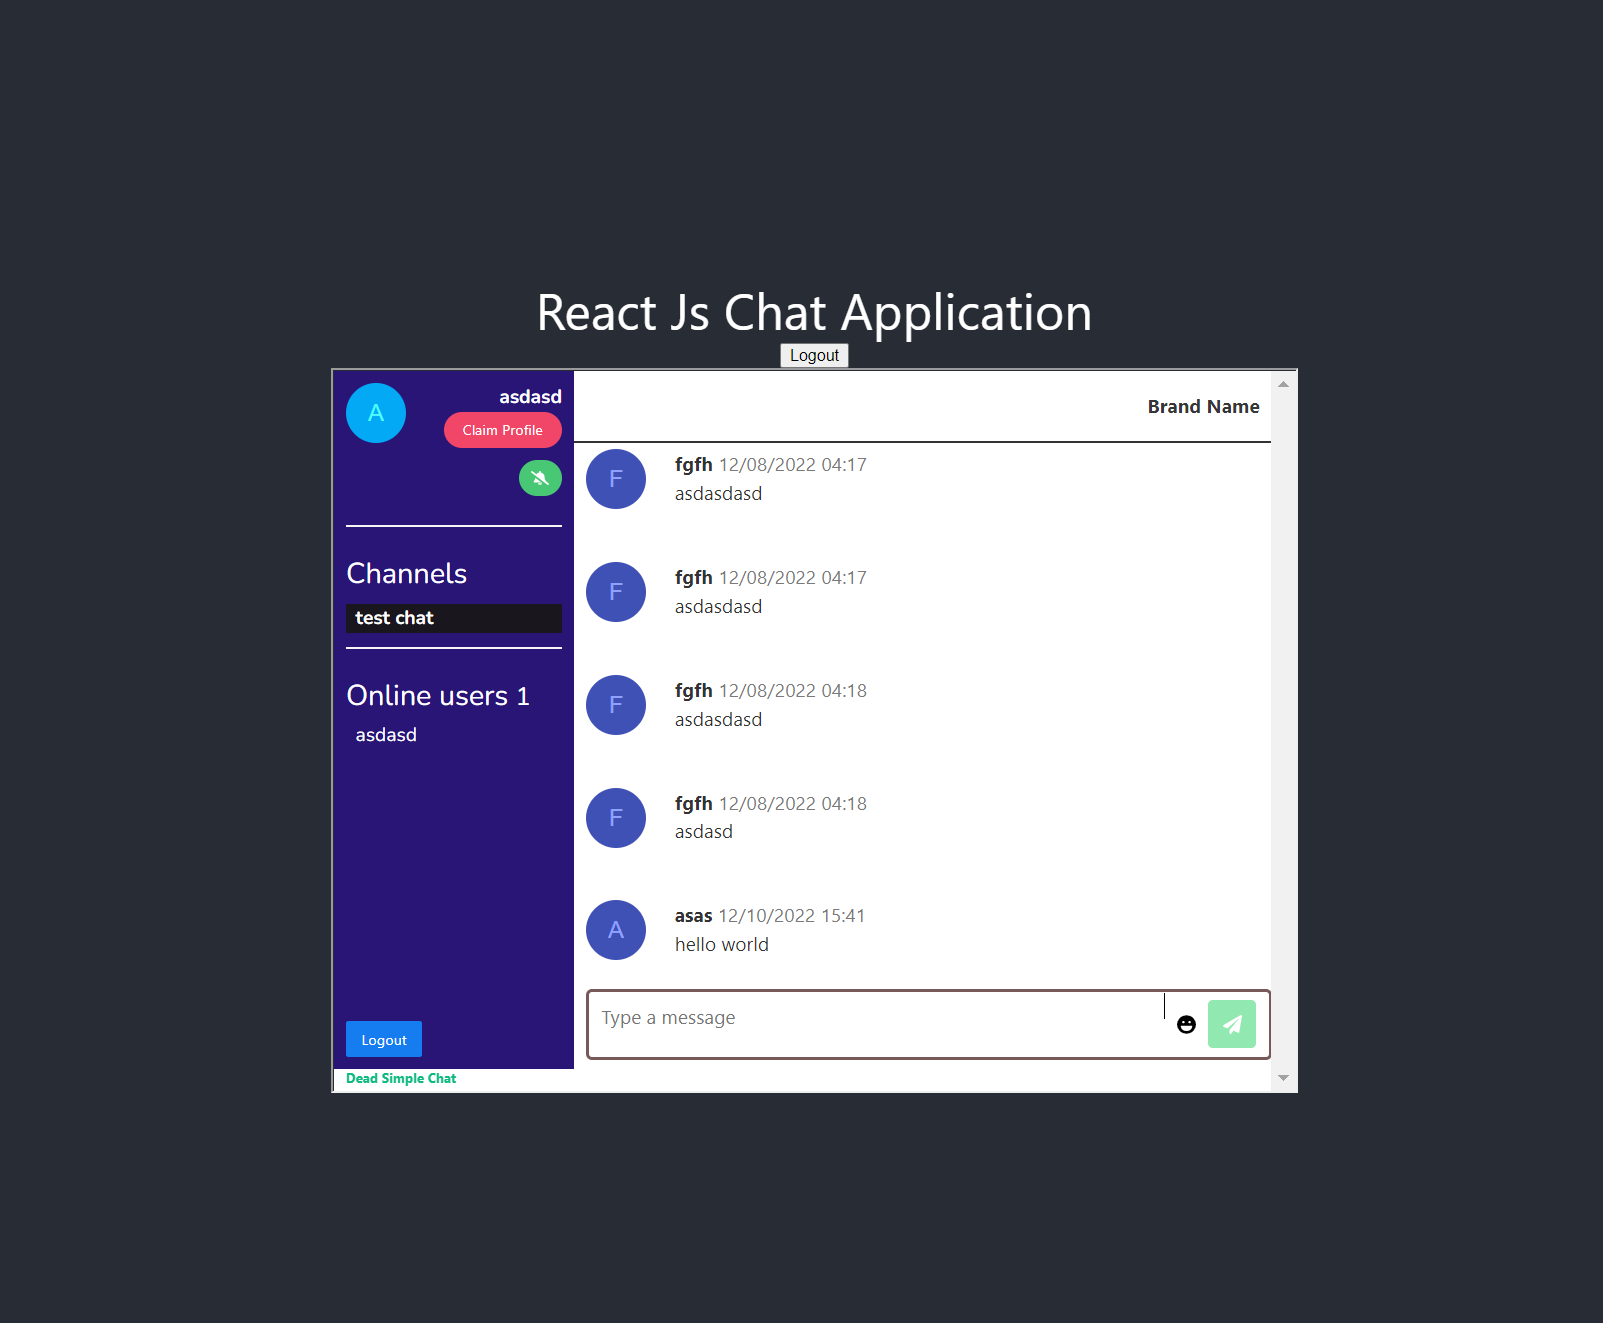
The react application should look something like this
Now we are rendering the chat component instead of the App component in our home page.
In the next steps let us add chat to our Chat component
Step 2: Adding Chat from chat provider
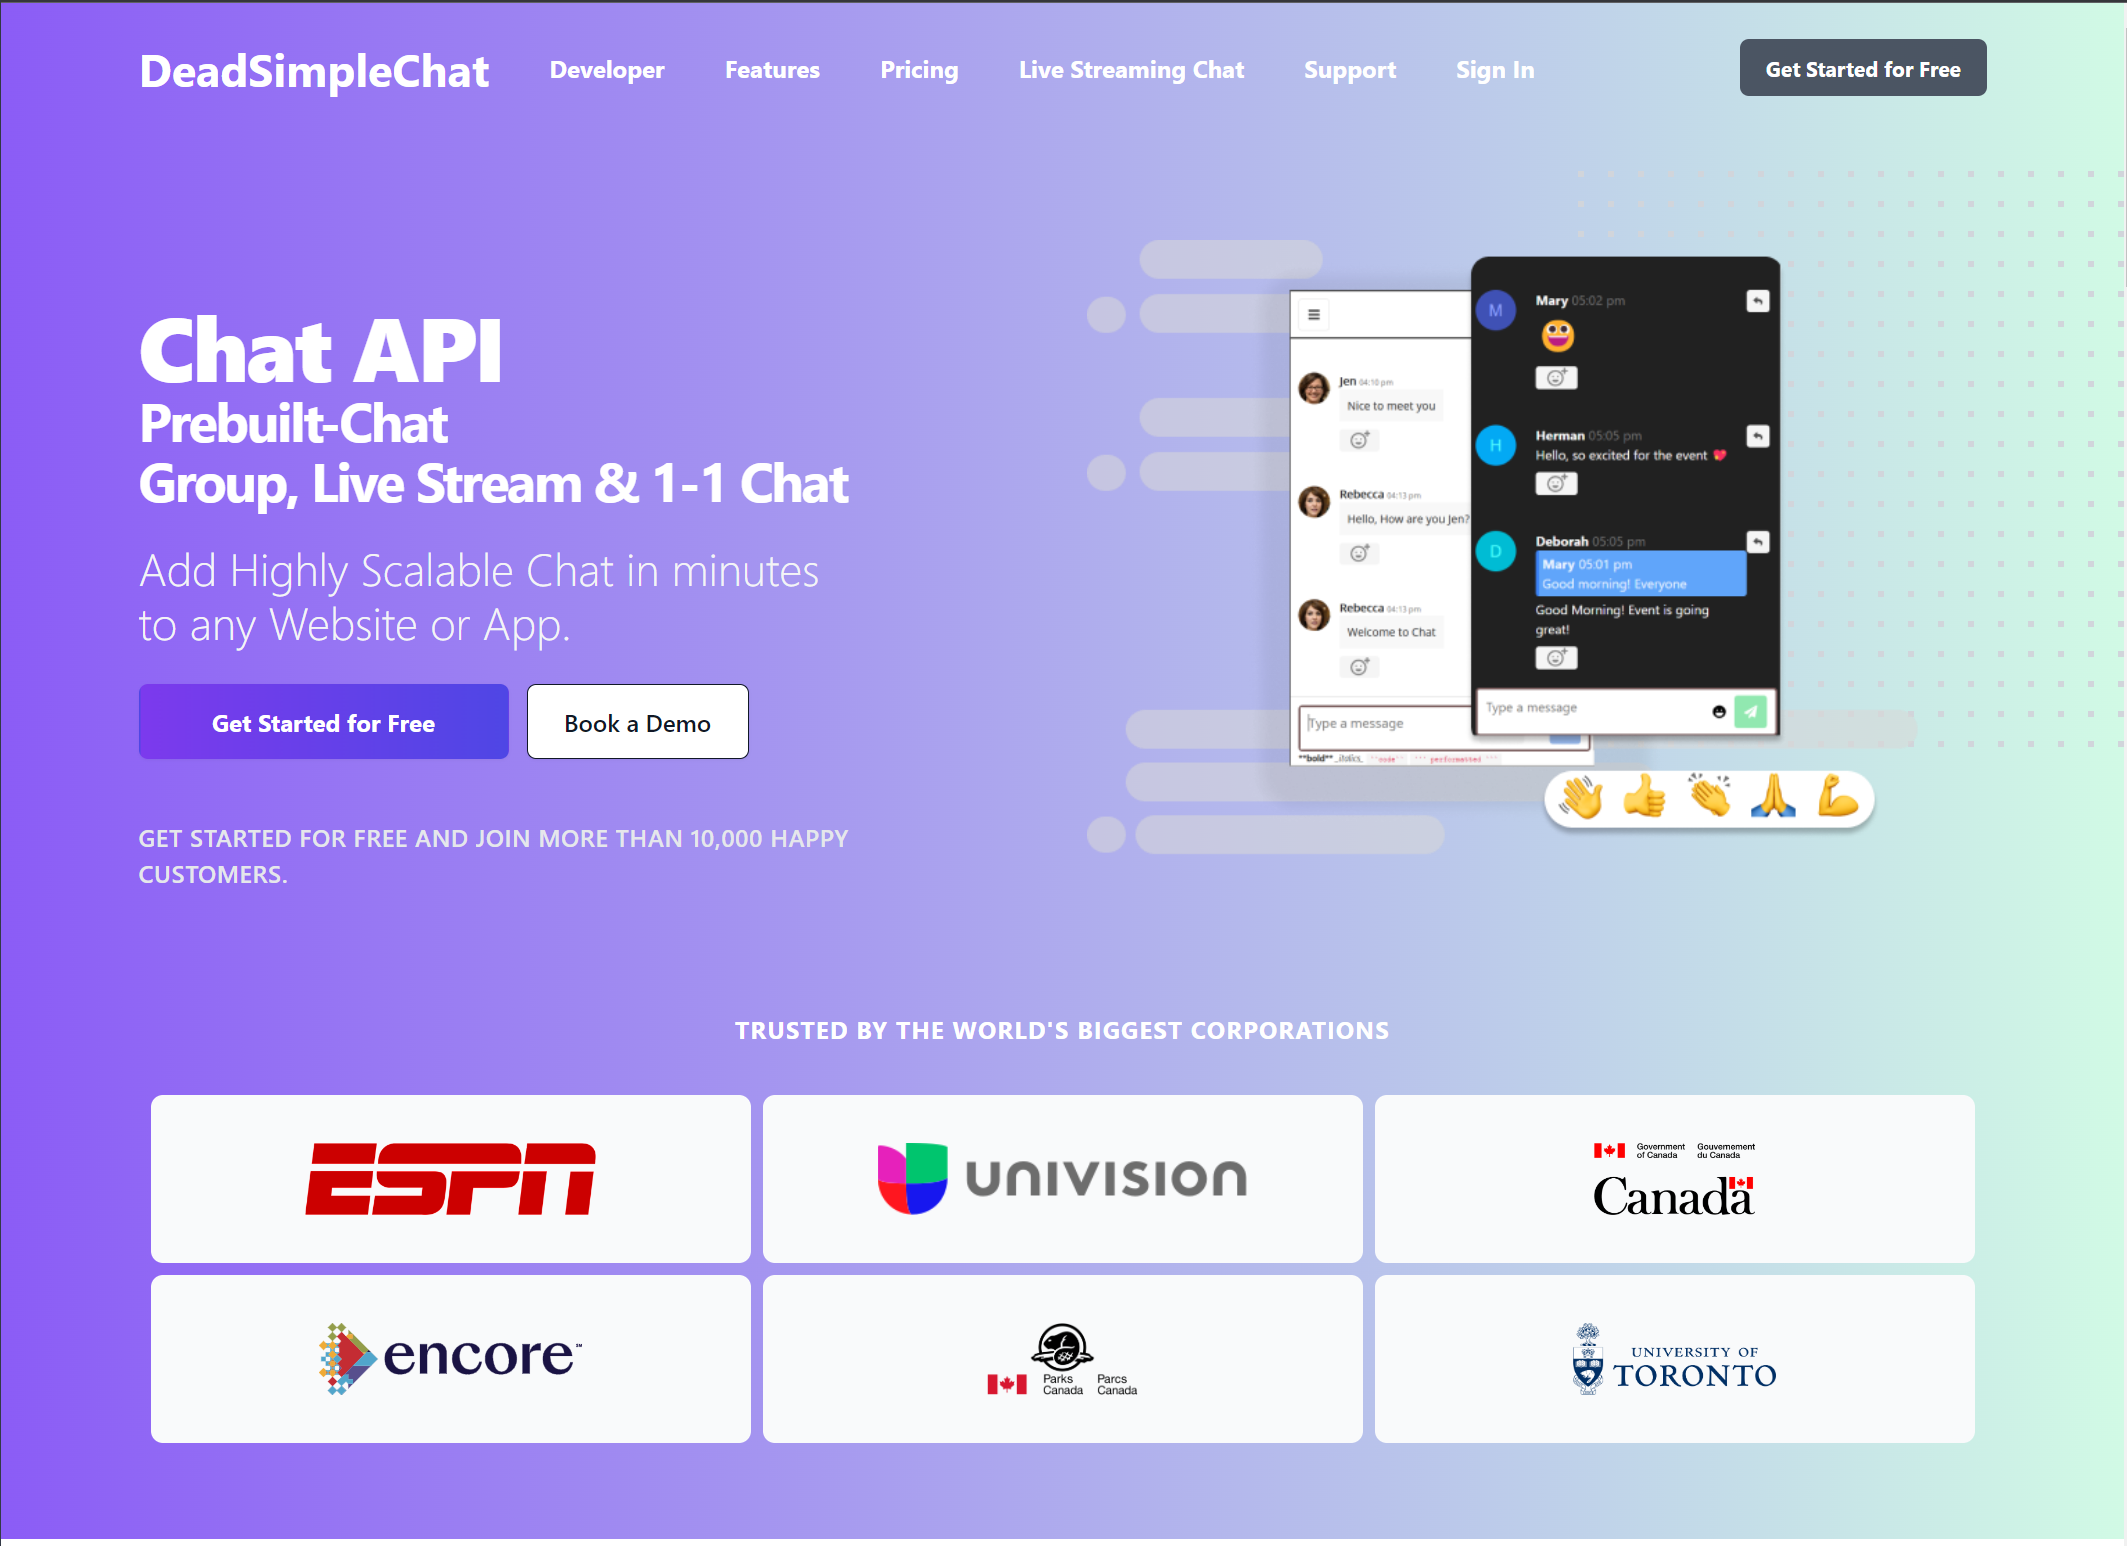
We need a chat provider to add chat to our react application. Go to DeadSimpleChat.com and click on the Get Started button to create a free account with DeadSimpleChat
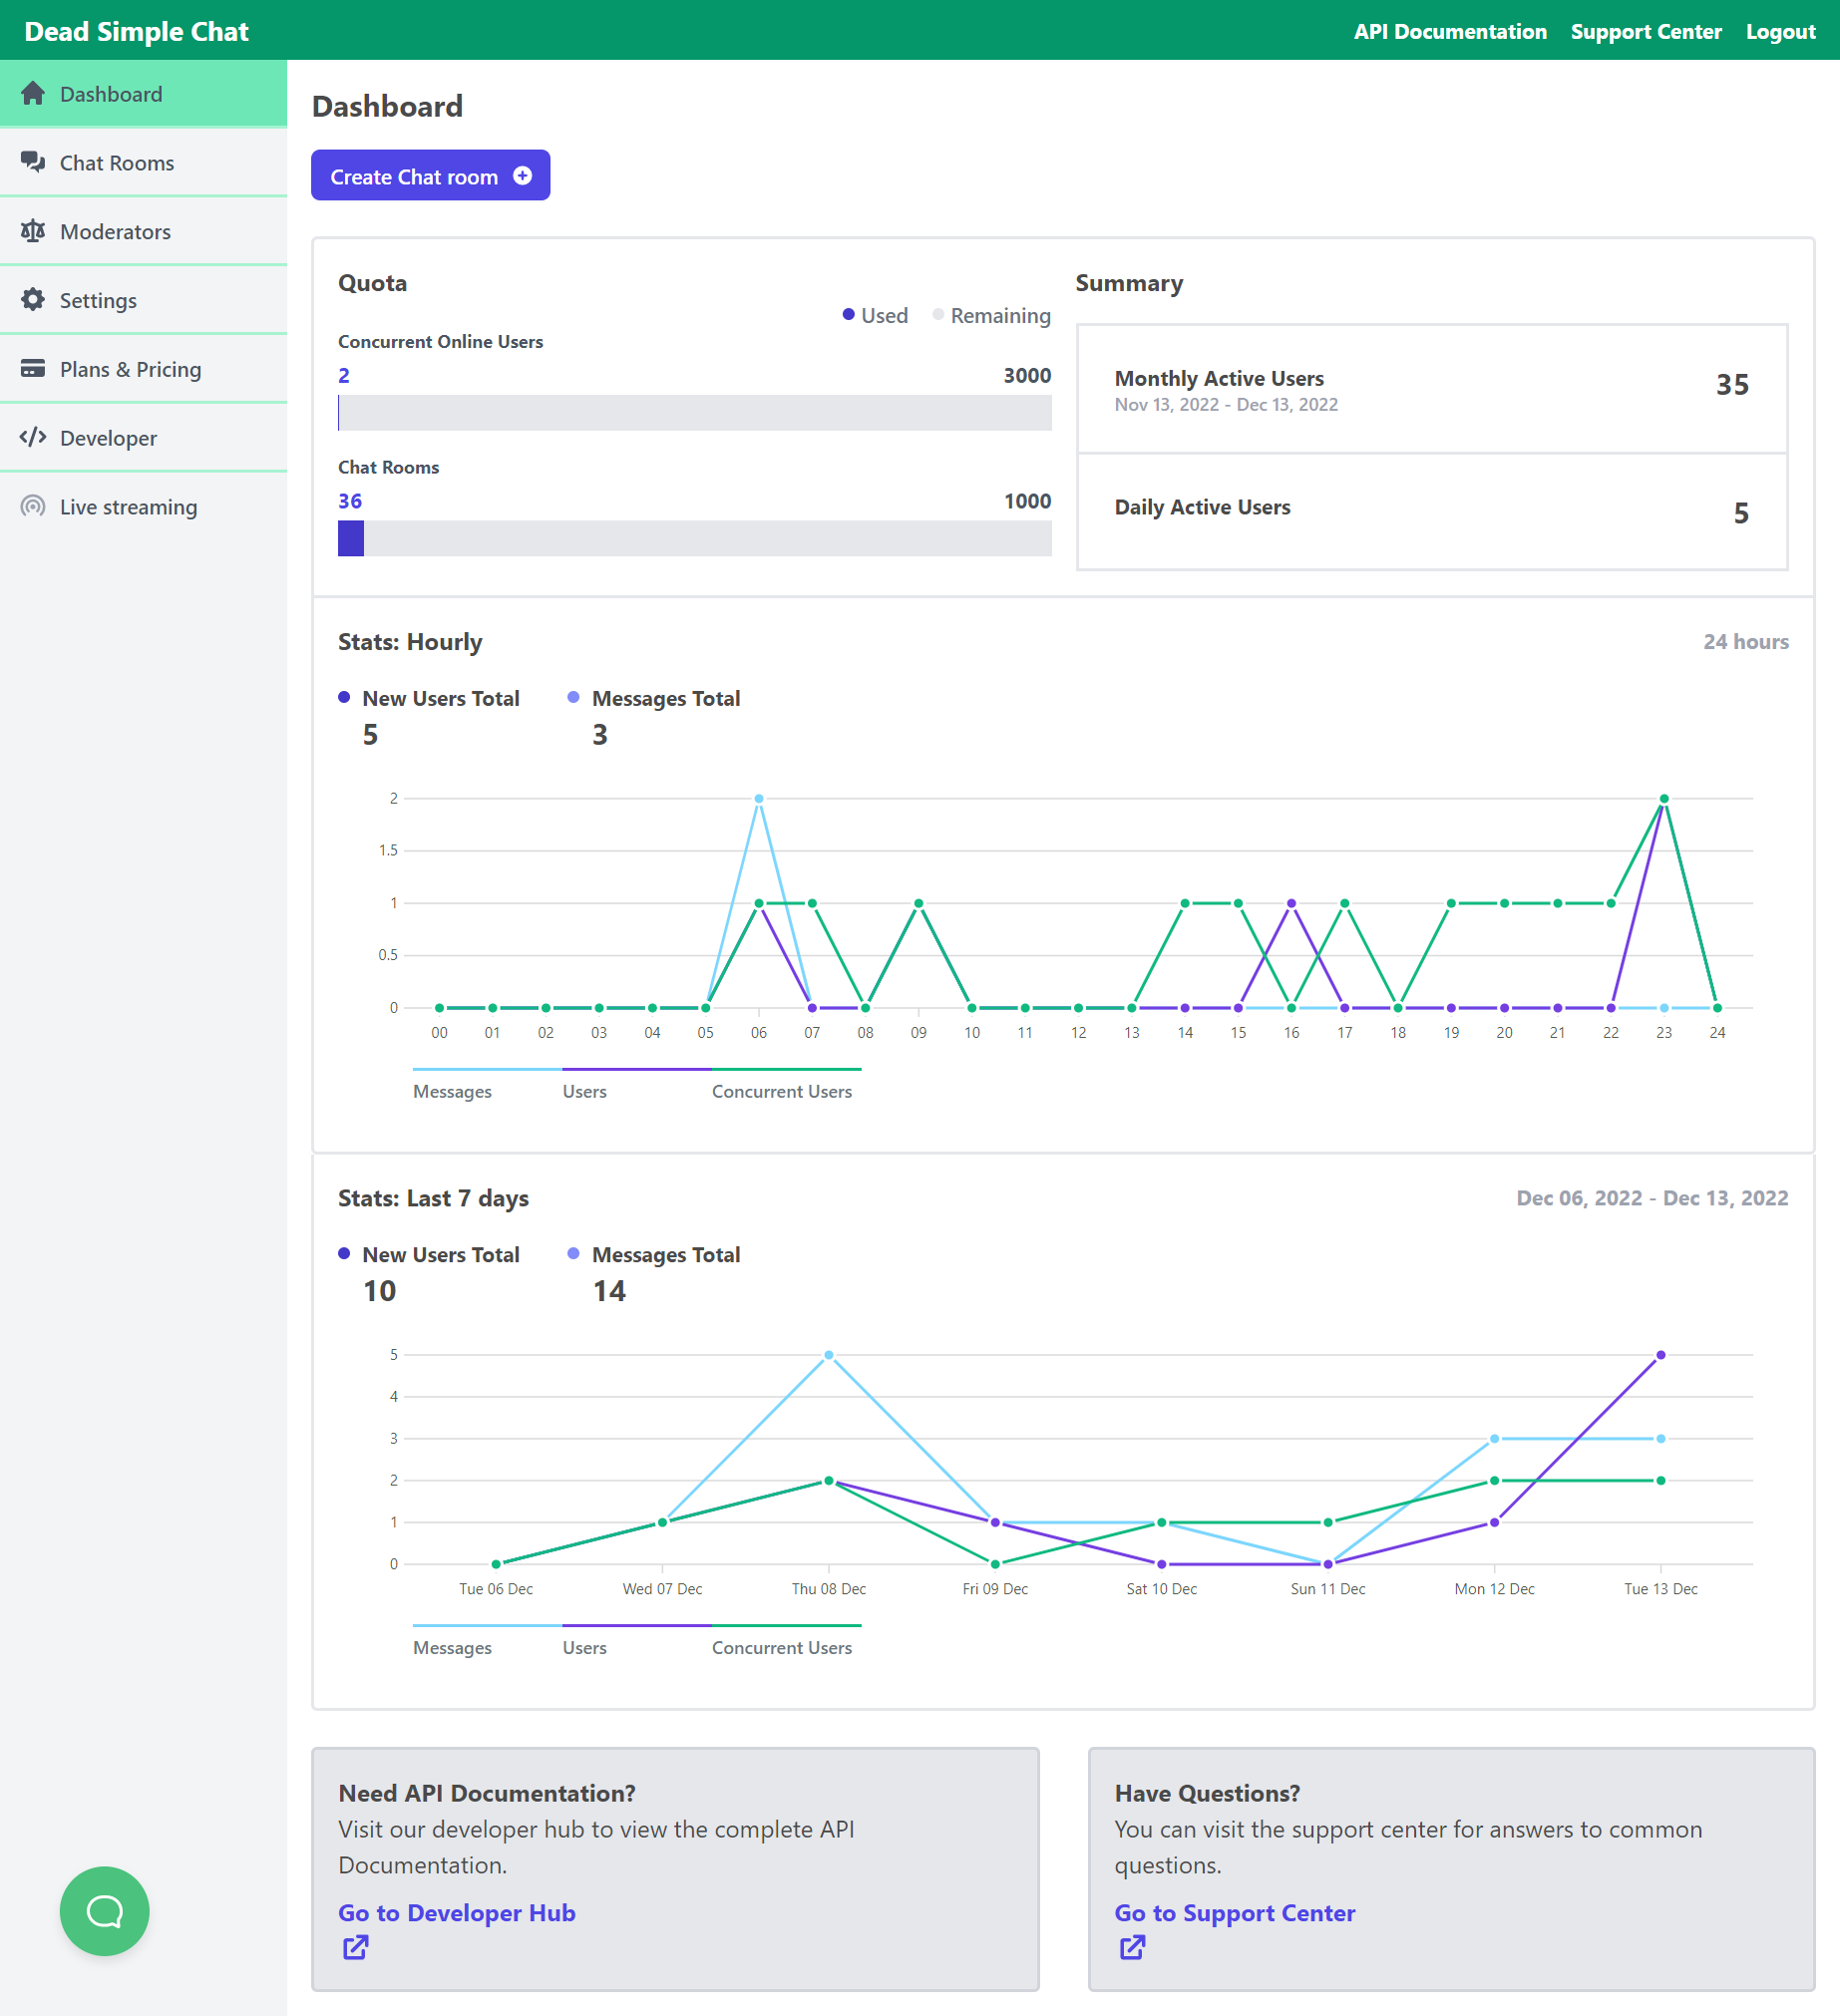
Once you create an account you will land up in the Dashboard section there click on the create chat room button to create a new chat room
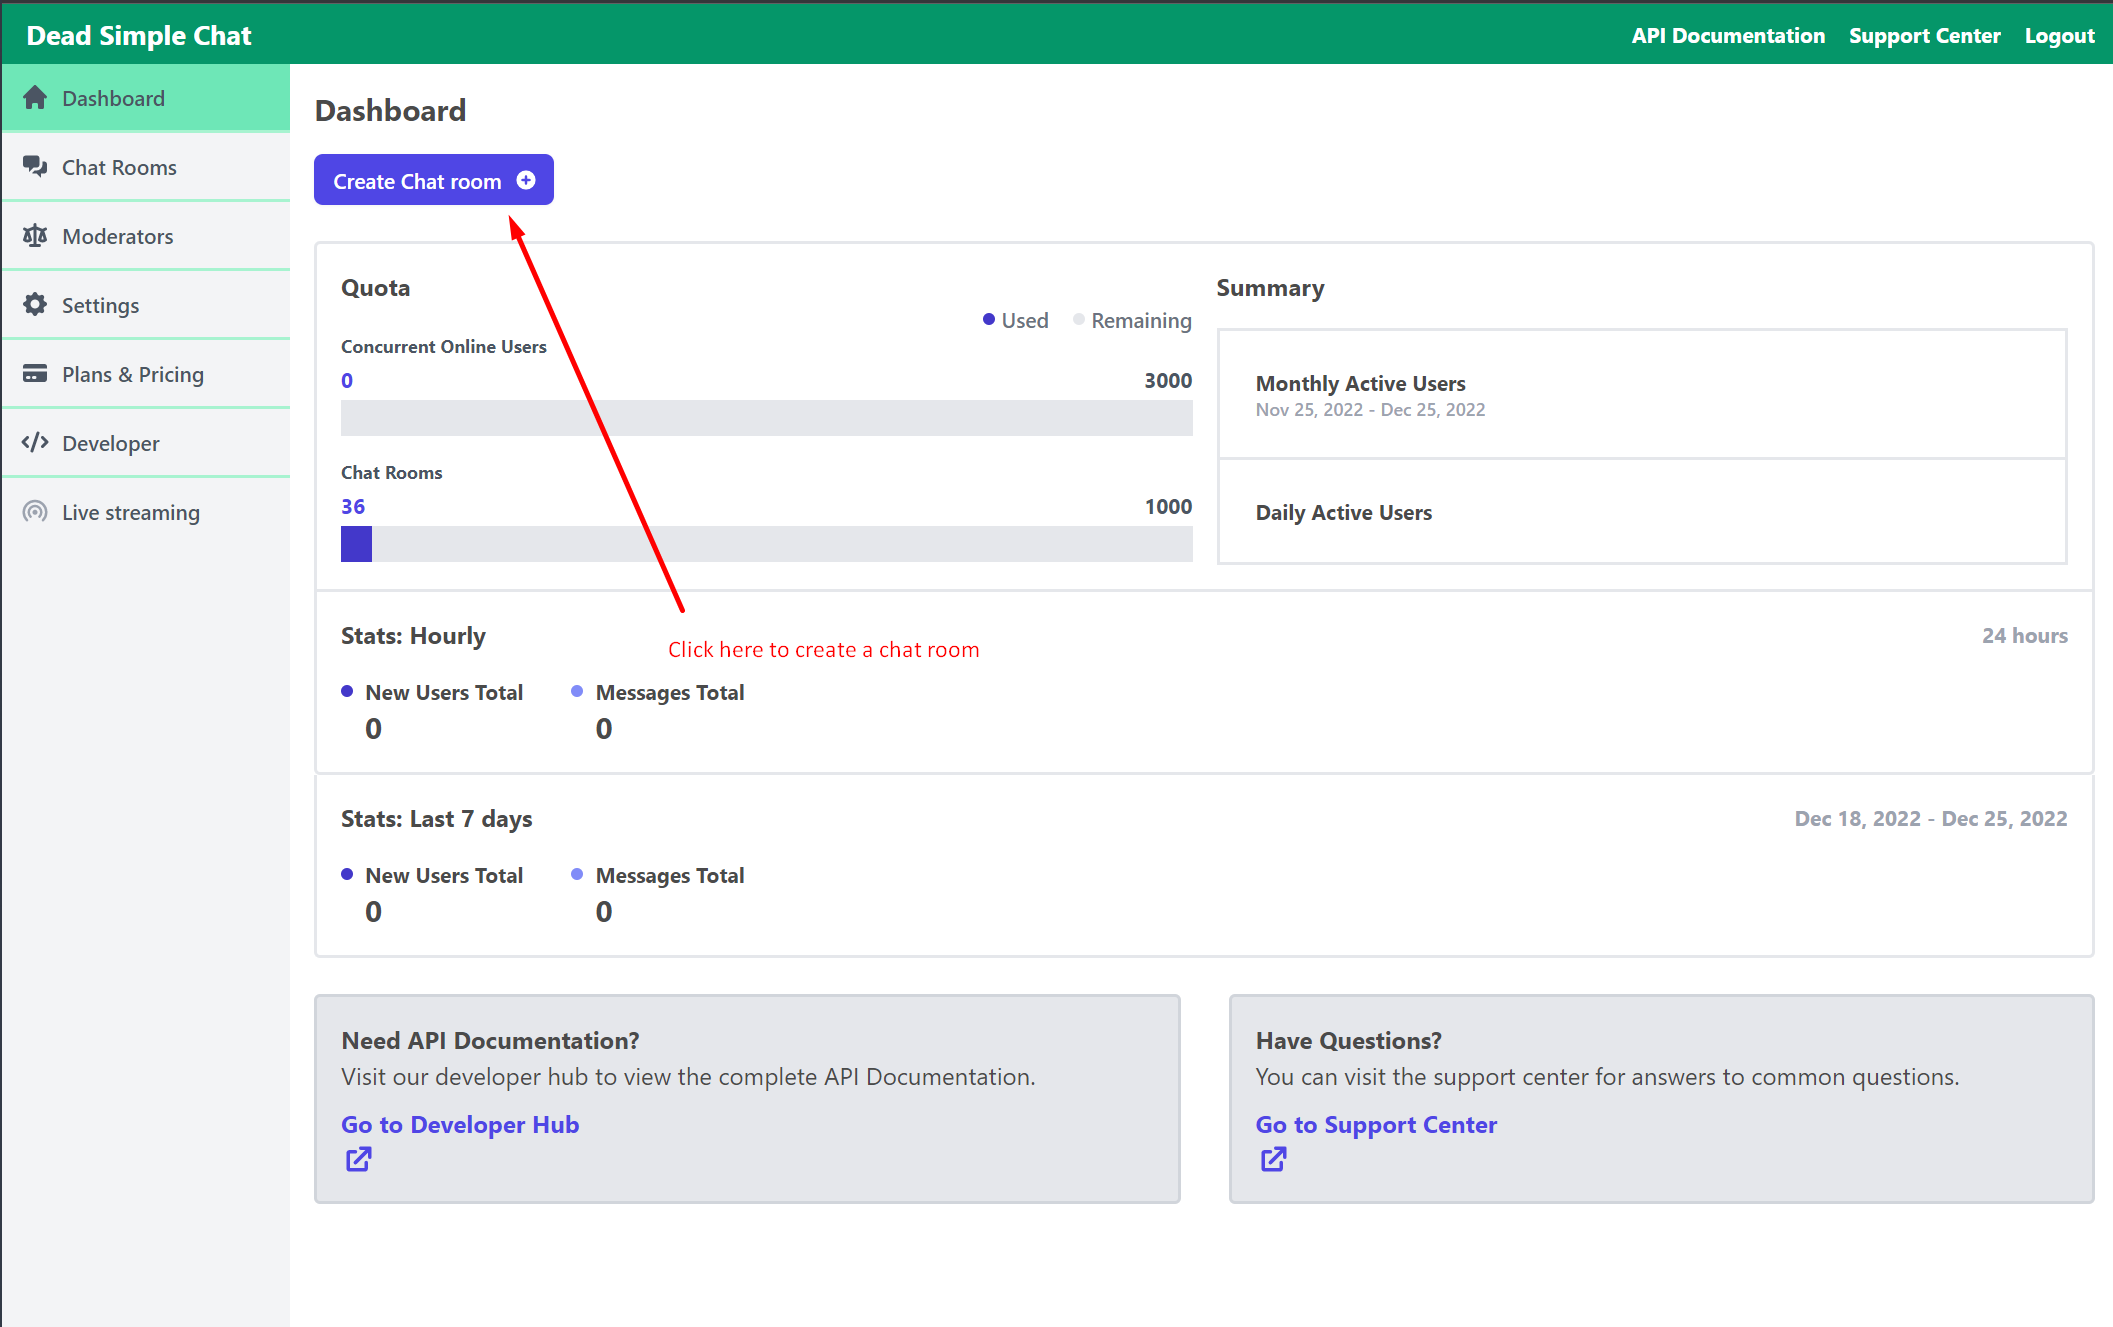
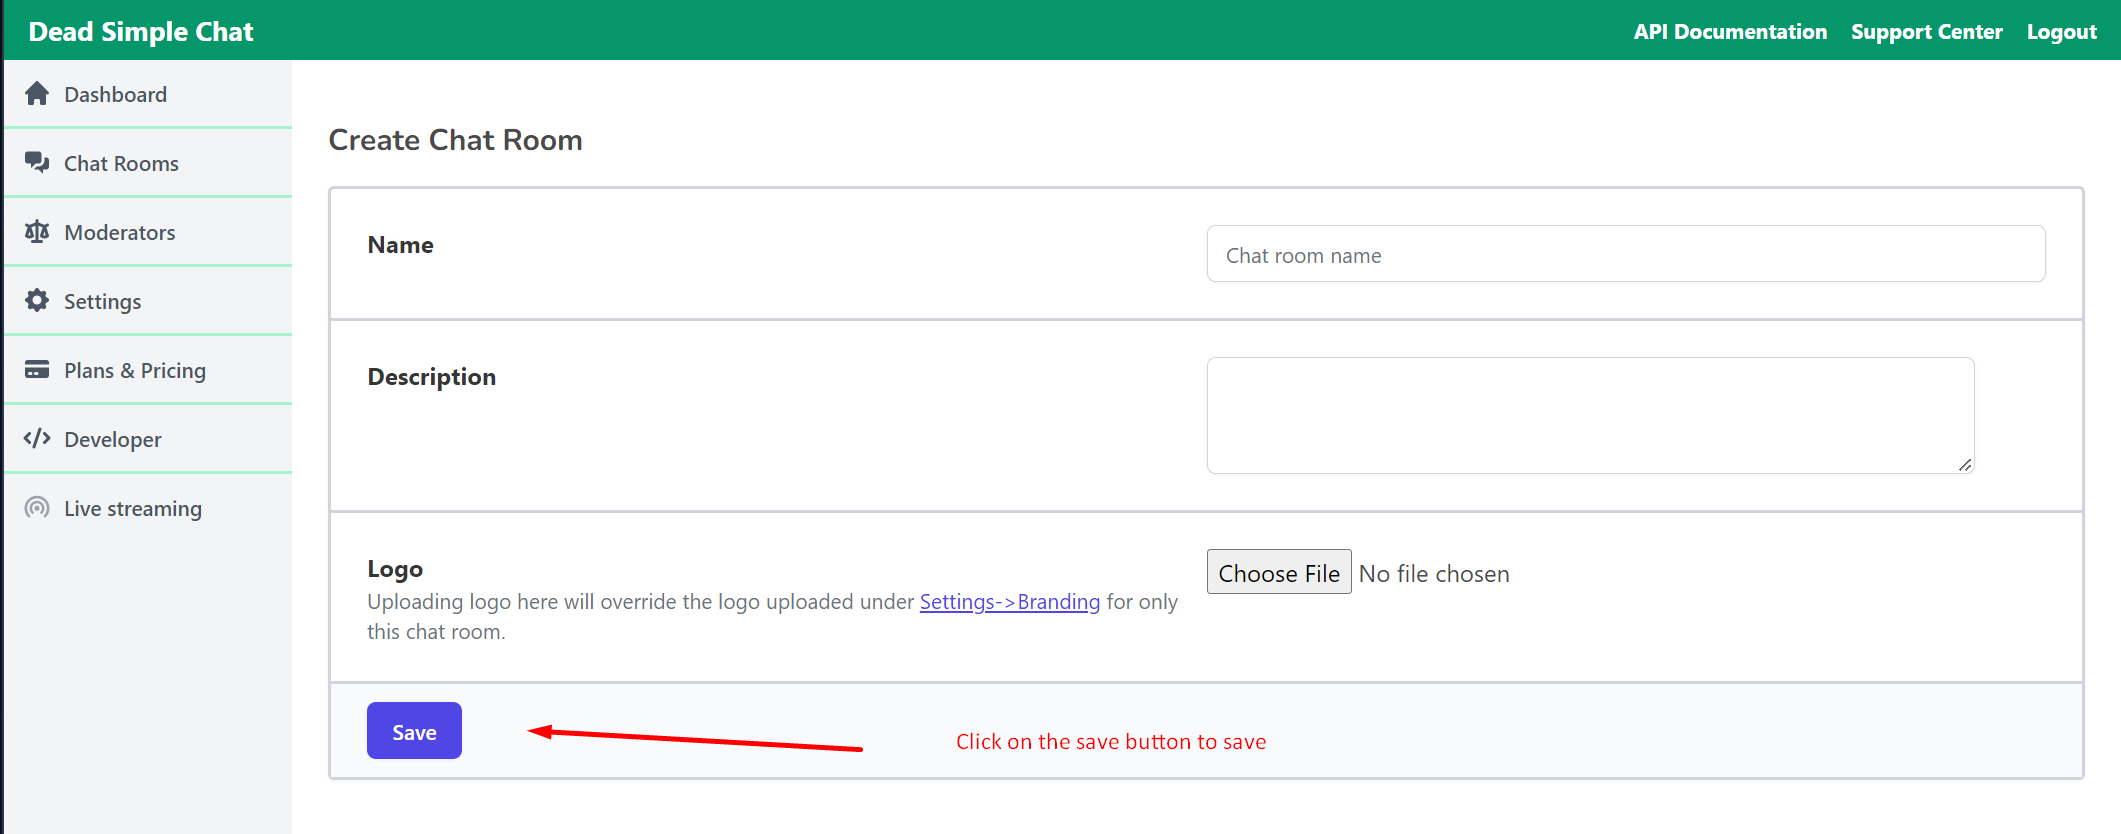
Click on the save button to create a chat room
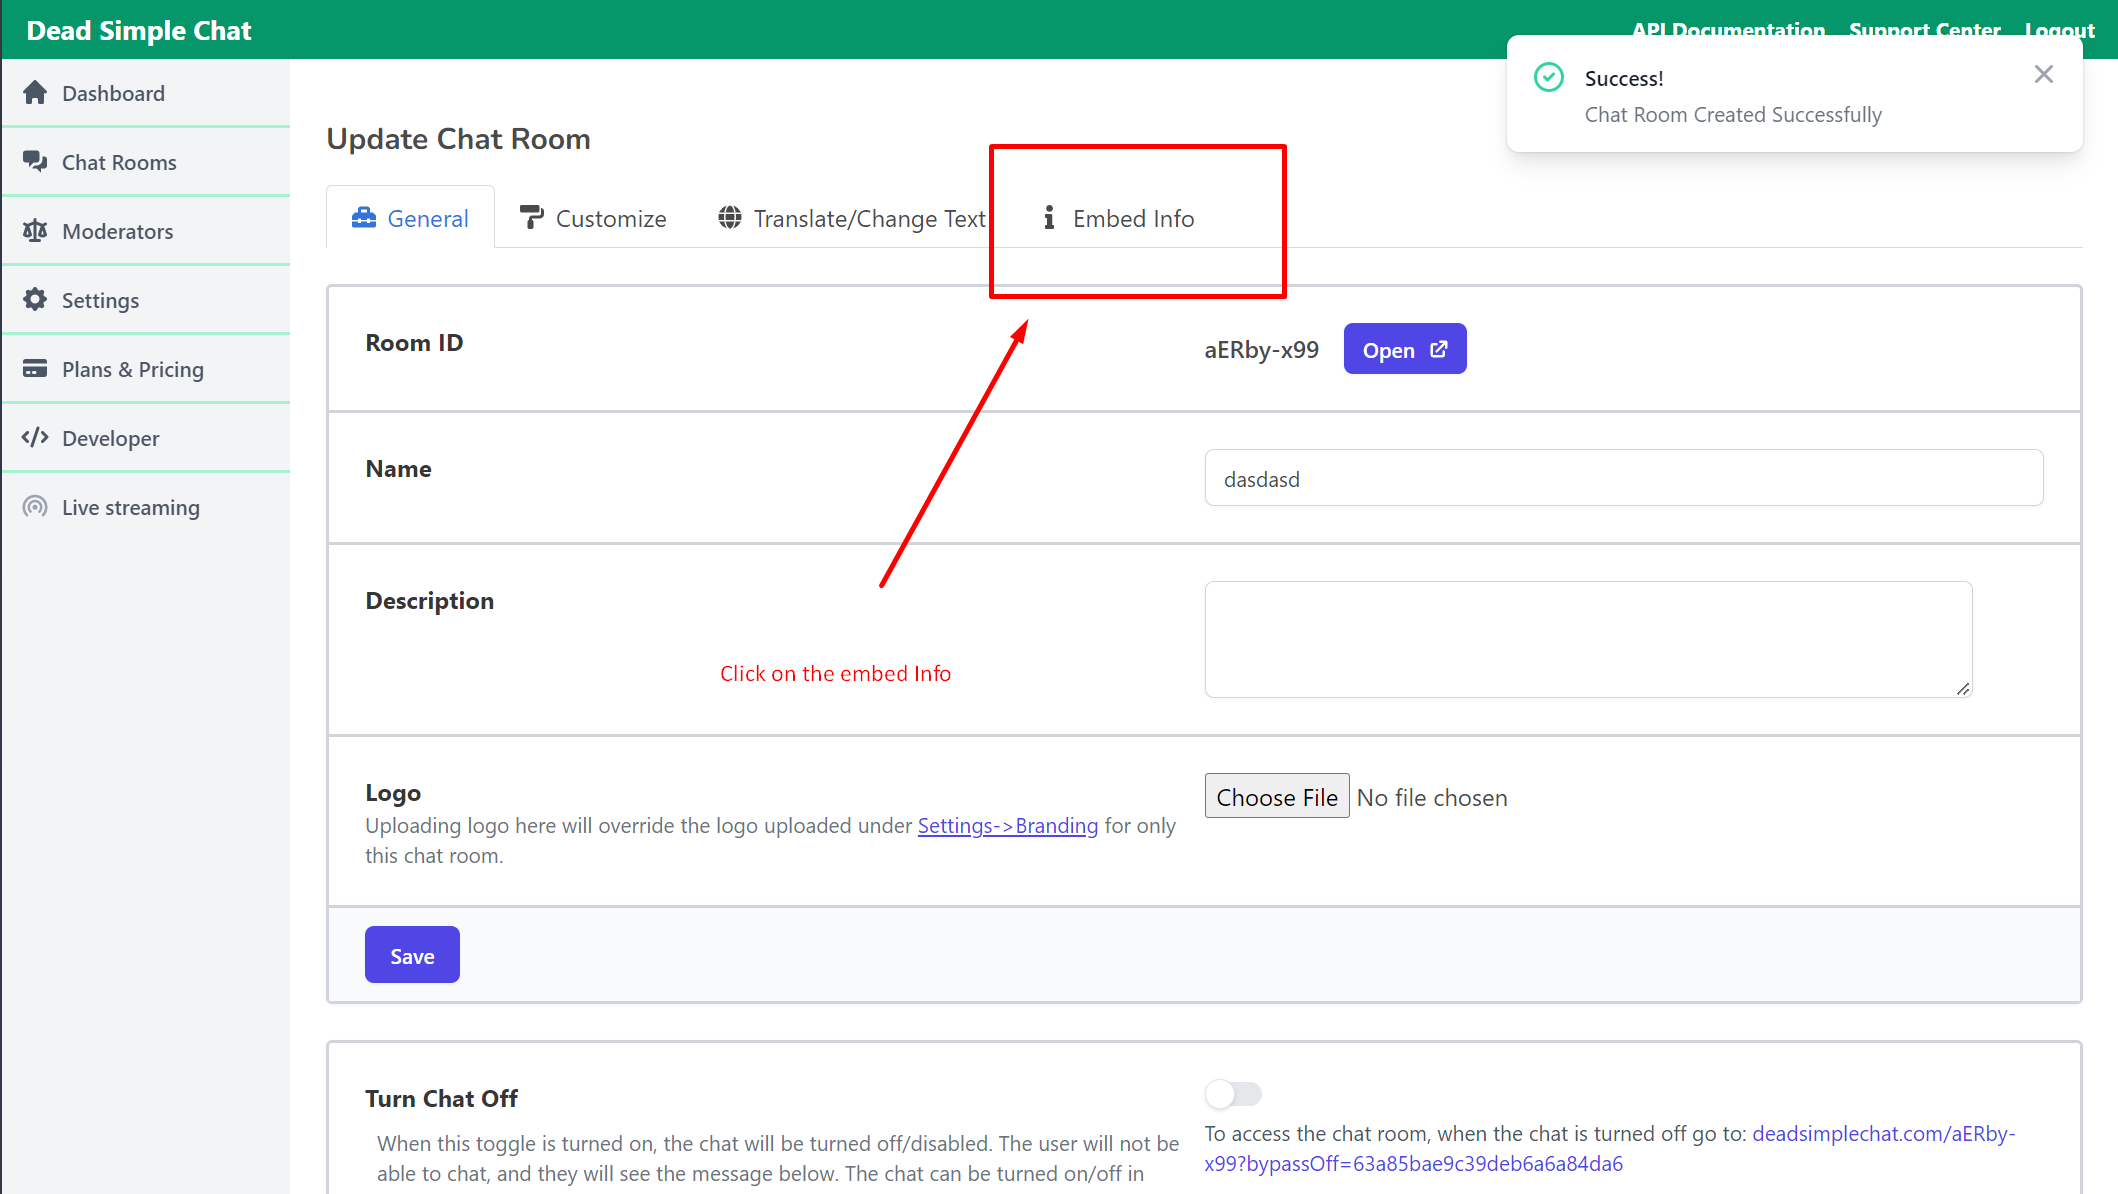
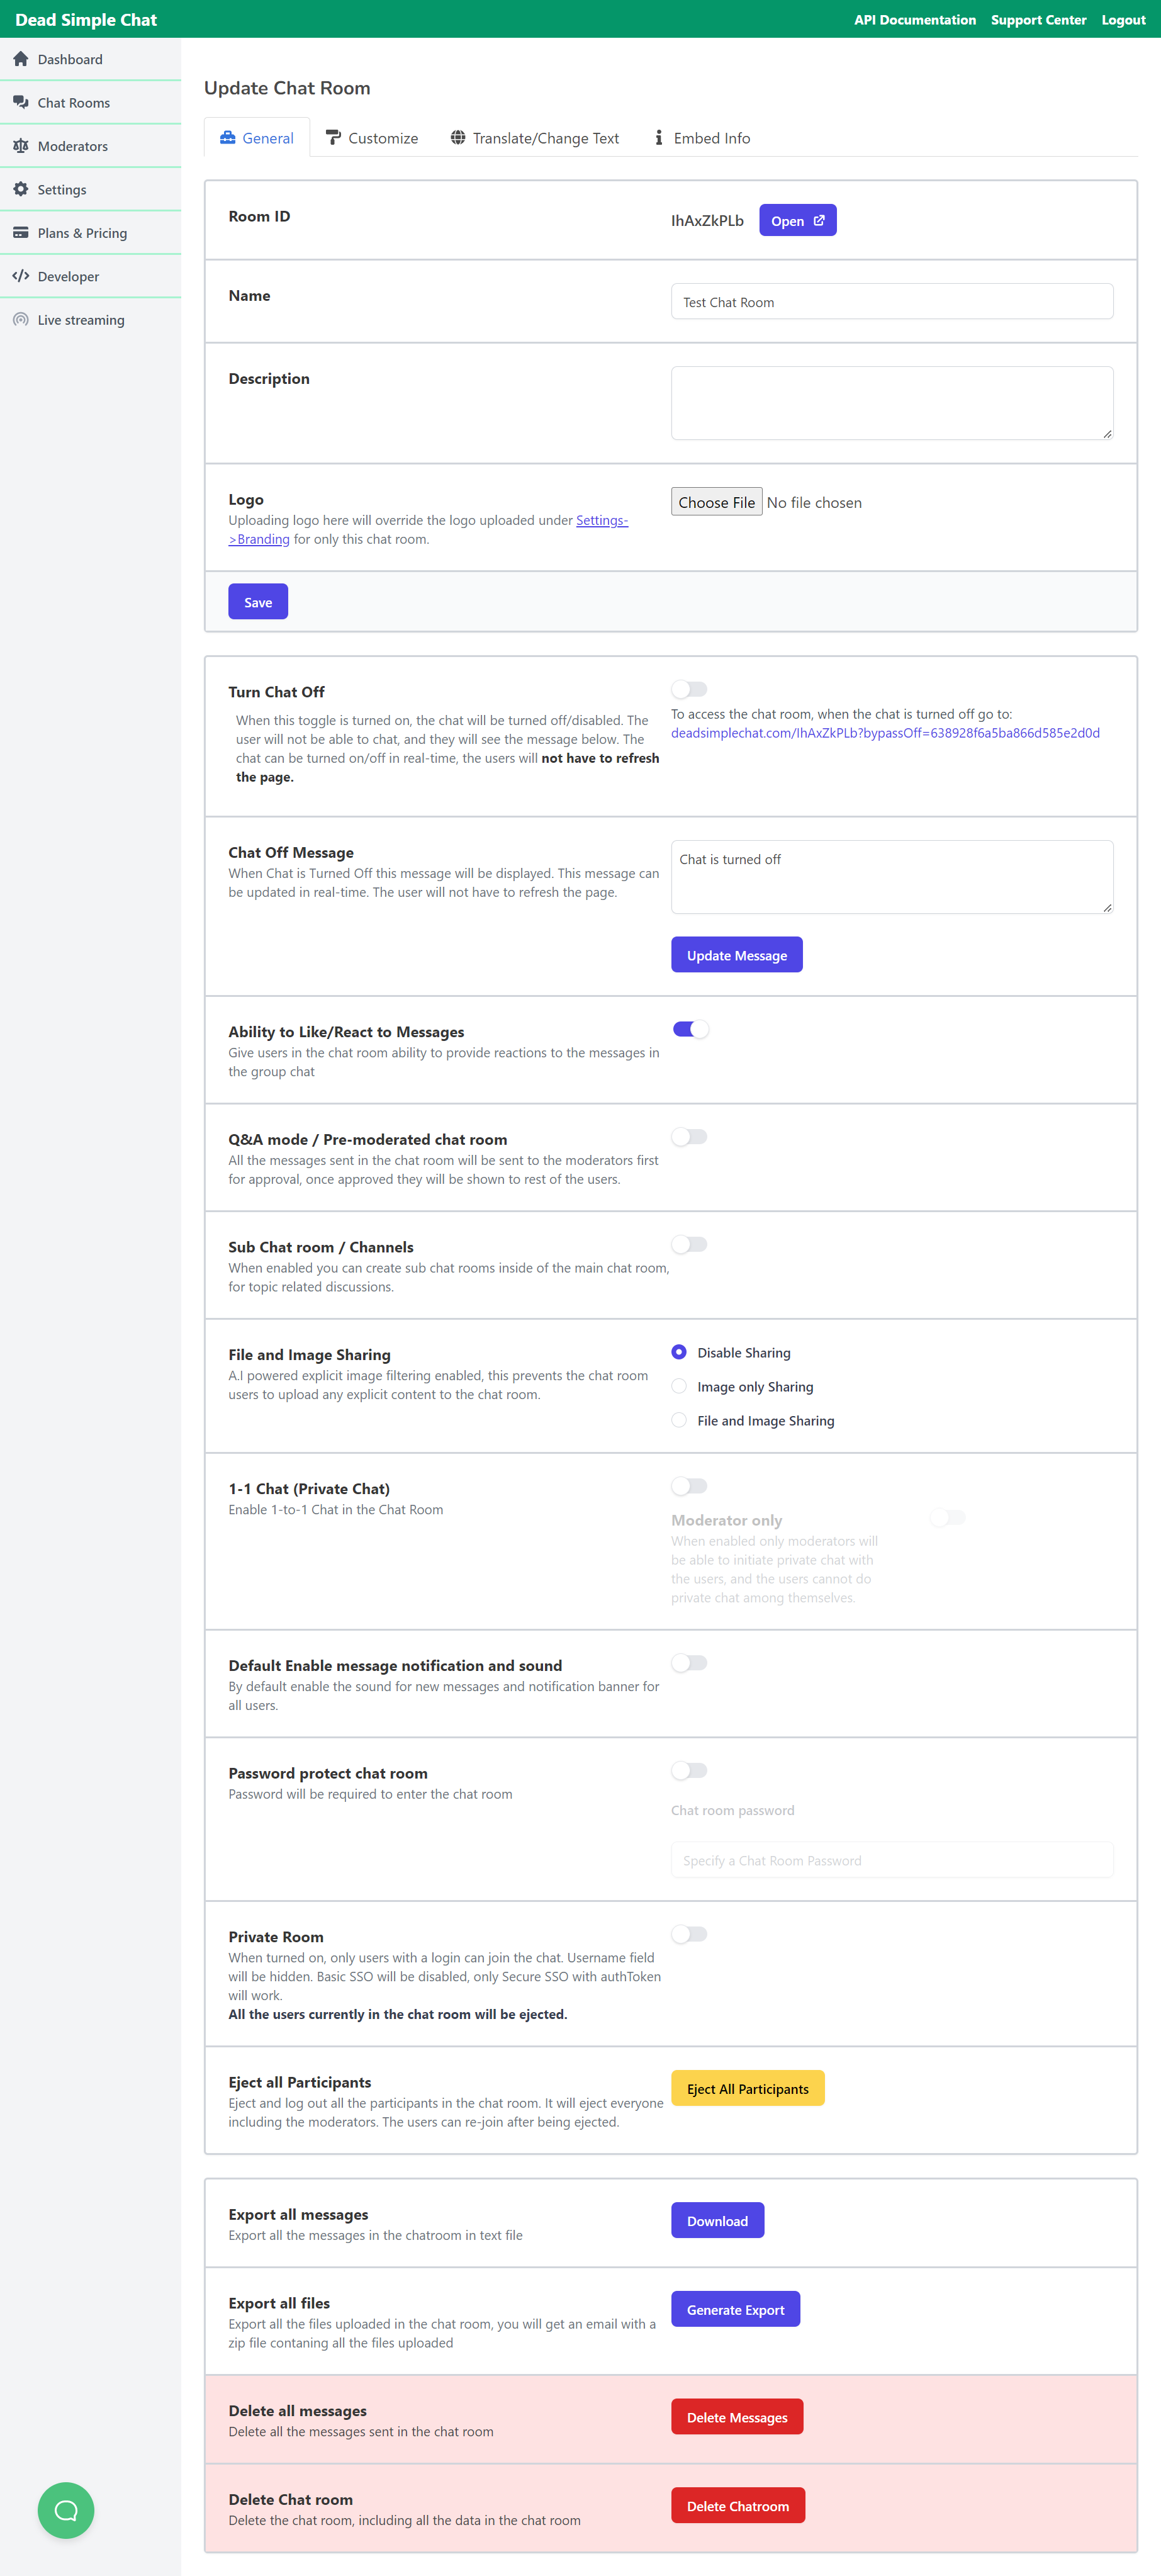
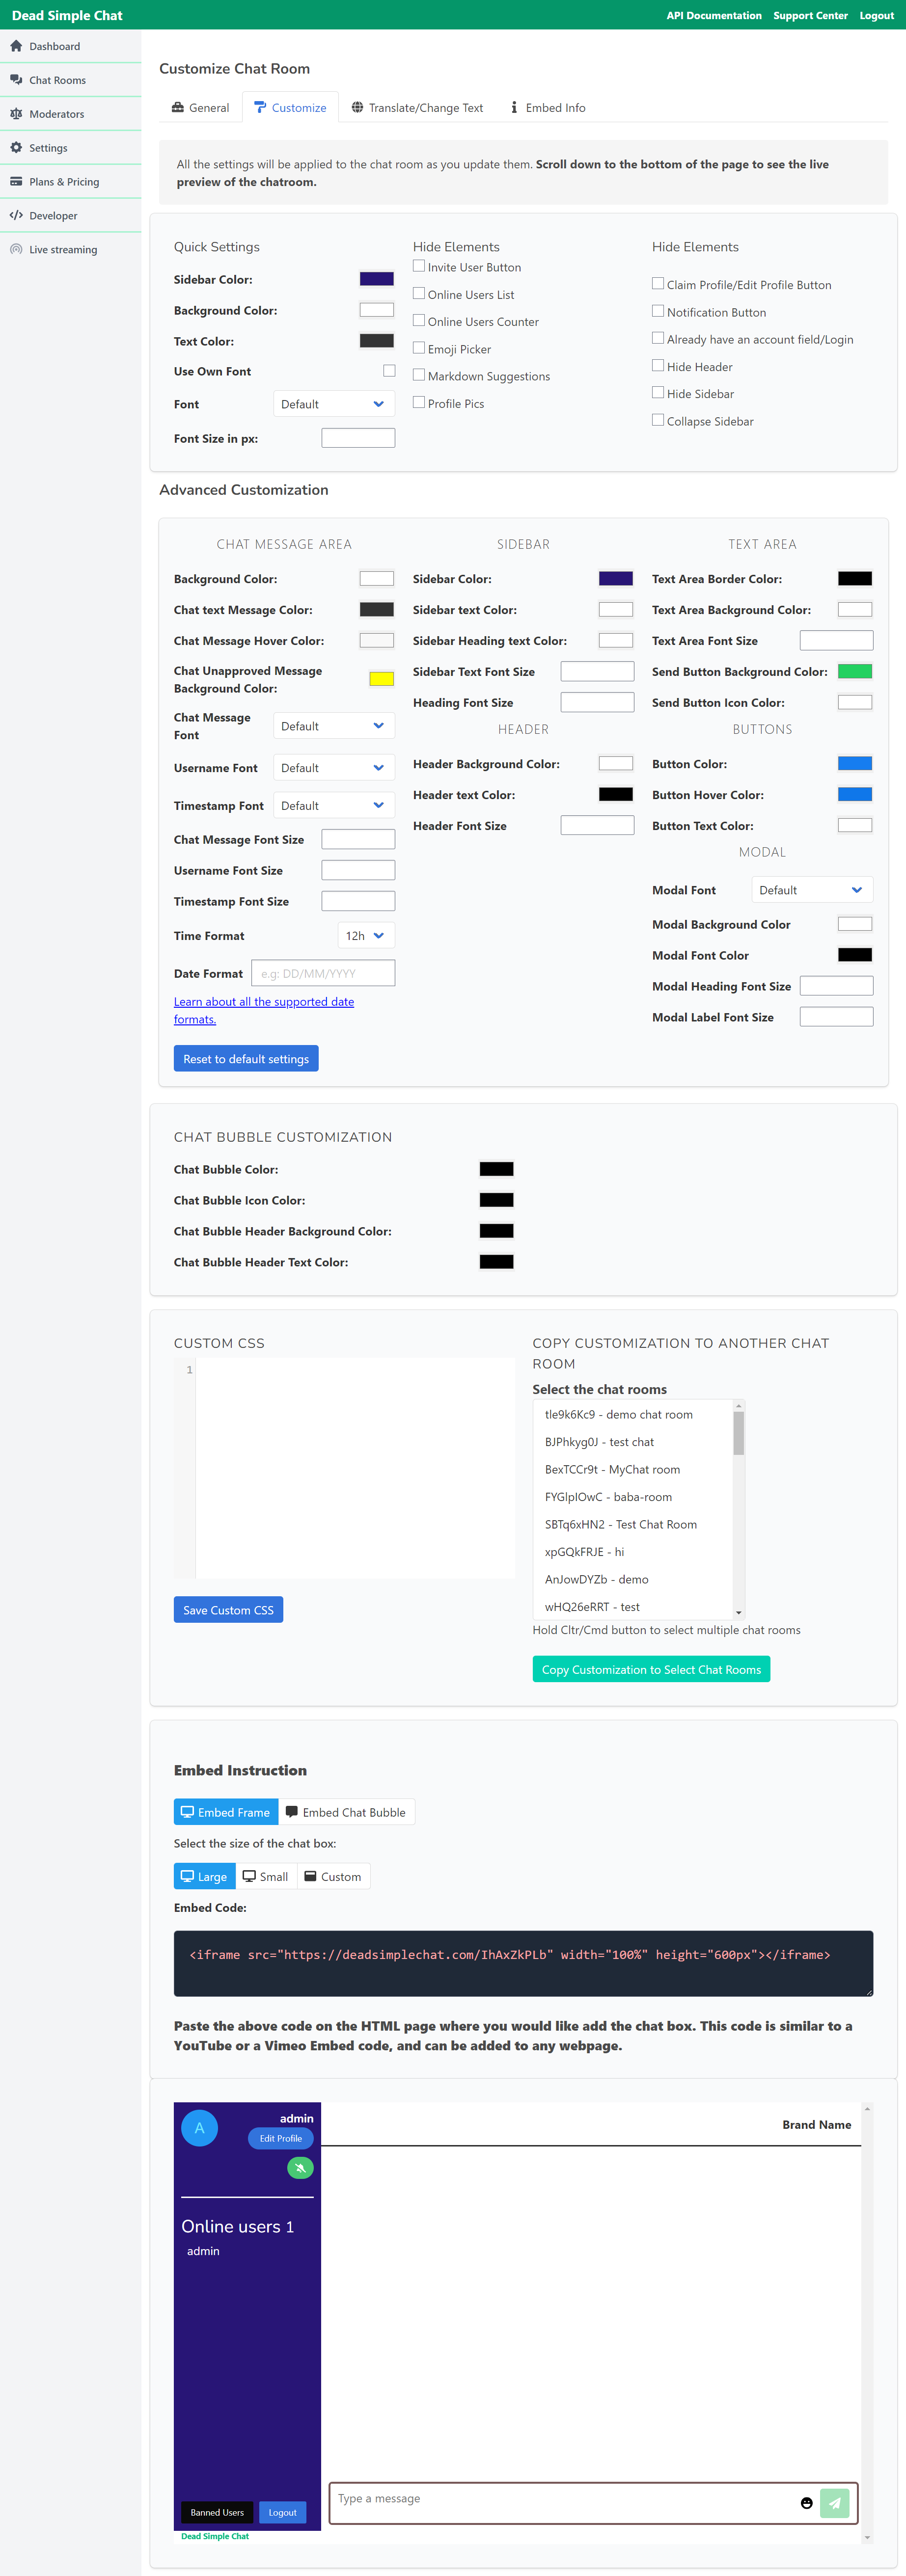
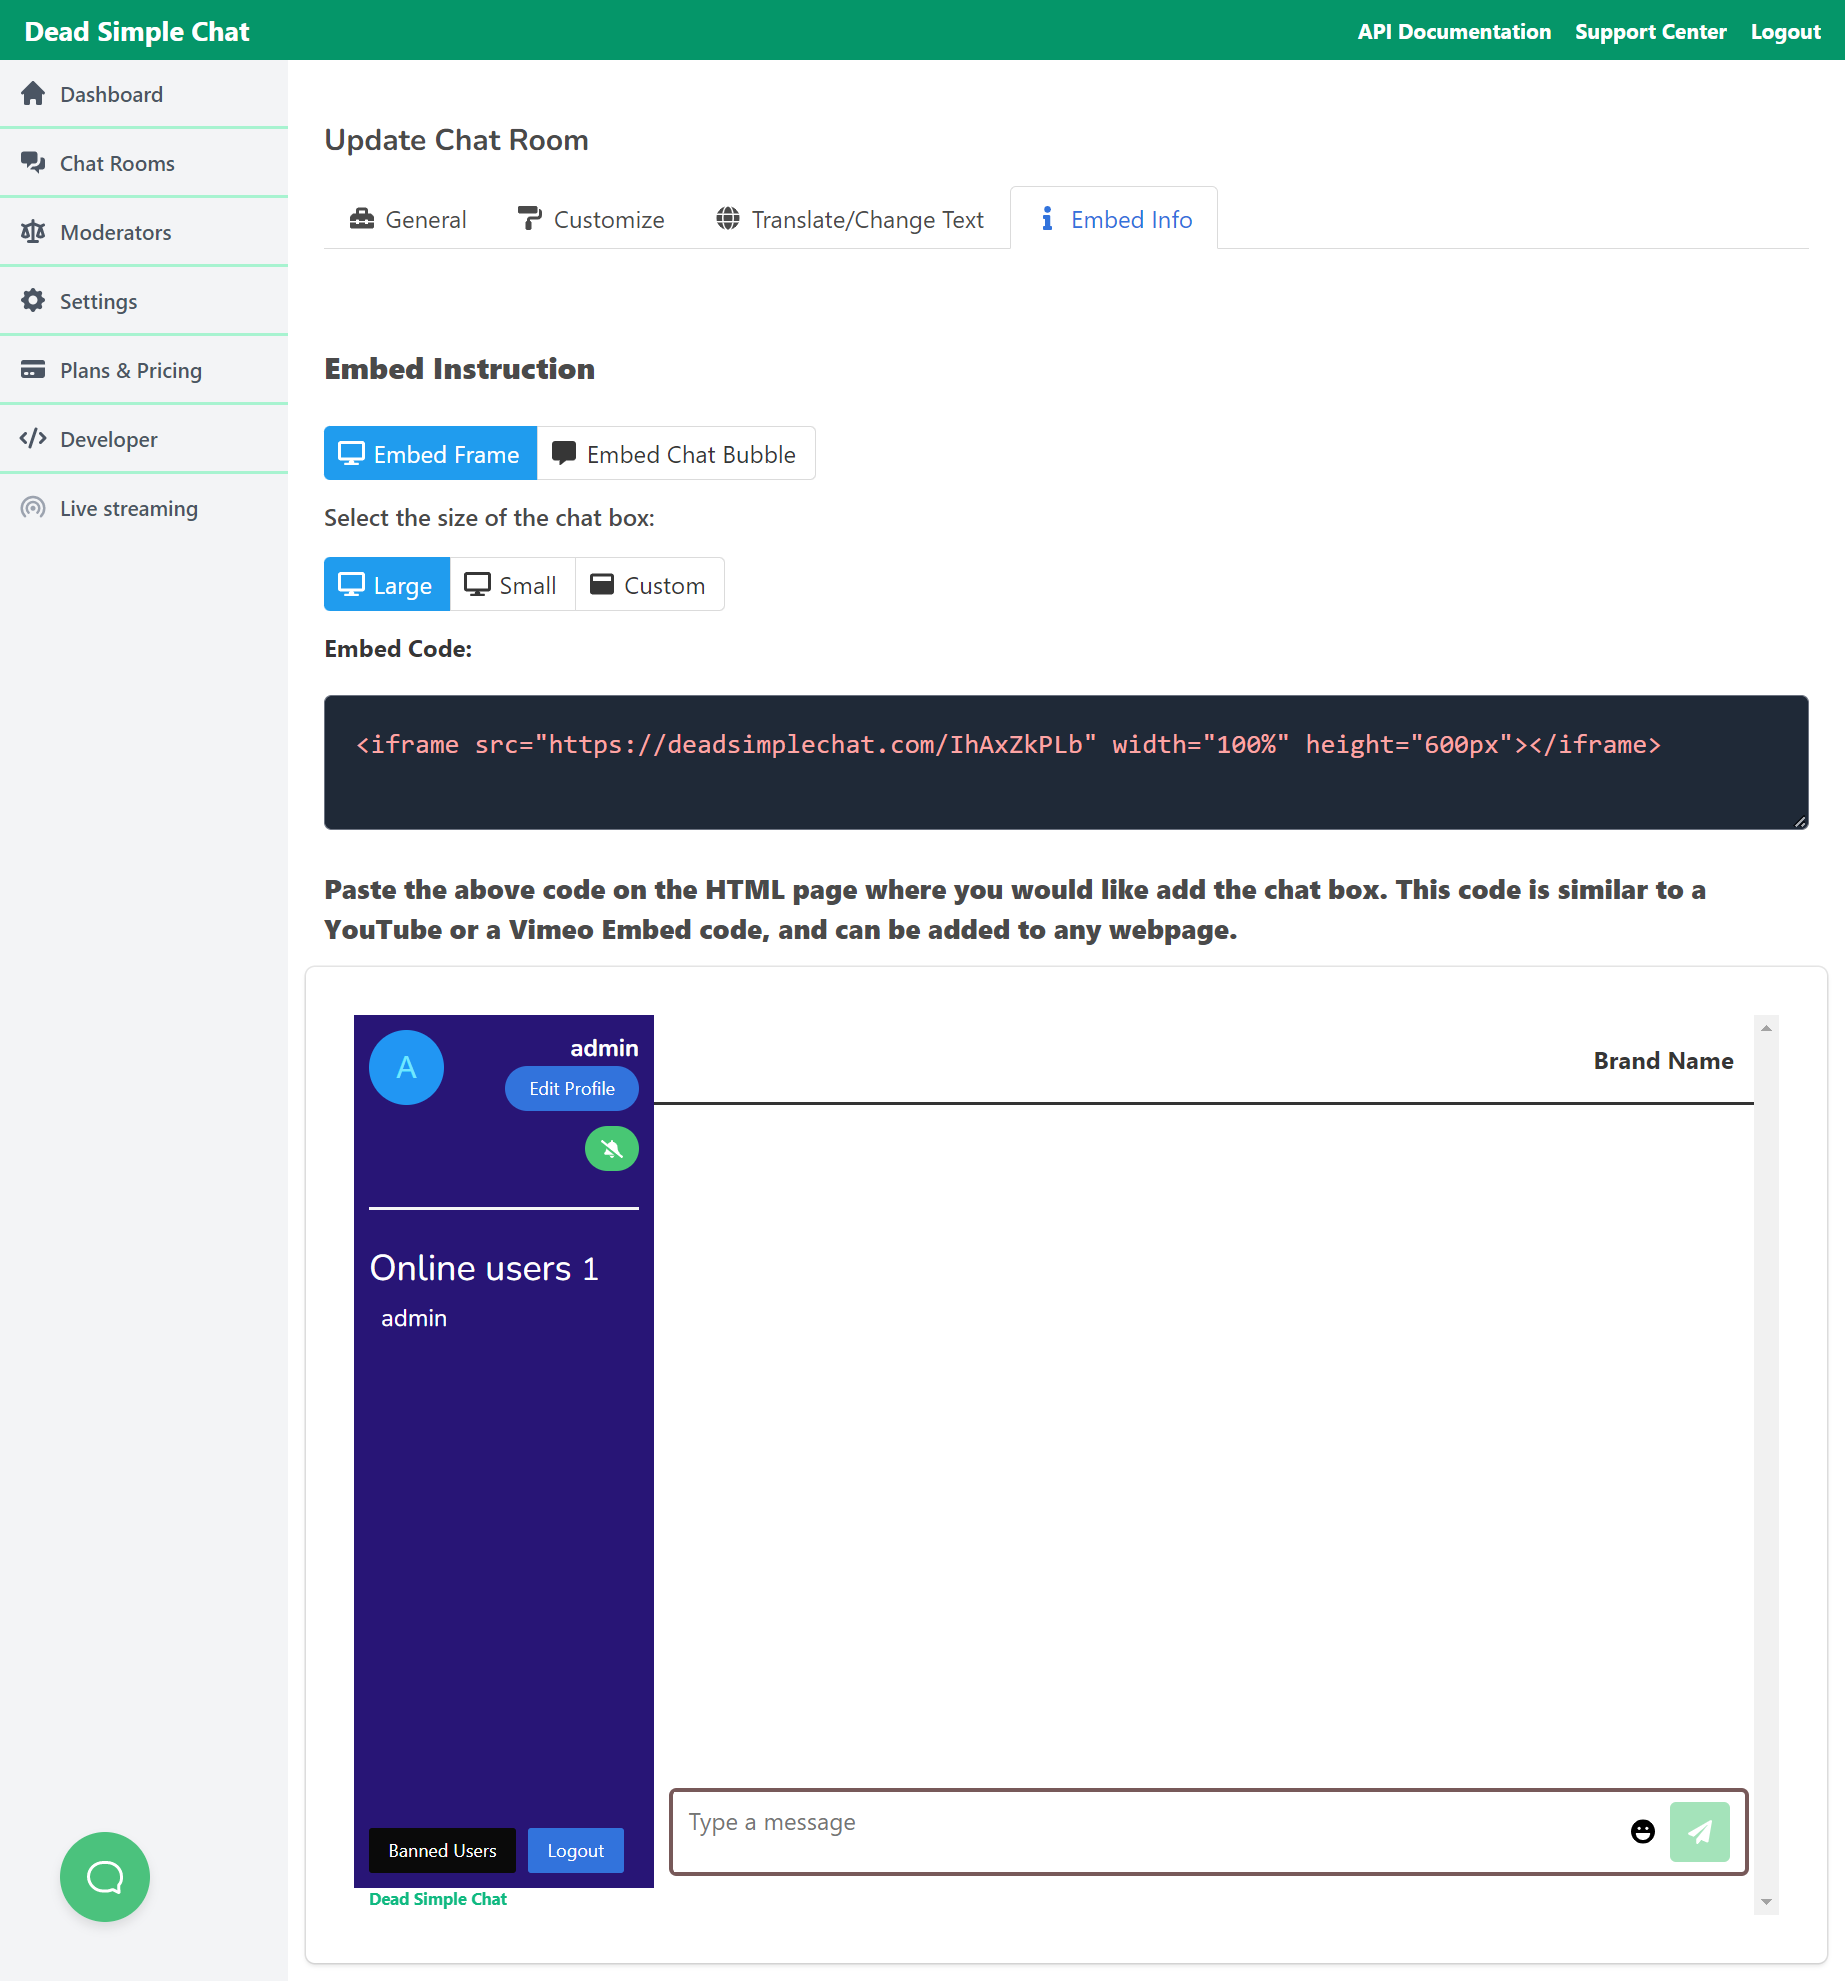
After creating a new chat room and enabling various features that you need in the chat go to embed section and copy the embed code.
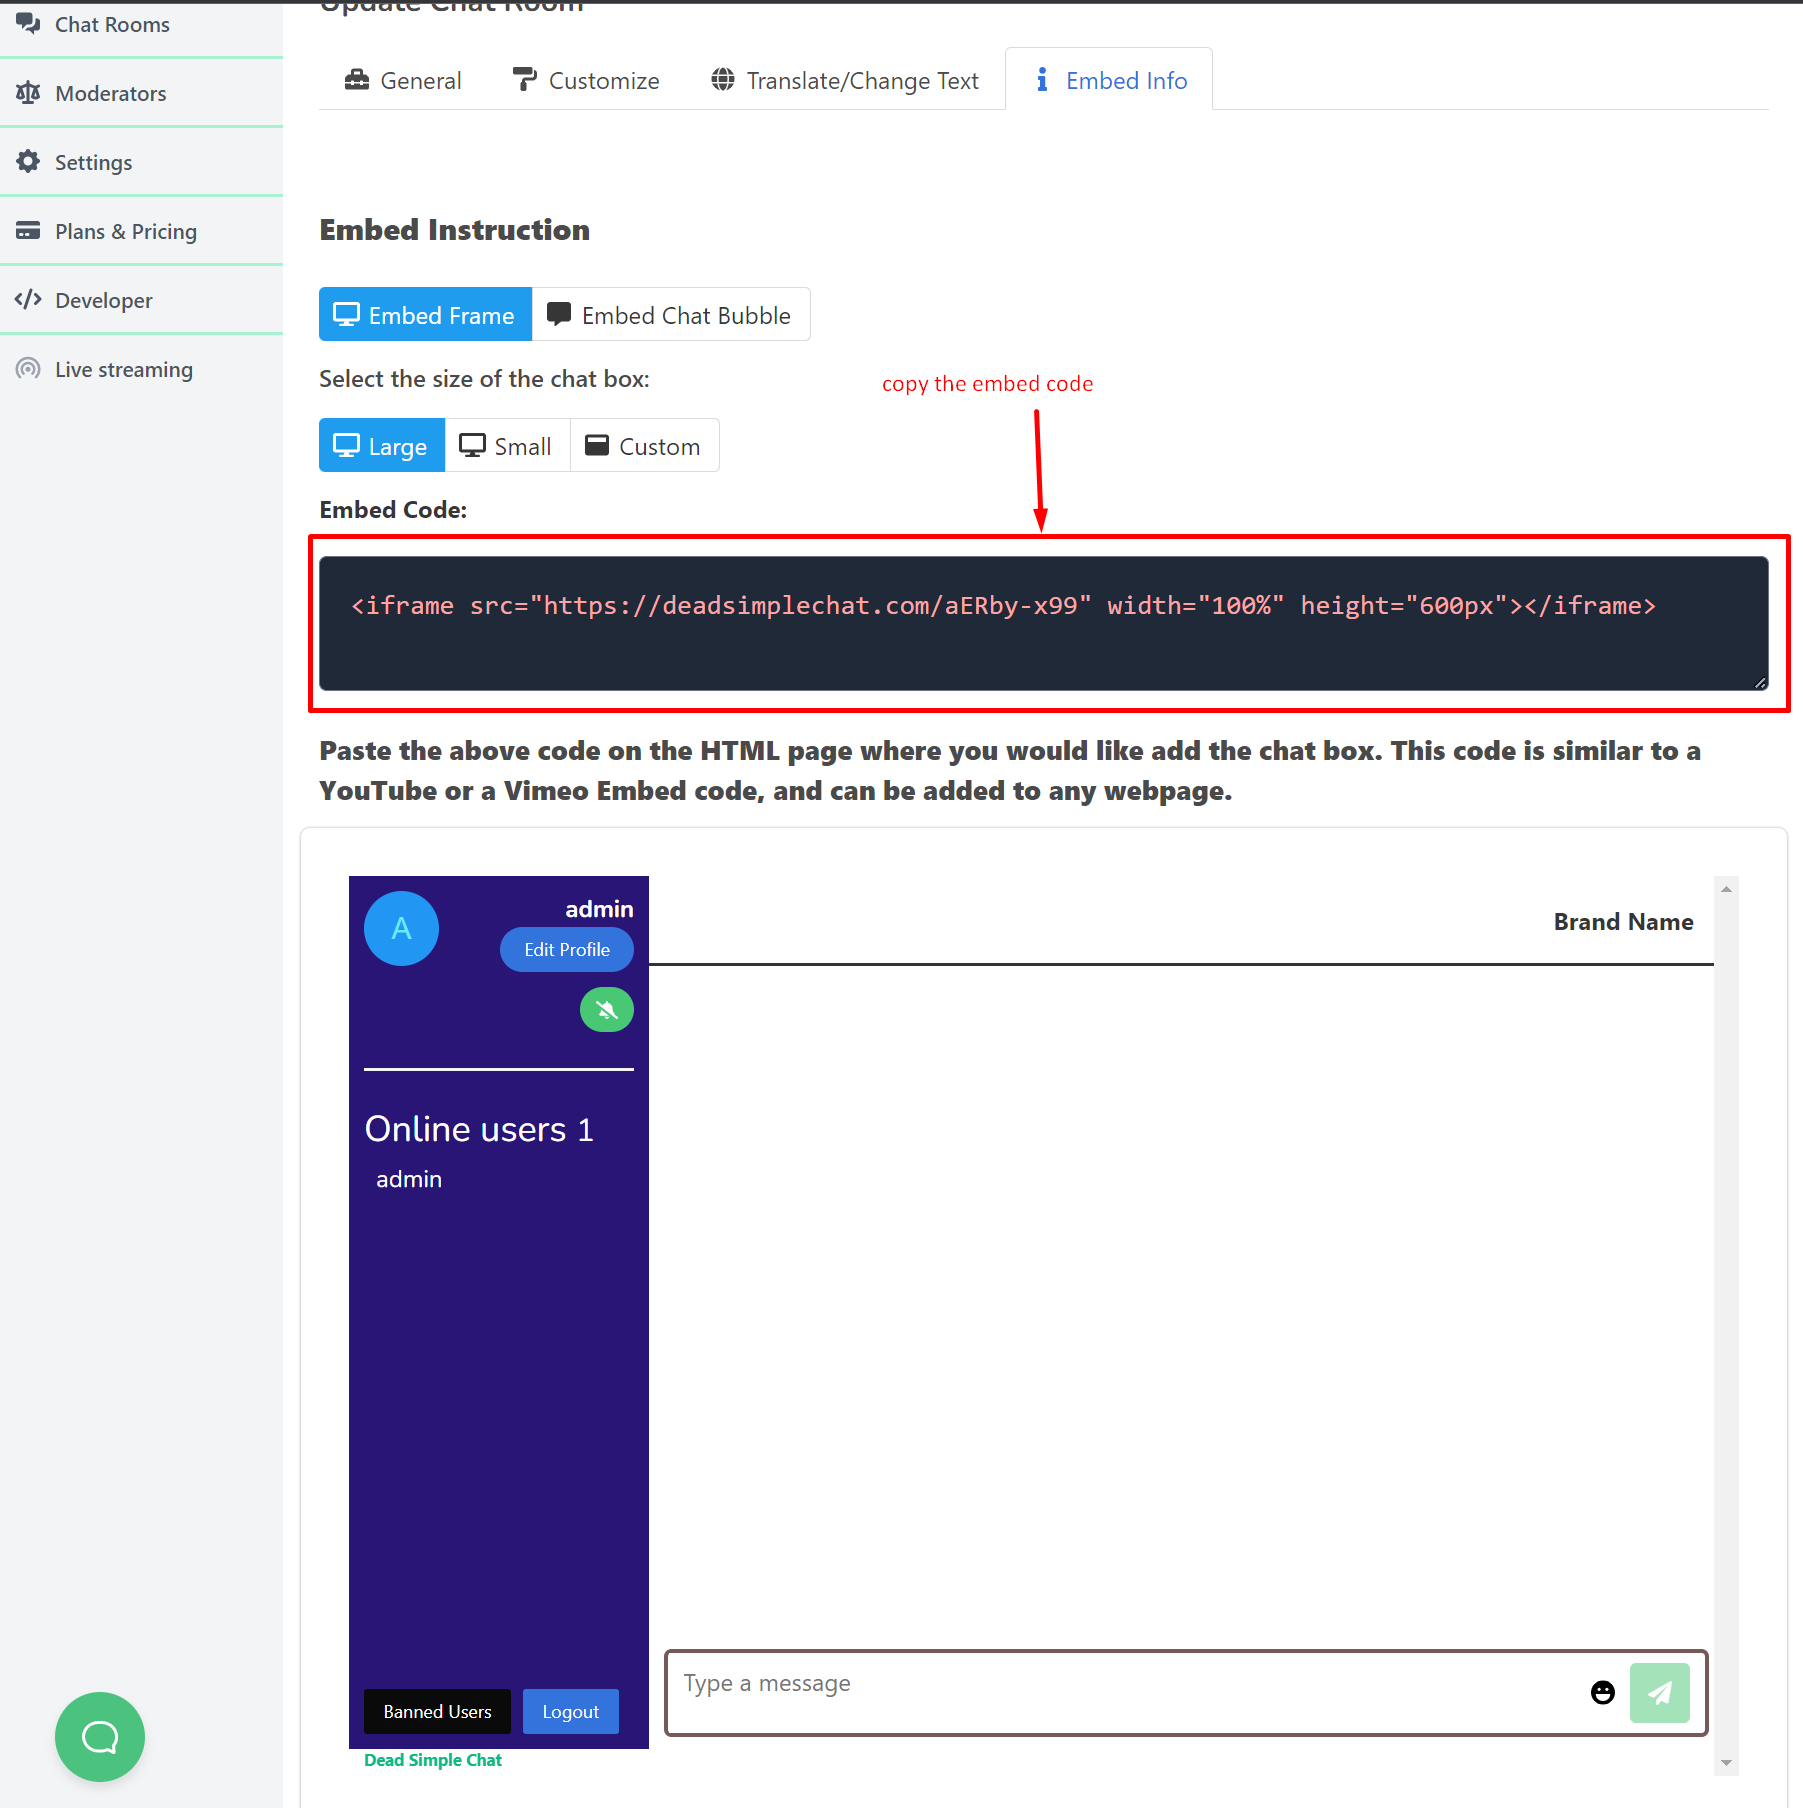
You can change the size of the chat box here.
You will need this code to add chat to the react component
Step 3: Adding Chat to React Component
Go to the chat.js file and in the header section paste the embed code that you copied in the previous step.
like this
function Chat() {
  return (
    <div className="Chat">
      <header className="App-header">
        React Js Chat Application
        <iframe src="https://deadsimplechat.com/CGOC0byXC" width="50%" height="600px"></iframe>
      </header>
    </div>
  );
}

export default Chat;
You will be able to see the chat in your react application. This chat is coming through the react Chat Component that we created.
We have created react js chat app component. You can find the complete code on github here: react-chat-app-component
Now let us explore some of the features of the chat API and SDK that is offered by DeadSimpleChat
Step 4: Chat API and SDK
Let us know explore how you can use chat API and SDK features in your react js chat component.
There are a lot of SDK and API features available with DeadSimpleChat. To view the complete list here is the Chat APIs and SDK
There are a lot of features and capabilities that can be explored using the Chat API and SDK. Here we are going to go over a few basic functionalities so as to give you an overview of the chat API and SDK
Step 5: Adding the chat SDK to the react chat component
To add the chat sdk to the chat component go to
https://cdn.deadsimplechat.com/sdk/1.0/dschatsdk.min.js- click
ctrl + aorcmd + aif you are on a mac and right click and copy the code - go to
src/and create a new file namedeadsimplechat.js - In this file paste the code that you just copied in the previous step
- In
Chat.jsrequire the filedeadsimplechat.jsfile
Now you have imported the chat sdk to the react chat component.
The Chat.js file should look like this
require ("./deadsimplechat.js");

function Chat() {
  return (
    <div className="Chat">
      <header className="App-header">
        React Js Chat Application
        <iframe src="https://deadsimplechat.com/CGOC0byXC" width="50%" height="600px"></iframe>
      </header>
    </div>
  );
}

export default Chat;
Step 6: Initializing the Chat SDK
Now that we have added the chat sdk to our react chat component. let us initialize it by connecting the chat iframe to the chat sdk
To connect the chat sdk with the iframe you will require 3 things
- Chat Room ID
- ID of the iframe
- Public API Key
Chat Room ID
Now let us take a deeper look at the iframe code that we used to embed chat on our react chat component
<iframe src="https://deadsimplechat.com/CGOC0byXC" width="50%" height="600px"></iframe>looking at the url the code at the end after the deadsimplechat.com/ is the chat room id
Thus in this code the chat room ID is CGOC0byXC
You can also get the chat room ID by going to Deadsimplechat.com -> Chat rooms
There you can see a list of chat rooms with their IDs in a table
Id of the iframe
The iframe currently does not have an id. Let us give the iframe an id of chat-frame
the iframe code now looks like this
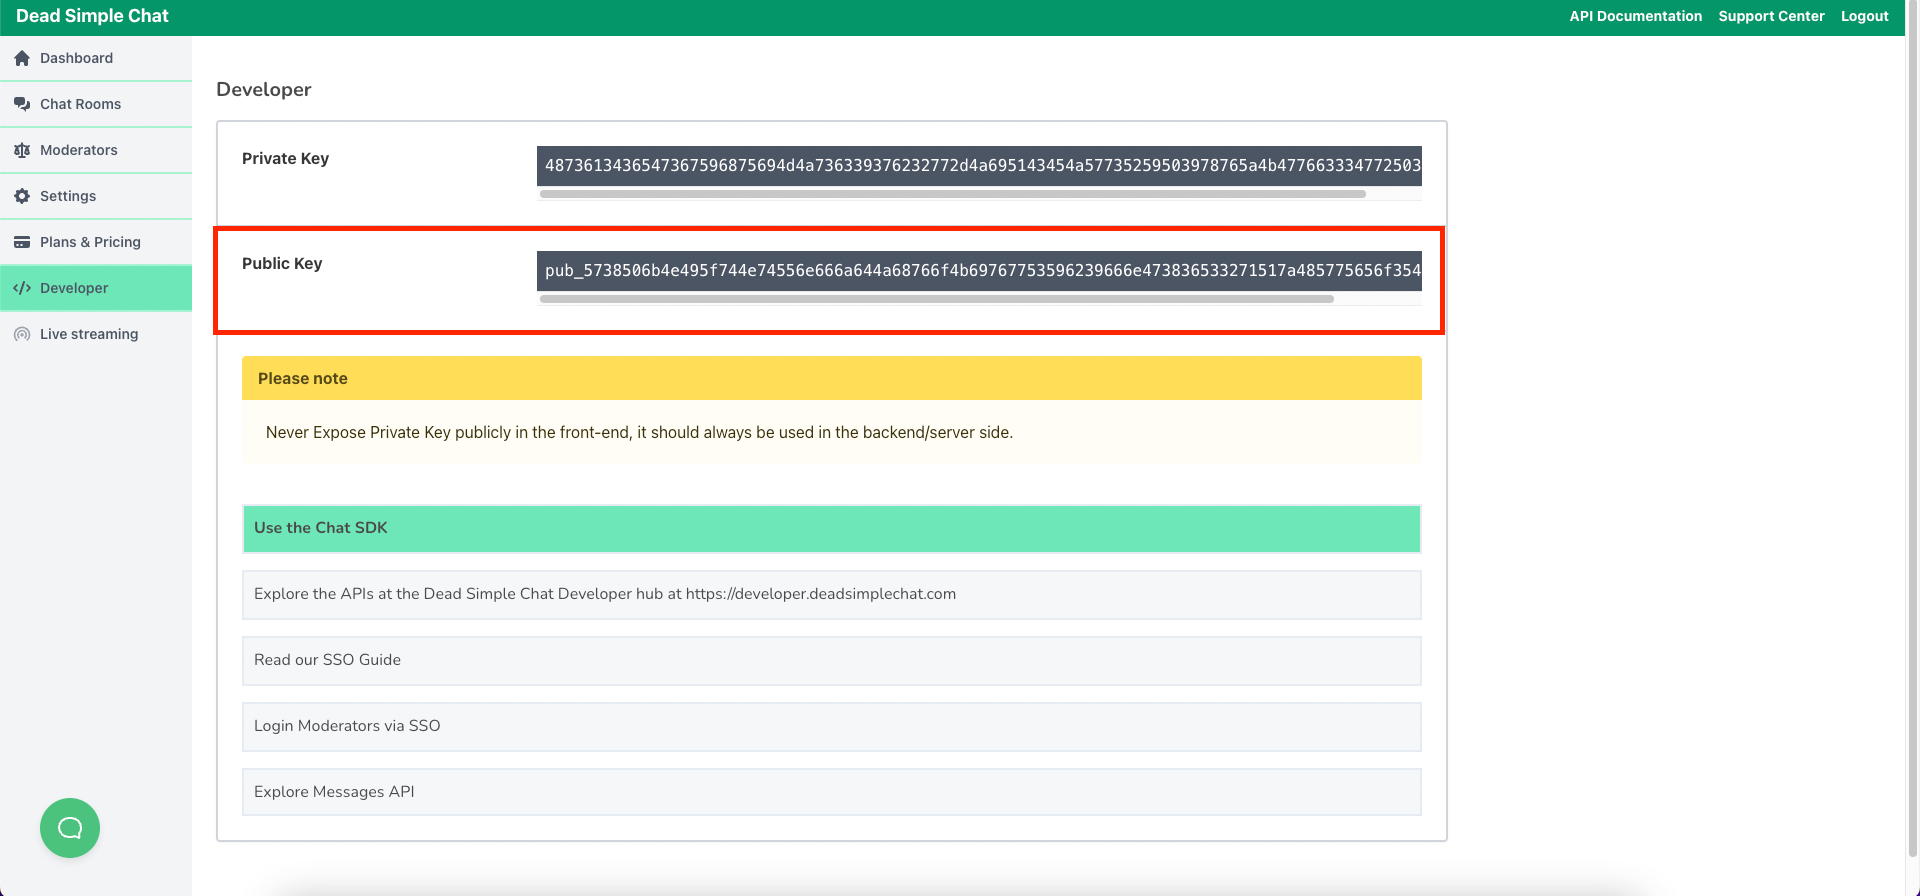
<iframe id="chat-frame" src="https://deadsimplechat.com/CGOC0byXC" width="50%" height="600px"></iframe>Public API Key
You can get your public API key from DeadSimpleChat -> Dashboard -> developer
Now, we have all the three things that we need to call the connect method. We do that using the code snippet below
(async () => {
    // DSChatSDK construction accepts two parameters:
    // 1. Chat Room Id
    // 2. ID of the iFrame tag
    // 3. Dead Simple Chat Public API Key.
    const sdk = new DSChatSDK("CGOC0byXC", "chat-frame", "pub_5738506b4e495f744e74556e666a644a68766f4b69767753596239666e473533271517a485775656f354978795830")
    // Call the connect method to connect the SDK to the Chat iFrame.
    await sdk.connect();
});We will need to call this function inside react hooks to connect the sdk to the chat iframe.
Add the below in your Chat.js file inside your chat function. The Chat.js file should look like this
require ("./deadsimplechat.js");

function Chat() {
  const [sdk, setSDK] = useState(0);
  useEffect(()=>{
    (async () => {
      // DSChatSDK construction accepts two parameters:
      // 1. Chat Room Id
      // 2. ID of the iFrame tag
      // 3. Dead Simple Chat Public API Key.
      const sdk = new window.DSChatSDK("CGOC0byXC", "chat-frame", "pub_7172586270477a656a3863587a594f46566e736839307737544b532d3463484c4e524b5743676b7733336d5151767a4b")
      // Call the connect method to connect the SDK to the Chat iFrame.
      await sdk.connect();
      setSDK(sdk);
  })();
  }, [])

  return (
    <div className="Chat">
      <header className="App-header">
        React Js Chat Application
        <iframe src="https://deadsimplechat.com/CGOC0byXC" width="50%" height="600px"></iframe>
      </header>
    </div>
  );
}

export default Chat;
We need to write window.DSChatSDK instead of DSChatSDK in the react application
We have added the chat SDK and initialized it, Now let us try out a simple function to test the SDK
We will create a logout button next to the chat iframe and call the logout function of the sdk when the button is clicked to log the user out of the chat room
If you are interested in the list of functions available in the Chat SDK here is the Chat SDK documentation
Write the following code to create a button next to the chat iframe
<button id='logout-button'>Logout</button>This would create a logout button on top of the chat in the react component
Now let us create a logout function that would call the chat SDK logout function and log the user out when the button is clicked
Write the below code inside the Chat function
  function logout(){
    sdk.logout()
}and edit the button to call the logout function when clicked
<button onClick={()=>logout()} id='logout-button'>Logout</button>Now, when you click on the logout button in your react application the user will logout of the chat room.
the Chat.js file looks like this
import {useState, useEffect } from 'react';

require ("./Deadsimplechat.js");

function Chat() {
  const [sdk, setSDK] = useState(0);
  useEffect(()=>{
    (async () => {
      // DSChatSDK construction accepts two parameters:
      // 1. Chat Room Id
      // 2. ID of the iFrame tag
      // 3. Dead Simple Chat Public API Key.
     const sdk = new window.DSChatSDK("CGOC0byXC", "chat-frame", "pub_7172586270477a656a3863587a594f46566e736839307737544b532d3463484c4e524b5743676b7733336d5151767a4b")
      // Call the connect method to connect the SDK to the Chat iFrame.
      await sdk.connect();
      setSDK(sdk);
  })();
  }, [])

  function logout(){
    sdk.logout()
  }
  return (
    <div className="Chat">
      <header className="App-header">
        React Js Chat Application
        <button onClick={()=>logout()} id='logout-button'>Logout</button>
        <iframe id="chat-frame" src="https://deadsimplechat.com/CGOC0byXC" width="50%" height="600px"></iframe>
      </header>
    </div>
  );
}

export default Chat;and the index.js file looks like this
import React from 'react';
import ReactDOM from 'react-dom/client';
import './index.css';
import App from './App';
import Chat from './Chat'
import reportWebVitals from './reportWebVitals';

const root = ReactDOM.createRoot(document.getElementById('root'));
root.render(
  <React.StrictMode>
    <Chat />
  </React.StrictMode>
);

// If you want to start measuring performance in your app, pass a function
// to log results (for example: reportWebVitals(console.log))
// or send to an analytics endpoint. Learn more: https://bit.ly/CRA-vitals
reportWebVitals();
List of Important Chat SDK methods
As we have implemented above the logout method is one of the many methods available in the DeadSimpleChat SDK.
There are methods available to control every aspect of the chat. From sending messages to adding users.
You can customize the chat experience by sending custom css through methods.
Moderate the chat room be
- deleting messages
- banning / unbanning users
- Sending a 1-1 message to a specific user in a group chat
You can create 1-1 chat or Group chat on the fly using Chat SDK methods
Here is a list of few important methods for a complete list of Chat SDK methods visit the Chat SDK methods page
- joinRoom: You can join a user to the chat room by calling the joinRoom method. There are five optional parameters that the
joinRoommethod takes: a. username. b. roomPassword. c. accessToken: accessToken, d. email. e. password. You can learn more about joinRoom method - logout: With logout method you can log a user out of the chat room
- sendMessage: sendMessage method you can send a message to the chat room
- getMessage: getMessage gets you a list of message in a specific chat room
- replyMessage: replyMessage you can reply to a specific message that was sent in the chat room
- getOnlineUsers: You can get a list of all the online users present in the chat room
- banUser: You can ban a user from the chat room
- getBannedUsers: Get a list of banned users by calling the getBannedUsers method
- unBanUser: Call this method to unban a user
- loadCustomization: You can laod custom css customization to a chat room or to multiple chat rooms by calling the loadCustomization method
- loadTranslation: you can load Chat UI translation to a chat room or to multiple chat rooms by calling the loadTranslation method
- openConversation: This will cause 1-1 chat conversation pop up to open. like when someone clicks on 1-1 chat to create a 1-1 chat session.
SSO: Single Sign On
Using the Single Sign On system you can automatically login users that are on your website or app to the chat room
You can assign the users any username that you want to assign to them.
There are two kinds of SSO that comes with DeadSimpleChat
- Basic SSO
- Advanced SSO
Basic SSO
- Easy to implement.
- Does not require coding knowledge
- less secure than advanced SSO
Advanced SSO
- Bit more complicated
- Requires basic coding knowledge
- Is more secure than basic SSO and comes with Access Token
To learn more about SSO refer to SSO documentation
Events and how you can leverage them in your app
Events are triggered when something happens in the chat. You can leverage events for a deeper integration with your website or application
for example: there are events for when a user joins a chat or when someone sends a message in the chat.
You can listen to these events and activate functionality in your app is required.
There is a massive list of event for almost everything that happens in the chat, you can integrate as much as you like with your app or platform
here are some of the examples of events in the chat
- messageHistory
- message
- messageApproved
- MessageDeleted
- updateUsers
- notAuthorized
- channelCreated
- roomLimitReached
- messageApproved
Chat APIs
There are Chat APIs available with DeadSimpleChat. With Chat APIS various tasks can be accomplished
There are 6 types of Chat APIS
- Chat Room API: Chat room api consists of apis for 1. Creating a chat room, deleting chat rooms 2 turning on the chat / turning off the chat 3. updating the chat etc. You can learn more about chat room api documentation
- Channels API: Channels are chat rooms inside of chat rooms. You can enable Channels if you need them, otherwise they are disabled and does not appear in the chat at all. You can learn more about channels API
- Presence API: With Presence API you can fetch the number of online users in the chat room
- User and Moderator API: With user and Moderator APIs you can create users, update users, create moderators and update moderators, you can also validate and invalidate the accessToken. You can learn more about User and Moderator API in the documentation
- Messages API: With messages API you can send message in the chat room
- Export API: The export API can be used to export the messages, files and images from the chat room.
A word about Webhooks
Webhooks are a way to listen to events in the chatroom. The webhooks will send a
HTTP POST request whenever a event that you have enabled/ subscribed to happens in the chat room
You can use the webhooks to learn about certain events that are happining in the chat room and do something that you wish to do
You can learn more about Chat Webhooks
Bonus: Building a No-Code Chat.
We talked about building a react chat component and we learned that it is pretty easy to build the component with DeadSimpleChat.
We can use the API and SDK and webhooks for precision customization and integrations with our website or application
But all the functionality or most of it can be used without code as well.
By using the UI based chat customization tool you can easily
- Create Chat rooms
- Create Users
- Create Moderators
- Assign Moderators to chat rooms
- Customize Colors, fonts, size and shape of the chat room to suit your website.
- Customize user interface language
- Translate the user interface langauge into any language.
- turn on/off chat
- ban users
- delete messages
- ban bad words
- Export messages, files and images
and much more all from the Graphical User Interface of the DeadSimpleChat
DeadSimpleChat is truly a turn key chat solution. you can get started with it without writing any code.
Conclusion
In this article we learnt how to create a react chat component with DeadSimpleChat.
you can copy the above react chat component and add it to your existing react application and get instant chat.
You can also customize the above react chat component to your liking.
I hope you liked the article about react chat component
Ready to Add Chat to Your Website?
Get started for free. No credit card required.
Start a Free Trial
![Webinar Chat: The Complete Guide to Engaging Your Audience [2026]](/blog/content/images/size/w600/2026/02/article-hero-webinar-chat.svg)