How to Create Chat For Only Registered Users
Introduction
This guide will walk you through the process of configuring chat settings to ensure that only specific user types can join. We will focus on:
- Provisioning users
- Setting chat rooms to allow only provisioned users
- Creating member-only chat rooms
- User Types: Provisioned vs. Members
Understanding the difference between provisioned users and members is crucial:
Provisioned Users: These are users that you have manually created or added to your platform. They can join any chat room unless restricted.
Members: These users have been explicitly marked as members of a specific chat room. They can only join the chat rooms to which they've been assigned.
For instance, if you are adding a chat feature to your educational platform and want to prevent students in Course A from joining the Course B chat room, you can make each chat room "Members Only."
Steps to Provision Users
Users can be provisioned in the following ways:
- Manually creating users through the dashboard
- Importing users using CSV
- Using REST API to create users
Manually Creating Users Through the Dashboard
To manually create users, navigate to the DeadSimpleChat dashboard, and select the Users tab.
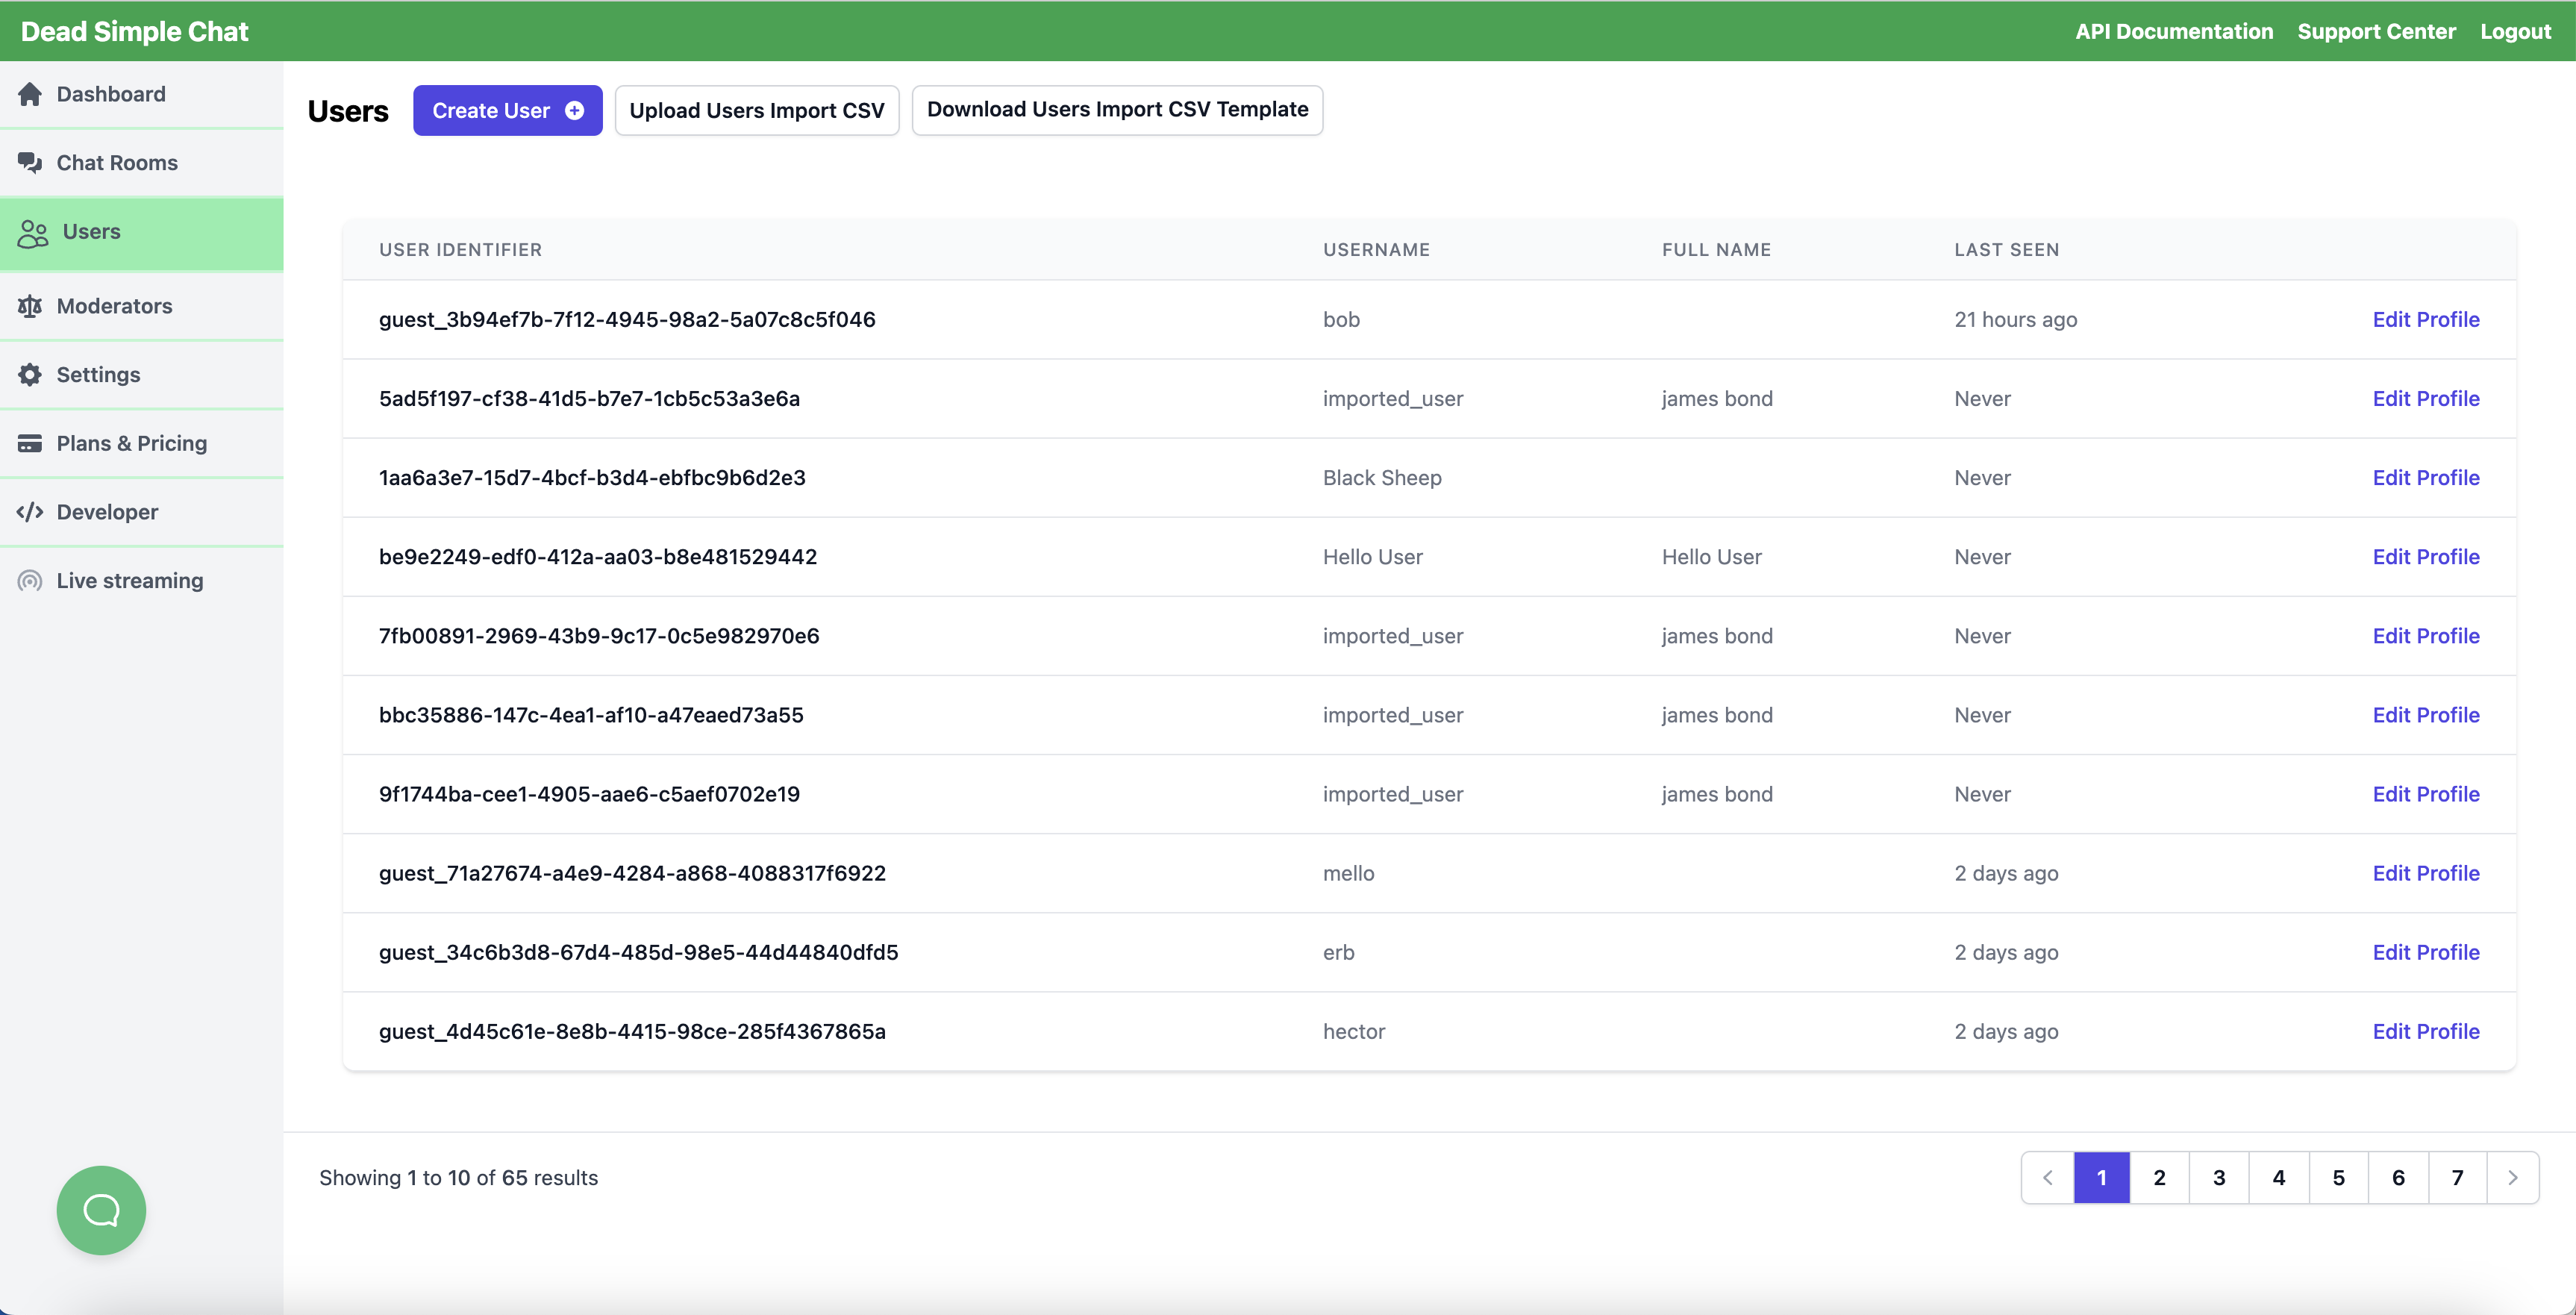
Click on the "Create User" button. You will be presented with an "Add User" modal, which allows you to provision the user.
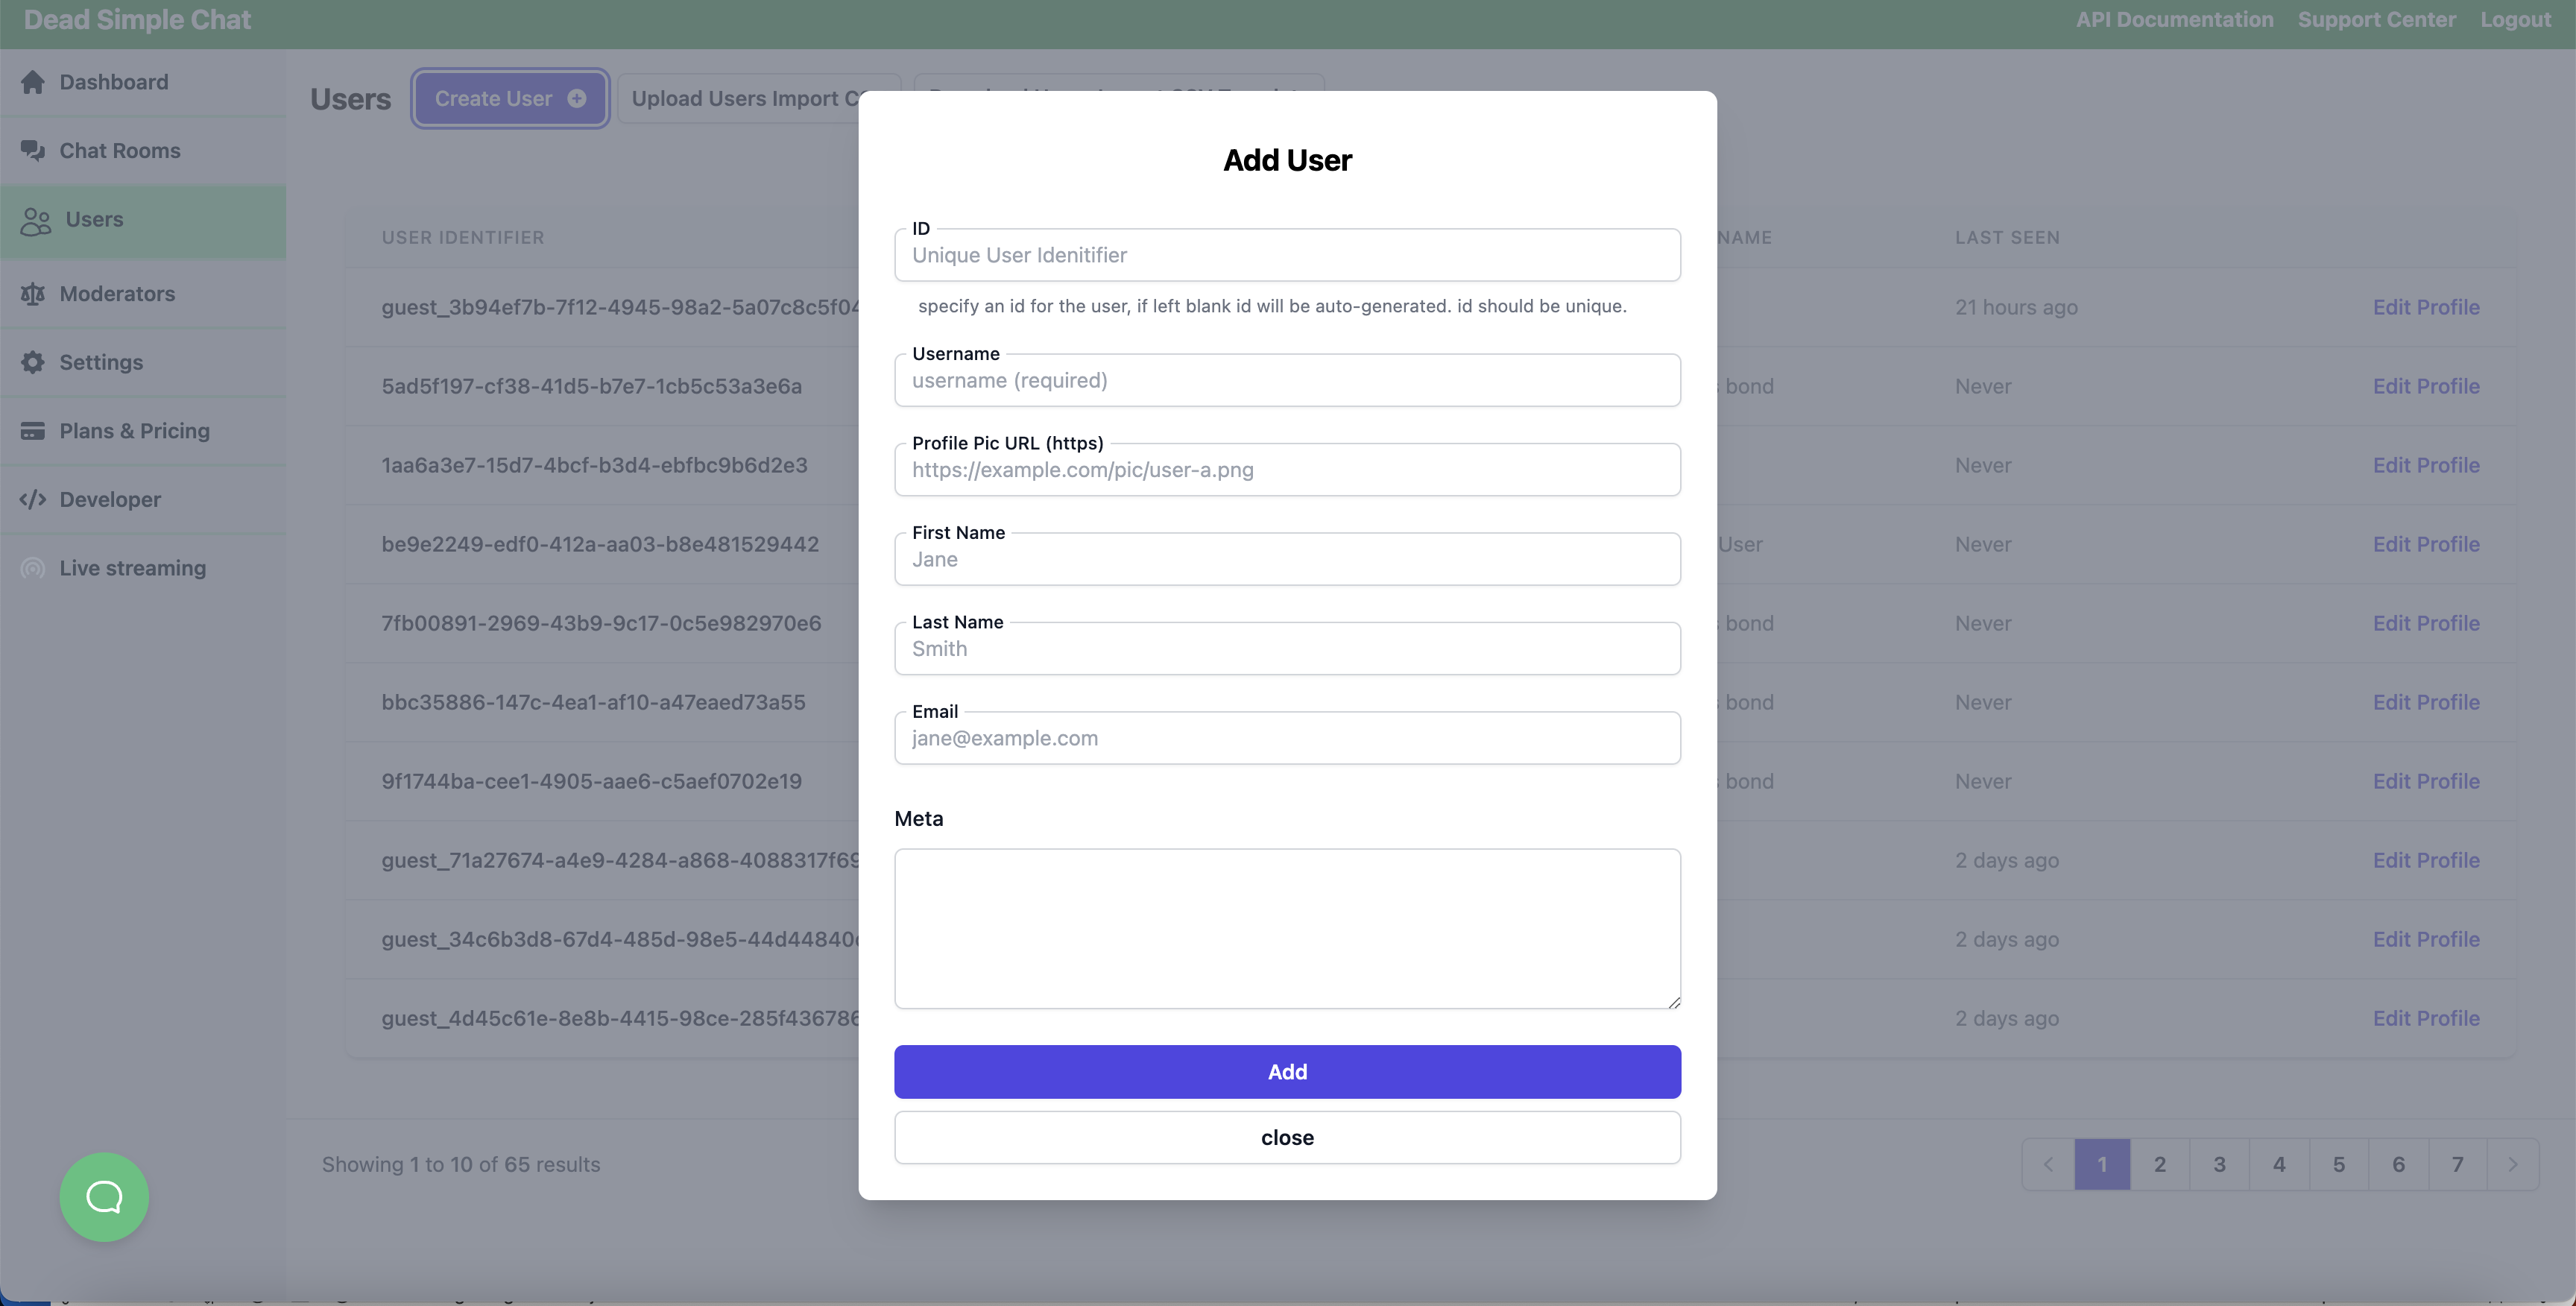
After filling in the user details and clicking the "Add" button, you will be presented with the Edit User modal.
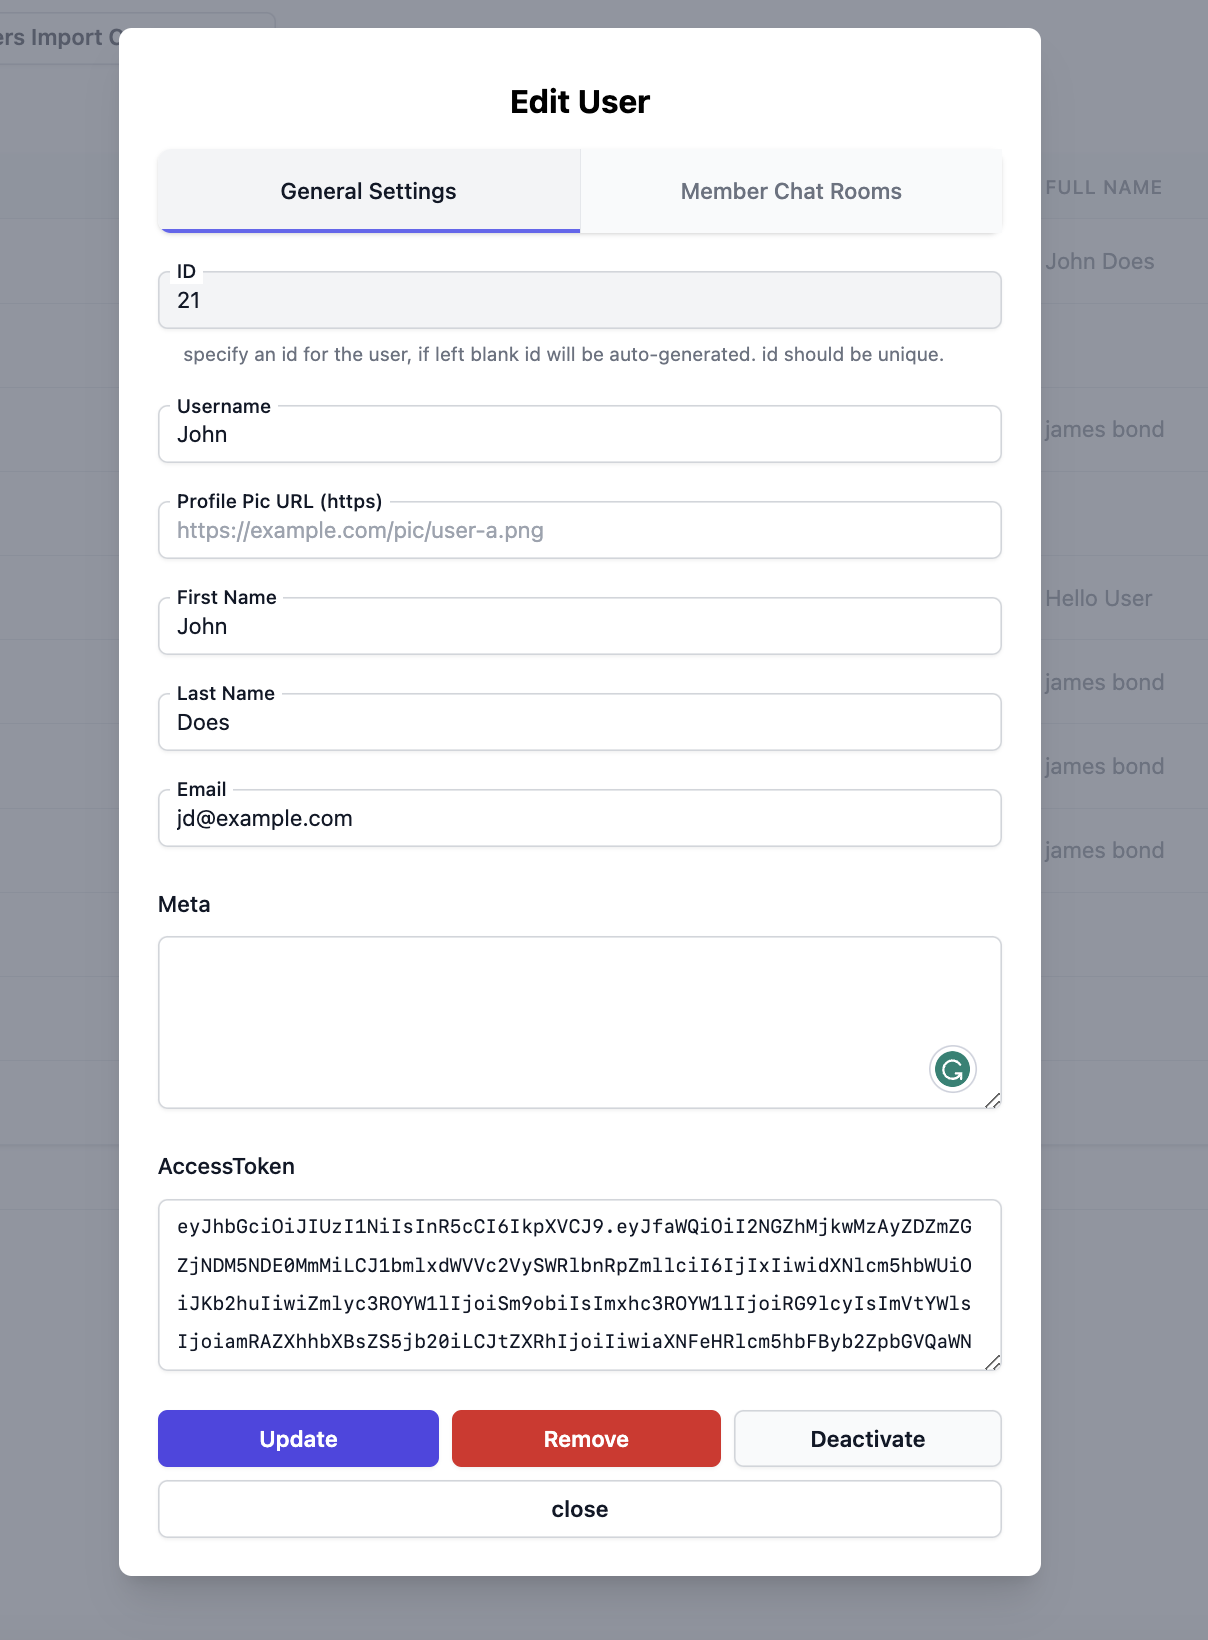
The Edit User modal displays the ID, which is also the uniqueUserIdentifier. If
you have not specified it, it will be generated automatically for you.
It also shows the accessToken. You can use both the accessToken and
the uniqueUserIdentifier to log the user into the chat room.
Importing Users Using CSV
You can also import users using CSV. On the Users tab, click on the "Download Users Import CSV Template" to download the CSV template for importing users.
In the CSV, fill in the information of the users you wish to import.
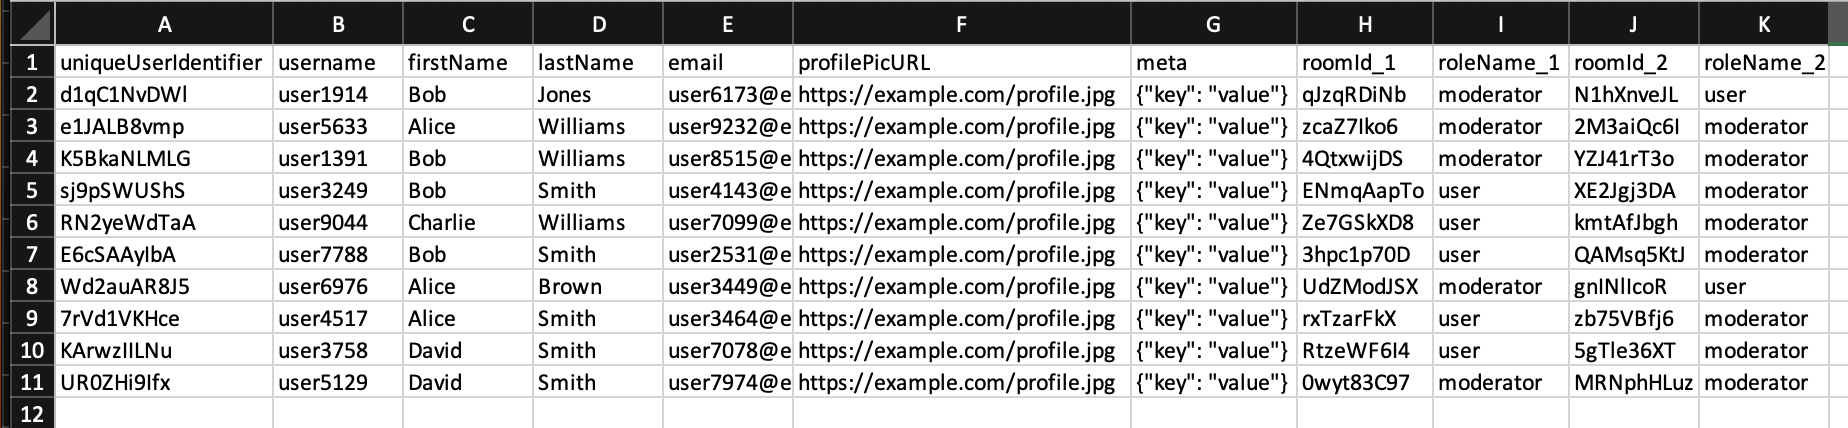
You can also assign users to chat rooms by optionally specifying
the roomId through the roomId_1, roomId_2 columns, and the role of the user
through the roleName_1 and roleName_2 columns, with possible values guest,
user, moderator, and admin.
If you want to assign users to more than two rooms, you can add more
columns like roomId_3, roomId_4 and roleName_3, roleName_4, and so forth.
Using REST API to Provision Users
You can use the Create User API to provision users via the API.
Call this API to create a user in DeadSimpleChat each time an account is created in your application. This automates the process of creating users.
Steps to Set Chat Rooms for Provisioned Users
By default, the chat room is set up to allow anyone to join the chat by typing in their username, as seen in the default Join Chats Modal.
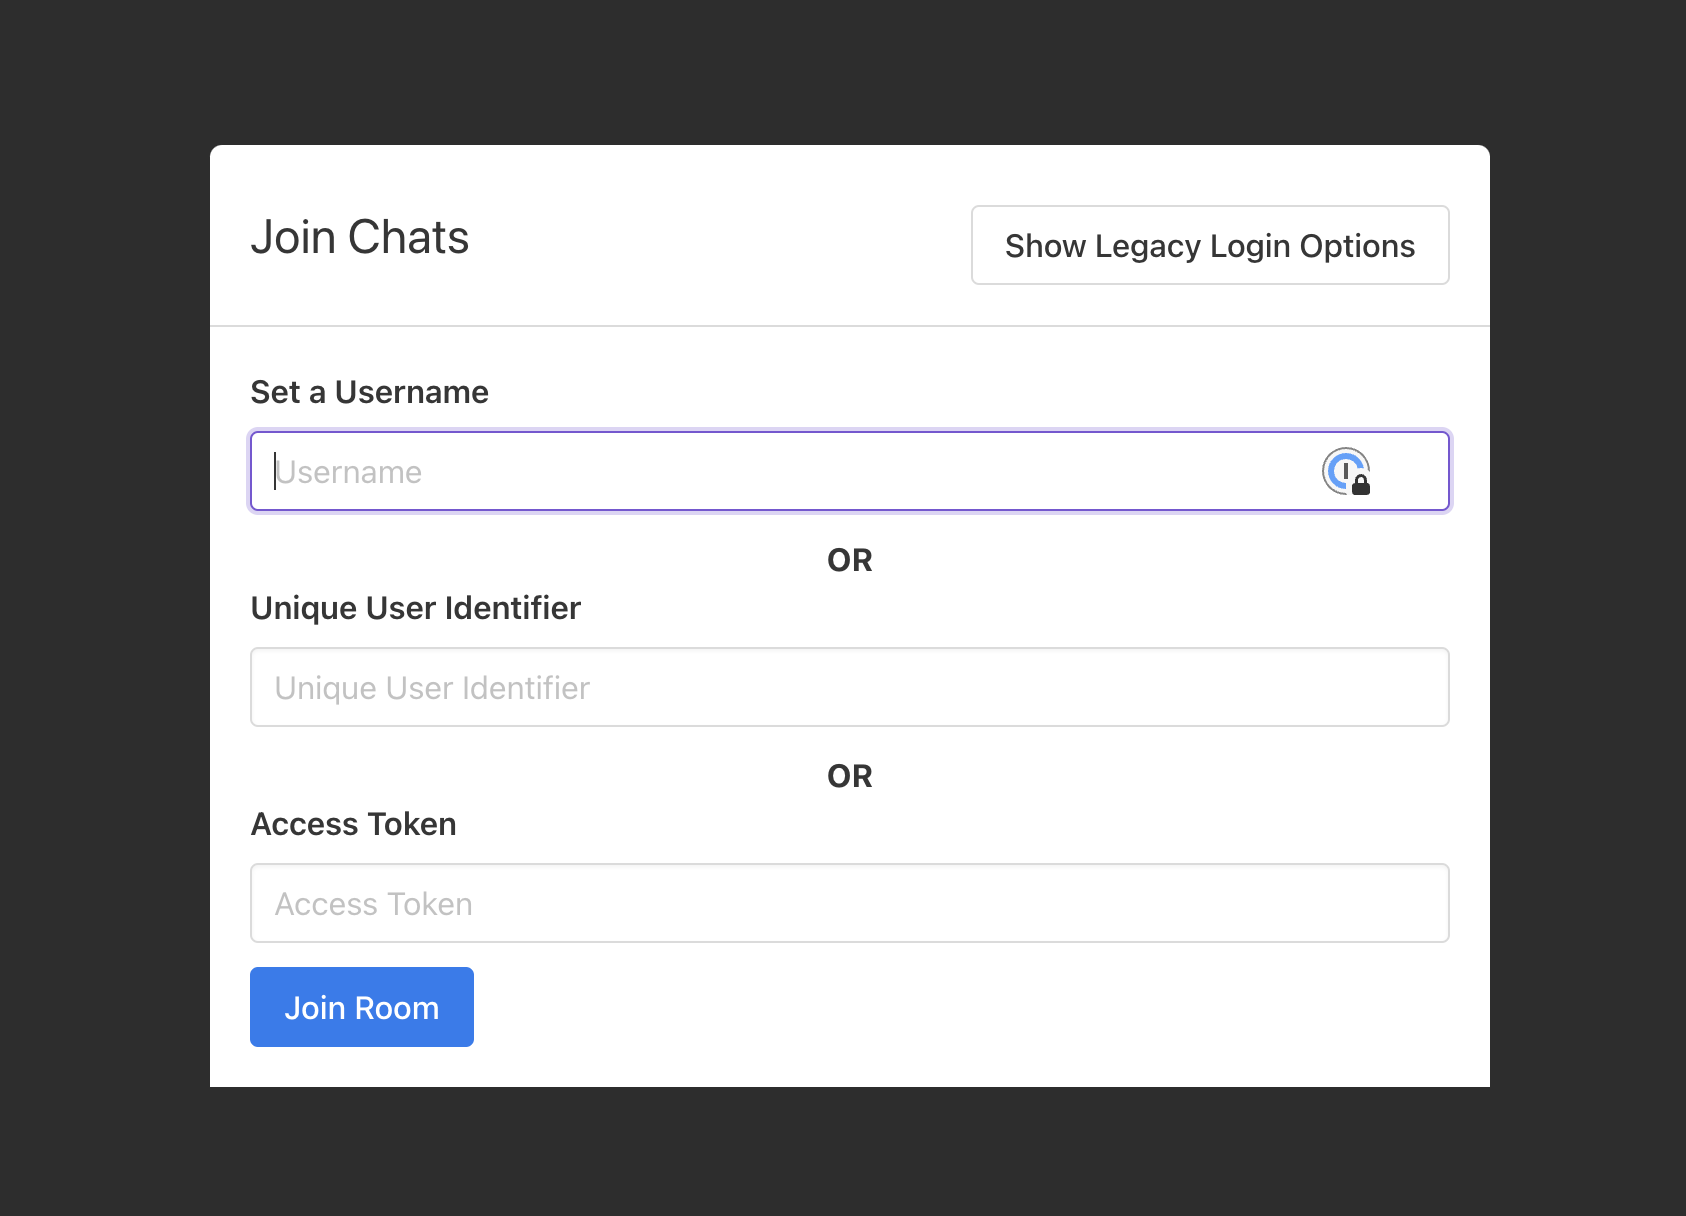
Fields to enter the uniqueUserIdentifier and accessToken are also available
for user login.
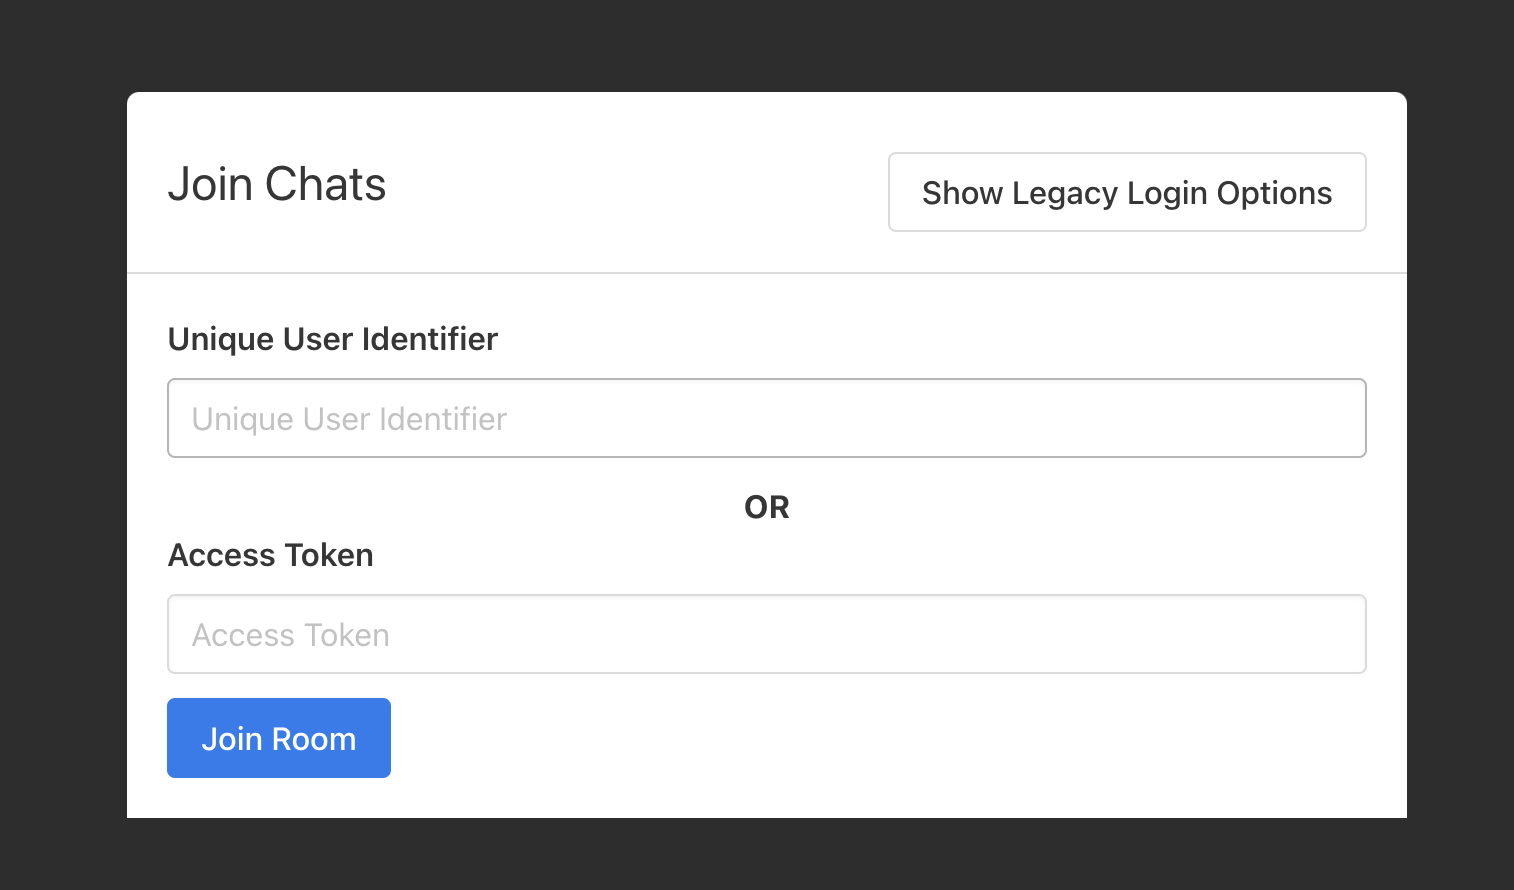
When you enable "Provisioned Users" only in the Chat Room, the field
to enter the "Username" will be removed, and the user will be able to login using
uniqueUserIdentifier or accessToken.
Go to Chat Room Settings and set the "Chat Room Permission Level" to "Provisioned" Users only.
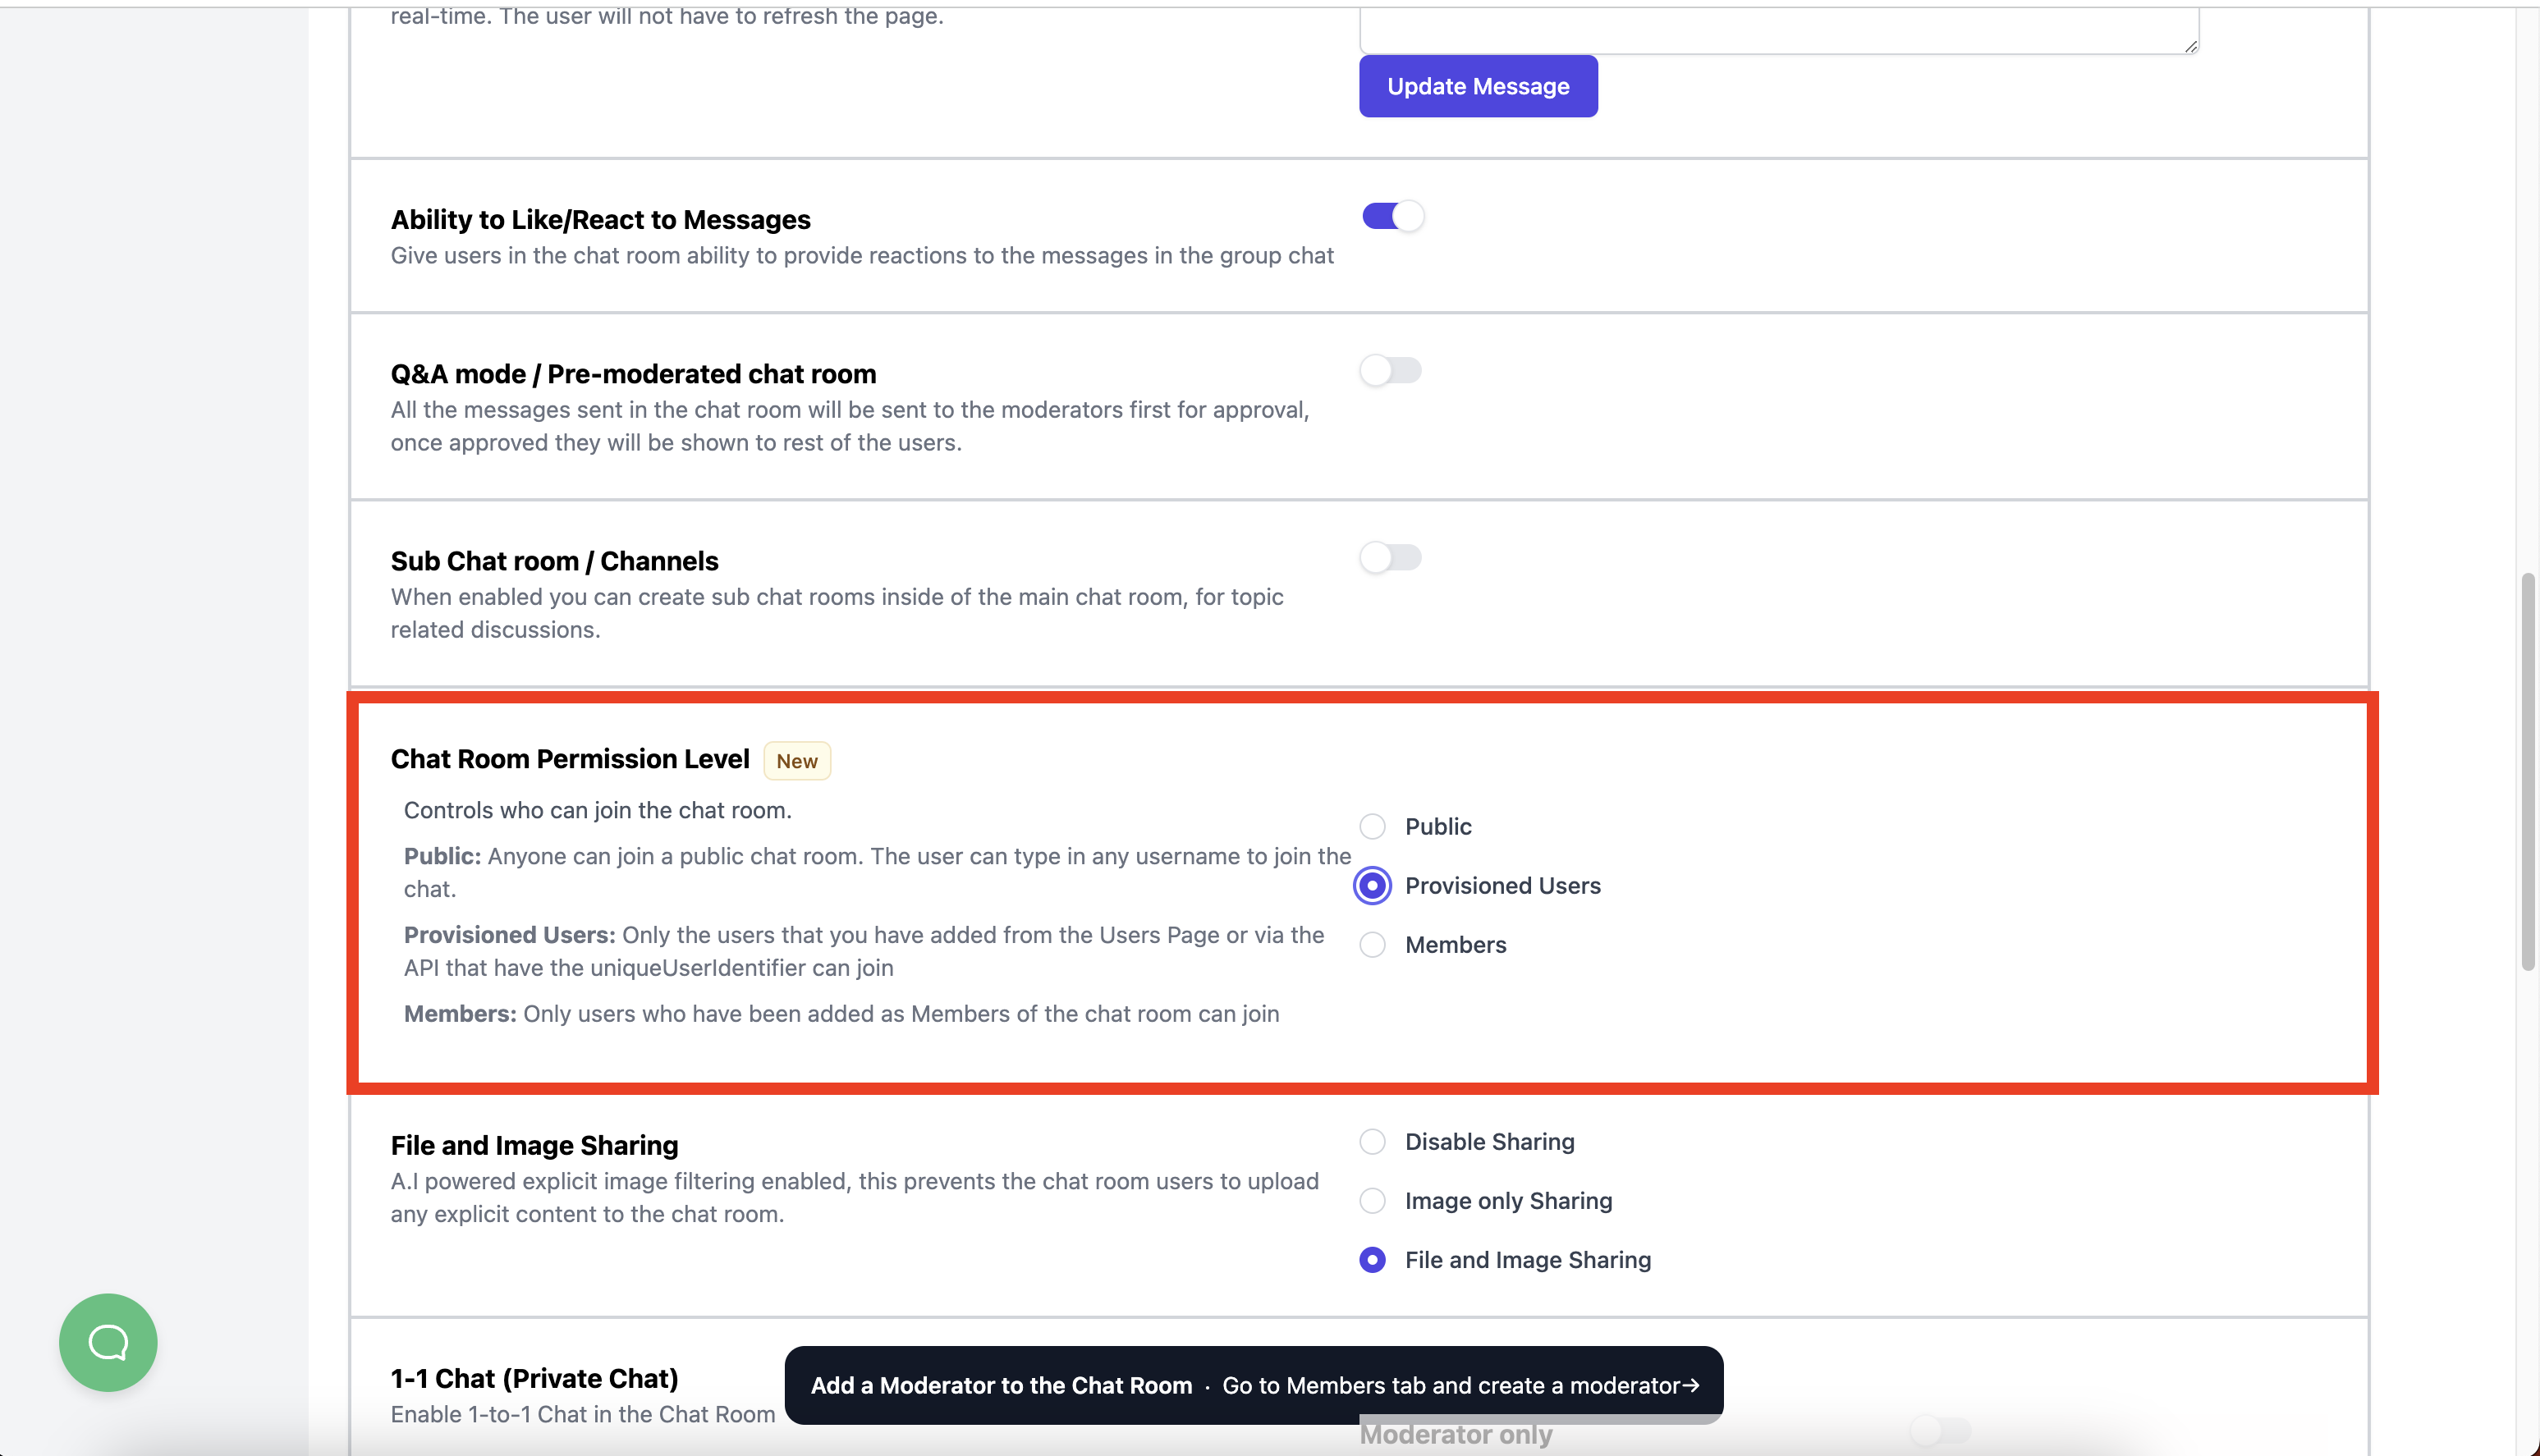
This setting prevents users from joining by simply typing in their username. The
Join Chat modal will be updated to include just the uniqueUserIdentifier
and accessToken.
You can also automatically log users into the chat room once they log into your platform using SSO.
Steps to Create Member-Only Chat Rooms
To create a Member-Only Chat Room, go to chat room settings and under "Chat Room Permission Level" select "Members".
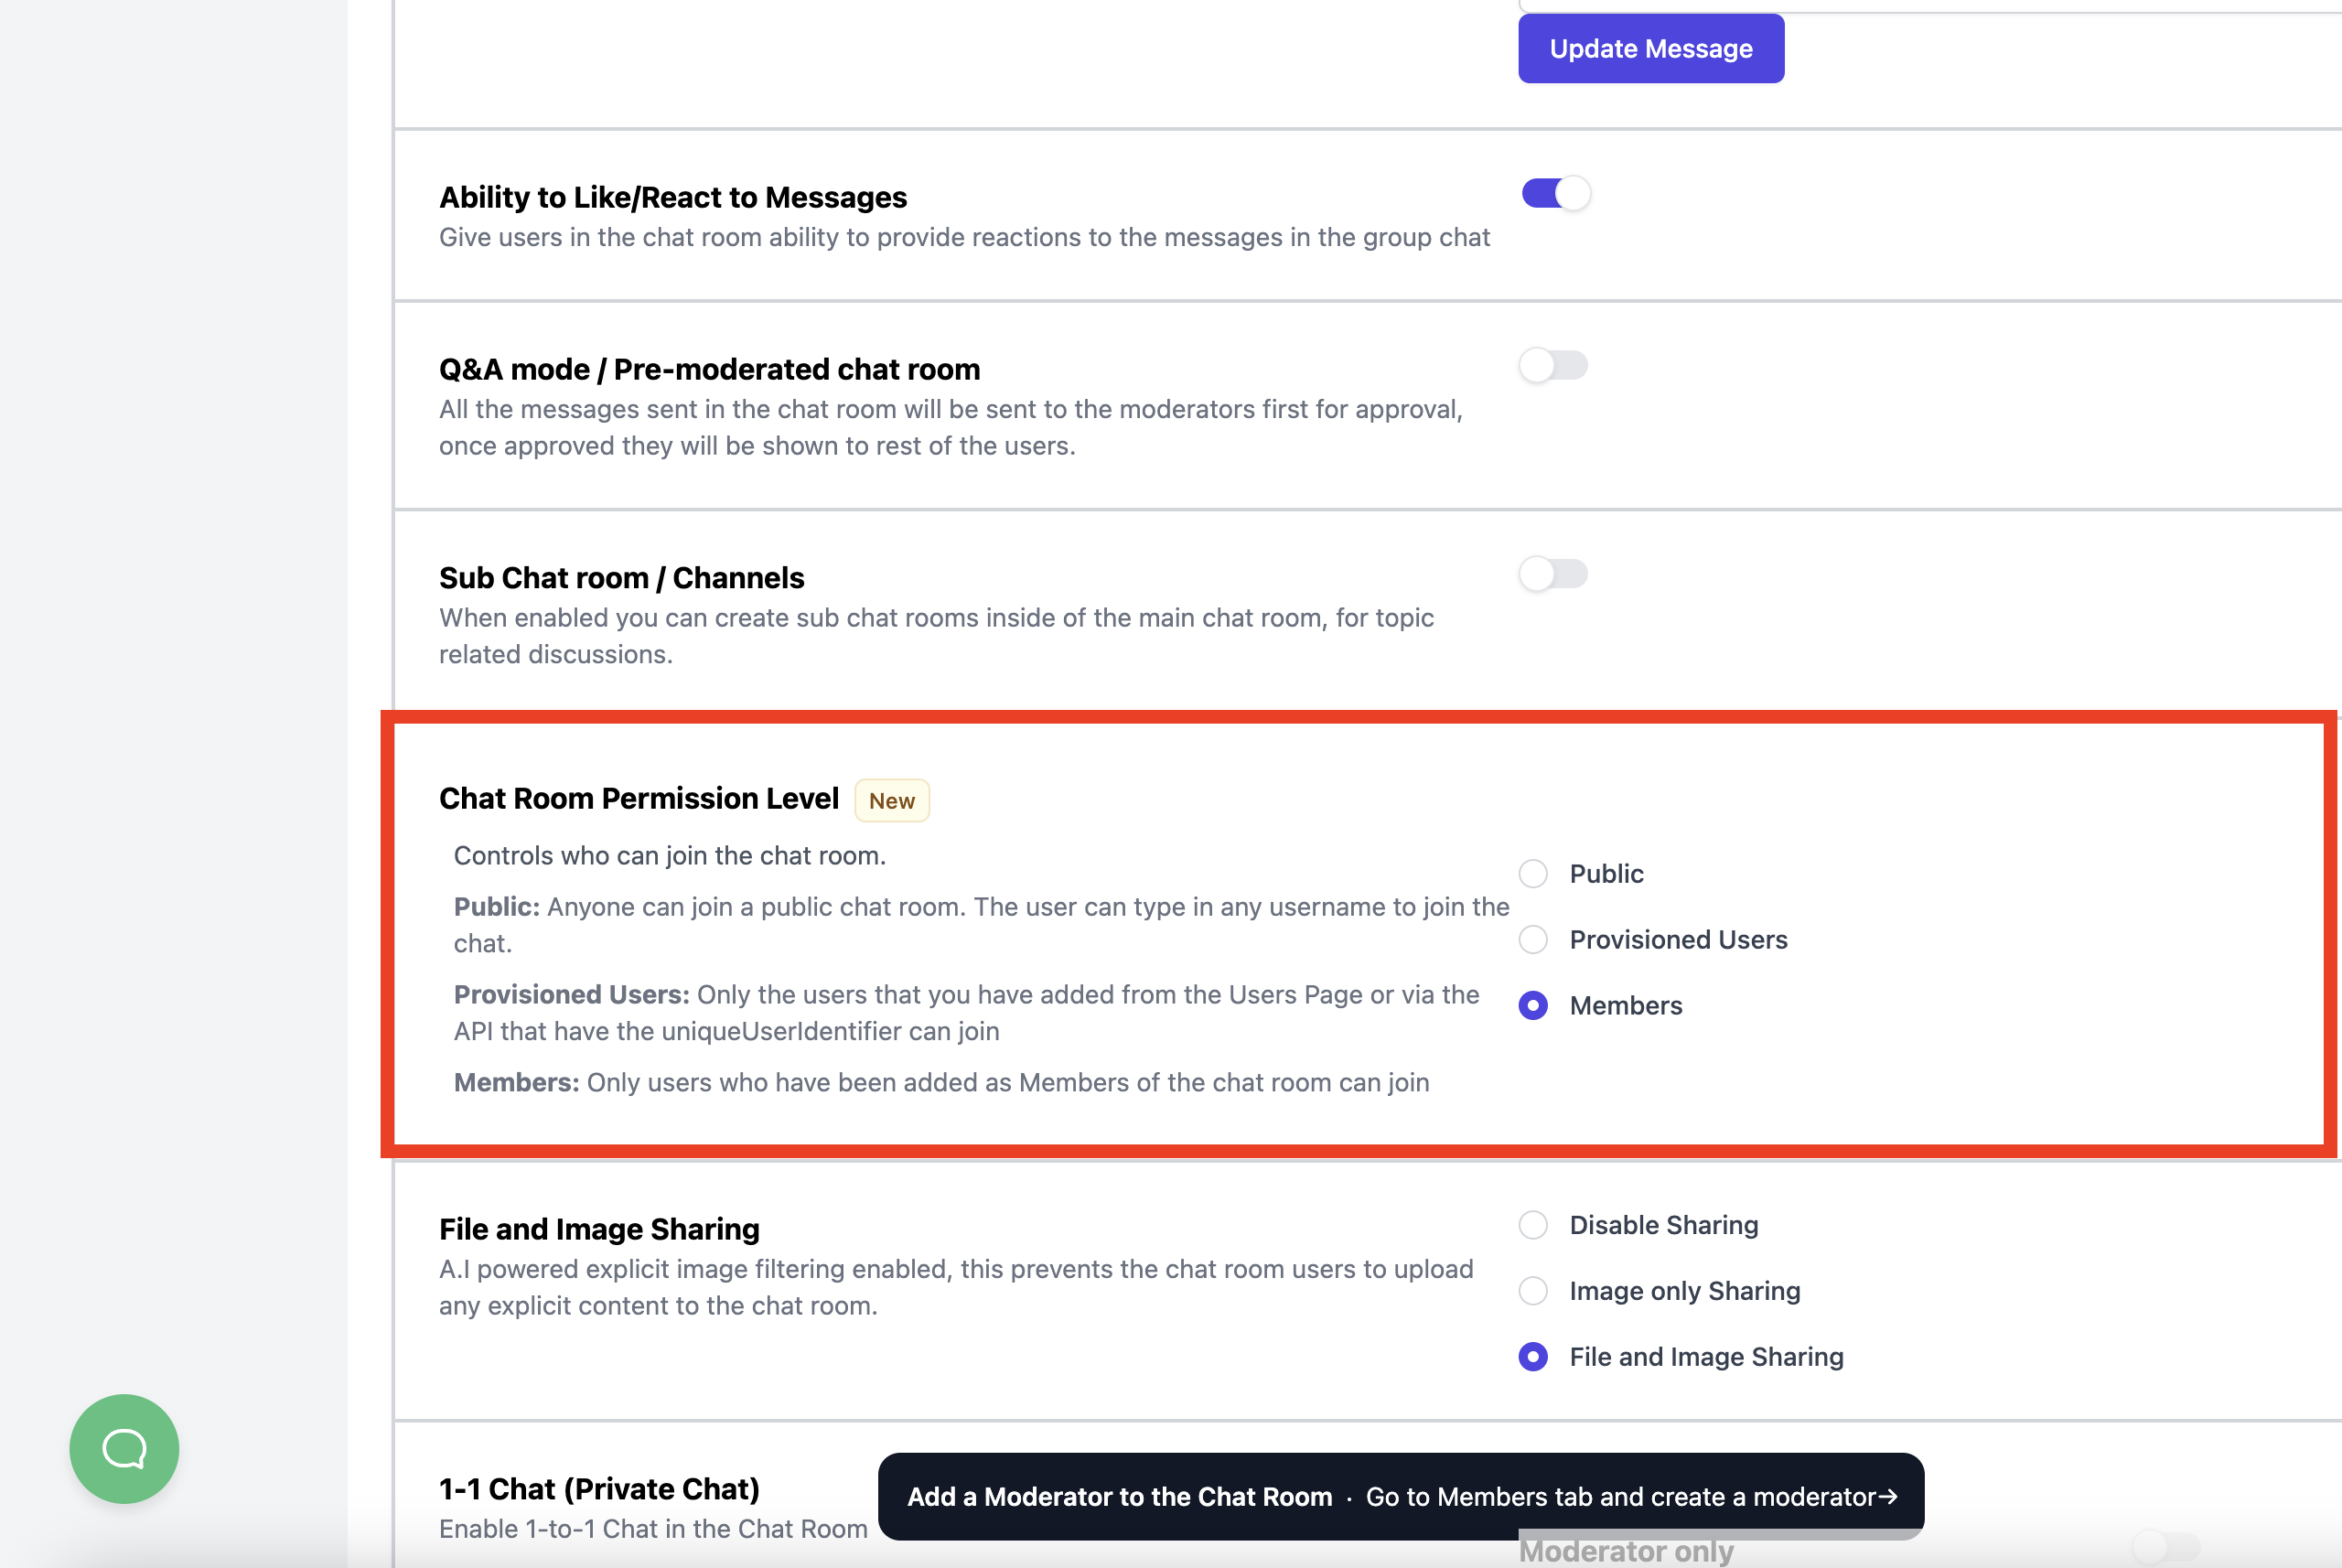
Once the Chat Room Permission Level is set to Members, only users who have been made members can join the chat room.
You can assign users as members in the following ways:
- Through the Dashboard
- Through the CSV
Through the Dashboard
Go to the Users Edit page, and click on the Edit Button on the User you wish to assign as a Member.
You will be presented with the "Edit User" modal. Click on the "Members" tab.
From the Members tab, you can select the Chat Room you wish to assign the User to.
If the User is not a Member, they will not be able to join the chat room.
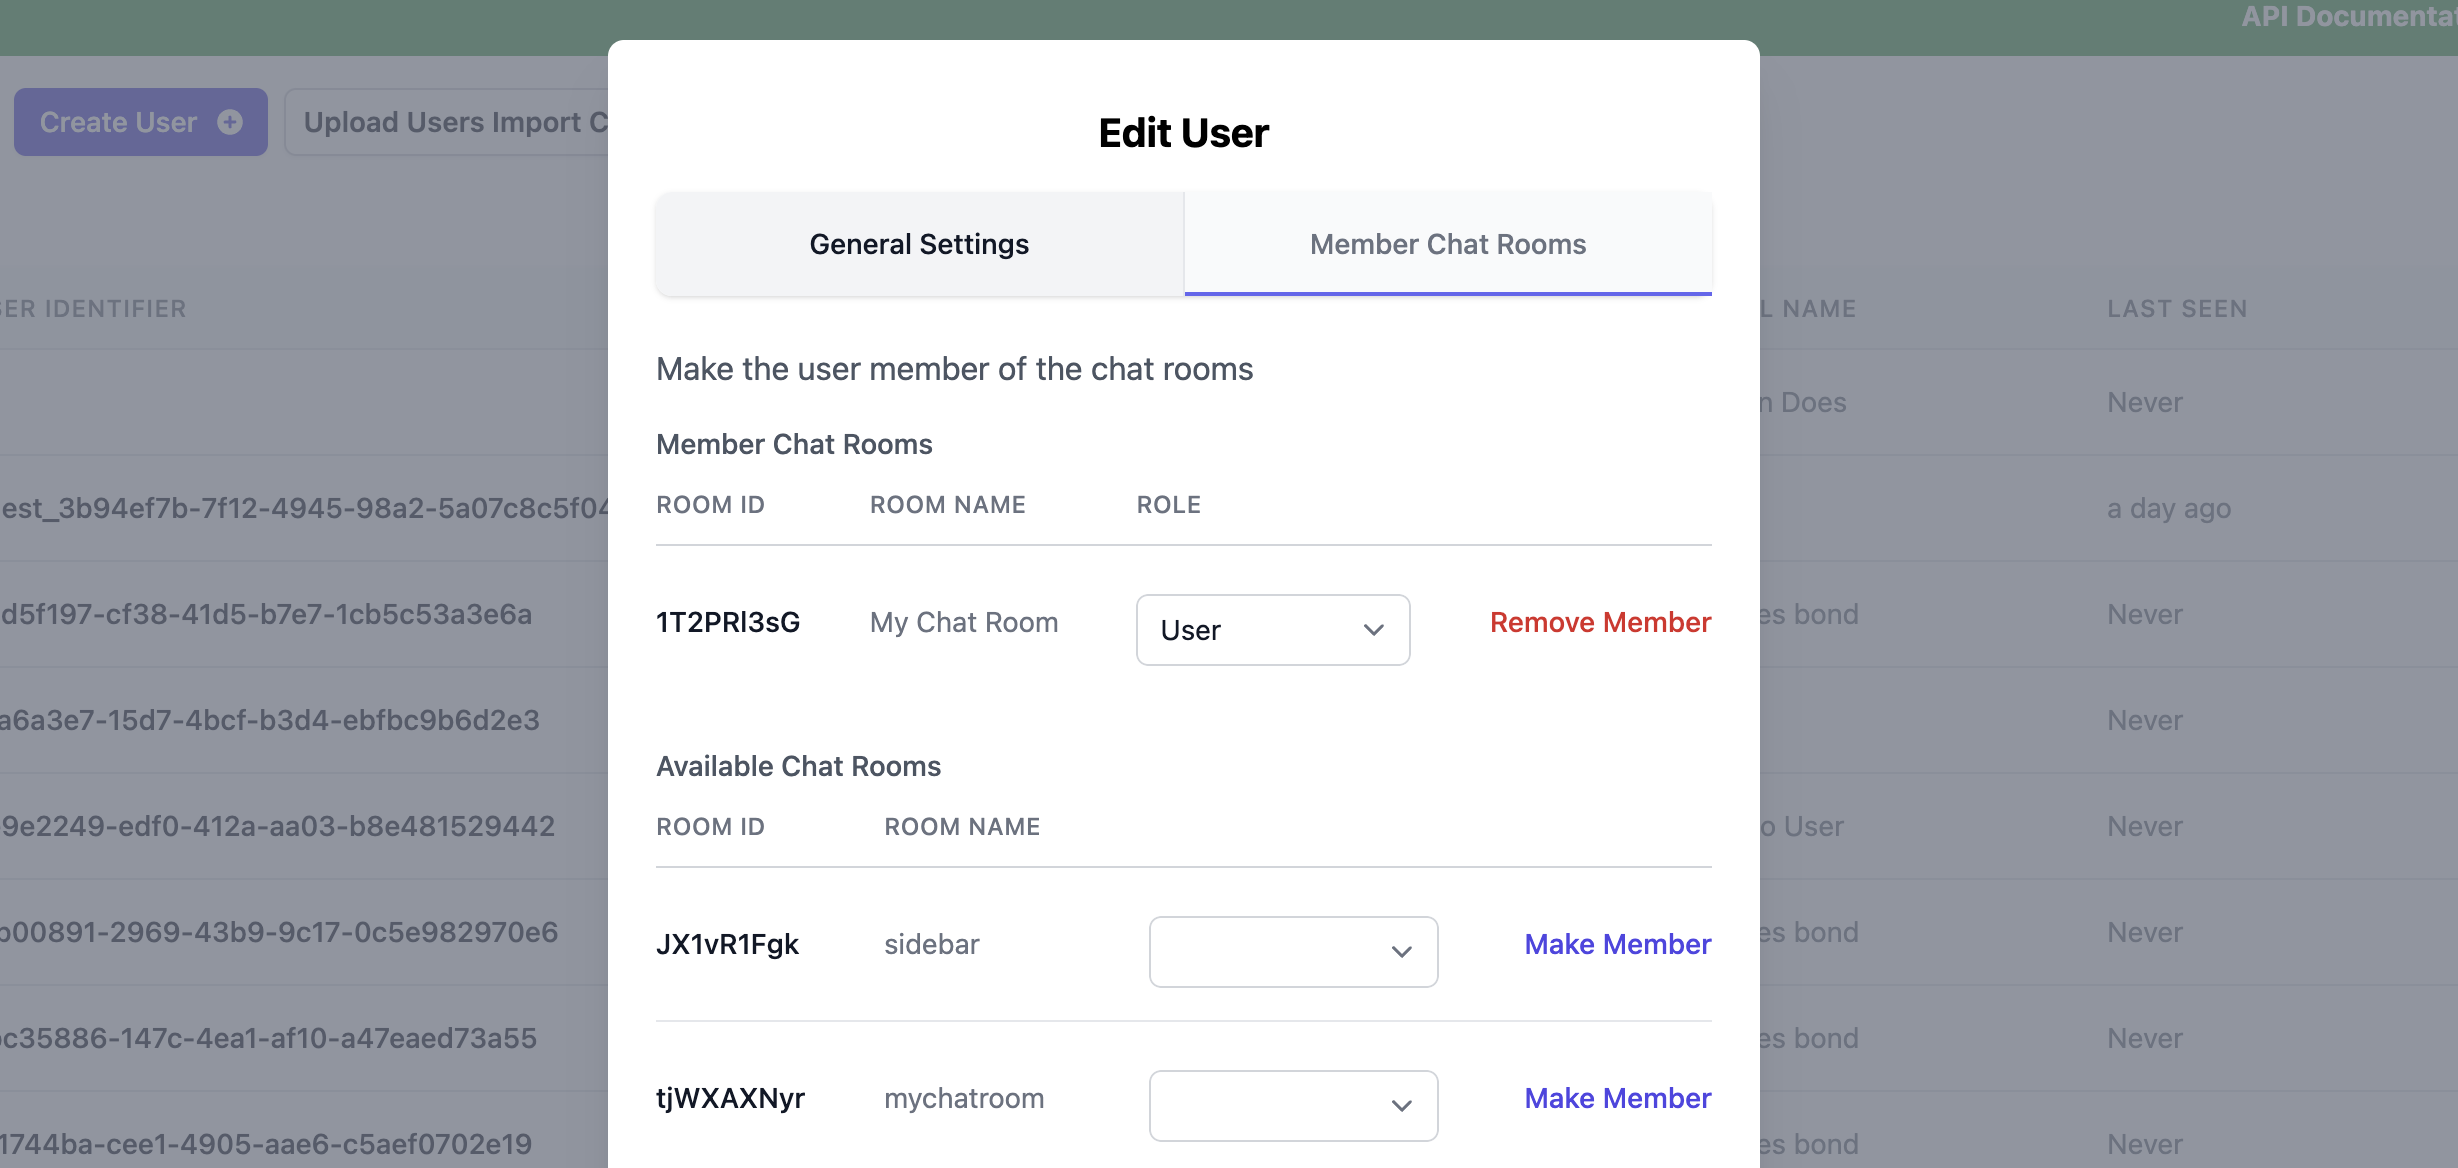
You can also view the Users who are Members of the Chat Room under the Members page inside the Chat Room.
Through the CSV
You can also assign users as members of chat rooms by optionally specifying
the roomId through the roomId_1, roomId_2 columns, in the Users Import CSV,
and the role of the user through the roleName_1 and roleName_2 columns,
with possible values guest, user, moderator, and admin.
Conclusion
In this guide, we've covered how to create a chat for registered users only. We've discussed the process of provisioning users, setting chat rooms to allow only provisioned users, and creating member-only chat rooms. We've also explored the difference between provisioned users and members, and how to manage these user types through the dashboard, CSV, or REST API.