
In modern business specially if you have SaaS business, sending emails are crucial. There are a lot of emails that you need to send on a regualar basis to your customers
To be able to send mails automatically through your node js server is an important part of your business
In this practical example we are going to learn how to send emails with the help of a live example. We are going to use the NodeMailer library and NodeJs server to send emails
Here is what we are going to learn
- Prerequisites
- Setting up the Development Environment
- Step-by-Step way to send emails using Nodemailer and Gmail
- Sending your first email
- Troubleshooting tips
- Creating the email template with HTML
- Adding attachments to your email
- Adding styles to your email
- HTML Emails with Dynamic data
- Using Queues with Transactional emails
- Conclusion
Prerequisites
In this article there are a few basic requirements and these are:
- Basic knowledge of JavaScript
- Basic knowledge of NodeJs and NPM
That's it. That is all you need for today's tutorial and you will be up and running with sending emails
Setting up the development enviroment
Now, that we have the pre-requisites out of the way. let us start with setting up the environment for our project
I am assuming that are already familier with NodeJs and have it installed in your system.
Nodemailer supports Node going back to Node 6, but anything above Node 14.0 is recommended for this tutorial as many of the advanced features don't work in the older versions of Node
Step 1: Create a new directory called email-sender and setup the project
To set up the project create a new directory called the email-sender then cd into it.
Then type npm init to initialize a new project and fill up the required fields as needed
create a new file name index.js in the root folder.
Step 2: Install nodemailer and set it up as a dependency
Now, install the nodemailer library with npm using the below command
npm install nodemailer --savethis command will install the node mailer library and save it as a dependency in the package.json file.
Your package.json file should look like this
{
  "name": "email-sender",
  "version": "1.0.0",
  "description": "",
  "main": "index.js",
  "scripts": {
    "test": "echo \"Error: no test specified\" && exit 1"
  },
  "author": "",
  "license": "ISC",
  "dependencies": {
    "nodemailer": "^6.9.5"
  }
}
If you are looking for a JavaScript chat SDK to build chat messaging, you can consider DeadSimpleChat JavaScript SDK

Step-by-Step way to send emails using Nodemailer and Gmail
Gmail does not allow bots to access gmail. Gmail expects the user to be a genuine user and not bot, because of increasing spam these days Google has adopted this strategy
Generating App specific password
Here are the steps to generate App specific password in Google Account settings.
- First you need to have Google 2FA enabled. If you do not have that you can enable it here
- Then Go to Google Account
- Security tab
- Select App and device, you can choose the device for which you need to set up the password. In our case Mail
- Then Click Generate google will generate the password
- Copy and Save
- Here is run down from google
Step by Step way to configure Mail with NodeMailer
Installing expressjs
Next we need to install expressjs in our application. Type the below code to install express
npm install express --saveNow that you have installed express open the index.js file and write the following code in it
const express = require('express');
const app = express();
const port = 3000;

app.get('/', (req, res) => {
  res.send('Hello World!')
});

app.listen(port, () => {
  console.log(`Server running at http://localhost:${port}`)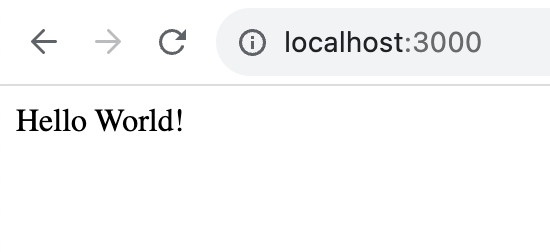
});This creates a simple http server in node that is listning at port 3000. you can visit localhost 3000 and see the 'Hello world' written there
Now that we have started our server let us try sending some emails
Sending your first email
In your index.js file write the following code to send an email
async function sendEmail() {
// Create a transporter object using the default SMTP transport
let transporter = nodemailer.createTransport({
service: 'gmail',
secure: true, // enforcing secure transfer
auth: {
user: 'your-email@gmail.com',
pass: 'your-app-specific-password'
}
});
// Set up email data
let mailOptions = {
from: 'your-email@gmail.com',
to: 'recipient-email@gmail.com',
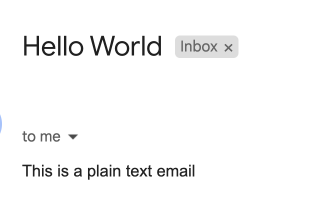
subject: 'Hello, World!',
text: 'This is a plain text email'
};
// Send email
let info = await transporter.sendMail(mailOptions);
console.log('Message sent: %s', info.messageId);
}
// Execute the function
sendEmail().catch(console.error);The complete index.js file should look something like this
const express = require('express');
const app = express();
const port = 3000;
const nodemailer = require('nodemailer');

async function sendEmail() {
  // Create a transporter object using the default SMTP transport
  let transporter = nodemailer.createTransport({
    service: 'gmail',
    secure: true, // enforcing secure transfer
    auth: {
      user: 'your-email@gmail.com',
      pass: 'your-app-specific-password'
    }
  });

  // Set up email data
  let mailOptions = {
    from: 'your-email@gmail.com',
    to: 'recipient-email@gmail.com',
    subject: 'Hello, World!',
    text: 'This is a plain text email'
  };

  // Send email
  let info = await transporter.sendMail(mailOptions);

  console.log('Message sent: %s', info.messageId);
}

// Execute the function
sendEmail().catch(console.error);


app.get('/', (req, res) => {
  res.send('Hello World!')
});

app.listen(port, () => {
  console.log(`Server running at http://localhost:${port}`)
});
What are we doing here:
- We have imported the necessary dependencies
- We are declaring Asynchronous Function
sendEmail() - then we are creating the Transport Object that specifies the service as
gmailand encforces thesecureparameter then declares the auth - Then we are configuring the email data. from, to, subject, and the text (body) of the email
- lastly, we are sending the email using the sendMail function
- We are also logging success and catching any errors if there are any
- That's it
Troubleshooting tips
Here are some of the common errors and their troubleshooting tips
- Auth Error: If you get the Auth error, check if 2FA has been enabled on your account or not
- Connection Timeout: If you are seeing connection timeout firewall in your server could be blocking or it might be CORS error
- Rate Limit Exceeded: Google sets the rate limit for account, usually it is 200 to 300 emails per day
- Debugging option: NodeMailer provides a debugging option with
Debug: trueyou can enable it to get more data about the issue less secure Appwarning: You might get this warning if you have not enable the 2FA and are using the app specific password in your app.
Creating Email template with HTML
Now, that we have learned how to send simple emails with Nodemailer. We want the emails to look beautiful when we send them to our users
We can achieve this by using HTML and styling in our emails. Let us first start with HTML and then use the css to style our emails to make them look better
We are also going to be using Dynamic data in our emails, for example if we want to send bulk email etc
Step 1 Installing dependencies
We will be using the ejs library along with HTML to customize our email and use Dynamic data in our emails. This is useful when sending bulk emails
let us first install the ejs library like so
npm install ejs --saveour package.json should look something like this
{
  "name": "email-sender",
  "version": "1.0.0",
  "description": "",
  "main": "index.js",
  "scripts": {
    "test": "echo \"Error: no test specified\" && exit 1"
  },
  "author": "",
  "license": "ISC",
  "dependencies": {
    "ejs": "^3.1.9",
    "express": "^4.18.2",
    "nodemailer": "^6.9.5"
  }
}
step2 : Create a email template
Now create a file name email-template.ejs in your root folder. then paste the following code in the file
<!DOCTYPE html>
<html>
<head>
    <title>Welcome to our SaaS Service</title>
</head>
<body>
    <h1>Hello <%= username %>,</h1>
    <p>Welcome to our demo service. Your signup date is: <%= signupDate %></p>
</body>
</html>
We are using dynamic data in our email template for the username of the user and the sign up date signupDate
Next, we need to update the NodeJs file with the following code
const nodemailer = require('nodemailer');
const ejs = require('ejs');
const fs = require('fs');

async function sendEmail() {
  let transporter = nodemailer.createTransport({
    service: 'gmail',
      secure: true, // enforce secure connection
    auth: {
      user: 'your-email@gmail.com',
      pass: 'your-app-specific-password'
    }
  });

  // Read the EJS template
  const templateString = fs.readFileSync('./email-template.ejs', 'utf-8');

  // Dynamic data
  const data = {
    username: 'John',
    signupDate: new Date().toLocaleDateString()
  };

  // Render HTML string
  const html = ejs.render(templateString, data);

  let mailOptions = {
    from: 'your-email@gmail.com',
    to: 'recipient-email@example.com',
    subject: 'Welcome Email',
    html: html
  };

  let info = await transporter.sendMail(mailOptions);
  console.log(`Email sent: ${info.messageId}`);
}

sendEmail().catch(console.error);
What are we doing here
- We are importing the modules nodemailer, ejs and fs
- Then we are defining the Async function
sendEmail()this function sends the email - We are configuring the Nodemailer transporter:
let transporter = nodemailer.createTransport({...})with service, auth, and secure - Then we are reading the ejs template that we just created in the
email-template.ejsfile. We are doing this by using thefs.readFileSync()function - Then we are preparing the dynamic data for
usernameandsignupDate. In a real app you will probably get the username from a database, but since this is a demo app we are using the static nameJohn - Then we are rendering the HTML content with
const html = ejs.render(templateString, data); - Then we are setting the mail options: from, to, subject and html
- Then we are sending the email and
- logging if the email was sent or not
- We are also catching the errors if any
Sending attachments in email
sending file attachments like pdf and images in email adds a layer of complexity but on the other hand enriches the email experience for the reciever
Sending Files, PDFs and Images
With nodemail it is quite easy to send pdfs and images, to do this you need to use the attachments field in the mail options to specify the attachments
let us edit our code to include the attachments.
We have our mail options code that looks something like:
  let mailOptions = {
    from: 'your-email@gmail.com',
    to: 'recipient-email@example.com',
    subject: 'Welcome Email',
    html: html
  };
we need to edit it to include the attachments field like so
  let mailOptions = {
    from: 'your-email@gmail.com',
    to: 'recipient-email@example.com',
    subject: 'Welcome Email',
    html: html,
    attachments: [
        {
          filename: 'test.pdf',
          path: 'path/to/file'
        },
        {
          filename: 'image.png',
          path: 'path/to/image'
        }
      ]
};with this you can easily include images and files in your emails.
Embedding files instead of attaching them to emails
You can also embed files and images in the HTML itself instead of sending them as an attachment to the email
There are two ways to do this:
- Sending them as CID (Content-ID) references
- Sending them as Base64 String
Adding styles to your email
Adding styles to emails is quite easy, we are considering three methods of adding styles to email and these are:
- Inline Styling: The easiest and reliable way to add CSS styling to your emails is through inline CSS. You can set the inline CSS in your HTML like
<h1 style="font-size:24px;color:#333;">Welcome to Our Service</h1>
<p style="font-size:16px;color:#666;">Hello World,</p>
- Embedded CSS: The embedded CSS does not work on all the email clients out there. Through modern one's support the embedded CSS. If you are aiming to reach a wider audience skip this one. Or you can add embedded CSS as a progressive enhancement, if this works all good, if not then also users should be able to see the email
<head>
  <style type="text/css">
    h1 {
      font-size: 24px;
      color: #333;
    }
    p {
      font-size: 16px;
      color: #666;
    }
  </style>
</head>
- CSS Inlining Tools: To get the best of both worlds, there are CSS inlining tools.
Using these tools you can write the CSS in style tags and in production they automatically gets converted into inline CSS.
One such tool is Juice
npm install juiceconst juice = require('juice');
const htmlWithStyles = '<style>h1 { color: red }</style><h1>Hello</h1>';
const inlinedHtml = juice(htmlWithStyles);Creating Queues for bulk email/ transactional emails
If you are sending bulk emails or transactional emails that are send to every customer at certain events in their customer journey
These emails tend to become high volume emails and hence handling them efficiently is important
Queues
Using Queues becomes essential when handling large amounts of email. This can be done using libraries like Bull.
The queues handle emails sequentially or in parallel as they are programmed to do.
The purpose of queues is to prevent server overloads and ensure mail delivery.
Let us consider an example using Bull Library
const Queue = require('bull');
const emailQueue = new Queue('emails');

emailQueue.add({
  email: 'recipient@example.com',
  subject: 'Welcome'
});
You just need to install the library and then add emails to the queue. Let us add the queue to our existing index.js file
const nodemailer = require('nodemailer');
const ejs = require('ejs');
const fs = require('fs');
const Queue = require('bull');

const emailQueue = new Queue('emails');

emailQueue.add({
  email: 'recipient@example.com',
  subject: 'Welcome'
});

async function sendEmail() {
  let transporter = nodemailer.createTransport({
    service: 'gmail',
    auth: {
      user: 'your-email@gmail.com',
      pass: 'your-app-specific-password'
    }
  });

  // Read the EJS template
  const templateString = fs.readFileSync('./email-template.ejs', 'utf-8');

  // Dynamic data
  const data = {
    username: 'John',
    signupDate: new Date().toLocaleDateString()
  };

  // Render HTML string
  const html = ejs.render(templateString, data);

  let mailOptions = {
    from: 'your-email@gmail.com',
    to: 'recipient-email@example.com',
    subject: 'Welcome Email',
    html: html,
    attachments: [
        {
          filename: 'test.pdf',
          path: 'path/to/file'
        },
        {
          filename: 'image.png',
          path: 'path/to/image'
        }
      ]
  };

  let info = await transporter.sendMail(mailOptions);
  console.log(`Email sent: ${info.messageId}`);
}

sendEmail().catch(console.error);
Need Chat API for your website or app
DeadSimpleChat is an Chat API provider
- Add Scalable Chat to your app in minutes
- 10 Million Online Concurrent users
- 99.999% Uptime
- Moderation features
- 1-1 Chat
- Group Chat
- Fully Customizable
- Chat API and SDK
- Pre-Built Chat
You might be interested in some of our other articles:
- Environment Variables in NodeJs: The Complete Guide
- Rest API with PostgreSQL and Node Js, Step-by-Step Tutorial
- Nodejs fetch API: The Complete Guide
- File Upload using Nodejs, Express Multer
Conclusion
In this article we learned about how to setup sending emails with NodeJs and NodeMailer
I hope you liked the article. Thank you for reading
Ready to Add Chat to Your Website?
Get started for free. No credit card required.
Start a Free Trial
![Webinar Chat: The Complete Guide to Engaging Your Audience [2026]](/blog/content/images/size/w600/2026/02/article-hero-webinar-chat.svg)
